
DirectX is crucial for managing multimedia tasks on Windows 11, allowing applications to interact directly with your system’s graphics hardware. It enhances graphics performance in games and other graphics-intensive programs. If you’re experiencing issues with these applications, reinstalling DirectX might help resolve them.
Download the DirectX installer
While Windows 11 automatically updates DirectX, manually reinstalling it can fix certain problems. To do this, you’ll need to download the standalone installer from Microsoft’s official website.
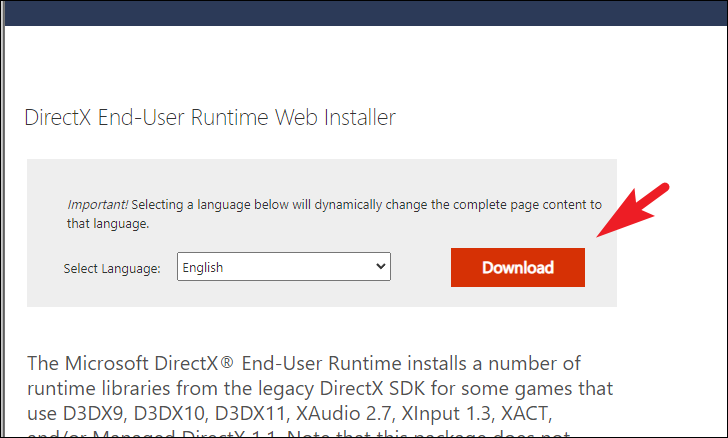
Go to www.microsoft.com/download using your preferred web browser. Click on the ‘Download’ button to start the process.
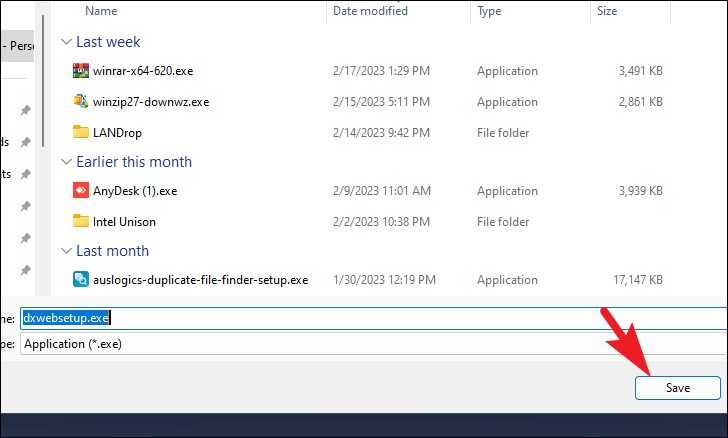
Choose a location on your computer to save the installer file, then click ‘Save’.
Once the download is complete, navigate to the folder where you saved the installer and double-click on it to launch the setup.

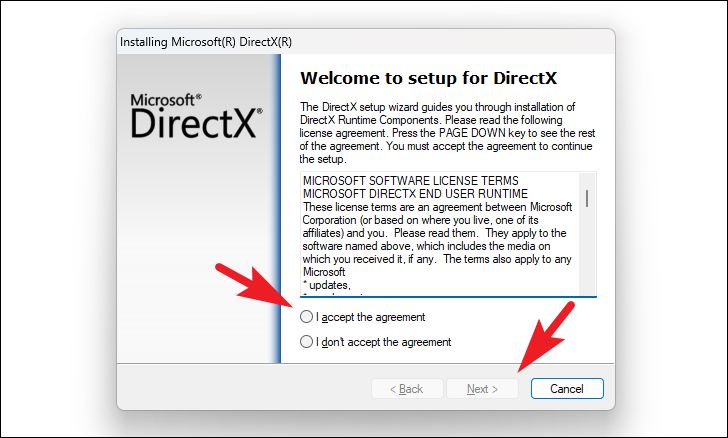
In the installer window, accept the license agreement by selecting ‘I accept the agreement’, then click ‘Next’.
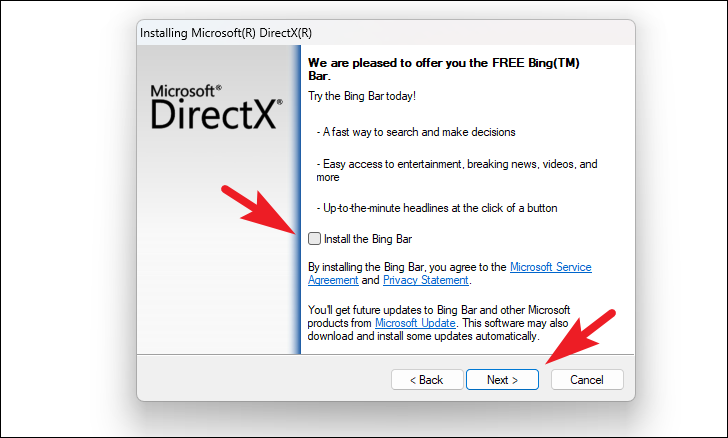
If you prefer not to install the Bing Bar, make sure to uncheck the box next to ‘Install the Bing Bar’. Click ‘Next’ to proceed. The installer will now begin installing DirectX on your system.
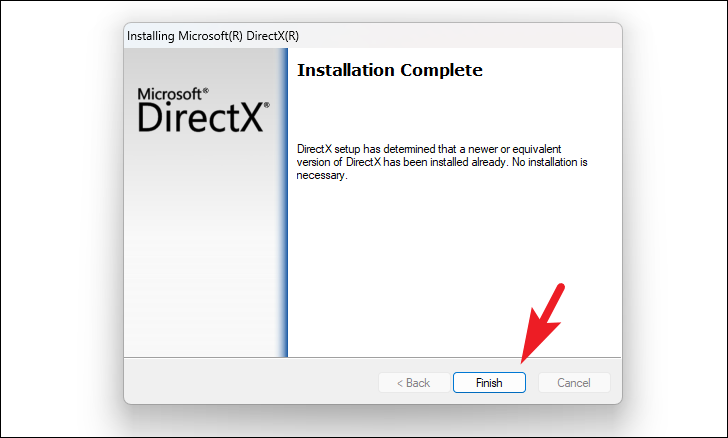
After the installation is complete, click on the ‘Finish’ button to close the installer.
How to fix errors with DirectX
If reinstalling DirectX didn’t resolve the issues you’re experiencing, try the following methods to fix them.
1. Update graphics driver
An outdated or corrupted graphics driver can cause DirectX errors and affect the performance of graphics-intensive applications. Updating your graphics driver can often resolve these problems.
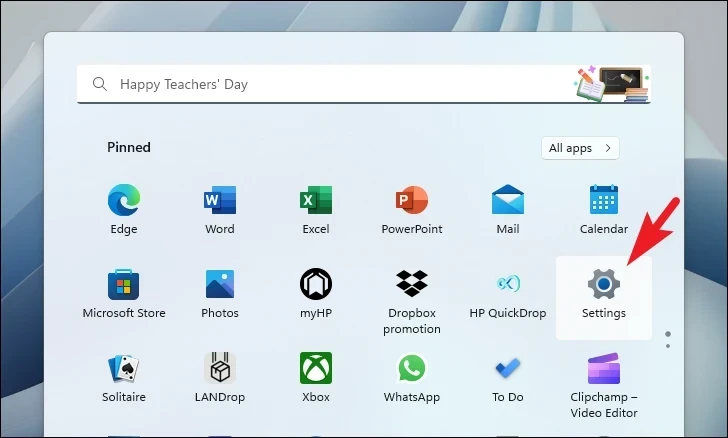
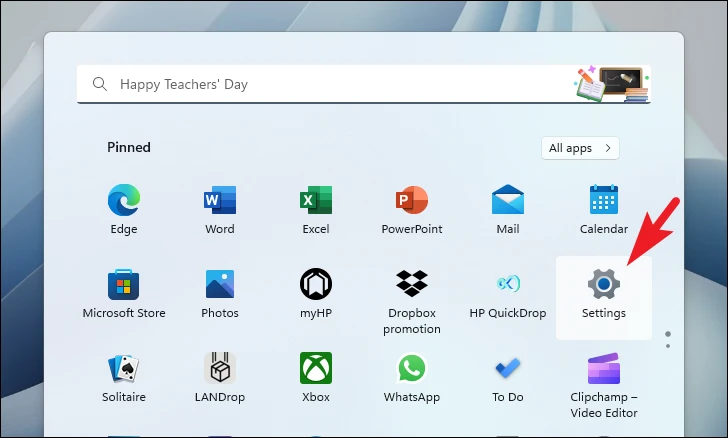
To update the driver using the Settings app, open the Start menu and click on the ‘Settings’ icon.
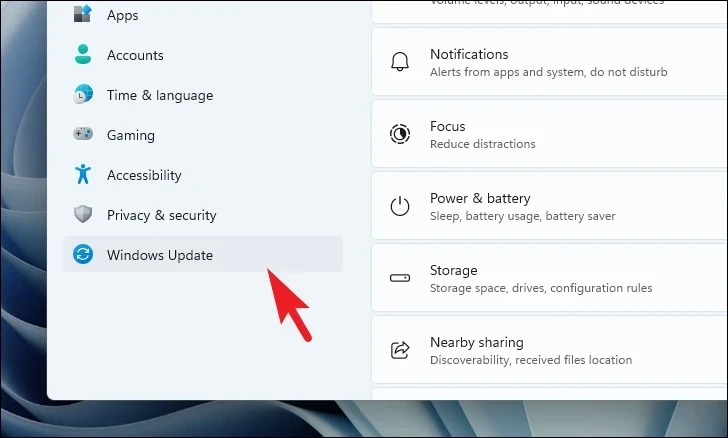
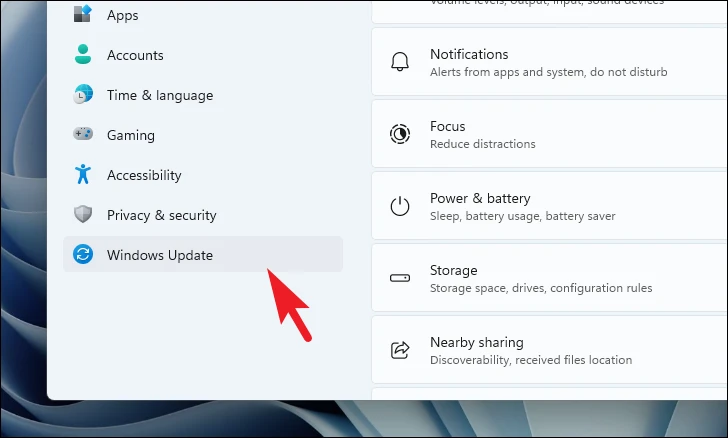
In the Settings window, select ‘Windows Update’ from the left sidebar.
Click on ‘Advanced options’ on the right side of the window.
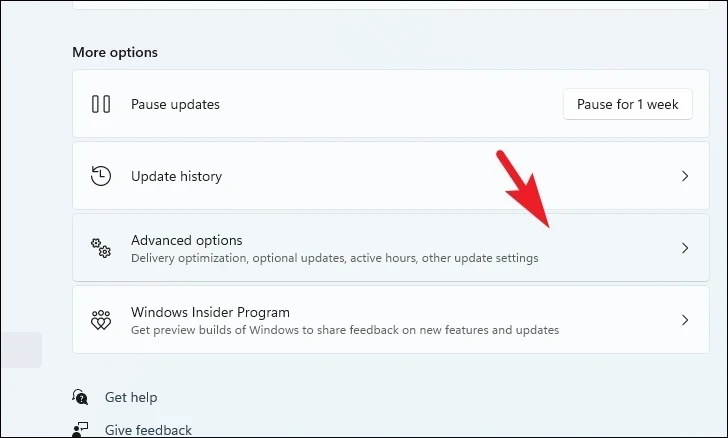
Under ‘Additional options’, select ‘Optional updates’.

In the list of available updates, check the box for any updates related to your graphics driver, then click on ‘Download & install’.
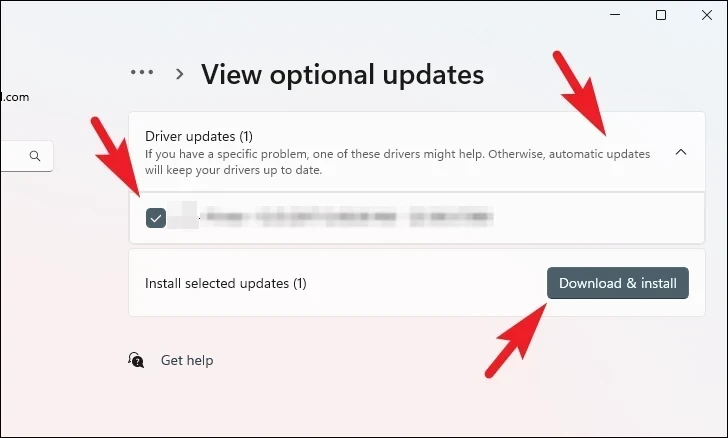
Once the updates are installed, restart your PC to apply the changes.
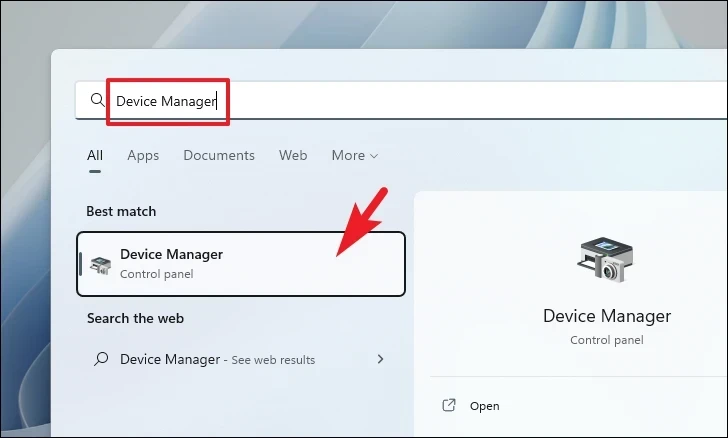
To update the driver using Device Manager, open the Start menu, type Device Manager, and select it from the search results.
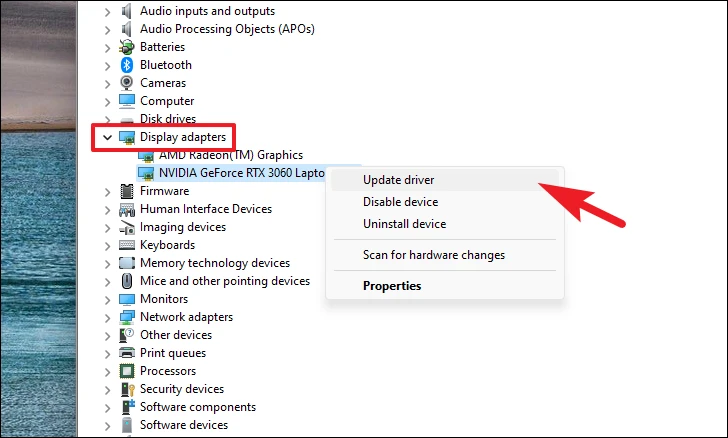
In Device Manager, expand the ‘Display adapters’ section. Right-click on your graphics card and choose ‘Update driver’.
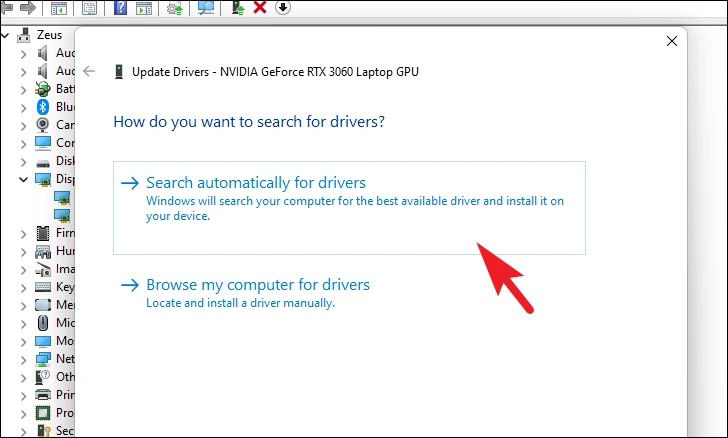
Select ‘Search automatically for drivers’ to let Windows find and install the latest driver. If you’ve already downloaded the driver from the manufacturer’s website, select ‘Browse my computer for drivers’ and navigate to the driver file.
If you have multiple graphics cards, repeat this process for each one.
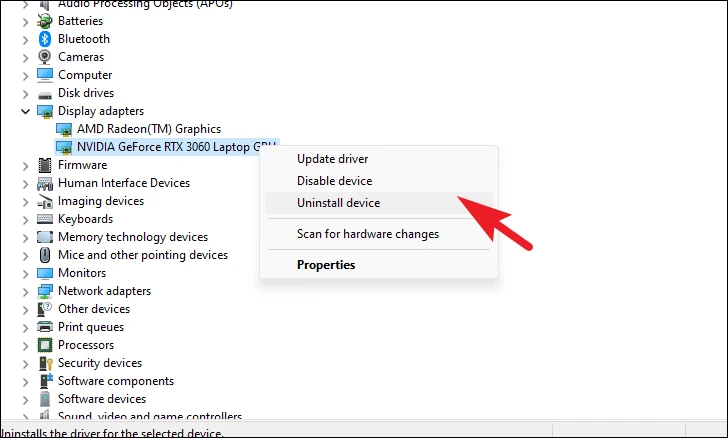
To force reinstall the driver, right-click on your graphics card in Device Manager and select ‘Uninstall device’.
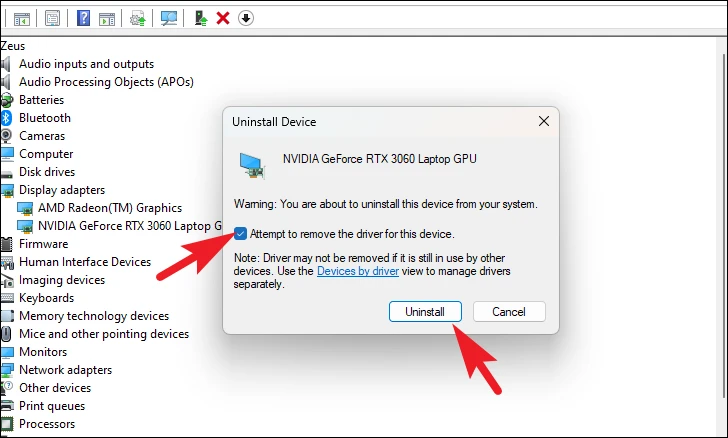
In the confirmation dialog, check the box that says ‘Attempt to remove the driver for this device’, then click ‘Uninstall’.
Restart your computer. After restarting, Windows will attempt to reinstall the driver automatically. You can also go back to the ‘Optional updates’ section in Windows Update to download and install the driver manually.

2. Update your Windows
Keeping Windows updated ensures you have the latest features and security patches, which can help fix DirectX errors. An outdated system might be missing critical updates that affect DirectX functionality.
Open the Start menu and click on the ‘Settings’ icon.
In Settings, select ‘Windows Update’ from the left sidebar.
Click on ‘Check for updates’. If updates are available, click ‘Download & install’ to install them.

After the updates are installed, restart your computer to apply them.
3. Run SFC and DISM
Corrupted or missing system files can cause DirectX errors. Running the System File Checker (SFC) and Deployment Image Servicing and Management (DISM) tools can repair these files.
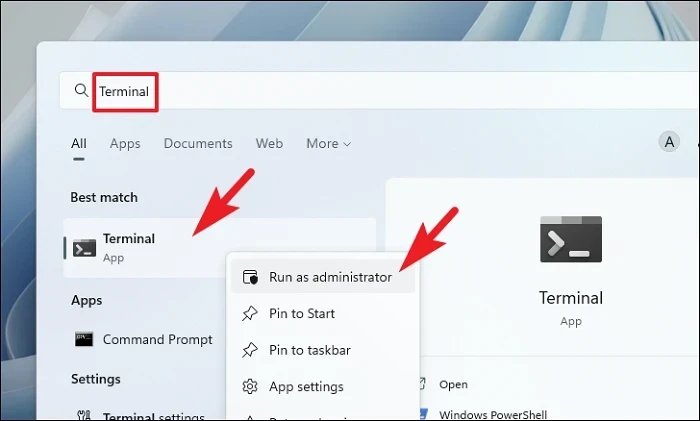
Open the Start menu, type Terminal, right-click on the ‘Terminal’ app, and select ‘Run as administrator’.
When prompted, click ‘Yes’ to grant administrative privileges.

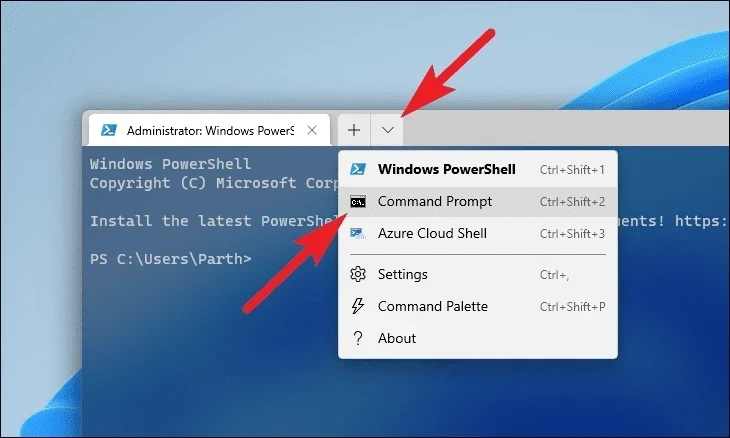
In the Terminal window, click on the downward arrow icon and choose ‘Command Prompt’ to open it.
Type the following command and press Enter to run the DISM scan:
DISM /Online /Cleanup-Image /RestoreHealth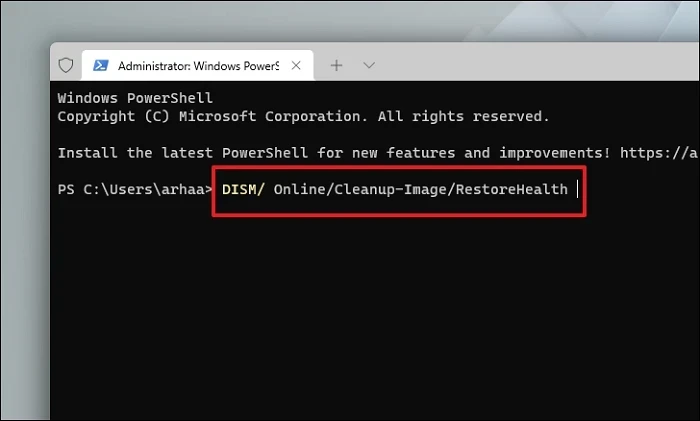
After the DISM scan completes, run the SFC scan by typing:
SFC /scannow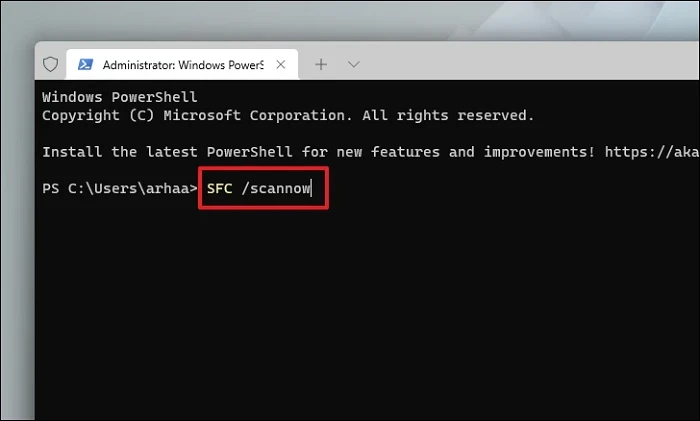
Once both scans are finished, restart your computer and check if the DirectX errors have been resolved.
4. Run System Restore
If the DirectX errors started occurring recently, you can use System Restore to revert your system to a previous state when everything was working correctly. This won’t affect your personal files but will remove recently installed apps and drivers.
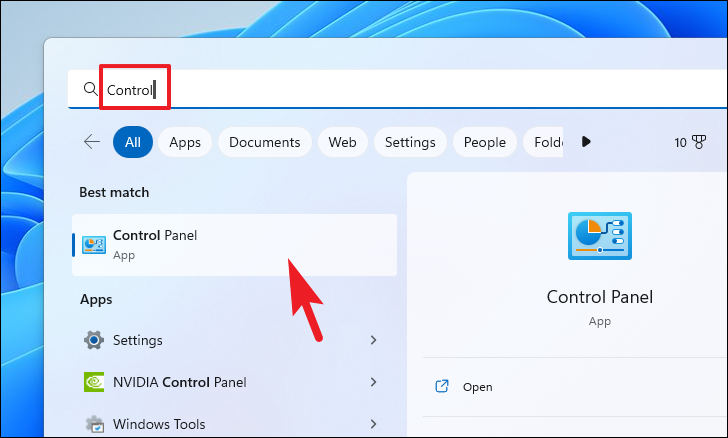
Open the Start menu, type Control Panel, and select it from the search results.
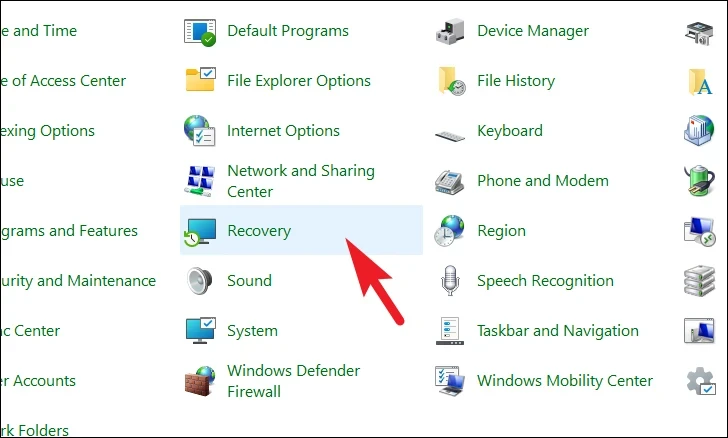
In the Control Panel, set the view to ‘Large icons’ if necessary, then click on ‘Recovery’.
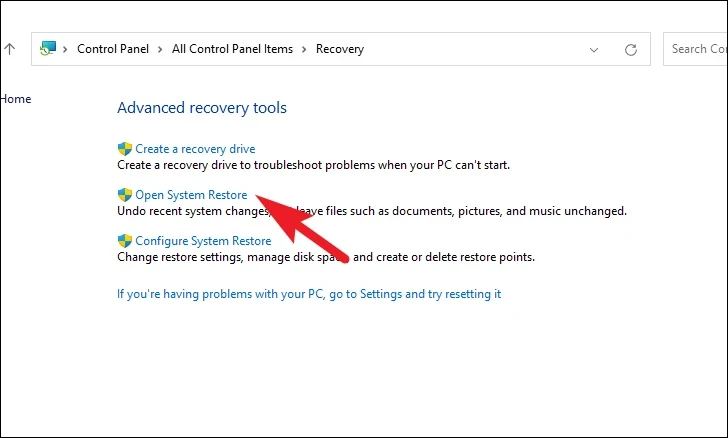
Click on ‘Open System Restore’ to launch the tool.
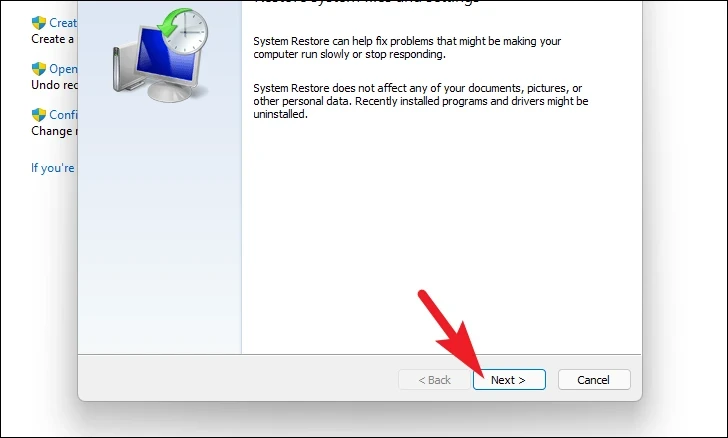
In the System Restore window, click ‘Next’.
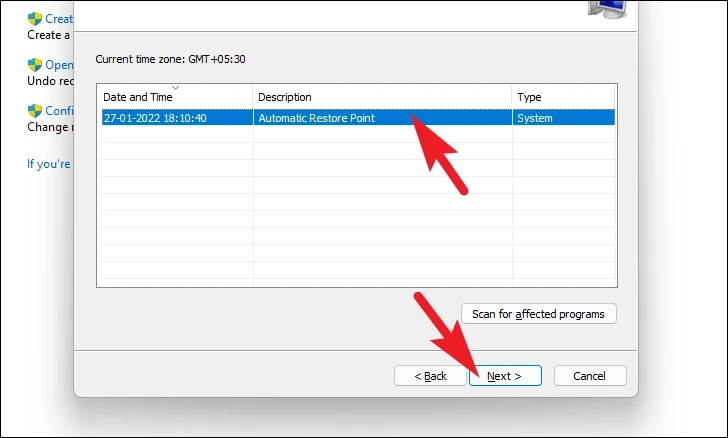
Select a restore point from the list, ideally one dated before the DirectX errors began, and click ‘Next’. To see which programs will be affected, click ‘Scan for affected programs’.
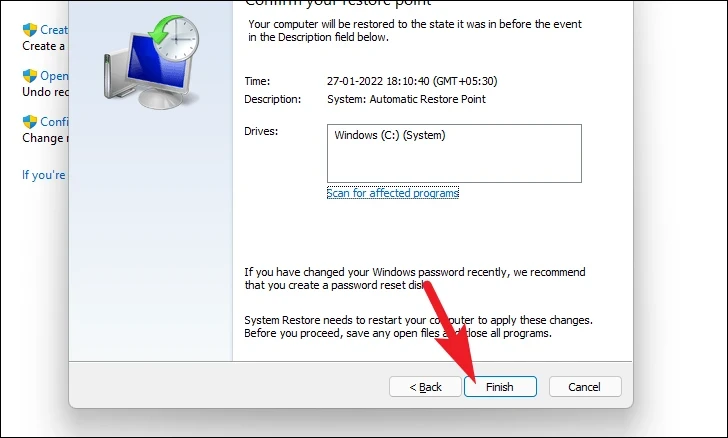
Review the information and click ‘Finish’ to start the restoration process. Your computer will restart, and System Restore will revert your system to the selected state.
By following these steps, you should be able to resolve DirectX errors on your Windows 11 PC and enjoy a smoother multimedia experience.


