Having to enter your password every time you log into Windows 11 can be a hassle, especially if you're the only user and don't have sensitive data on your PC. While it's important to be mindful of security risks, you might prefer to disable the password requirement for convenience. This guide will show you several ways to remove the login password on Windows 11.
Note: Disabling your password is not recommended if your computer contains important or sensitive data, as it can compromise the security of your system.
Disable the password using the User Accounts panel
The simplest method to remove your login password is through the User Accounts panel. This approach works for both Microsoft and local accounts. Follow these steps to disable the password requirement:
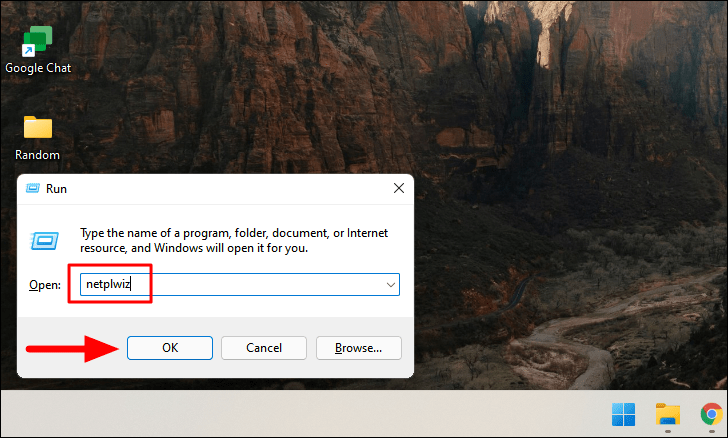
- Press WINDOWS + R to open the Run dialog box.
- In the Run dialog, type
netplwizand click OK or press ENTER.
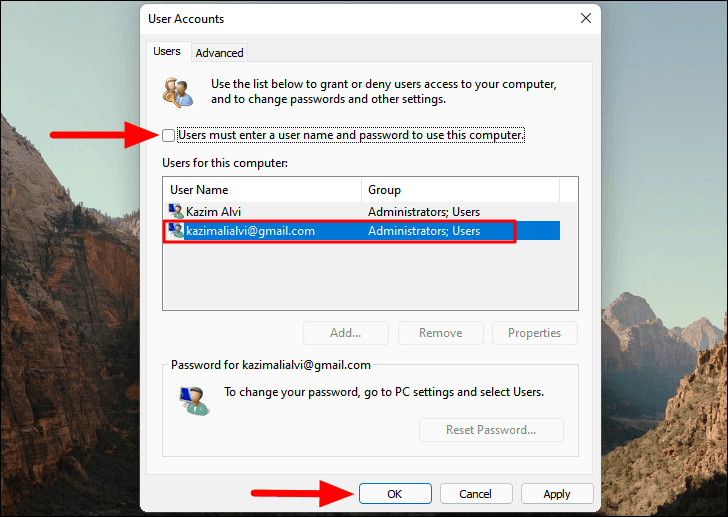
- In the User Accounts window, select your user account from the list.
- Uncheck the box next to Users must enter a user name and password to use this computer.
- Click OK at the bottom of the window.
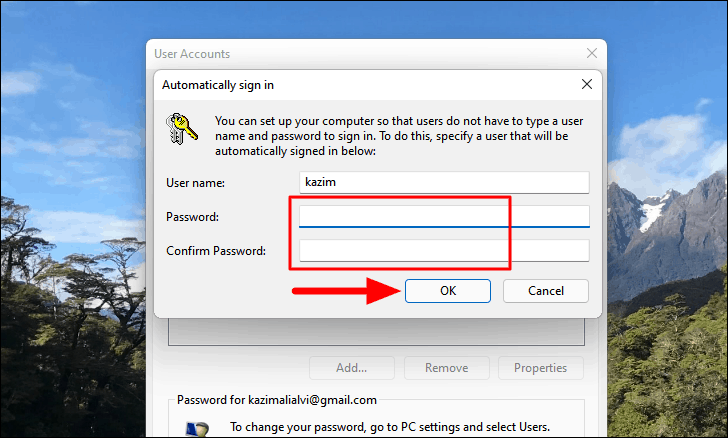
- A new dialog will appear. Enter your account's user name (or email address if it's a Microsoft account) in the User Name field.
- Type your current password in the Password and Confirm Password fields.
- Click OK to save the changes.
From now on, you won't be prompted to enter your password each time you start your computer.
Disable the password using the Registry Editor
You can also remove the login password by modifying the Windows Registry. Be cautious when editing the registry, as incorrect changes can cause system issues. Follow these steps carefully:
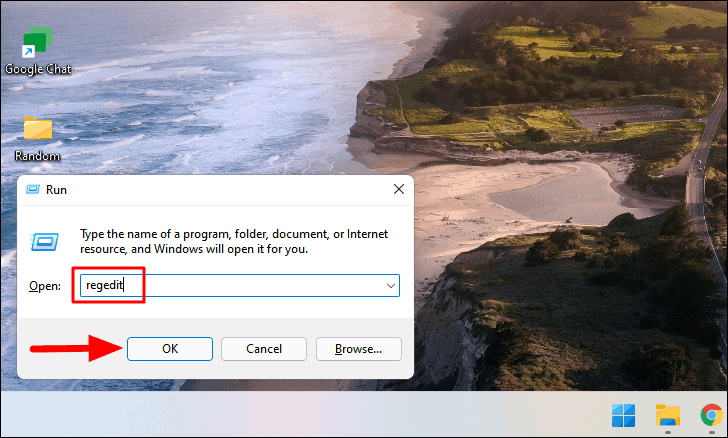
- Press WINDOWS + R to open the Run dialog box.
- Type
regeditand click OK or press ENTER to open the Registry Editor. If prompted, click Yes to allow changes.
In the Registry Editor, navigate to the following path:
Computer\HKEY_LOCAL_MACHINE\SOFTWARE\Microsoft\Windows NT\CurrentVersion\Winlogon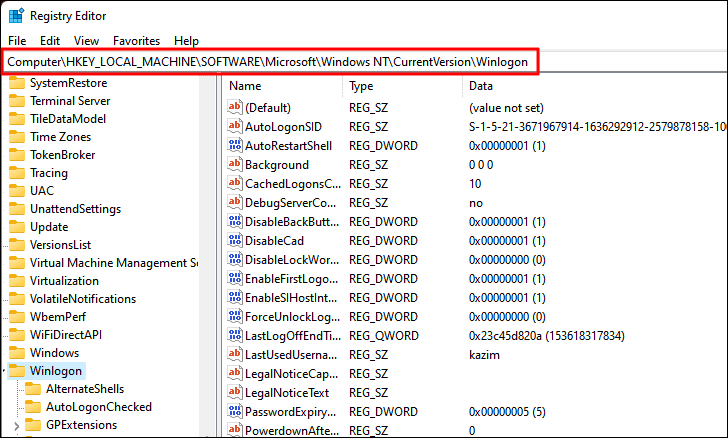
- In the Winlogon folder, look for the
DefaultUserNamestring. If it doesn't exist, create it by right-clicking in the right pane, selecting New, then String Value, and naming itDefaultUserName.
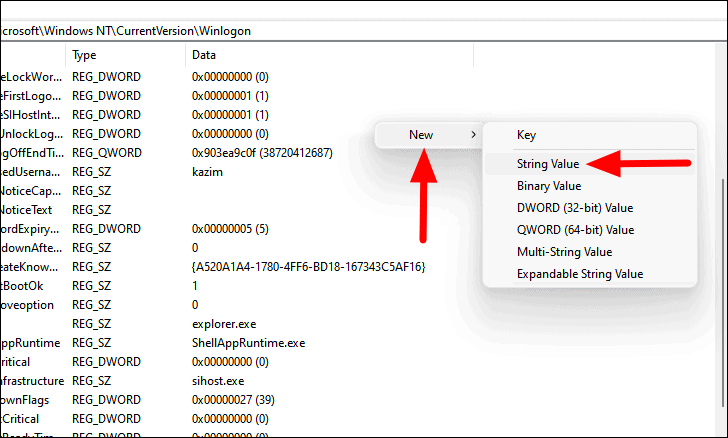
- Double-click the
DefaultUserNamestring and enter your user name or email address in the Value data field. Click OK.
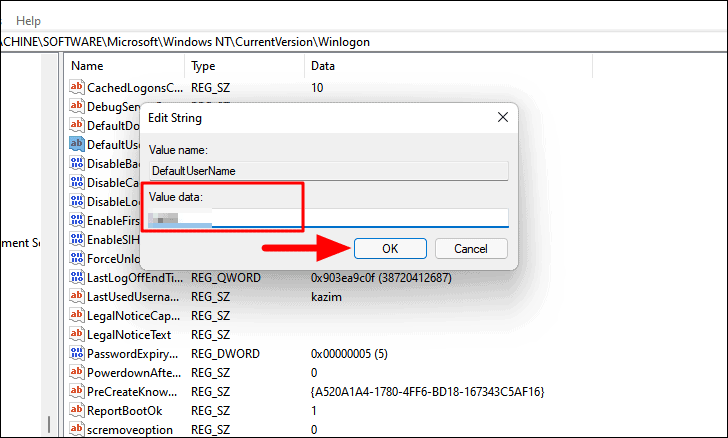
- Create a new string value named
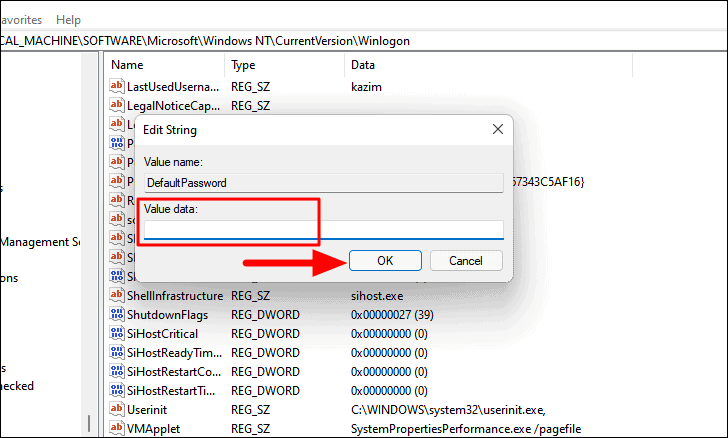
DefaultPasswordby right-clicking, selecting New, then String Value, and naming itDefaultPassword.
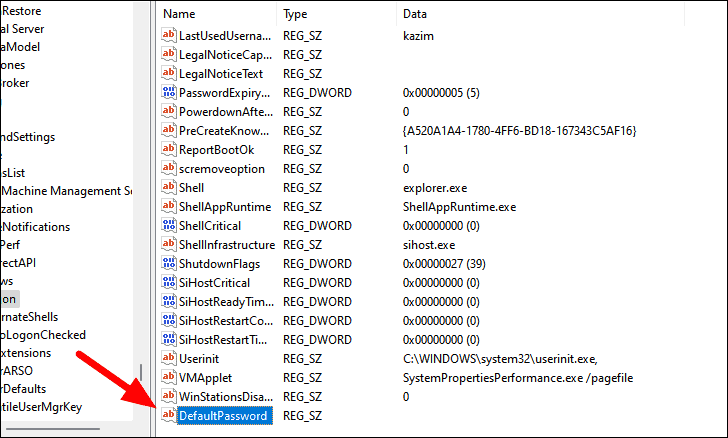
- Double-click the
DefaultPasswordstring and enter your account password in the Value data field. Click OK.
- Locate the
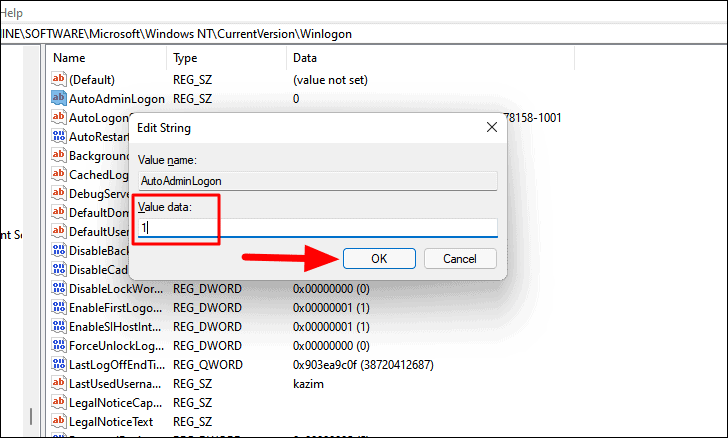
AutoAdminLogonstring. If it's not present, create it by right-clicking, selecting New, then String Value, and naming itAutoAdminLogon. - Double-click the
AutoAdminLogonstring and change the Value data to1. Click OK.
Close the Registry Editor. Your computer will now bypass the login screen and sign you in automatically.
Remove the password by creating a local account
If you prefer to completely remove the password, you can switch to a local account without a password. Be aware that this method will disable some Microsoft services like OneDrive, Microsoft Store, and settings synchronization across devices. Here's how to do it:
- Open the Settings app by pressing WINDOWS + I.
- Go to Accounts and select Your info.
- Click on Sign in with a local account instead.
- Follow the on-screen instructions to create a local account without a password.
- After setting up the local account, delete your Microsoft account profile from the system.
Read: How to Create a Local account on Windows 11
By following these methods, you can disable the login password on your Windows 11 computer for a faster and more convenient sign-in experience. Remember to consider the security implications before removing your password.

