Windows 11 brings a modern look and improved functionality compared to its predecessors. However, if you’ve installed Windows 11 on a PC that doesn’t meet the minimum hardware requirements, you might notice a “System requirements not met” watermark on your desktop or within the Settings app. While this watermark doesn’t impact system performance, it can be distracting. Luckily, there’s a straightforward way to remove it by editing the Windows Registry.
Why does the “System requirements not met” watermark appear?
Microsoft designed Windows 11 with specific hardware requirements to enhance security and performance. These requirements include features like TPM 2.0 and Secure Boot. If your PC doesn’t meet these criteria but runs Windows 11 due to a workaround or upgrade from the Windows Insider Program, the system may display a “System requirements not met” watermark. This is a gentle reminder from Microsoft that your device isn’t officially supported and might face compatibility issues or lack future updates.
How to remove the “System requirements not met” watermark
To eliminate the watermark, you’ll need to make a small adjustment in the Windows Registry. This process is safe if you follow the steps carefully. Here’s how to do it:
Start menu and type Registry Editor in the search bar. When it appears in the search results, click on the Registry Editor application to launch it.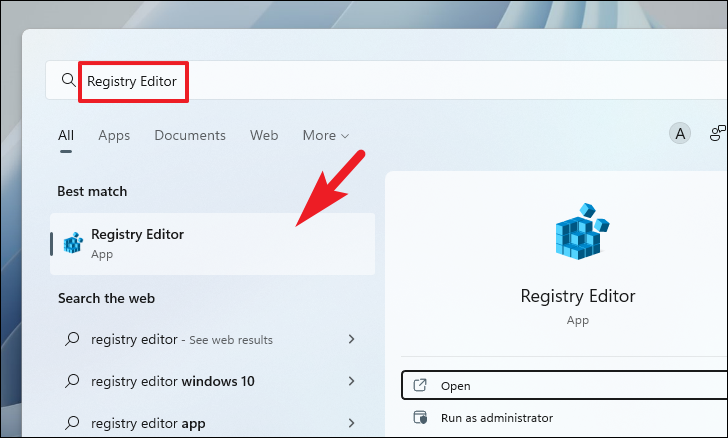
Yes to continue.
Enter:HKEY_CURRENT_USER\Control Panel\UnsupportedHardwareNotificationCache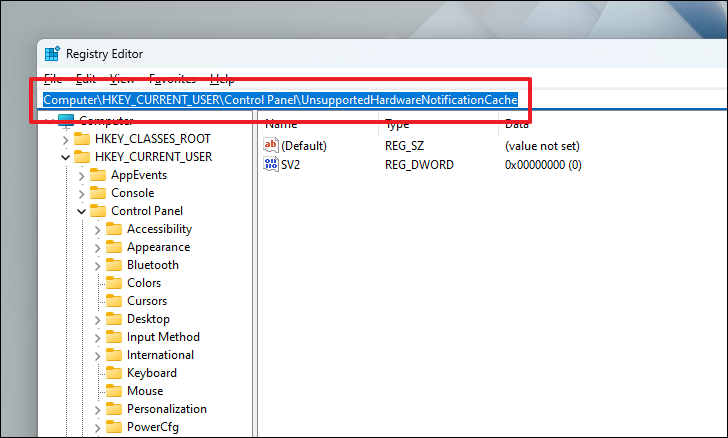
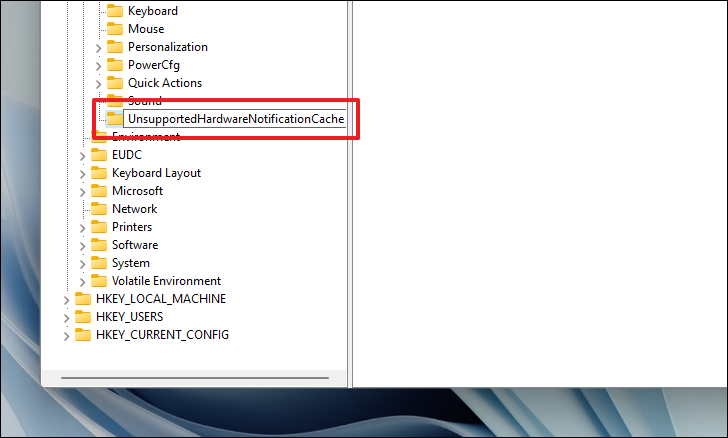
UnsupportedHardwareNotificationCache key doesn’t exist, you’ll need to create it. Right-click on the Control Panel folder in the left pane, hover over New, and select Key. Name the new key UnsupportedHardwareNotificationCache and press Enter.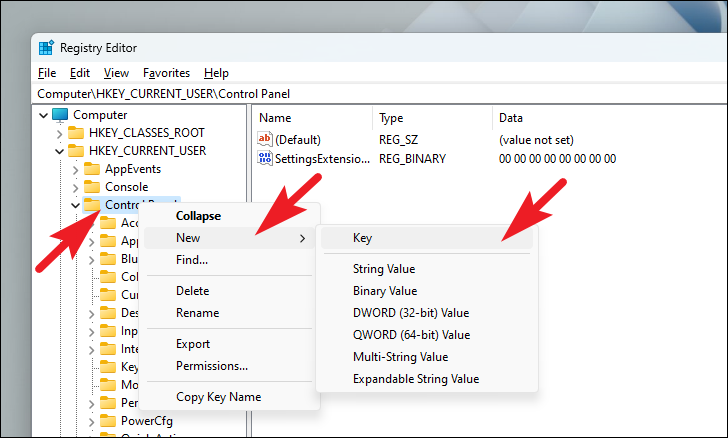
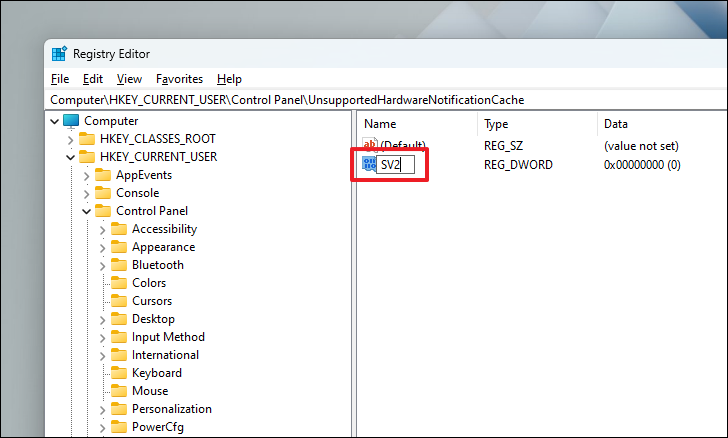
After naming the key:
UnsupportedHardwareNotificationCache key selected, right-click in the right pane, hover over New, and choose DWORD (32-bit) Value. Name this value SV2 and press Enter.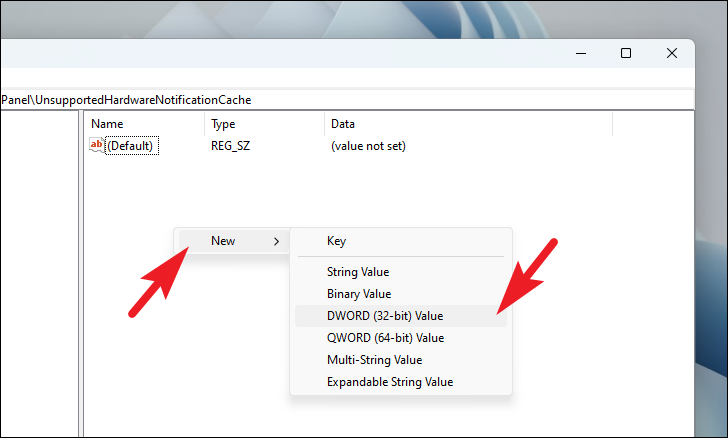
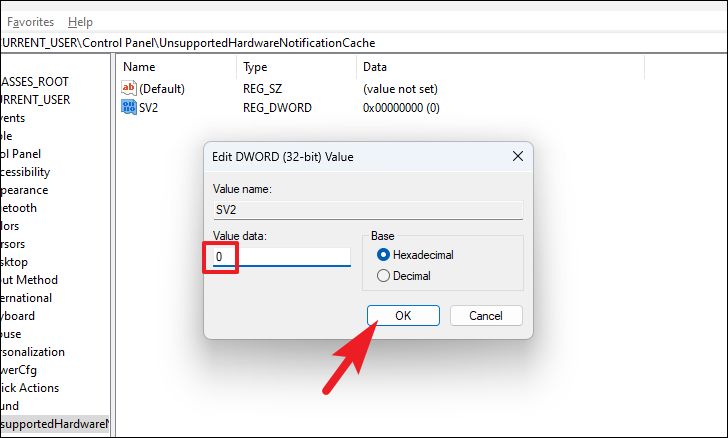
After creating the SV2 value:
SV2 entry to modify its value. In the Value data field, type 0. Ensure the Base is set to Hexadecimal, and then click OK.Note: If there’s an existing value in the field, replace it with 0.
Start menu, select the power icon, and choose Restart.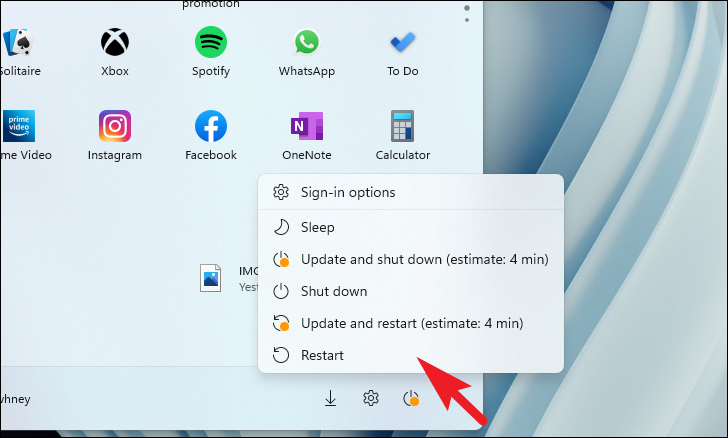
After your PC restarts, the “System requirements not met” watermark should no longer appear on your desktop or within the Settings app. This registry tweak effectively suppresses the notification, allowing for an uninterrupted experience on Windows 11.


