Over time, a Windows 10 PC can develop issues that slow it down or cause errors. Whether you’re experiencing frequent crashes, slow performance, or even malware pop-ups, resetting Windows 10 can help restore your system without losing your personal files.
In this guide, we’ll walk you through the steps to reset your Windows 10 PC while keeping your data intact. This process is straightforward and doesn’t require any installation media or accessing the BIOS.
Why Resetting Windows 10 Is Easier Than Ever
Resetting your PC used to be a daunting task that required technical know-how and external installation media. With Windows 10, Microsoft has simplified this process significantly. You can now reset your PC directly from the operating system, and your other partitions remain untouched, ensuring your personal files are safe.
Before proceeding, it’s a good idea to back up your important data and sync your browser bookmarks if they’re not already synced with your Microsoft or Google account.
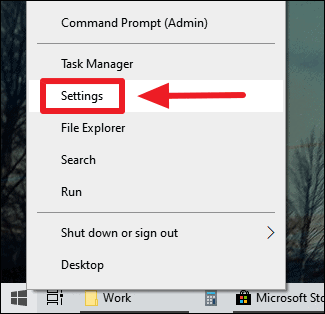
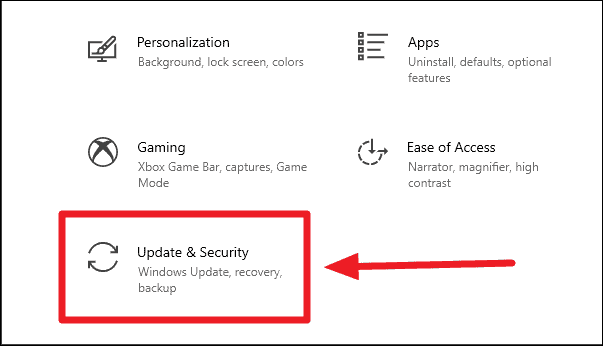
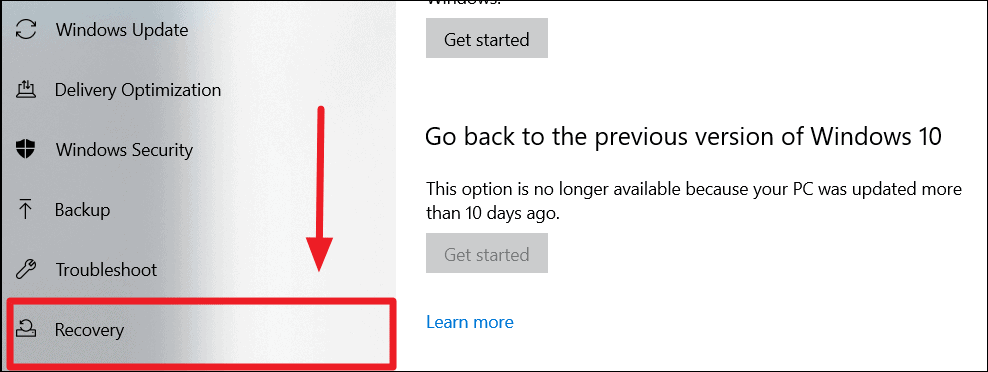
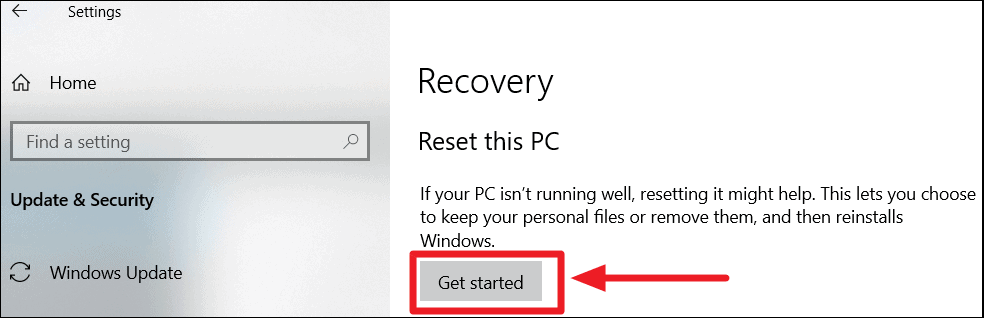
How to Reset Windows 10 Without Losing Your Data
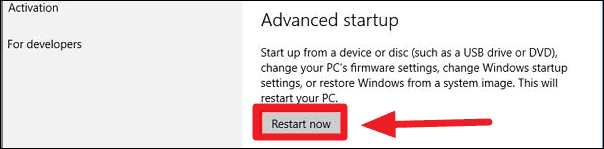
If the reset function doesn’t start within the operating system, you can use the Advanced Startup option.
Alternative Step: Under the Advanced startup section, click on Restart now to boot into the Windows Recovery Environment (WinRE).
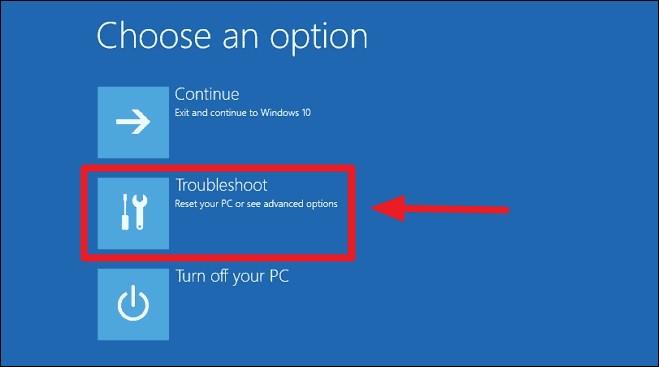
Once in WinRE, select Troubleshoot.
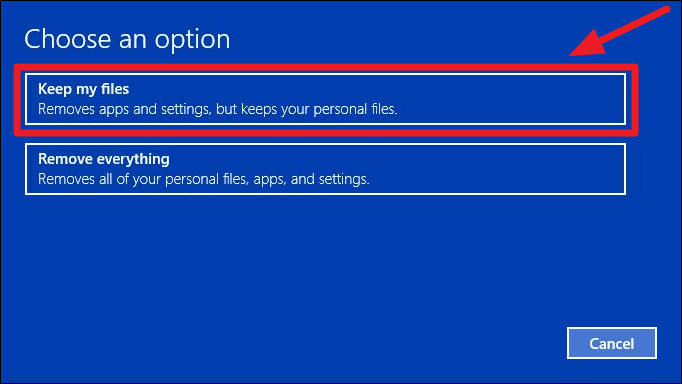
Then, click on Reset this PC.

Next to proceed.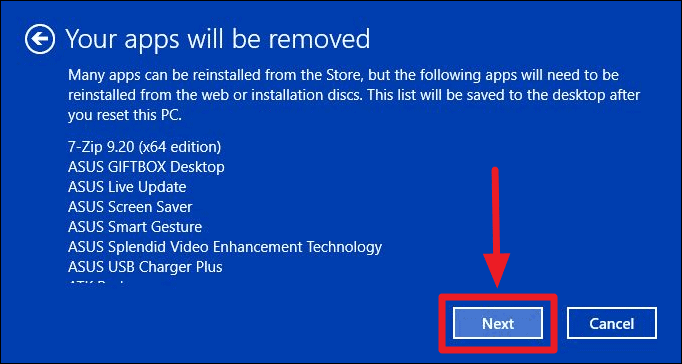
If you upgraded to Windows 10 from a previous version, you might see a warning that you won’t be able to return to the earlier version after the reset. Click Next to continue.

Reset to begin the process. Your PC will restart, and the reset will take some time to complete.
Continue to boot into your freshly reset system.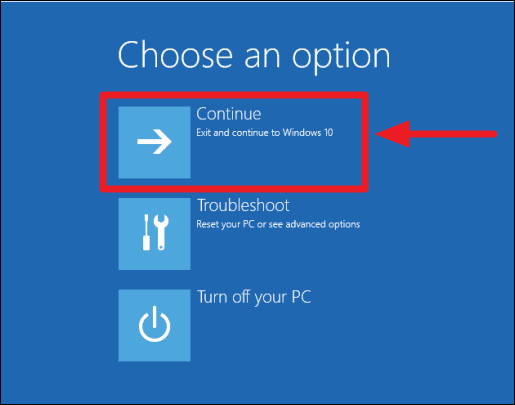
With your PC reset, you should notice improved performance and stability. Remember to reinstall any necessary applications and adjust your settings as needed. Regular maintenance and mindful installation of software can help keep your system running smoothly.


