Windows 11 screen orientation suddenly flipping upside down or sideways can disrupt your workflow, especially if you’re using convertible laptops or multiple displays. Fortunately, Windows 11 includes straightforward methods to rotate your screen back to normal or to your desired orientation. Follow these simple methods to quickly correct or adjust your screen orientation.
Method 1: Rotate Screen Using Display Settings
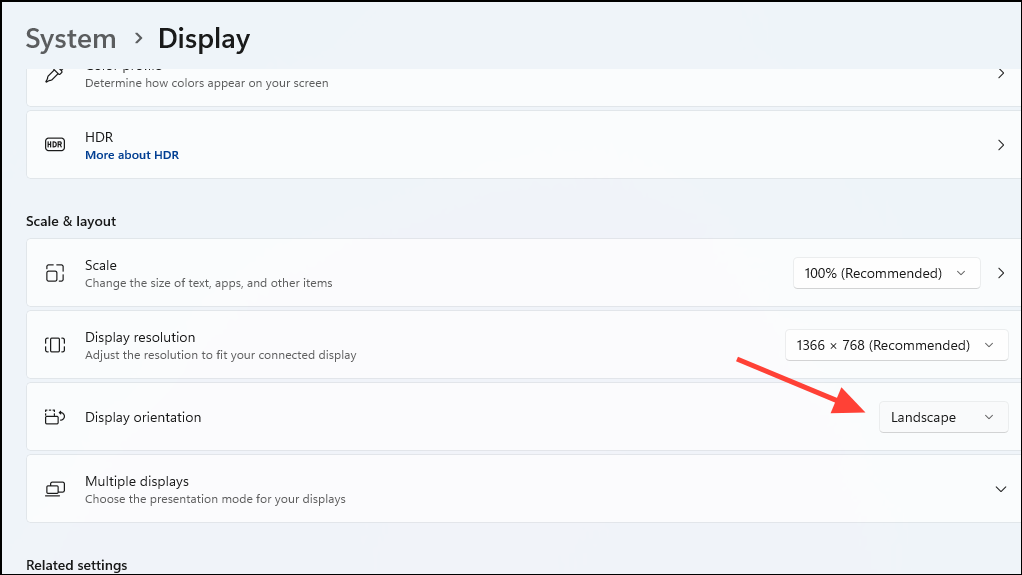
Windows key on your keyboard, type Display settings, and press Enter. This opens the Display Settings menu where you can manage screen orientation and other display properties.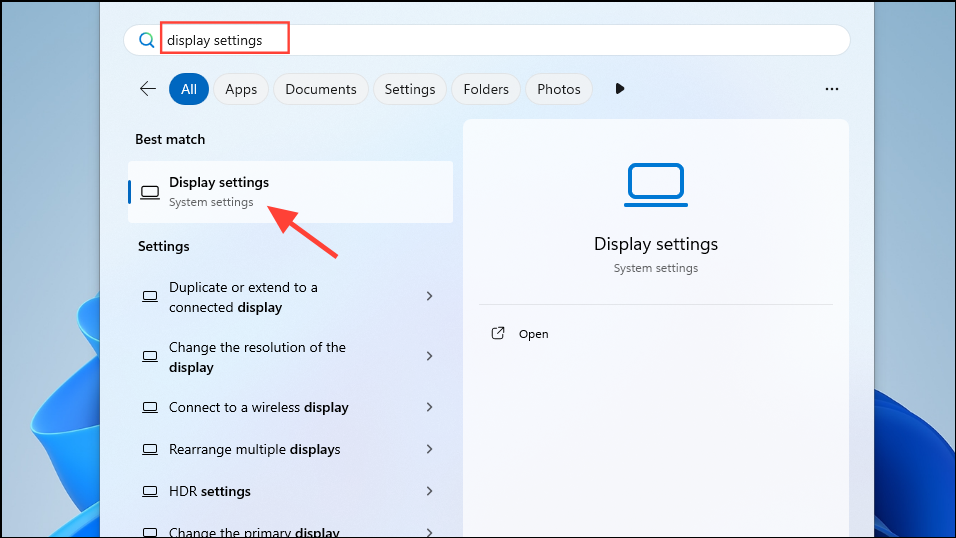
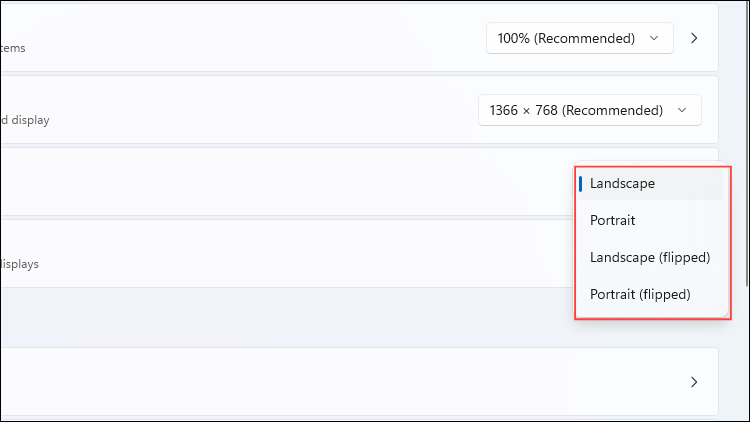
- Landscape: Standard horizontal orientation.
- Portrait: Vertical orientation useful for reading or coding.
- Landscape (flipped): Horizontal but flipped upside down.
- Portrait (flipped): Vertical but flipped upside down.
Method 2: Rotate Screen Using Keyboard Shortcuts
Windows 11 also supports convenient keyboard shortcuts for quickly changing screen orientation without navigating through settings.
Ctrl + Alt + Up Arrow: Rotates screen to normal landscape mode.Ctrl + Alt + Right Arrow: Rotates screen to portrait mode.Ctrl + Alt + Down Arrow: Rotates screen to upside-down landscape mode.Ctrl + Alt + Left Arrow: Rotates screen to flipped portrait mode.
These shortcuts instantly change your screen orientation, making them ideal for users who frequently switch between layouts, such as graphic designers, coders, or analysts.
Method 3: Enable or Disable Automatic Screen Rotation
Convertible laptops and tablets running Windows 11 often include an automatic rotation feature. This feature detects device orientation and adjusts the screen accordingly. However, you might prefer to disable it to maintain a stable orientation.
Alternatively, you can manage automatic rotation in Settings:
With these methods, rotating your screen in Windows 11 becomes straightforward, helping you quickly restore your screen to the correct orientation or optimize your display for specific tasks.


