The Snipping Tool in Windows 11 hides a small virtual ruler that does more than sit flat across your screenshot. You can turn it to any angle, lock it in place, and draw a clean straight line along it. The control for this is not obvious, which is why so many people assume the ruler only works horizontally.
Quick answer: Add the ruler to your capture, hover the mouse pointer over it, then scroll the mouse wheel up to rotate clockwise or down to rotate counterclockwise. On a laptop, slide two fingers up or down on the trackpad.
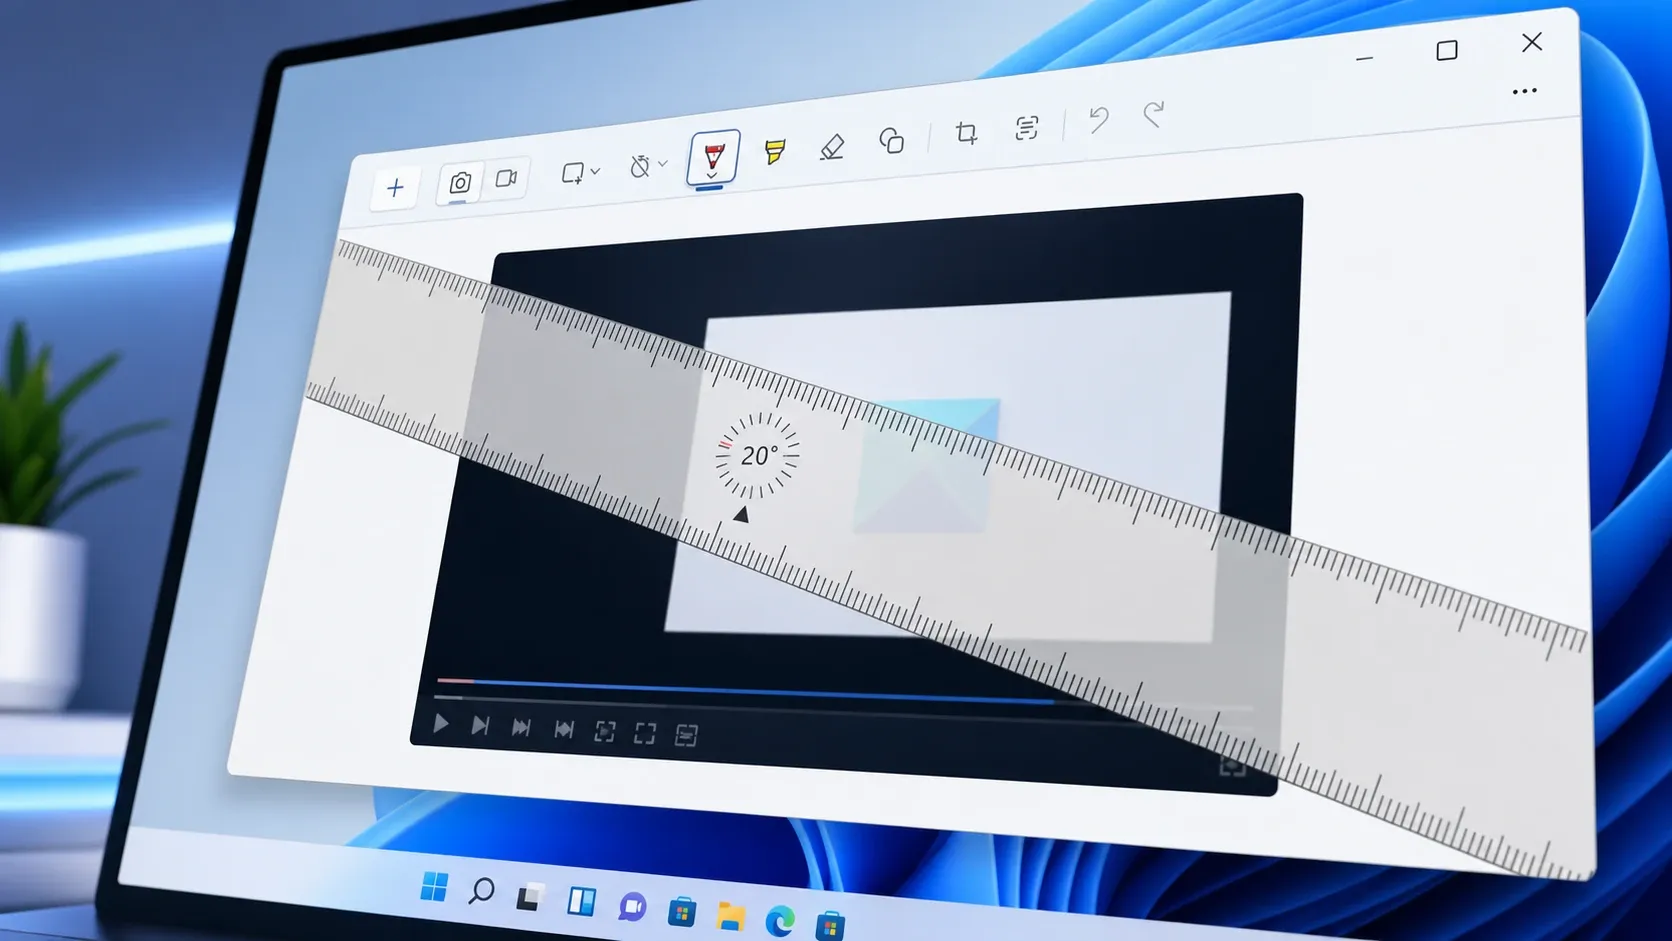
Rotate the Ruler in Snipping Tool with a mouse
Win + Shift + S to start a new snip, then choose your capture mode.Ctrl + R also toggles the ruler (older versions used Alt + L).Rotate the Ruler on a laptop trackpad or touchscreen
If you do not have a scroll wheel, the gesture is just as simple. Move the pointer over the ruler first, then place two fingers on the trackpad and slide them up to rotate clockwise or down to rotate counterclockwise. On a touchscreen tablet, the same two-finger swipe over the ruler changes its angle.
Fix: Ruler won’t rotate when you scroll the mouse wheel
A common snag is that the ruler sits there and refuses to turn no matter how much you scroll. This happens because the ruler only responds to the wheel when Windows is allowed to scroll a window your pointer is hovering over, even if that window isn’t selected. Turning on one setting usually fixes it.
Ruler shortcuts and version differences
| Action | How to do it |
|---|---|
| Show the ruler (current builds) | Three-dot menu (⋯) → Show ruler |
| Show the ruler (11.2305 and earlier) | Click Ruler in the toolbar |
| Toggle ruler by keyboard | Ctrl + R (Alt + L in older versions) |
| Rotate clockwise | Scroll up / two-finger swipe down |
| Rotate counterclockwise | Scroll down / two-finger swipe up |
| Move the ruler | Click and drag it |
What you cannot rotate
The protractor is the other measurement tool in the Snipping Tool, and it does not rotate. You don’t need to spin it anyway, since you measure an angle by placing it over the vertex and drawing along the curve. The Snipping Tool also won’t rotate the captured image itself, though you can still crop it down to the area you want.
With the ruler angled exactly where you need it, every line you draw runs perfectly straight along that edge, which is handy for marking up screenshots, lining up design elements, or measuring across an image at a slant.


