Ensuring your Windows 11 computer shuts down automatically can help maintain its performance and extend the lifespan of its components. Whether you're downloading large files, rendering videos, or leaving tasks running overnight, scheduling an automatic shutdown can be highly beneficial. Here are some effective methods to schedule an auto shutdown on your Windows 11 PC.
1. Schedule a Shutdown with the Task Scheduler
The Task Scheduler offers a comprehensive way to automate shutdowns at specific times or on a recurring schedule.
Step 1: Open the Start menu and type Task Scheduler in the search bar. Click on the 'Task Scheduler' app from the search results.

Step 2: In the Task Scheduler window, select Create Basic Task from the right-hand Actions pane. This will launch the task creation wizard.

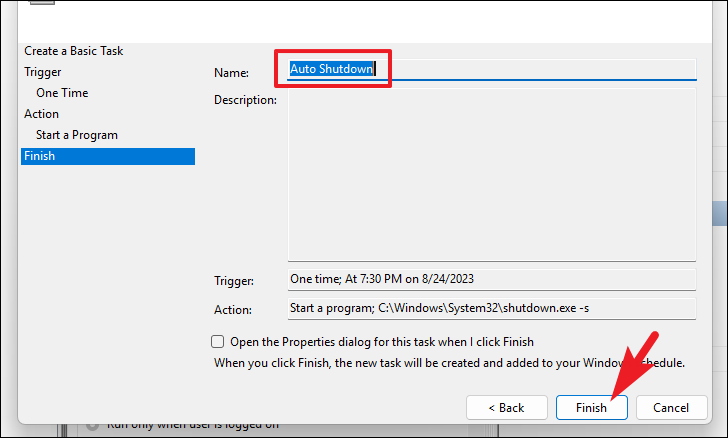
Step 3: Provide a name and description for your task (e.g., "Auto Shutdown") and click Next.
Step 4: Choose the frequency for the task. Select One time for a single occurrence or pick another option for recurring shutdowns. Click Next to proceed.

Step 5: Set the specific date and time when you want your computer to shut down automatically. After configuring the schedule, click Next.

Step 6: Choose Start a program as the action to perform and click Next.

Step 7: In the 'Program/script' field, enter C:\Windows\System32\shutdown.exe. In the 'Add arguments' field, type -s (which specifies shutdown). Click Next to continue.
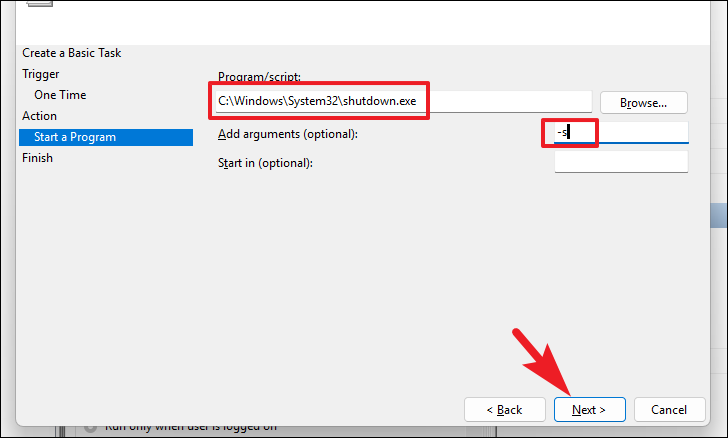
Step 8: Review your settings on the summary page. If everything looks correct, click Finish to create the scheduled shutdown task.
2. Schedule a Shut Down Using Run Command
The Run command provides a quick method to schedule a shutdown using a simple command line.
Step 1: Press Windows+R to open the Run dialog box.
Step 2: In the Run dialog, type or paste the following command and click OK or press Enter:
shutdown -s -t <number of seconds>
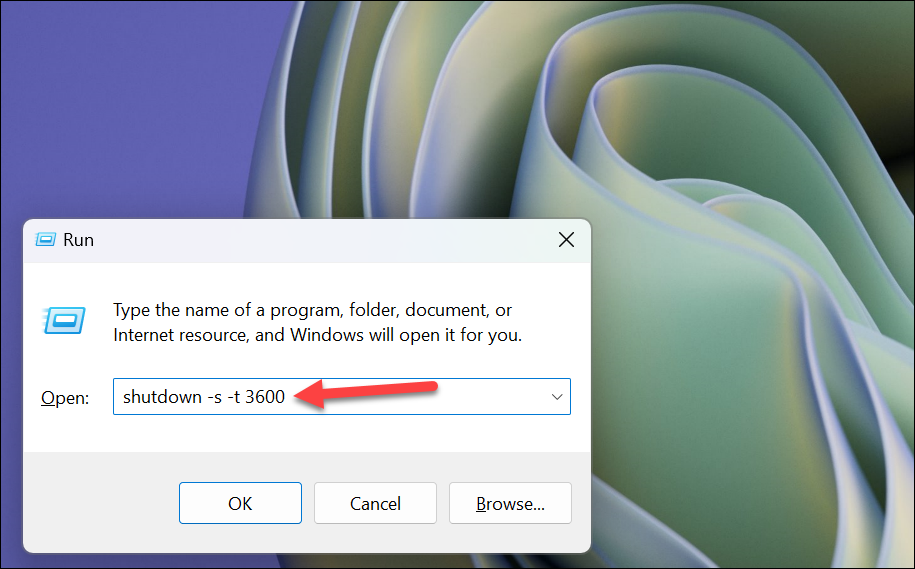
Replace <number of seconds> with the time in seconds before the shutdown occurs. For example:
- 1 hour:
shutdown -s -t 3600 - 2 hours:
shutdown -s -t 7200 - 3 hours:
shutdown -s -t 10800
Step 3: The system will schedule the shutdown after your specified duration. If you need to cancel the scheduled shutdown, reopen the Run dialog, enter the following command, and click OK:
shutdown -a

3. Auto Shutdown Using Command Prompt
You can also use the Command Prompt to schedule an automatic shutdown, especially if you prefer command-line interfaces.
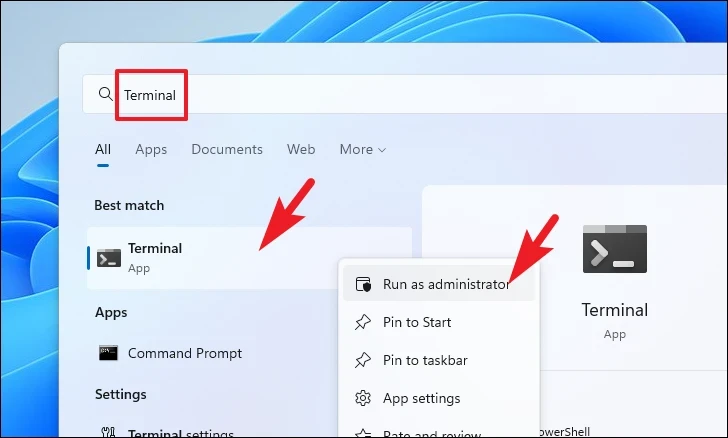
Step 1: Open the Start menu and type Terminal. Right-click on the 'Terminal' app and select Run as administrator.
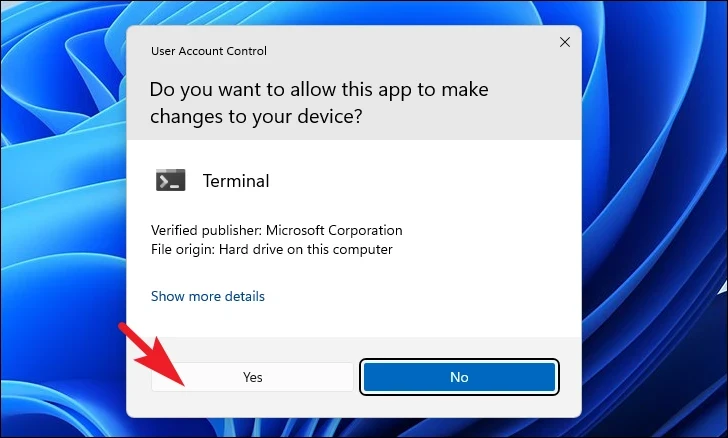
Step 2: If prompted by User Account Control (UAC), click Yes to grant administrative access.
Step 3: In the Terminal window, click the downward arrow icon and select Command Prompt to open it in a new tab.

Step 4: Type or paste the following command and press Enter:
shutdown -s -t <number of seconds>
Note: Replace <number of seconds> with the desired shutdown delay in seconds.

4. Create a Desktop Shortcut for Scheduled Shutdown
For quick access, you can create a desktop shortcut that initiates a shutdown countdown when activated.
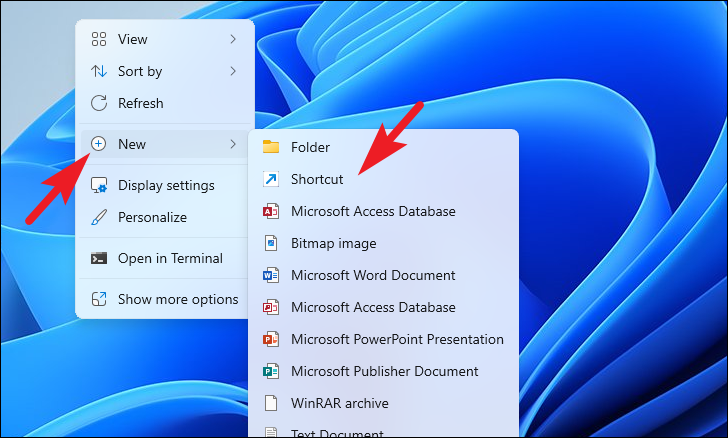
Step 1: Right-click on an empty area of your desktop, hover over New, and select Shortcut from the context menu.
Step 2: In the 'Create Shortcut' wizard, enter the following command in the 'Type the location of the item' field:
shutdown -s -t xxxx
Note: Replace xxxx with the number of seconds after which you want the shutdown to occur.
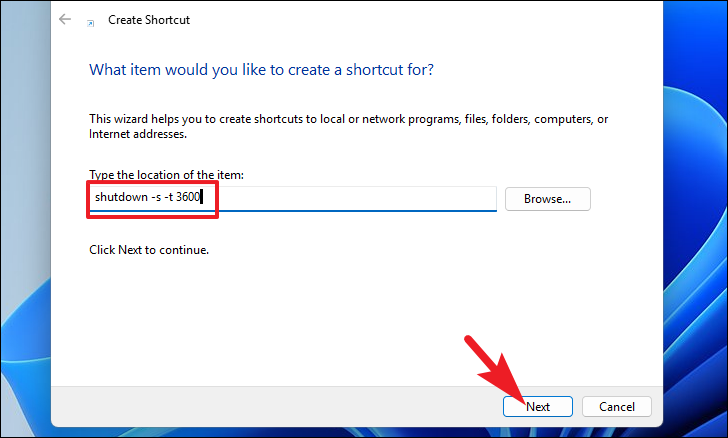
Step 3: Click Next, provide a name for the shortcut (e.g., "Scheduled Shutdown"), and click Finish.
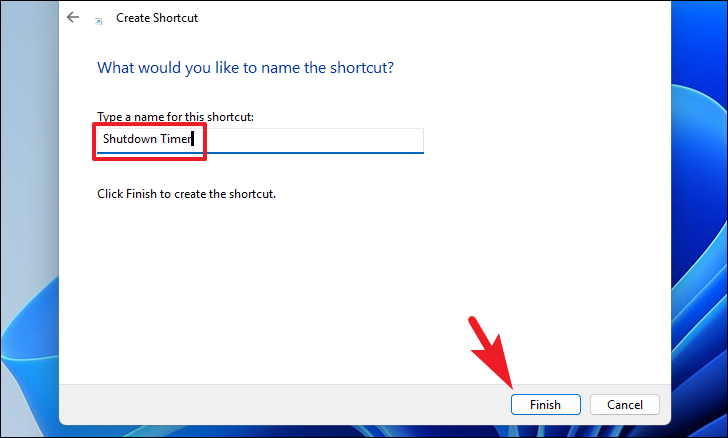
Step 4: The shortcut will now appear on your desktop. Double-click it to initiate the shutdown timer whenever needed.

By utilizing these methods to schedule automatic shutdowns, you can ensure your computer gets the necessary downtime, helping to maintain optimal performance and extend the life of its components.


