If you just bought a new iPhone from the latest lineup of this year, i.e., iPhones 14, 14 Plus, 14 Pro, or 14 Pro Max, this guide will help you set it up. Setting up a new iPhone can be a bit of a paradox; it’s the easiest task in the world but it can also be intimidating.
But it’s effortless to set up your iPhone after you turn it on. We’ll guide you through all the steps, whether you’re going to be using another iPhone to set up your phone or you’re going to do it from scratch. Let’s get going.
Getting Ready to Set Up your iPhone
Before you begin to set up your new iPhone, it’ll come in handy to be prepared. Below is the list of things you need to begin setting up your iPhone:
- Wi-Fi Connection: You’ll need to connect to a stable internet connection to set up your iPhone 14. For the iPhone 14 lineup, you don’t need cellular data service during setup.
- Apple ID and Password: If you have an Apple ID, you’ll need the ID and the password during setup. If you don’t have an Apple ID, you’ll be able to create it during setup.
- Your old iPhone or backup of your iPhone: If you want to set up your new iPhone with the data of your old iPhone, you need to keep your old iPhone nearby. On the off-hand you don’t have your old iPhone, you’ll need your device’s backup. For users who don’t have enough storage, iCloud offers temporary storage, free of charge, to complete phone transfers.
- Your old Android phone: If you previously had an Android device, keep it close if you want to transfer your data to your iPhone.
- Charger: You should also keep your charger nearby, just in case.
Setting up your iPhone
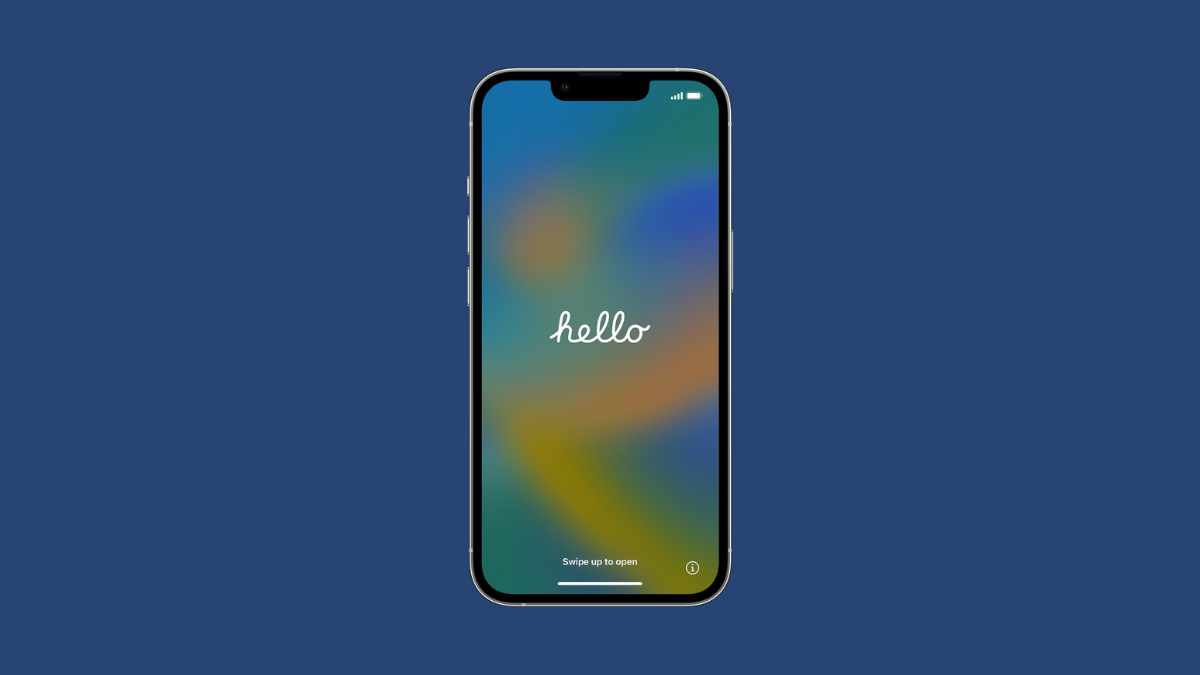
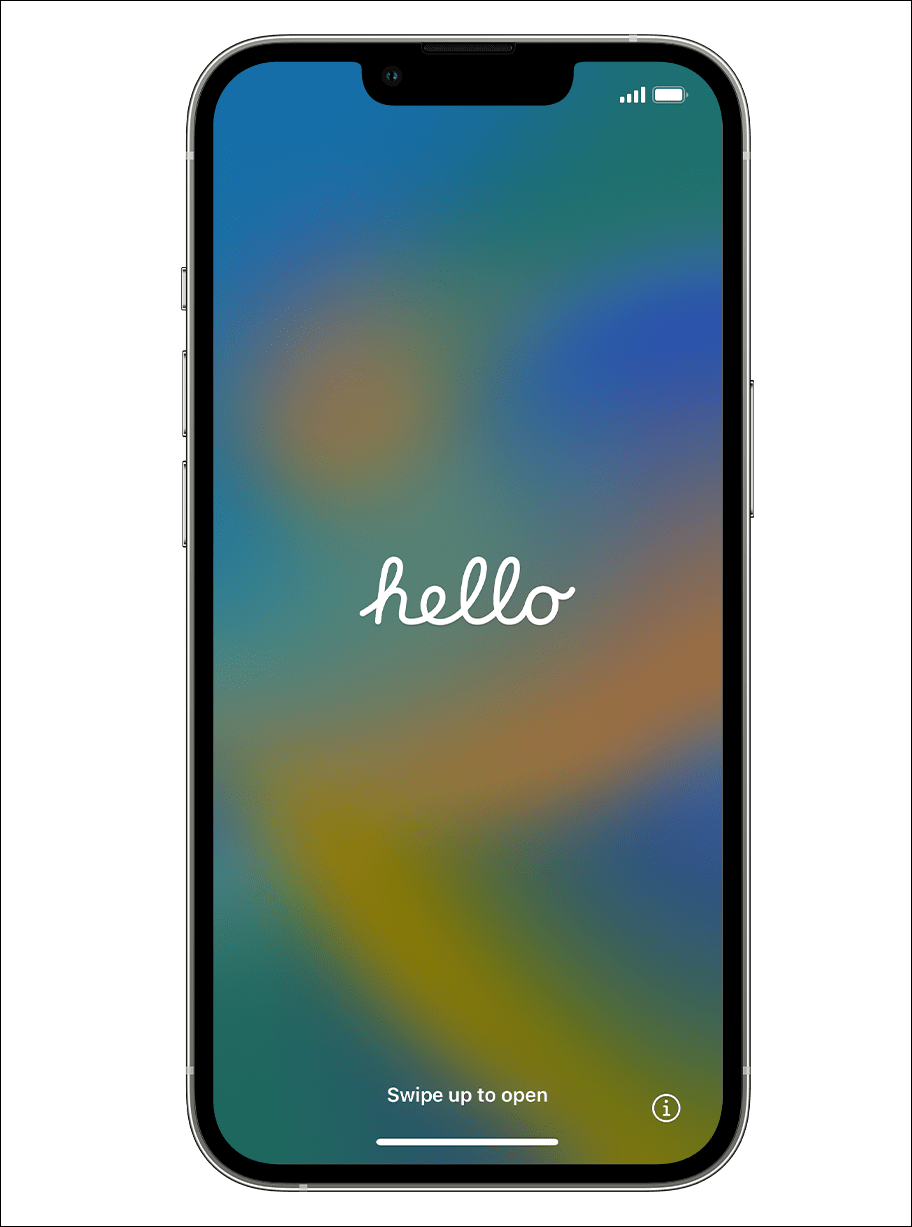
Now, let’s get on to setting up your iPhone. First, turn on your iPhone 14 by pressing the side button until the Apple logo appears. Then, you’ll be greeted by a screen saying Hello in different languages. Swipe up from the bottom to begin.
Then, select the language you want to set up your phone in; for instance, English.
After that, select your country or region. The country you’ll be in will most likely appear at the top.
Using Quick Start to Set up iPhone
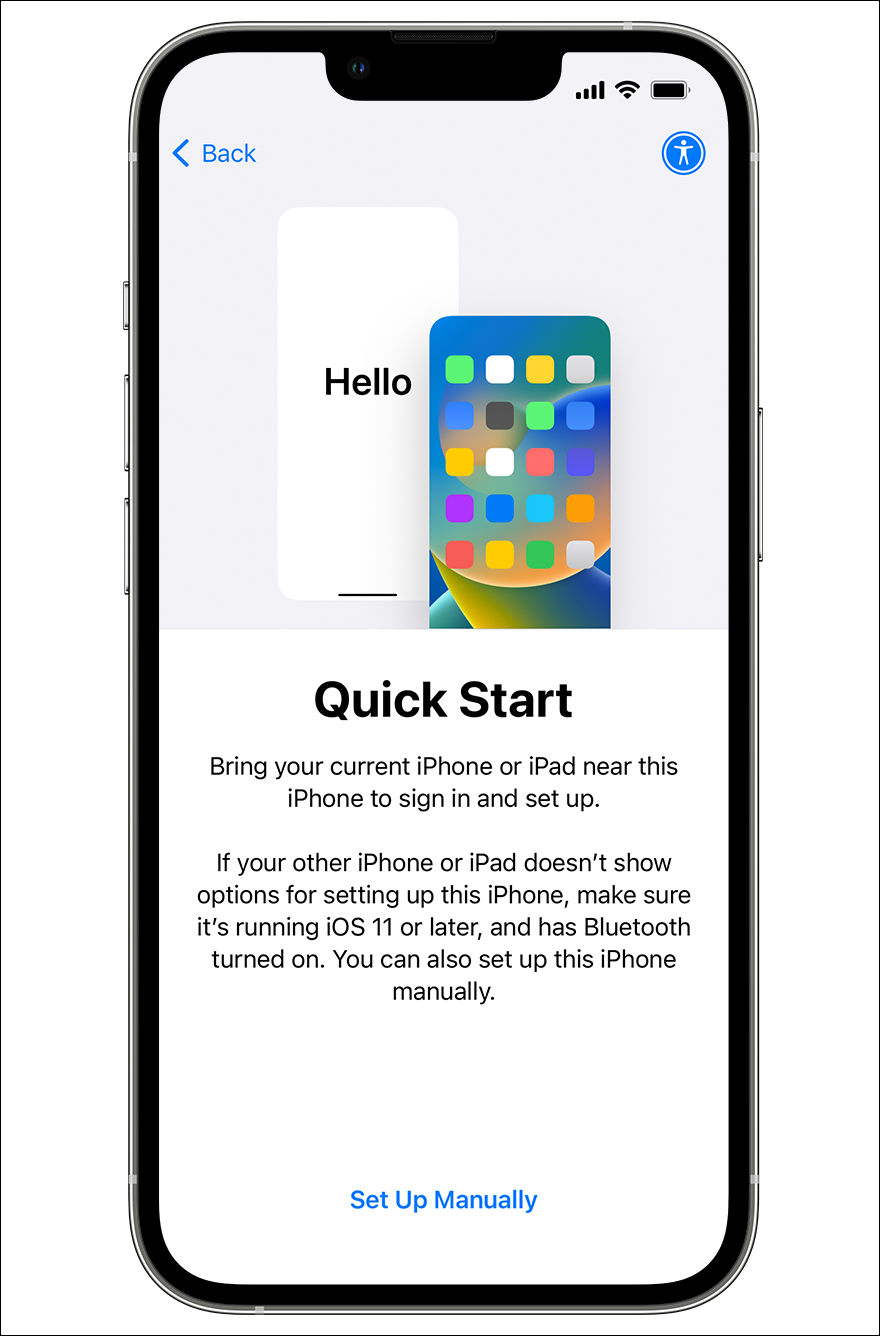
Now, if you have your previous iPhone, you can set up your new iPhone automatically with Quick Start. Quick Start can transfer all the data from your old iPhone to your new iPhone; the two devices will be practically identiacal. Your older iPhone should be running iOS 11 or higher. Bring your old iPhone closer. If using Quick Start, your new iPhone will connect to the Wi-Fi network your old iPhone is connected to automatically.
You’ll get a prompt on your old phone to ‘Set up New iPhone’. Tap ‘Continue’ to begin. If the prompt disappears before you could take action, restart both devices.
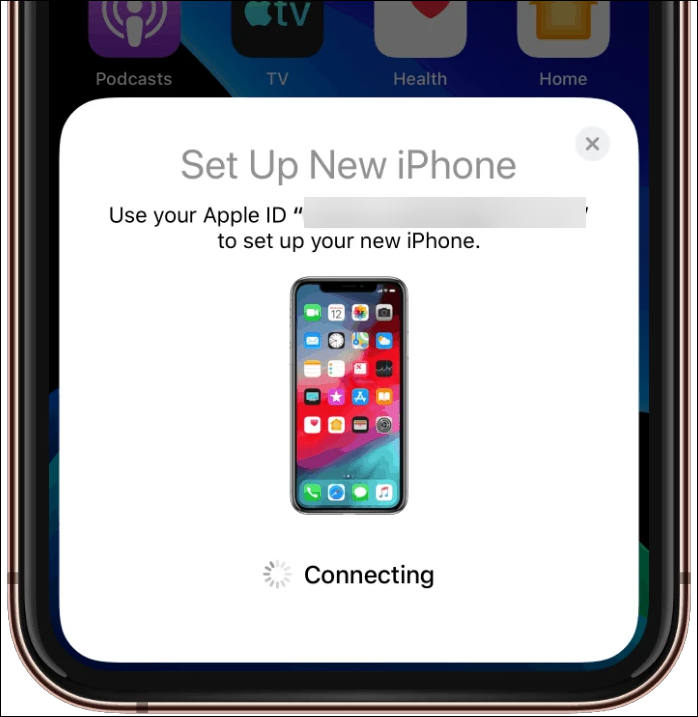
A pattern will appear on your new iPhone. Hold it up to your old phone and scan the pattern using the camera scanner that’ll appear on the old iPhone. Keep the two iPhones close to each other during the whole process.
It might take a few seconds for the two phones to establish a successful connection for the transfer.
First, if you’re in the US and your iPhone 14 does not have a physical SIM tray, you will get the option to set up eSIM. You can either set it up right now or later in the settings. There are several ways to activate an eSIM on your iPhone 14, depending on what your carrier supports. If your carrier supports iPhone-to-iPhone transfer, that’s the quickest way of setting up eSIM on your iPhone 14. Other methods your carrier might support include eSIM carrier activation, a QR code, or an app. You can check them out in detail in our focused guide on setting up eSIM on iPhone 14.
Next, you’ll be asked to set up Face ID. Again, you can set it up now or later from Settings. If you don’t set up Face ID, create a passcode for your iPhone instead.
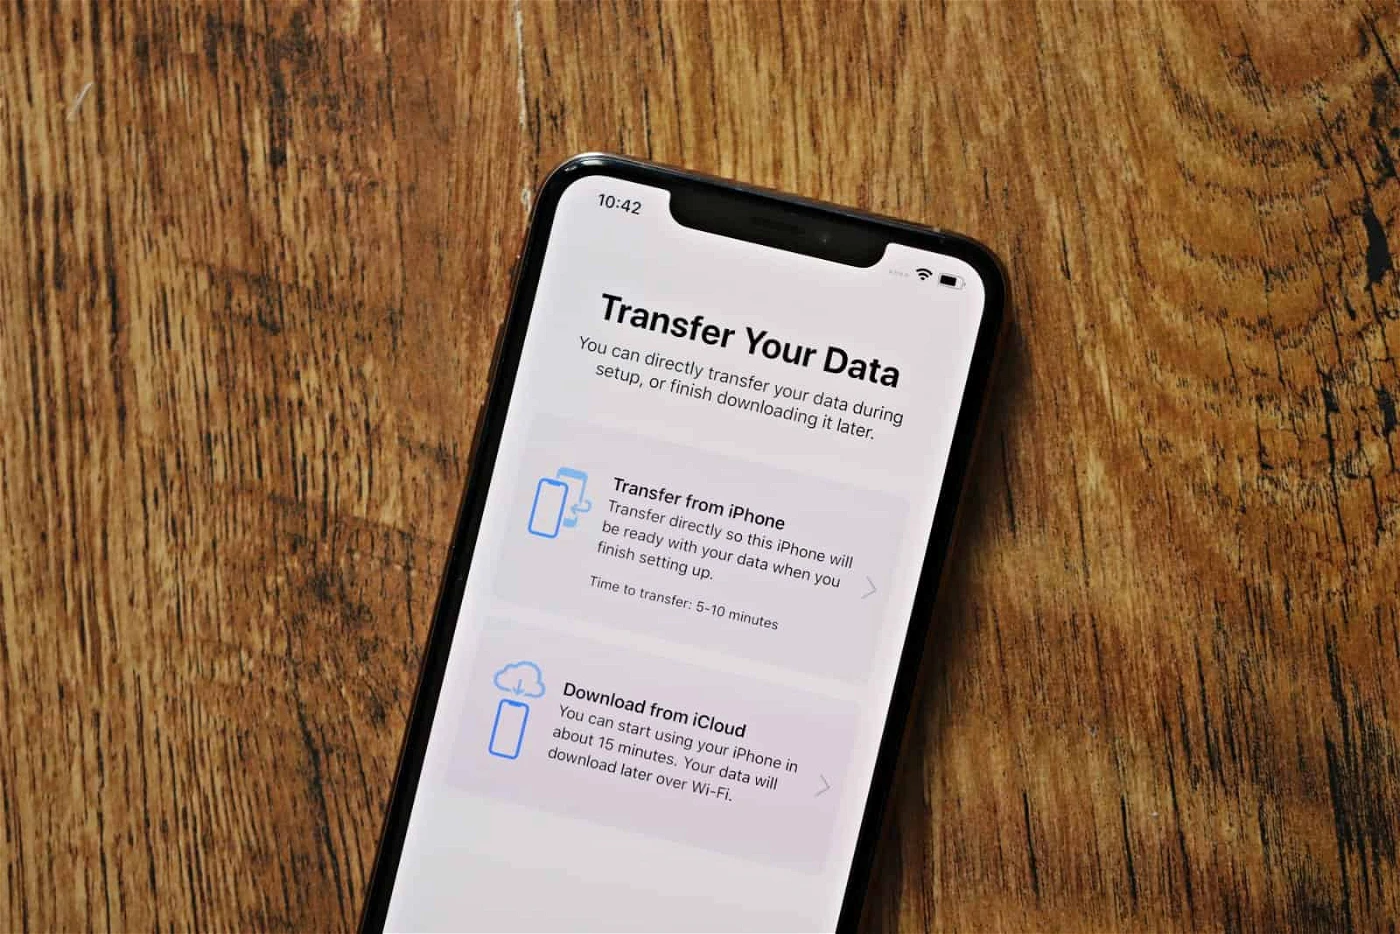
Then, transfer data from your iPhone. You’ll need to enter the password for your Apple ID to begin the transfer. While the transfer completes, keep your older iPhone connected to power. You won’t also be able to use either of your devices while the migration completes. You can also use iCloud to download the data if you want to use your iPhone while the apps and data download in the background.
After this, it’s only a matter of following the instructions on the screen of your new iPhone 14, like setting up Apple Pay, sharing Siri and Dictation Data, and iPhone Analytics, etc. You can choose to set them up or share data now or later.
Once the set up is complete, your iPhone will be ready to use. But some apps or photos and videos might still not be available. You can use the rest of your phone until iOS finishes downloading everything else.
Setting up your iPhone Manually
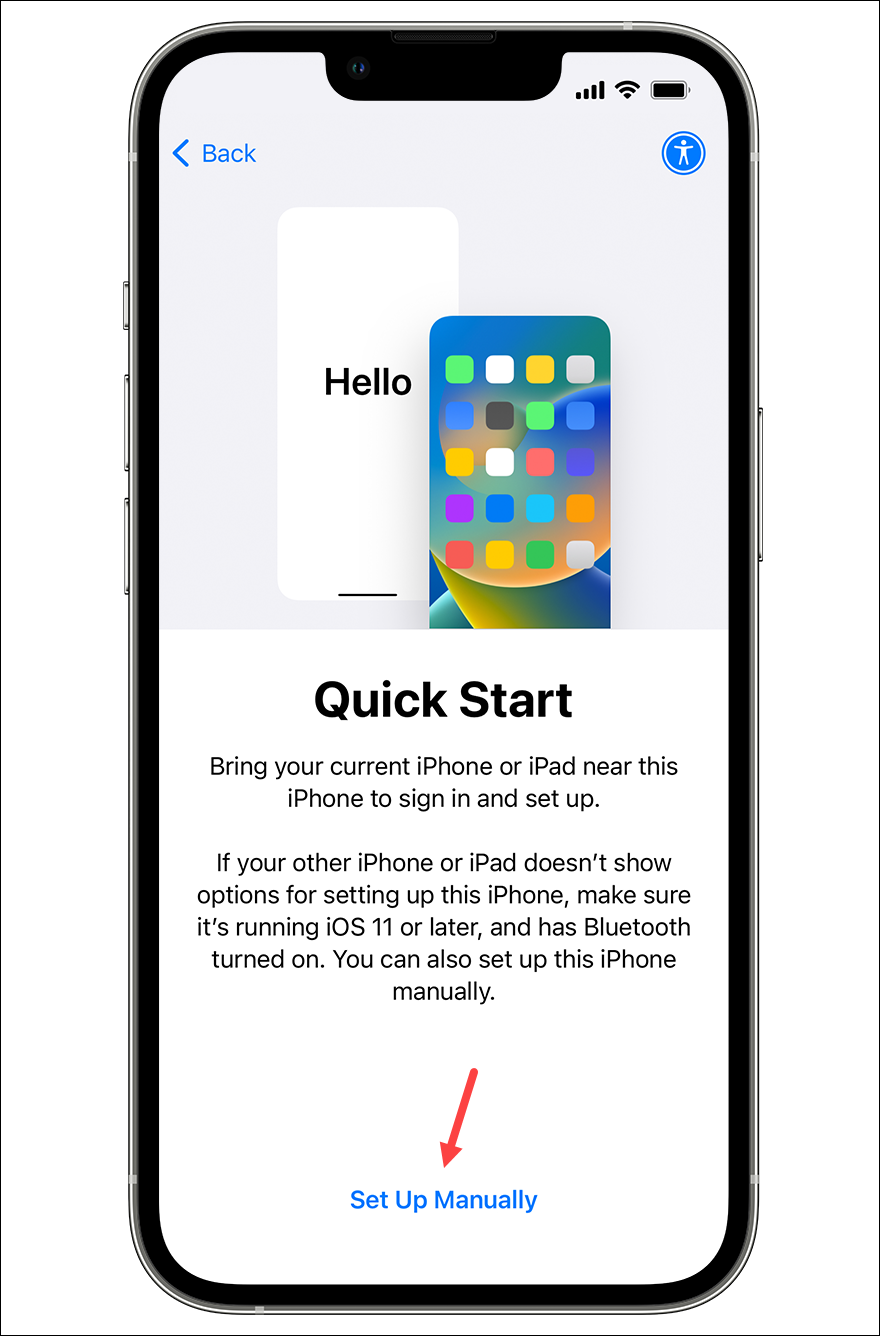
If you want to set up your iPhone without any older data, from an Android device, or from an iCloud or computer backup, tap ‘Set Up Manually’ at the bottom of the Quick Start screen.
Then, select a Wi-Fi network to connect to and enter the password. It’ll take a few minutes to activate your iPhone. Then, you’ll be asked to set up the Face ID; you can choose to skip it now and set it up later from settings. After that, create a passcode for your iPhone.
Then, you’ll get options about how you want to move your apps and data. You can choose to ‘Restore from iCloud Backup’, ‘Restore from Mac or PC’, ‘Transfer Directly from iPhone’, ‘Move Data from Android’, or ‘Don’t Transfer Apps & Data’.
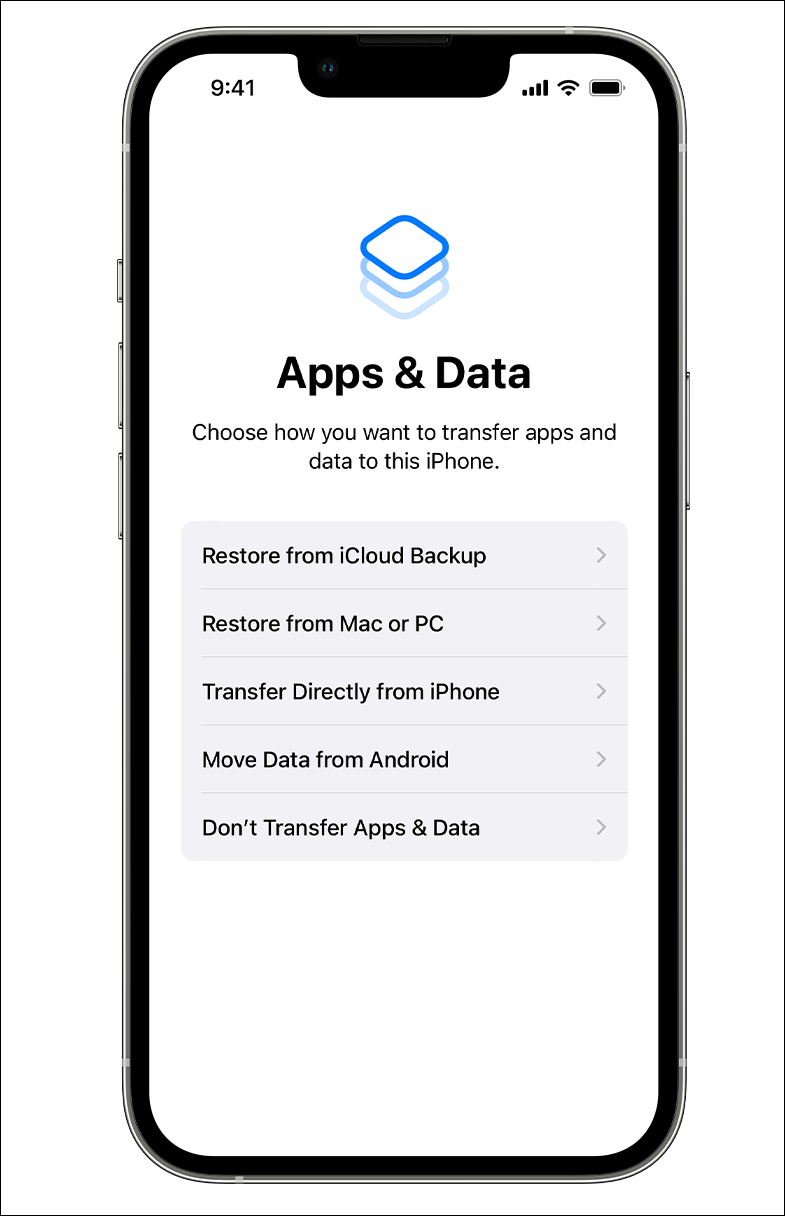
If you want to set up your iPhone as new, tap ‘Don’t Transfer Apps & Data’. Choose ‘Restore from iCloud Backup’ if you have the data on iCloud Backup. Or, if you have your backup on your PC/ Mac, choose the ‘Restore from Mac or PC’ option, connect your iPhone to your computer using the USB cable, and complete the restore using Finder or iTunes.
After that, go through the steps on the screen like setting up Apple Pay, sharing Siri Dictation data, app analytics, etc. to complete the setup.
Move Data from Android
If you want to move data from an Android device, tap the concerned option on the Move your Apps & Data screen on your iPhone.
To move your data from your Android device, your Android device must be connected to Wi-Fi. It should also have enough power backup; otherwise, connect it to the charger. Lastly, make sure that you have enough space on your iPhone to move data from your Android phone, including the data on your external SD card.
Now, open the ‘Move to iOS’ app on your Android device. If you don’t have the app, a QR code for the app will be displayed on your iPhone’s screen which you can scan on your Android. Alternatively, tap this link to go to the ‘Move to iOS’ app on the Google Play Store.
Once the app is set up, enter the code being displayed on your iPhone into the app.
Your iPhone will create a temporary Wi-Fi network. When you get the prompt on the Android, tap ‘Connect’ to join that network.
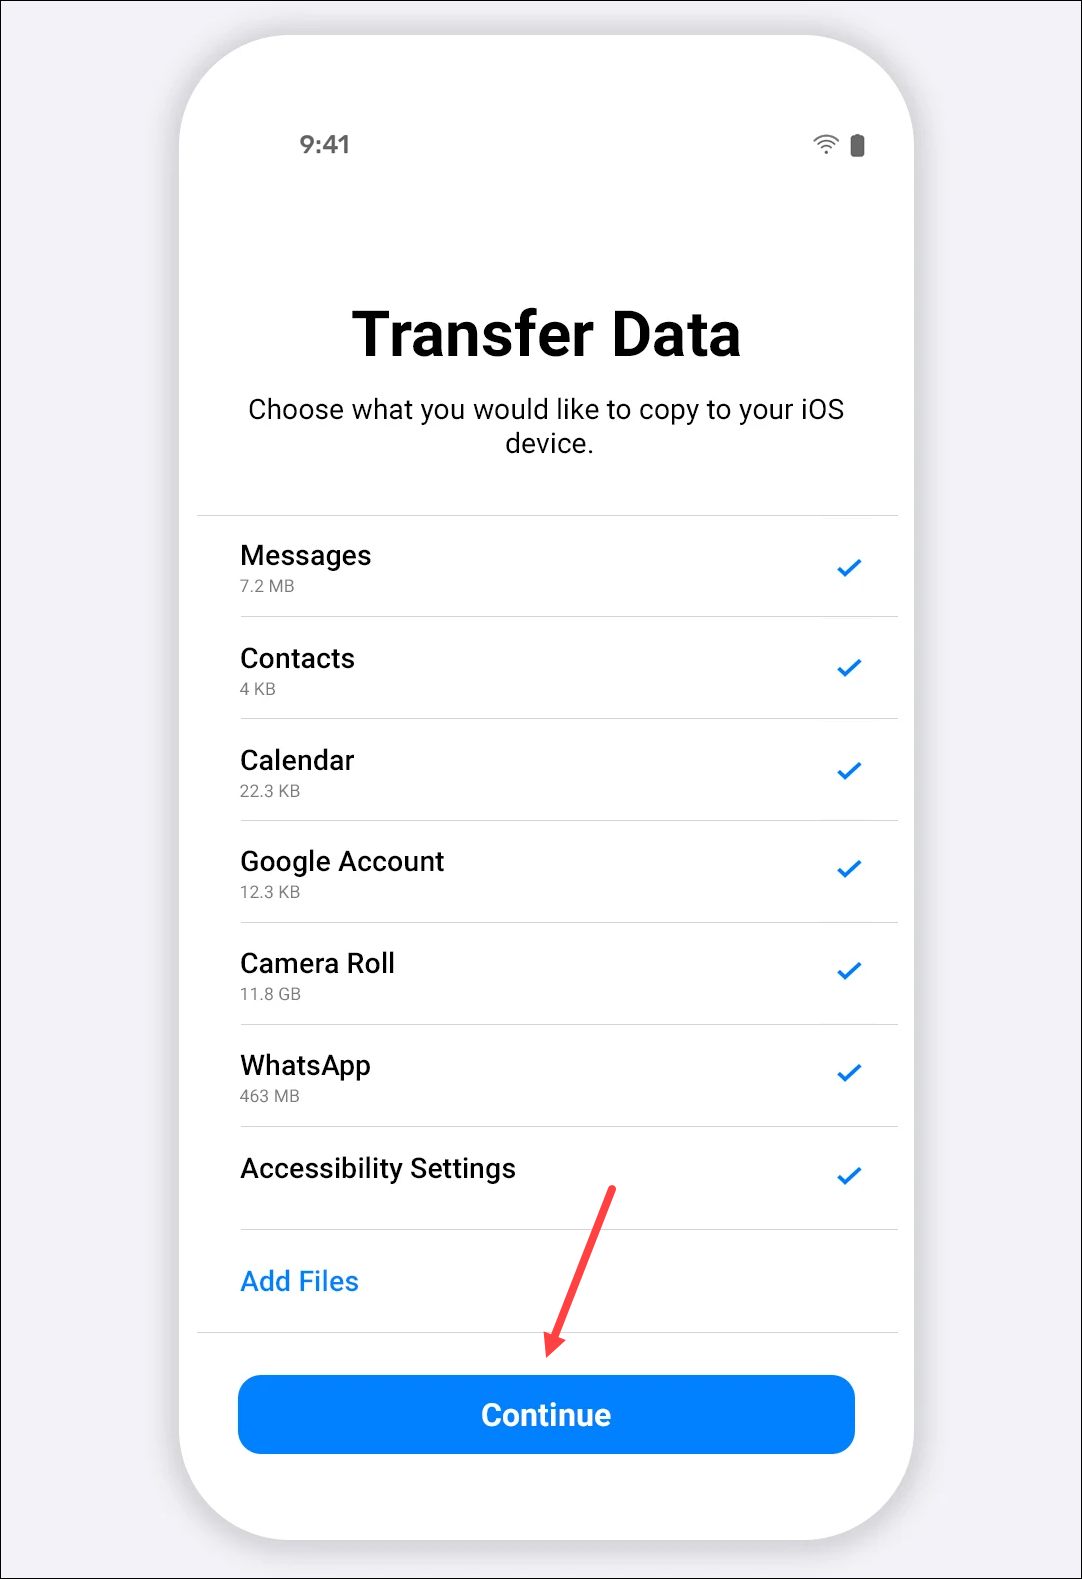
A ‘Transfer Data’ screen will appear on your Android. Choose the content you want to move. You can transfer your contacts, message history, camera roll, files and folders, accessibility and display settings, web bookmarks, mail accounts, WhatsApp messages and media, and calendars. Any free apps that are available on both Google Play and the App Store will also transfer. You’ll need to move any Music, books, and PDFs manually after the setup is complete. Tap ‘Continue’ after selecting the content.
Now, even if your Android device says that the process is complete, ignore it and leave both devices alone until the loading bar on your iPhone finishes.
Once the transfer is complete, set up the rest of your iPhone.
Setting up your iPhone is the easiest task; the only thing you need is a Wi-Fi connection. Now, go on and finish the setup so you can start using your new device.


