
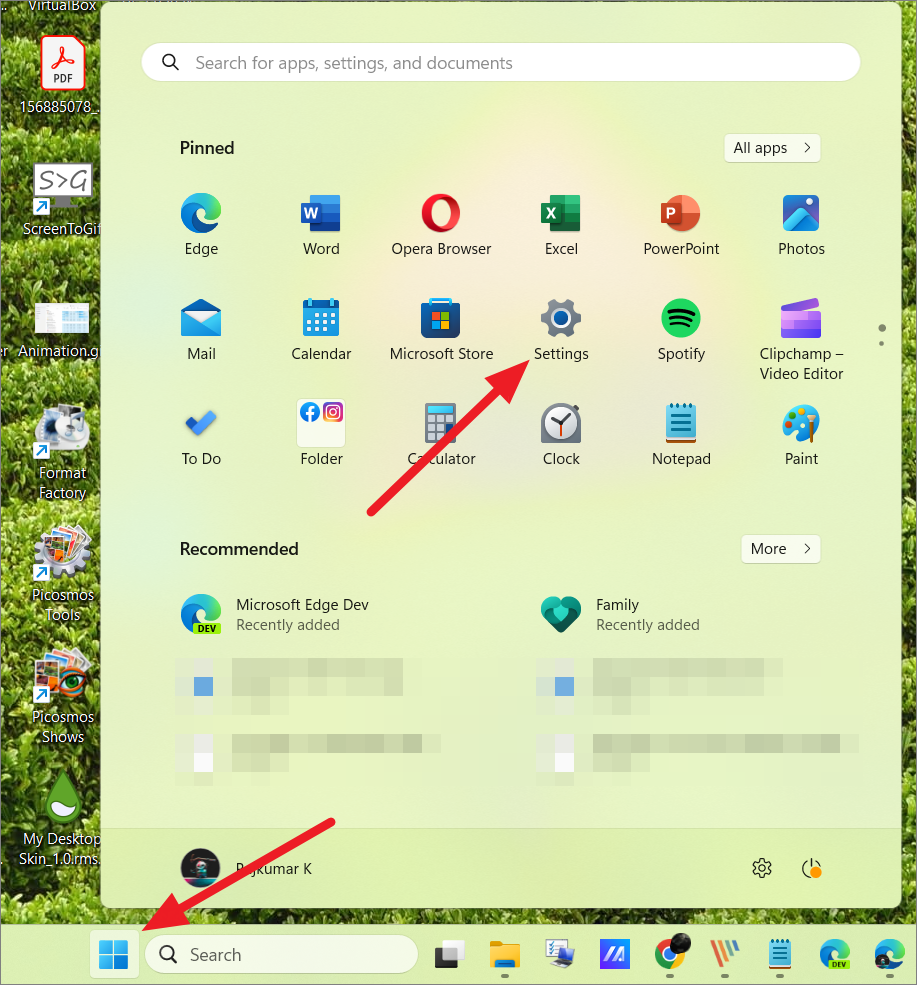
Ensuring a safe and controlled computing environment for children is essential in our increasingly digital world. Windows 11 provides a suite of parental control features that help parents manage their children’s computer usage, monitor activities, set screen time limits, and filter inappropriate content. This guide will outline how to set up a child account on Windows 11 and configure parental controls to create a secure experience for your kids.
Parental Control Features in Windows 11
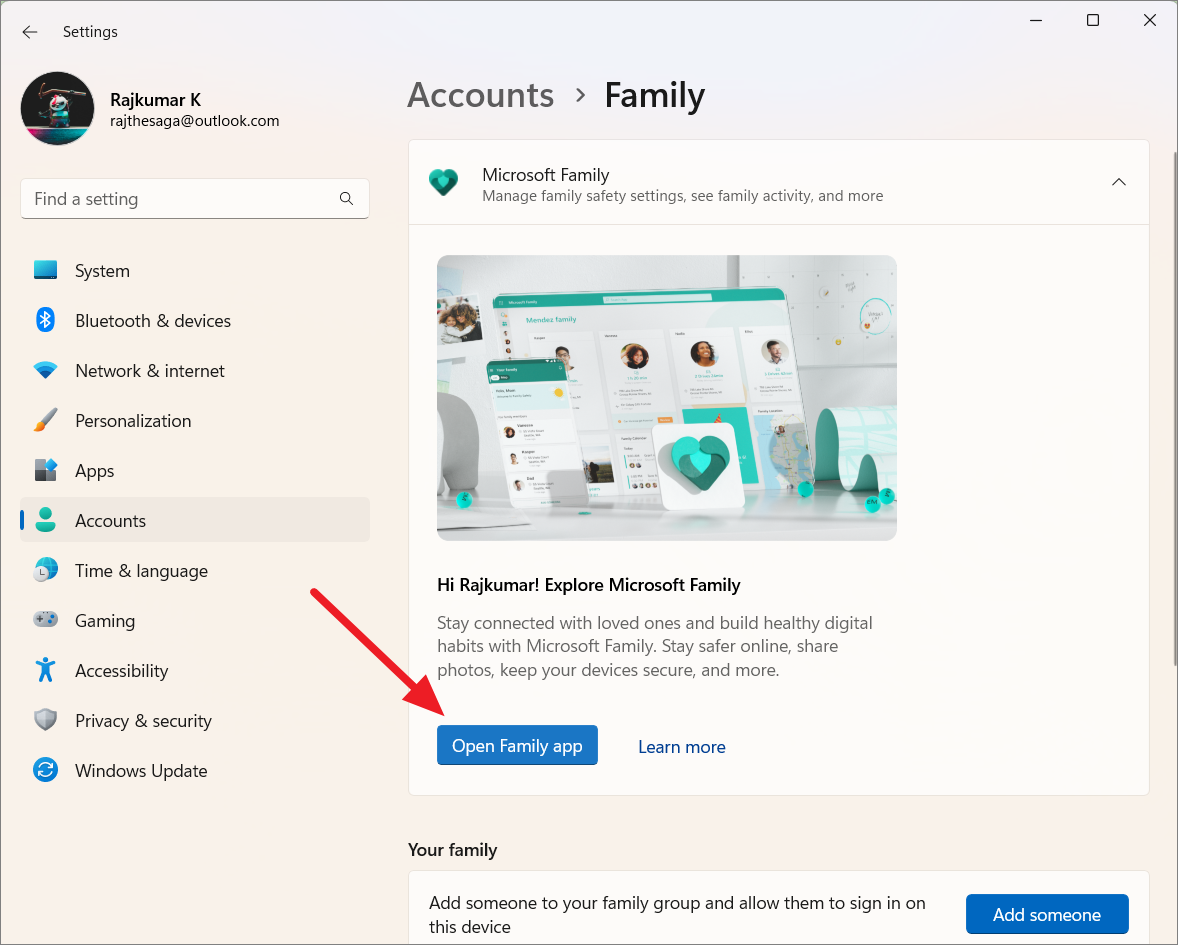
Windows 11 offers robust parental control options that allow you to set up dedicated accounts for your children. These accounts enable you to monitor and restrict your kids’ access to apps, games, websites, and control how they interact with the device. Key features include:
Family Safety: A built-in tool that lets you set screen time limits, content filters, and monitor online activity.
Microsoft Store: Provides access to age-appropriate apps and games, and allows you to set age restrictions for purchases.
User Accounts: Create individual user accounts for each child to customize their access to certain apps and features.
Microsoft Edge: Includes ‘Microsoft Defender SmartScreen’ to protect against harmful websites and phishing scams.
Microsoft Account: By linking your child’s account to your Microsoft account, you can manage family settings from any device.
Note: Regularly reviewing and updating parental control settings is important to ensure they remain effective.
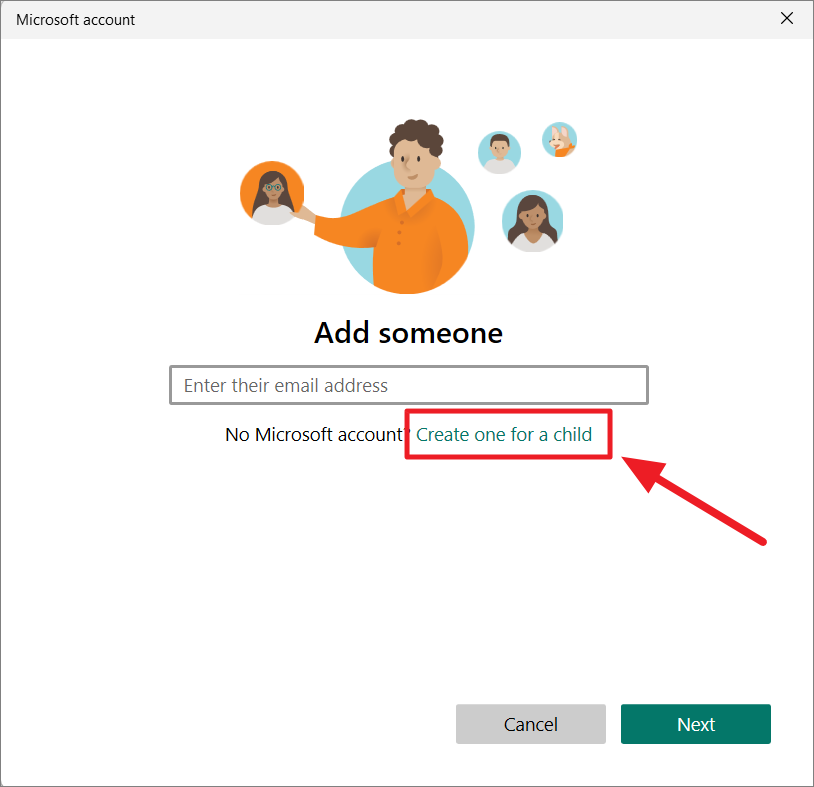
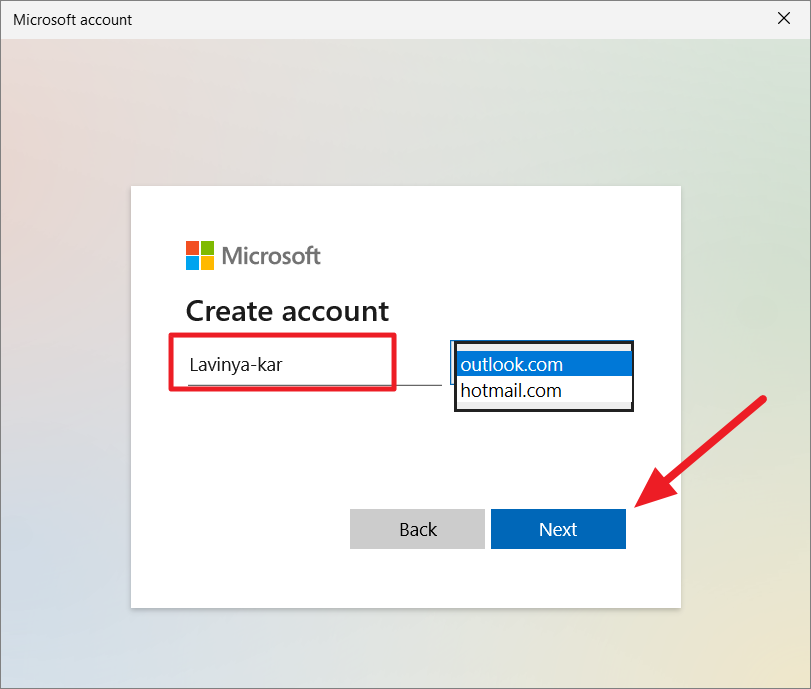
Creating a Child Account on Windows 11
To fully utilize parental controls, you’ll need to create a separate Microsoft account for your child. Follow these steps to set up a child account:

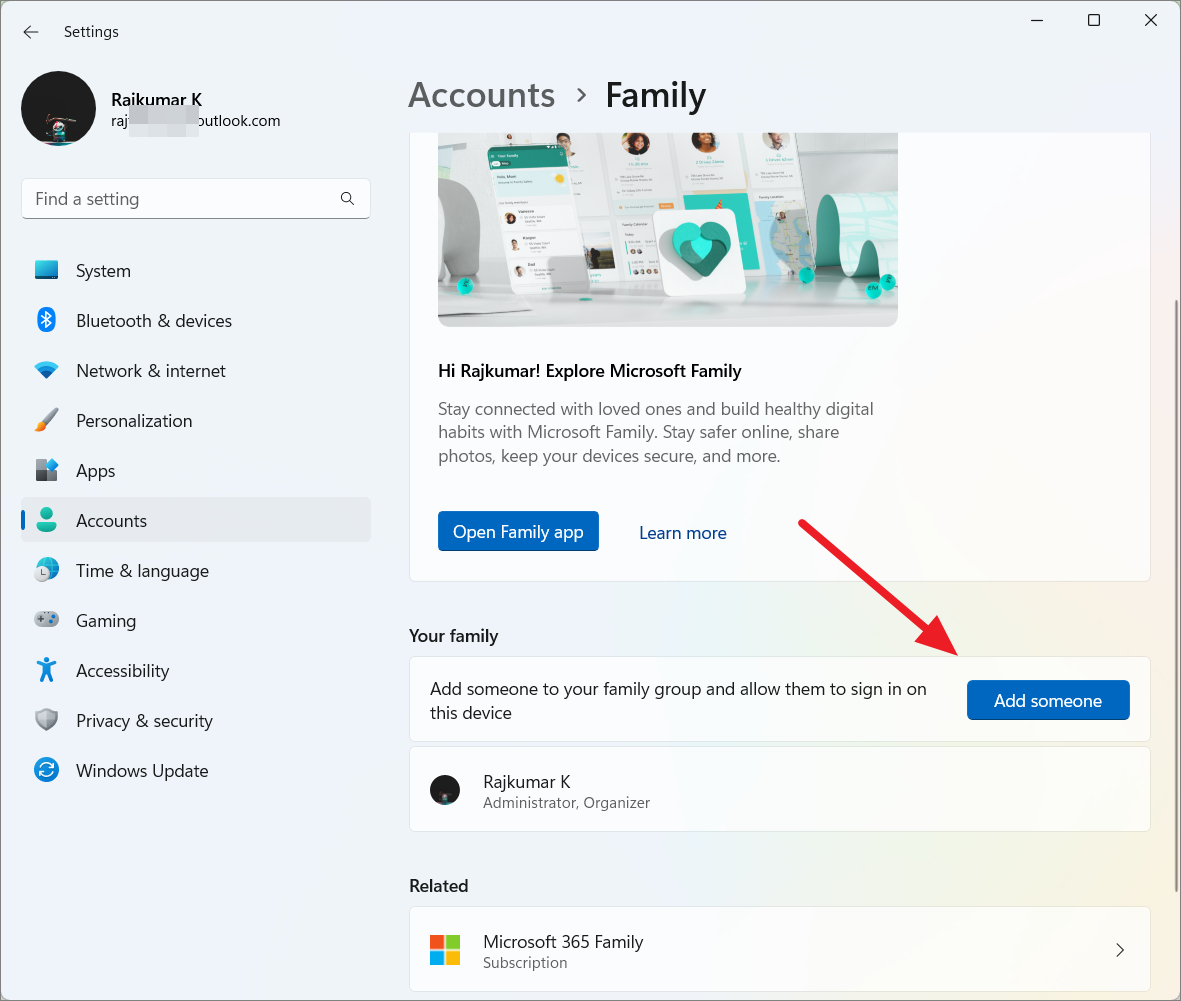

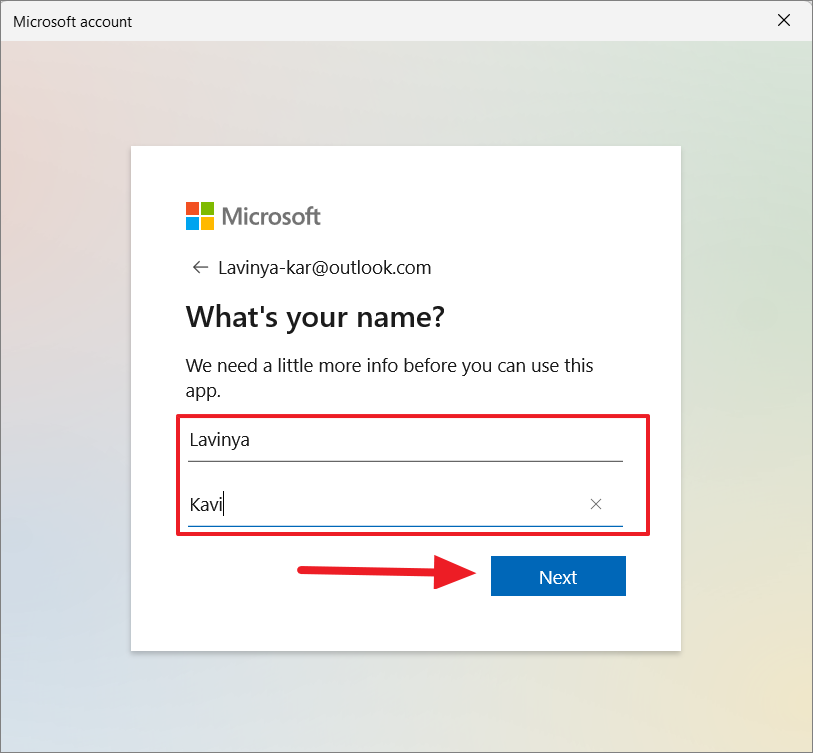
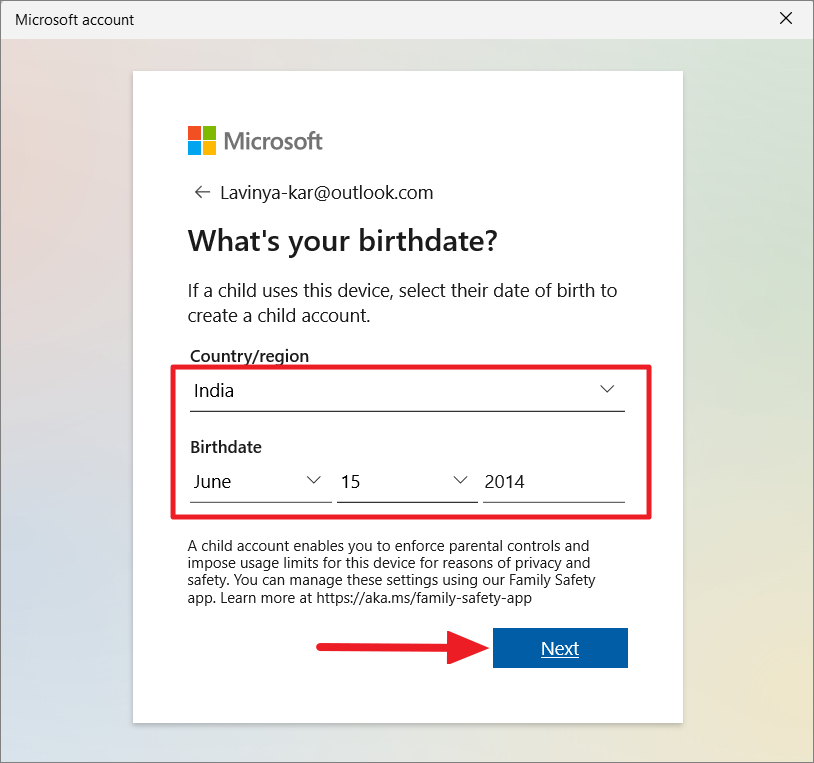
After creating the account, it will appear under the Family settings. To finish setting up the child account, sign out or lock your account, then sign in to the new child account using the email address and password you created. The first time your child logs in, they will need to complete the privacy settings setup. Once done, their account will be ready to use.
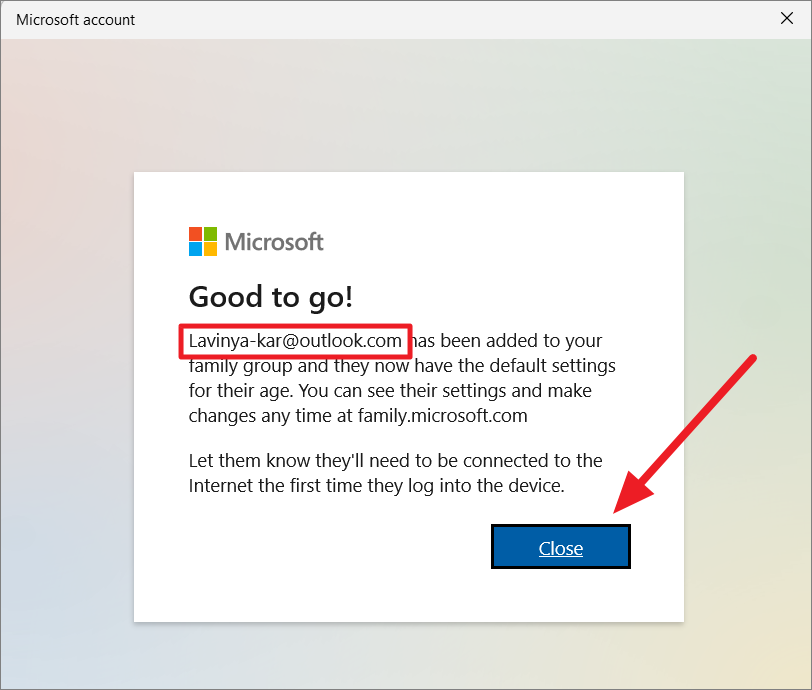
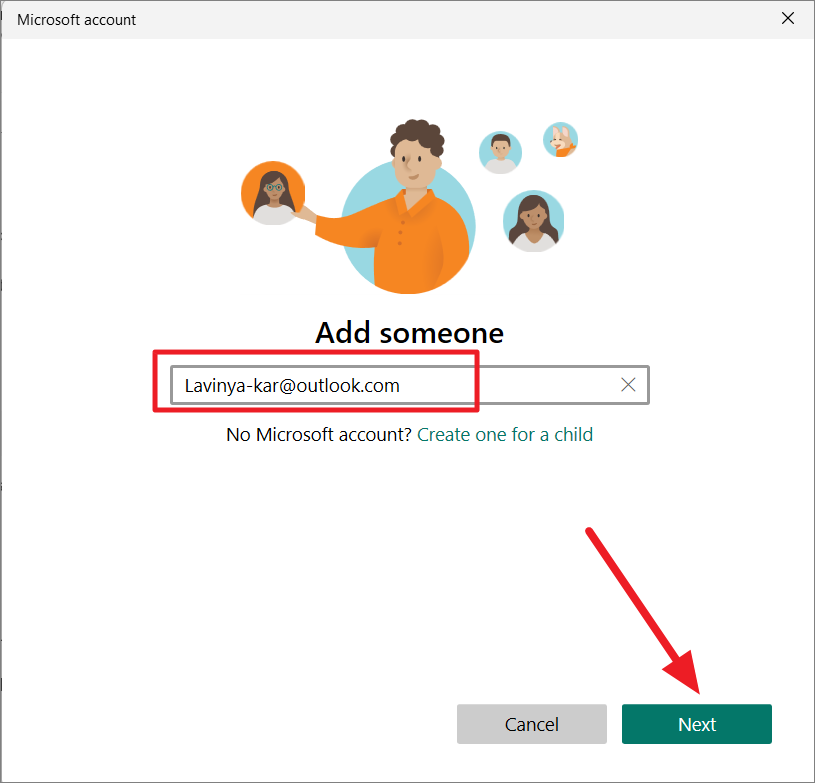
Adding an Existing Child Account
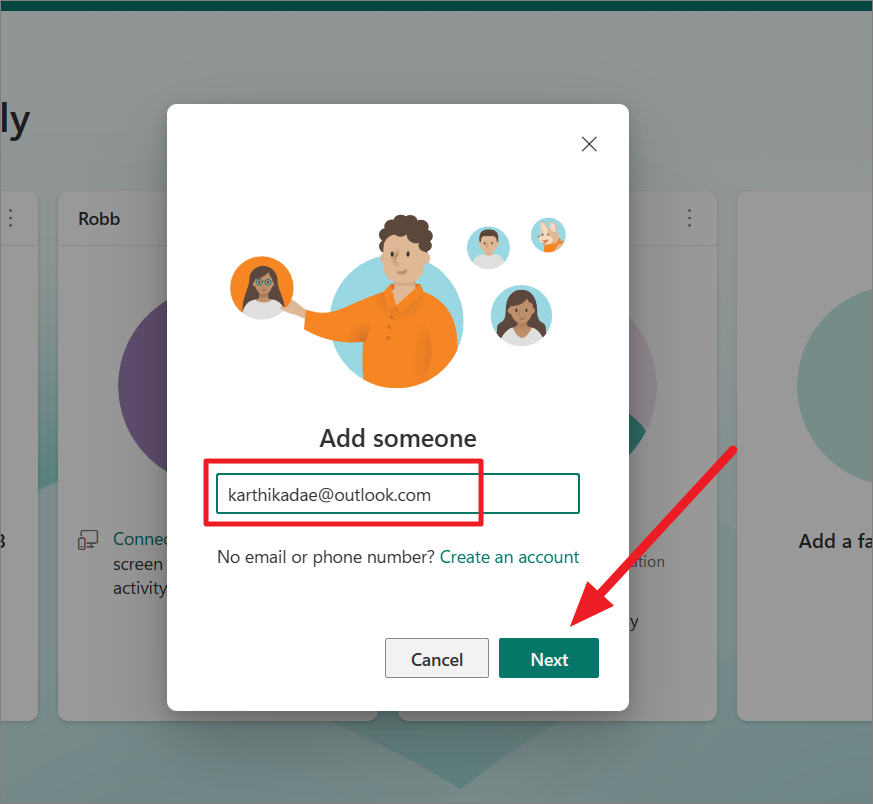
If your child already has a Microsoft account, you can add them to your family group directly:

Your child will receive an invitation via email. They need to accept the invitation to join the family group and have the family settings applied to their account.
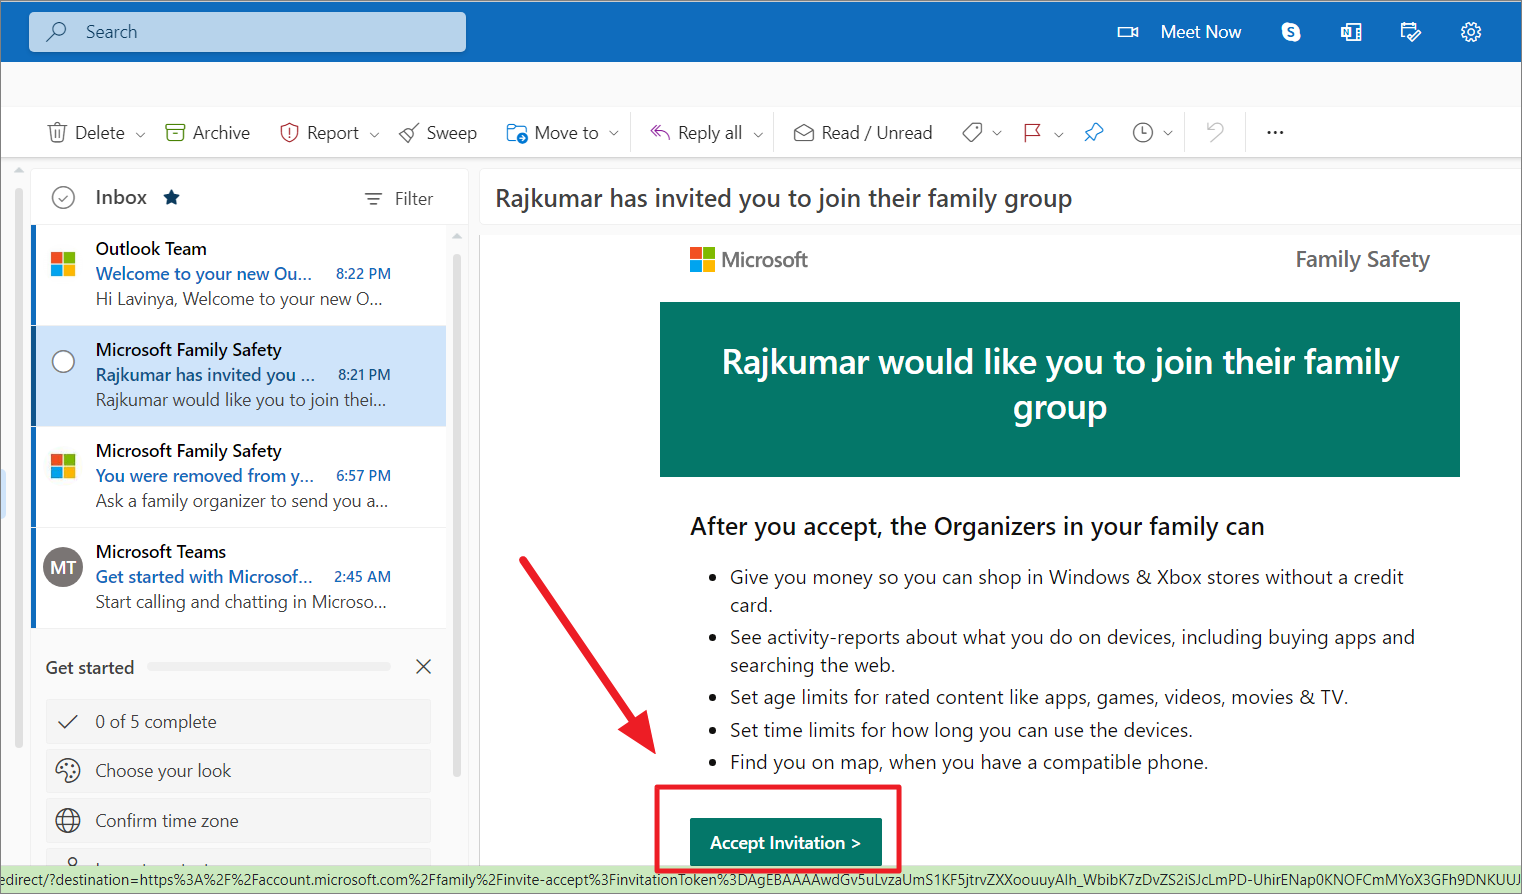
After they click Accept Invitation in the email, they should click Join now on the Microsoft account website.
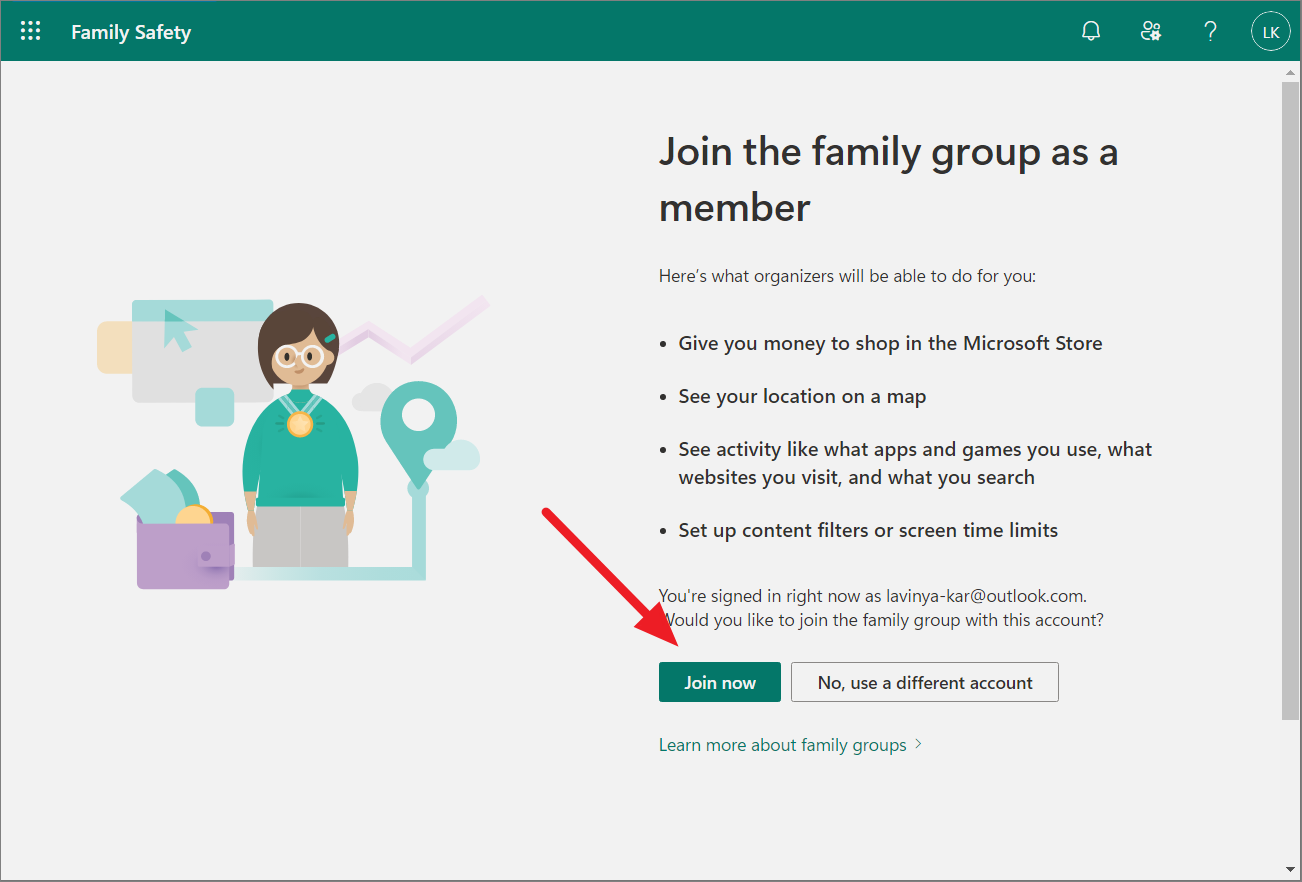
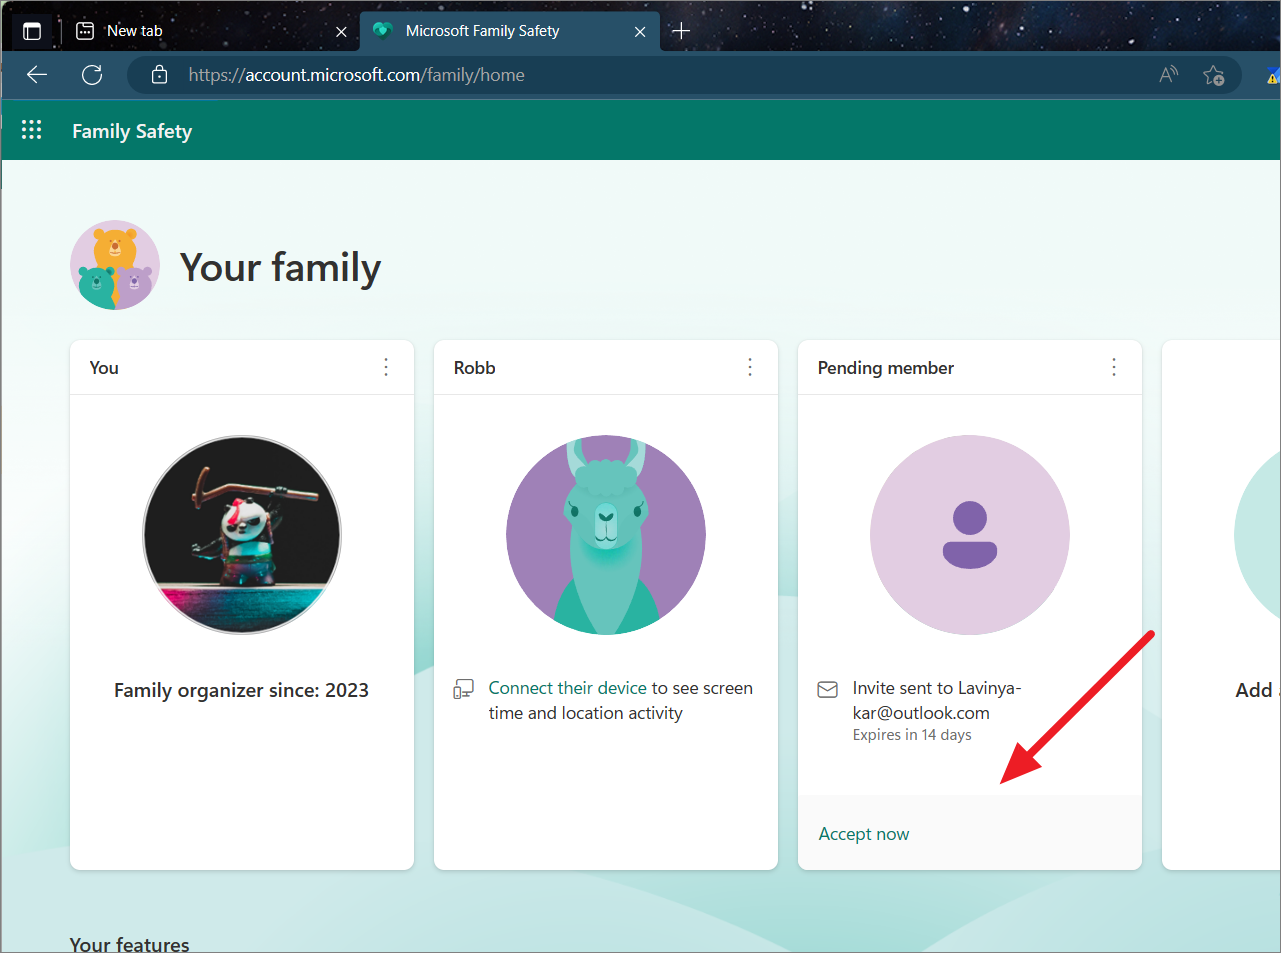
They can then complete the setup by following the on-screen instructions. Alternatively, you can accept the invitation on their behalf from the Family Safety dashboard by clicking Accept now under their profile.
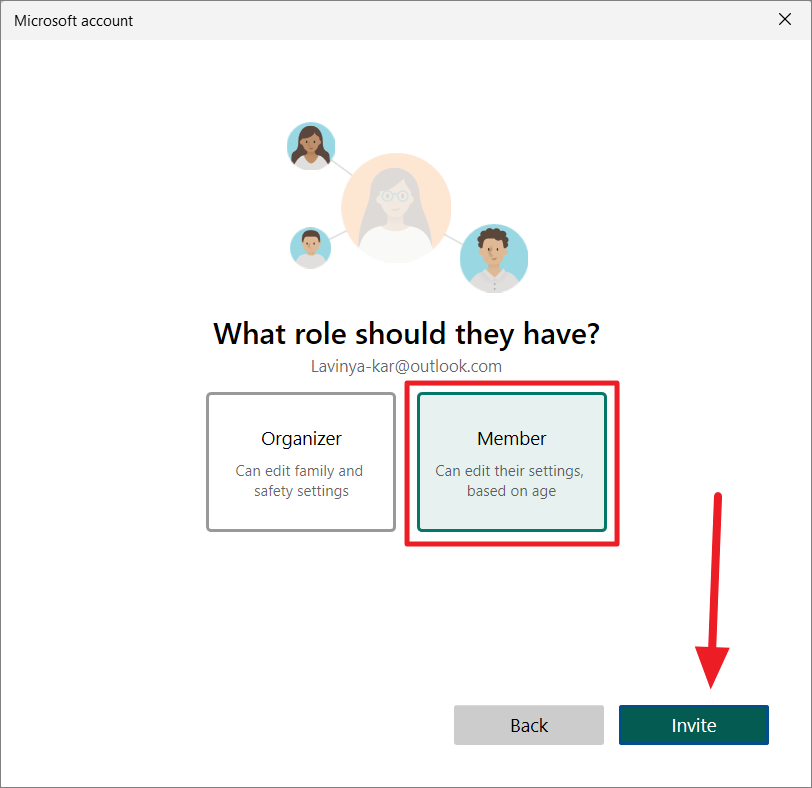
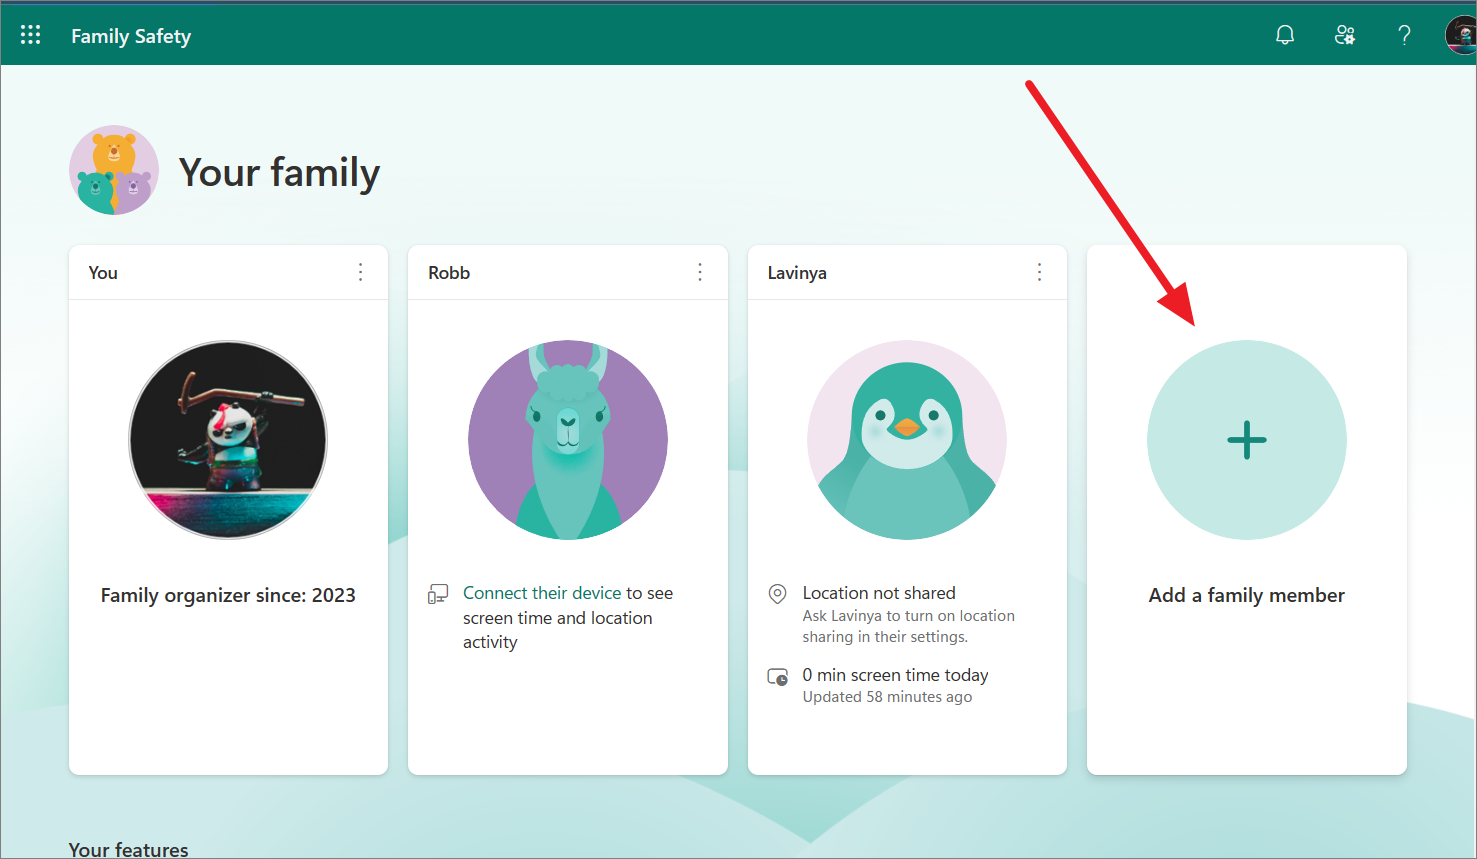
Adding an Adult Family Member/Organizer
If you want another adult in your household to co-manage the family group, you can add them as an organizer. To do this:
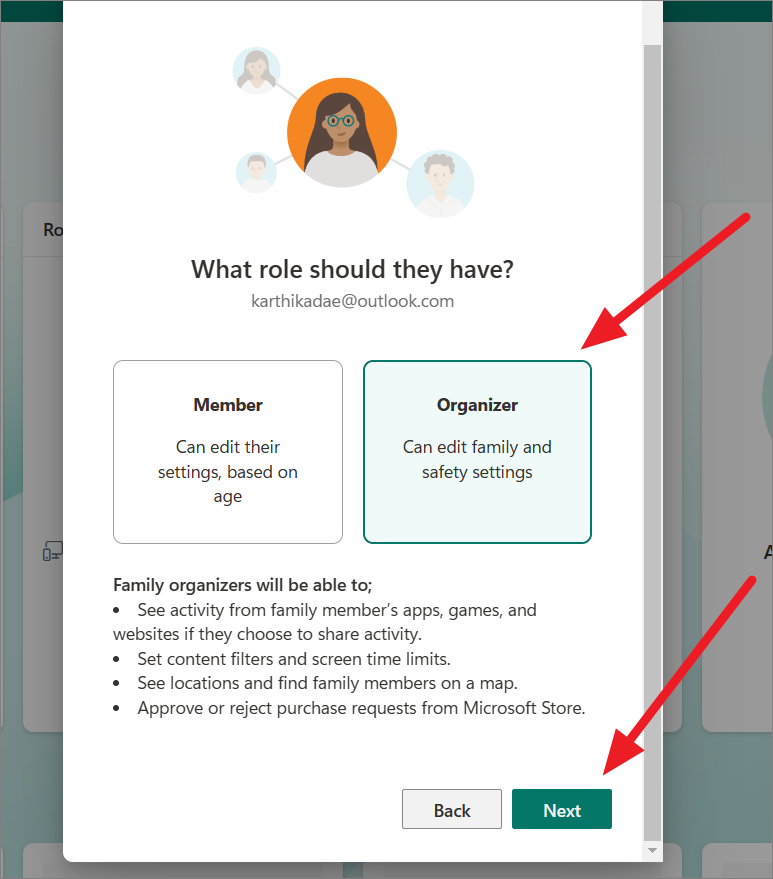
The invited adult will need to accept the invitation to join the family group as an organizer. Organizers can manage family members and adjust safety settings.
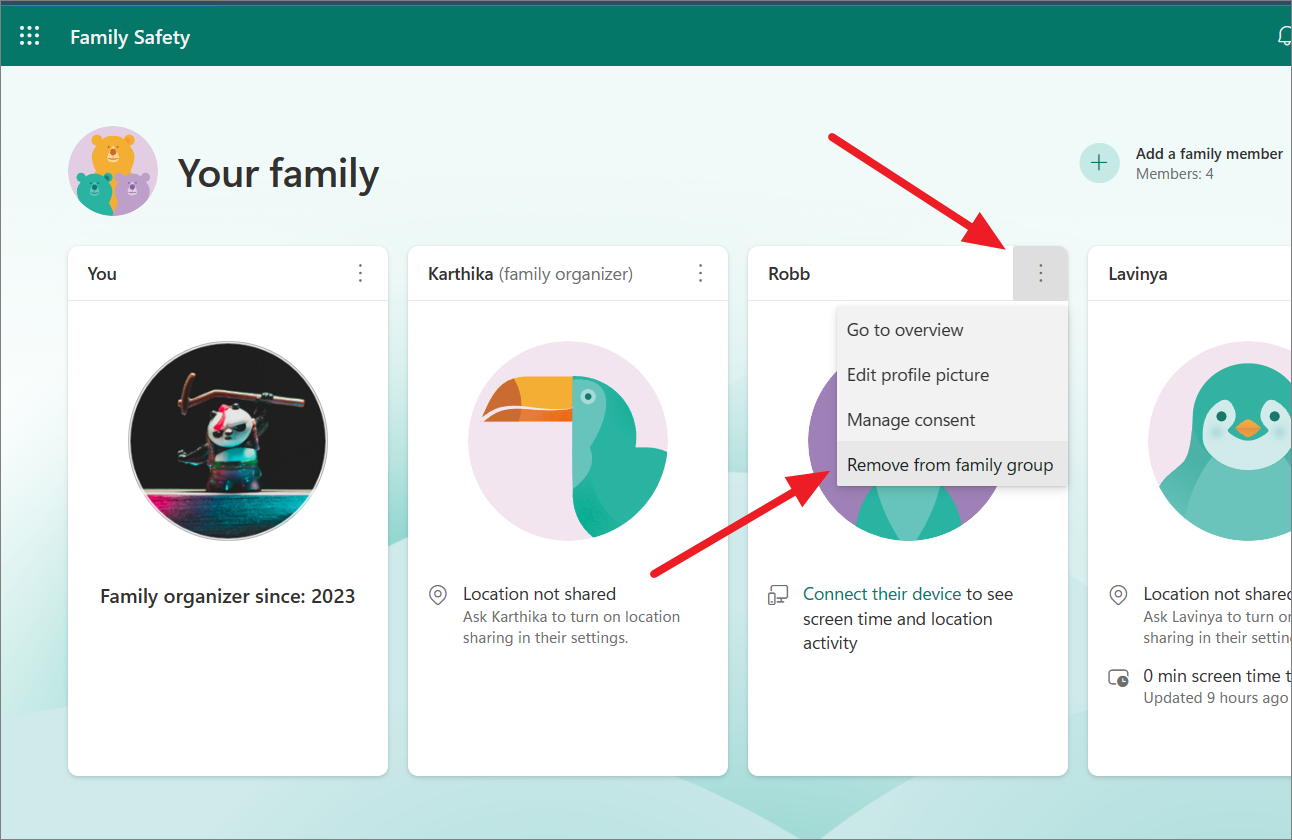
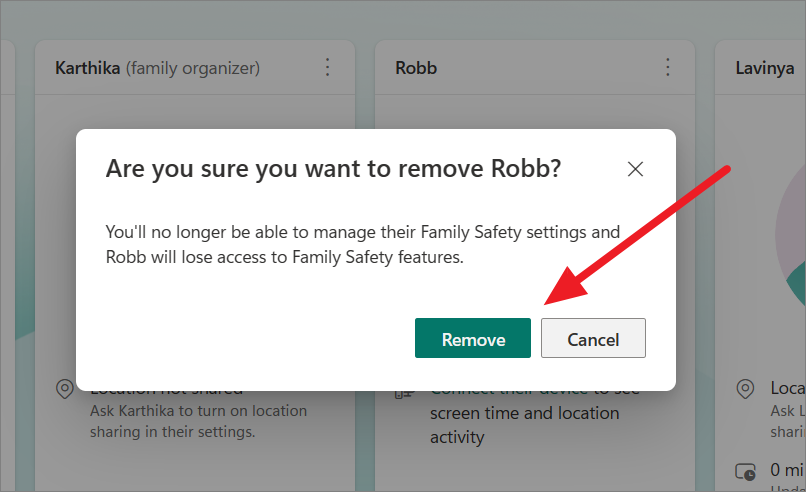
Removing a Family Member
If you need to remove a family member, you can do so from the Family Safety app or website:
Configuring Parental Controls on Windows 11
With the child account set up, you can now configure parental controls to manage how your child uses the computer.
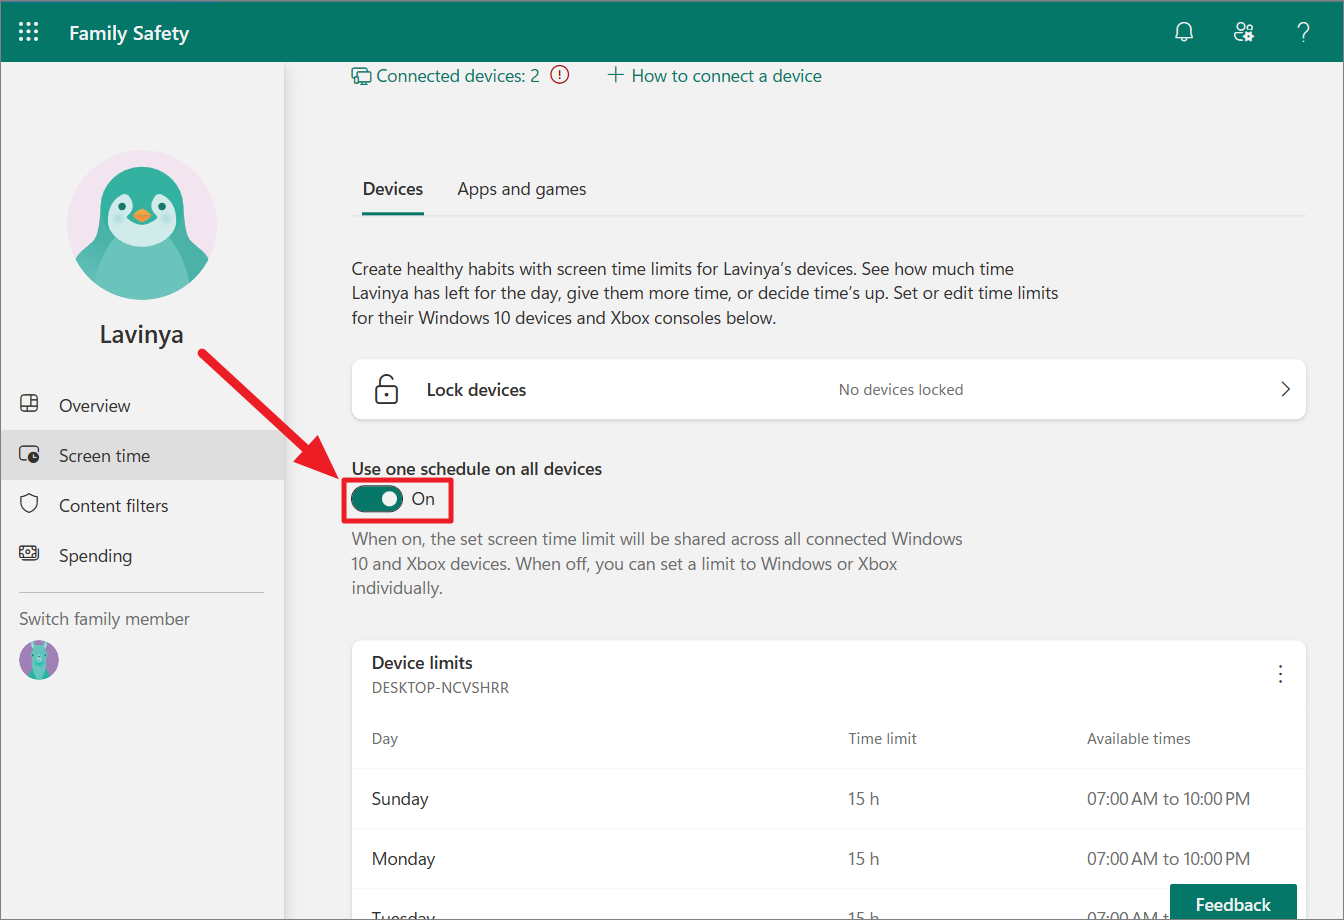
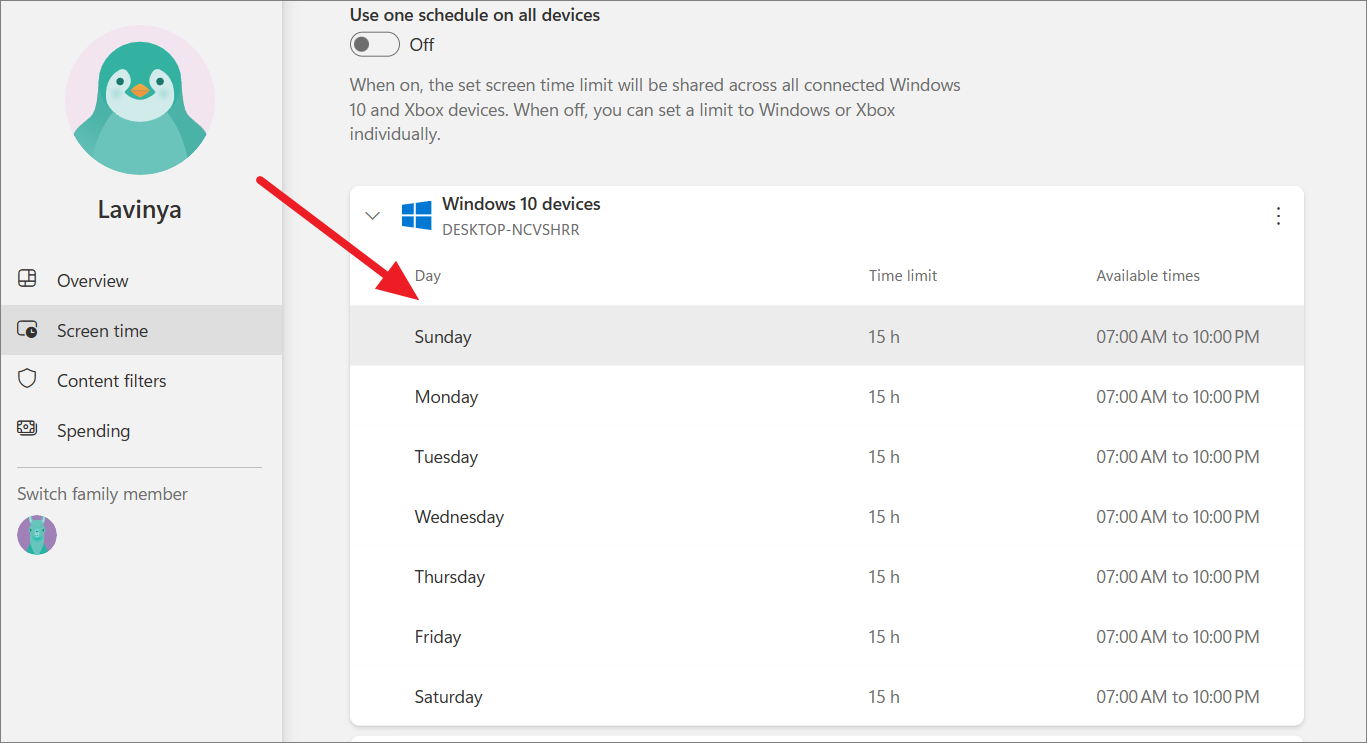
Setting Screen Time Limits
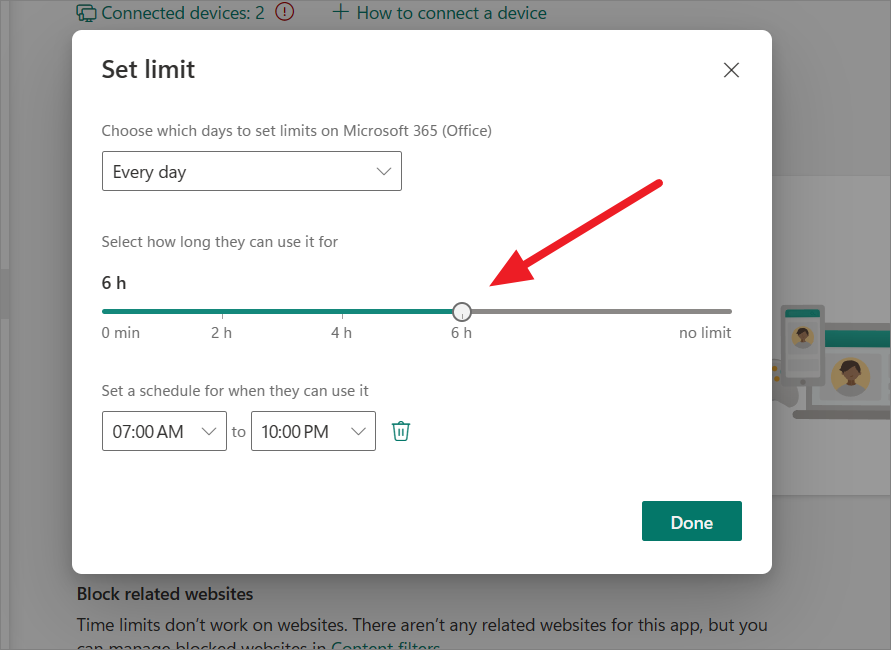
You can limit the amount of time your child spends on their devices to promote a healthy balance of online and offline activities. Here’s how to set up screen time limits:


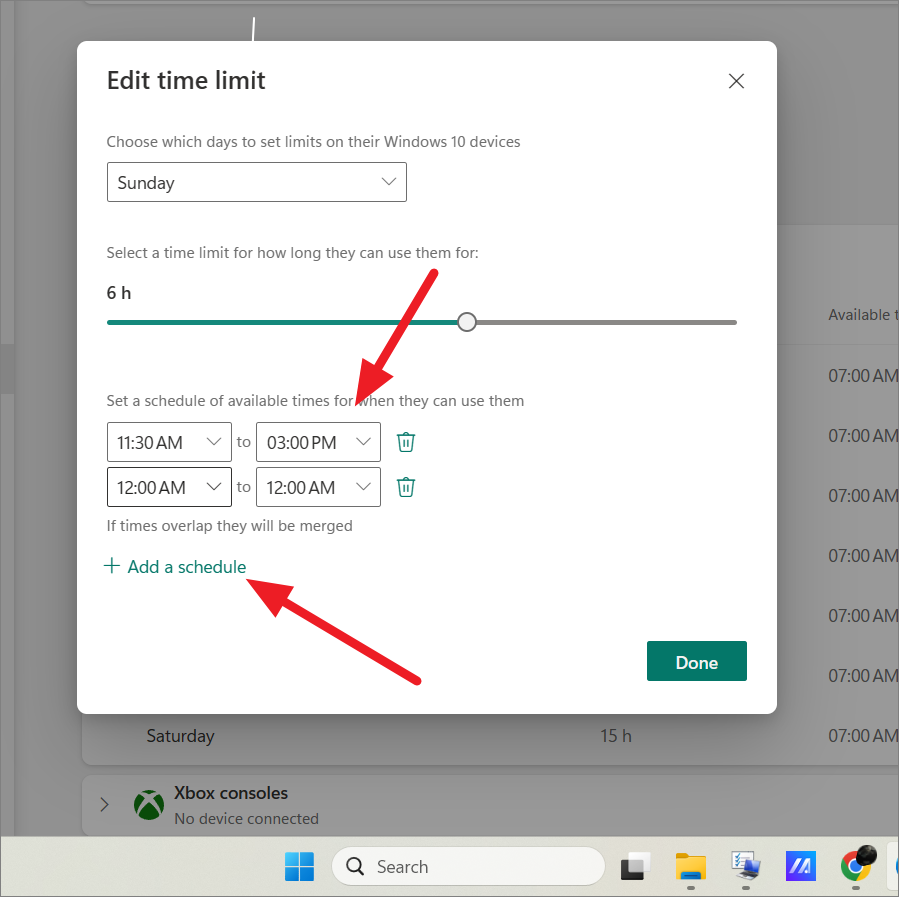
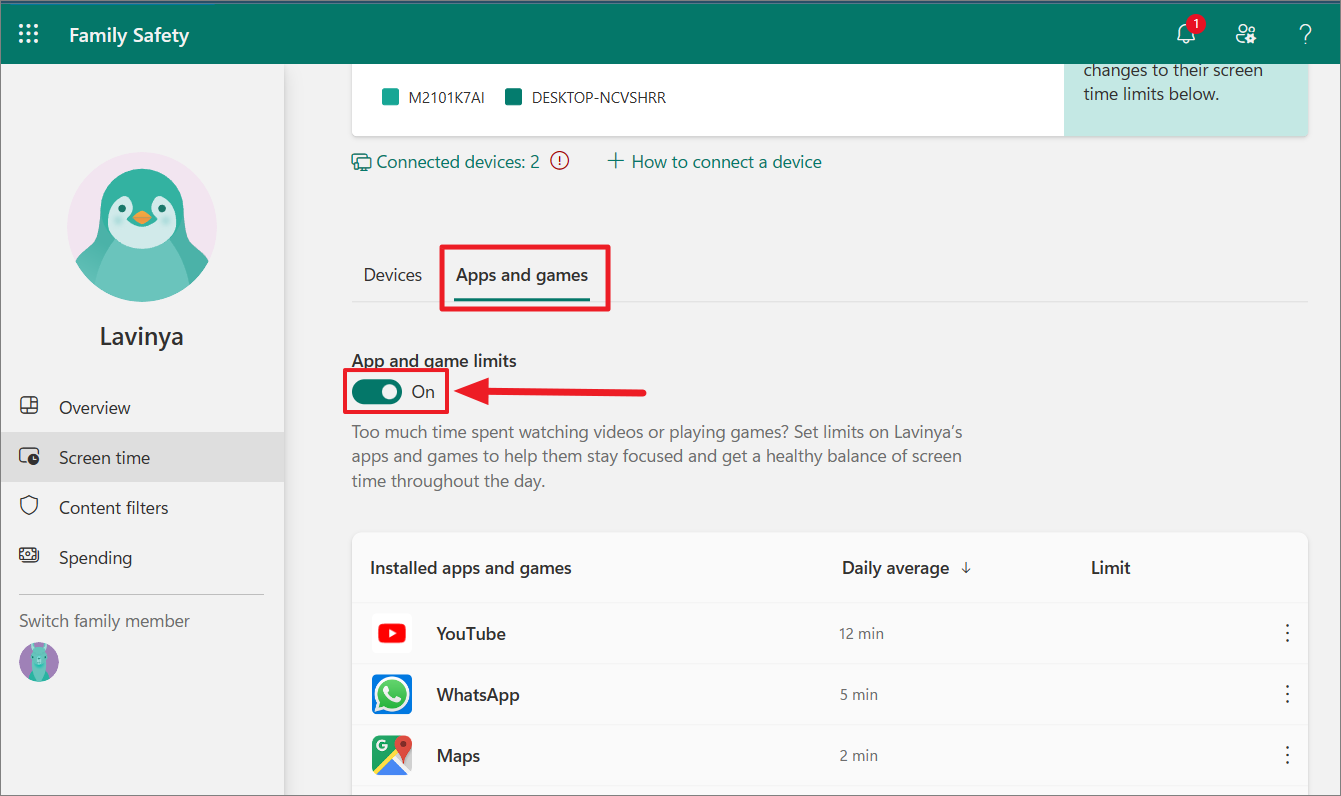
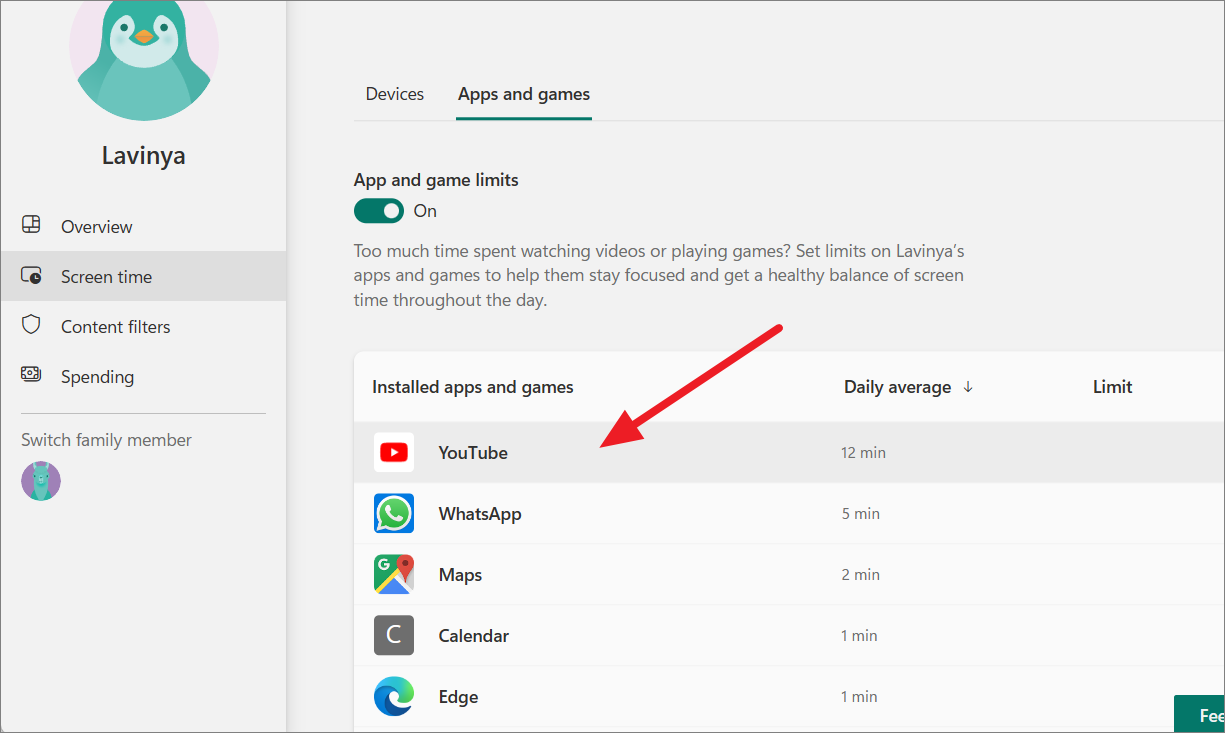
To limit your child’s usage of specific apps and games, switch to the Apps and Games tab on the Screen time page.
You can also block the app entirely by clicking Block app. To prevent your child from accessing related websites, check the box under Block related websites.
Filtering Inappropriate Content
To protect your child from accessing inappropriate content online, you can set up content filters:
Note: Web and search filters work with Microsoft Edge. Other browsers will be blocked unless you allow them in the App and game filters.

To filter apps and games based on age ratings:
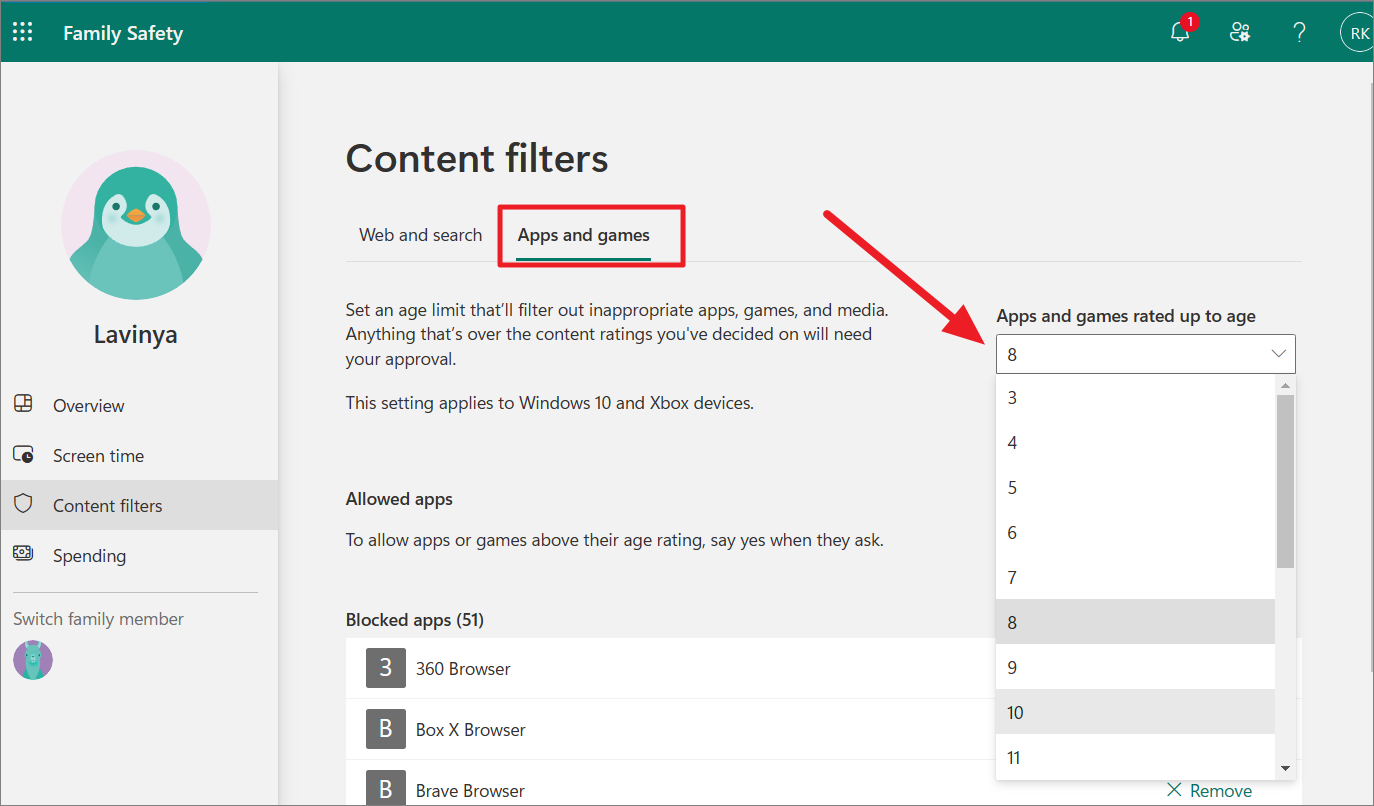
When your child attempts to download an app or game above the age limit, they will need your permission. You will receive a notification where you can approve or deny the request.
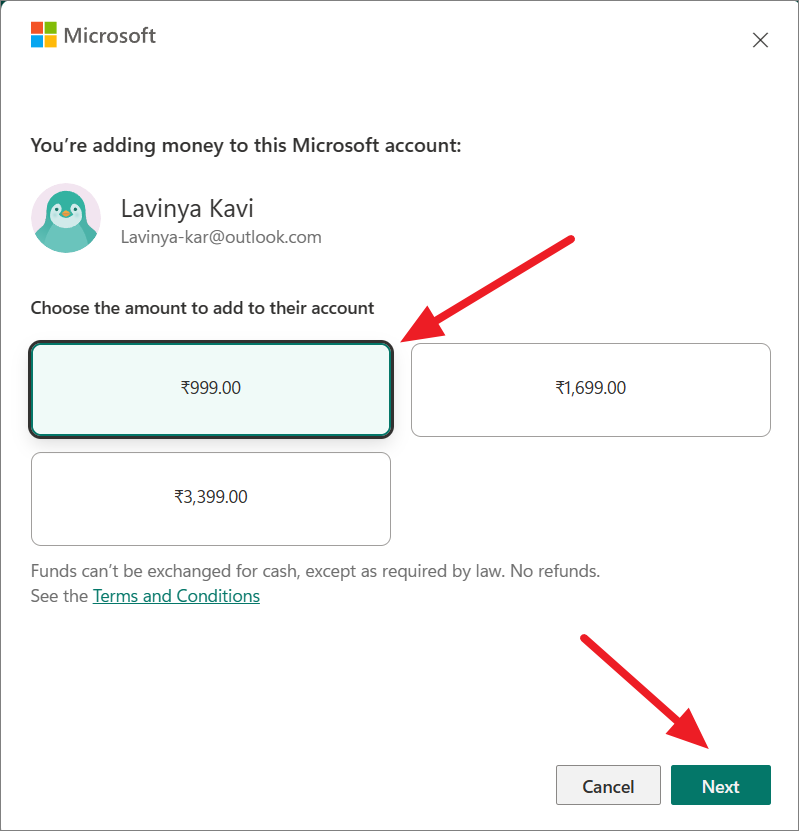
Managing Spending
You can control your child’s spending in the Microsoft Store and Xbox Store:
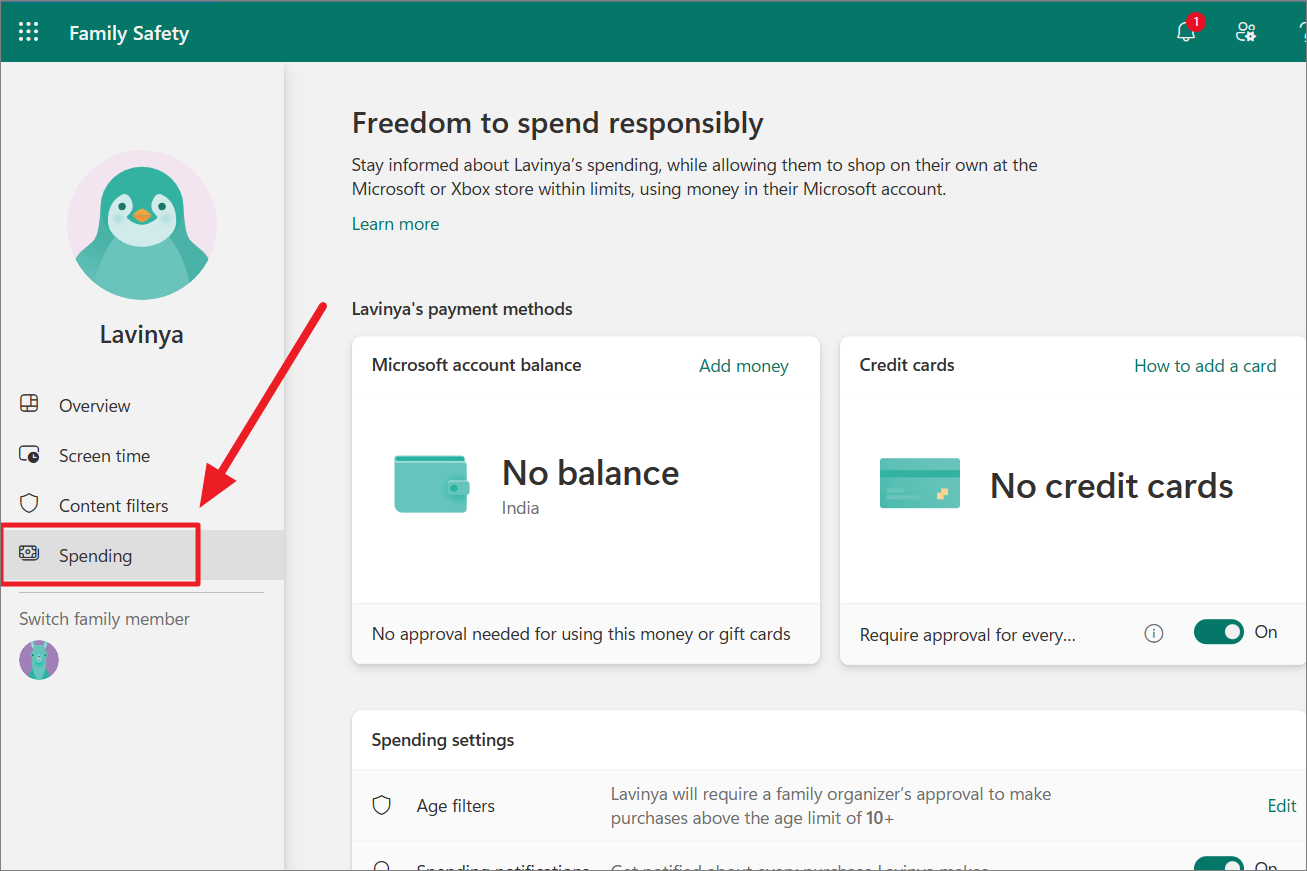
To require approval for purchases:
Now, any purchases will require your approval before completion.
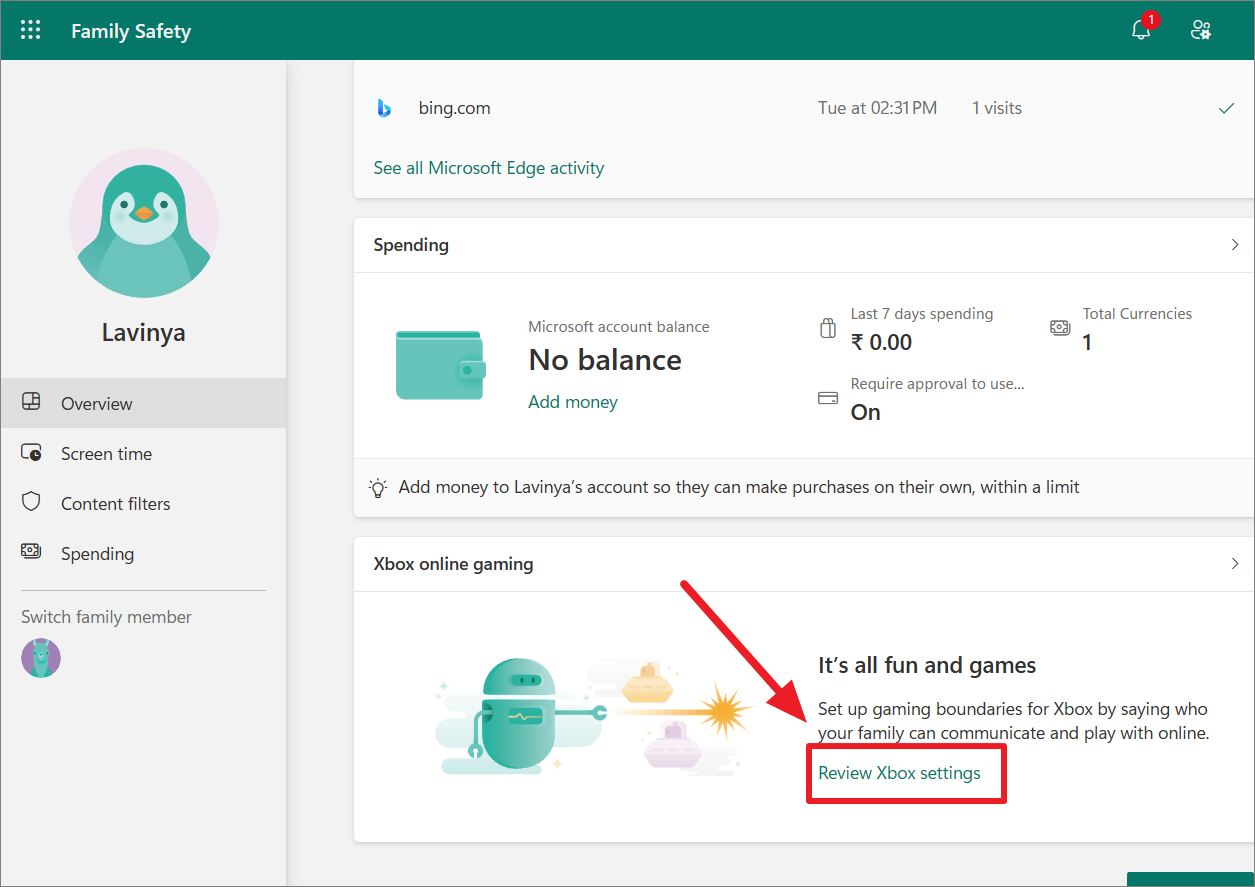
Setting Up Xbox Online Gaming Limits
If your child uses an Xbox console, you can manage their online gaming activities:

Viewing Your Child’s Activity
You can monitor your child’s online activity across devices:
Using Kids Mode in Microsoft Edge
Microsoft Edge offers a Kids Mode to provide a safe browsing environment for children without needing a separate child account.
Enabling Kids Mode

Customizing Kids Mode
Managing Allowed Websites
Exiting Kids Mode
To exit Kids Mode:
Alternative Parental Control Apps for Windows 11
In addition to Windows 11’s built-in parental controls, there are third-party apps that offer additional features:
Kaspersky Safe Kids for Windows
Kaspersky Safe Kids allows you to monitor your child’s online activity, set screen time limits, and filter content. It offers both free and paid versions, providing flexibility based on your needs.
OpenDNS Family Shield
OpenDNS Family Shield operates at the router level to block inappropriate content across all devices on your network. It filters out harmful domain names and can protect all connected devices, not just individual computers.
Kidlogger
Kidlogger is a free tool that tracks your child’s keystrokes, program usage, and even takes screenshots. It monitors both online and offline activities, providing comprehensive insights into your child’s computer usage.
Setting up parental controls on Windows 11 helps create a safer computing environment for your children. By following these steps, you can monitor and manage your child’s activities, ensuring they have a secure and responsible experience on the computer.


