
Windows 11 has introduced the exciting capability to run Android apps natively, enhancing the interoperability between your PC and mobile applications. While the Amazon Appstore is the official source for these apps, it may not offer everything you need. Fortunately, you can sideload Android apps using APK files. This guide will show you how to install any Android app on your Windows 11 PC.
Preparing your machine
To sideload Android apps successfully, you need to ensure that virtualization is enabled on your computer. This feature allows your system to efficiently run the Android environment.
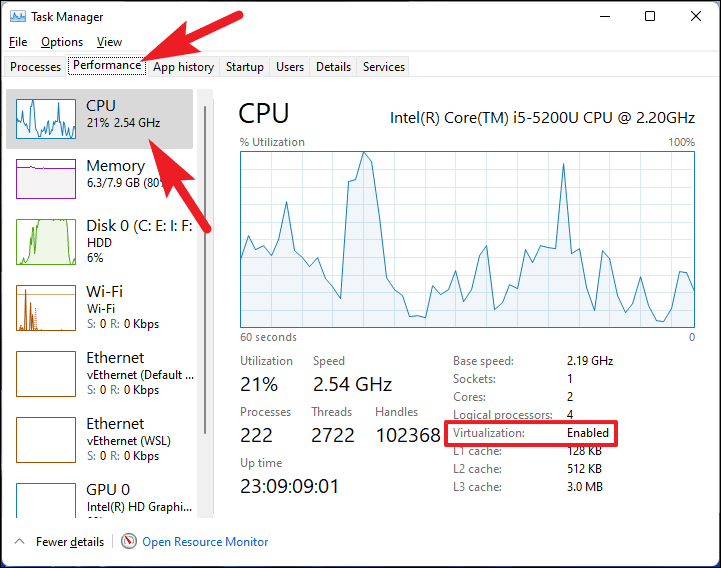
To check if virtualization is enabled:
- Press
Ctrl+Shift+Escto open Task Manager. - Click on the ‘Performance’ tab at the top.
- Select ‘CPU’ from the left sidebar.
- Look for the ‘Virtualization’ field; if it shows ‘Enabled’, you’re all set.
If virtualization is disabled, enable it through your BIOS settings:
- Shut down your computer completely.
- Turn it back on and immediately press the
Del,F2, orF10key (depending on your manufacturer) to enter the BIOS setup. - Navigate to the ‘Advanced’ tab using the arrow keys or your mouse.
- Find the ‘Virtualization’ setting and change it to ‘Enabled’ by pressing
EnterorSpace.
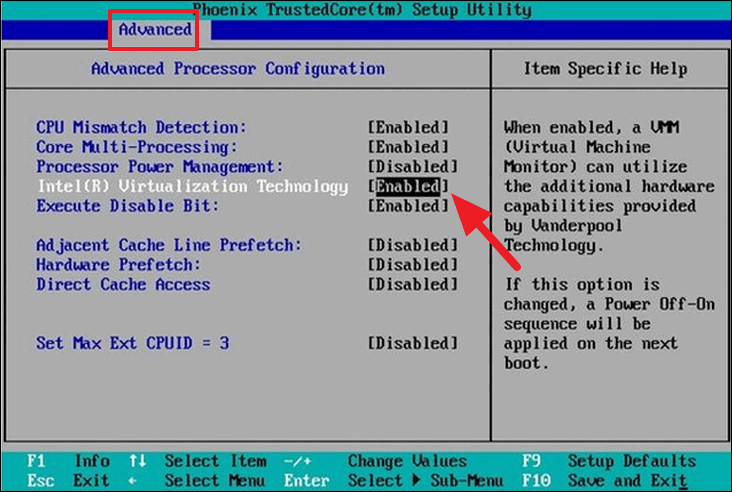
- Press
F10to save your changes. - Select ‘Yes’ when prompted, and your system will reboot with virtualization enabled.
Virtualization should now be active on your machine.
Install Android apps using Android Platform Tools
With virtualization enabled, you’ll need the Android SDK Platform Tools to sideload apps.
Note: Ensure you have the .APK file of the app you wish to install.
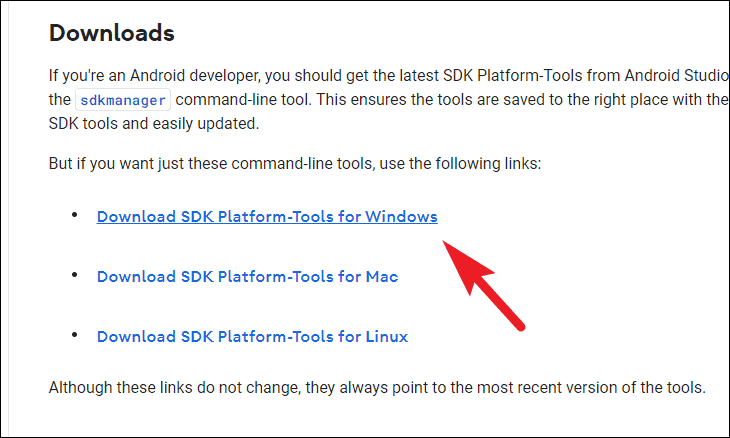
To download the platform tools:
- Open your browser and go to developer.android.com/platform-tools.
- Scroll down and click ‘Download SDK Platform-Tools for Windows’. A popup will appear.
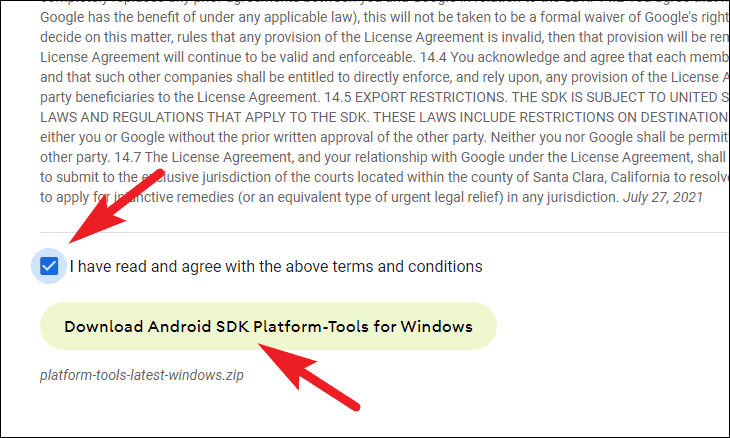
- Read and accept the terms by checking the box next to ‘I have read and agree with the above terms and conditions’.
- Click ‘Download Android SDK Platform-Tools for Windows’.
- After downloading, navigate to your downloads folder and extract the ZIP file.
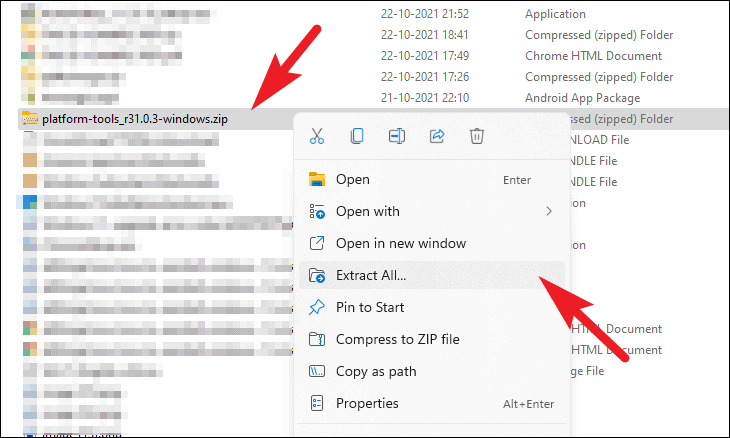
- Copy your
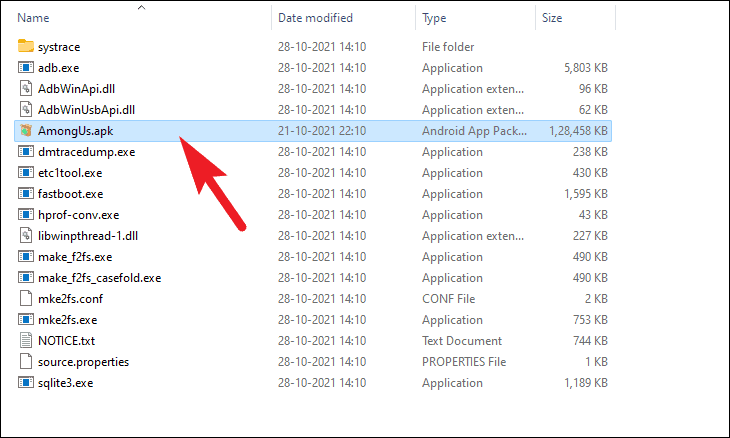
.APKfile and paste it into the extracted platform-tools folder.
Note: Keep note of the APK file name for later use.
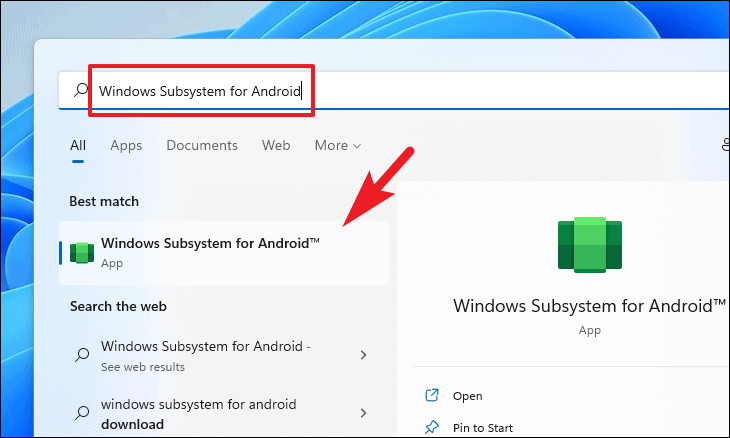
Next, enable Developer mode in the Windows Subsystem for Android:
- Open the Start Menu, search for ‘Windows Subsystem for Android’, and launch it.
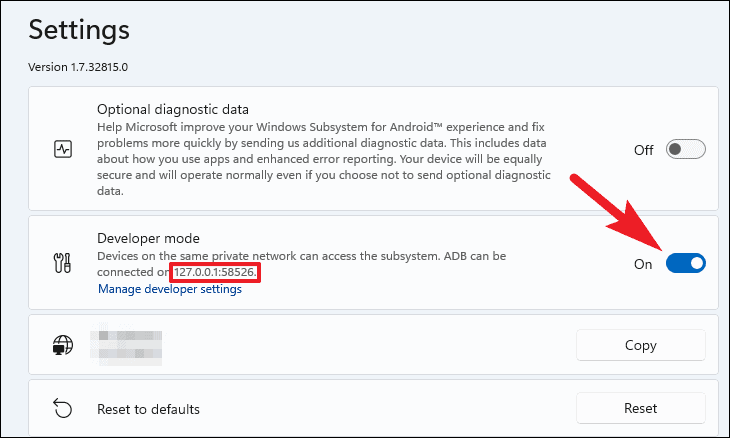
- In the WSA settings, toggle ‘Developer mode’ to ‘On’. Note the IP address provided.
Now, you’re ready to install the APK using Command Prompt:
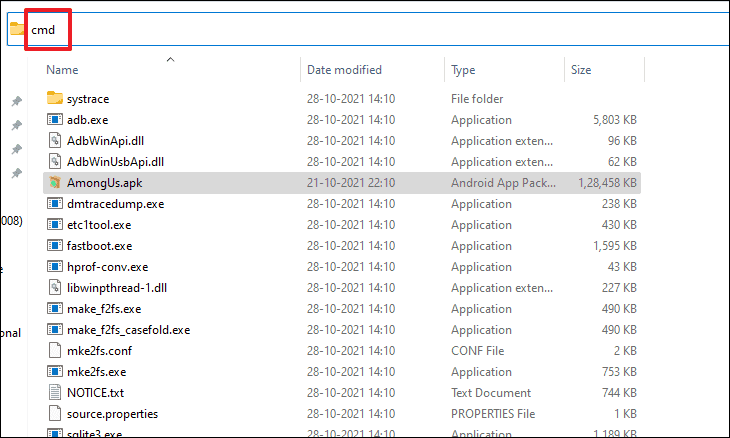
- In the platform-tools folder, click on the address bar, type
cmd, and pressEnter. This opens Command Prompt in the current directory.
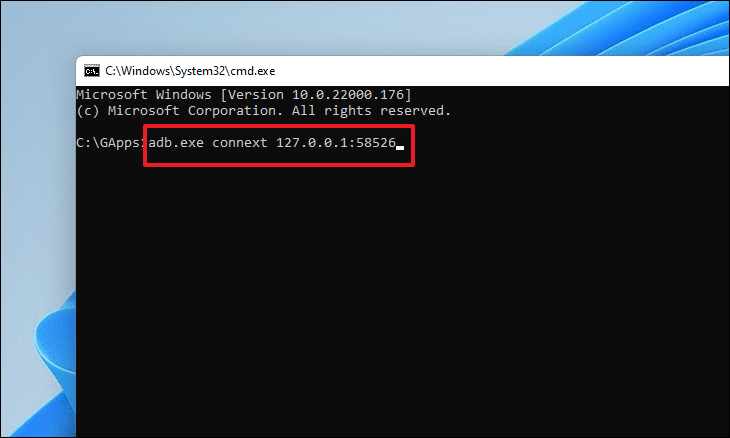
- Connect to ADB by entering the following command and pressing
Enter:
adb.exe connect <IP address>Note: Replace <IP address> with the IP address from WSA settings.
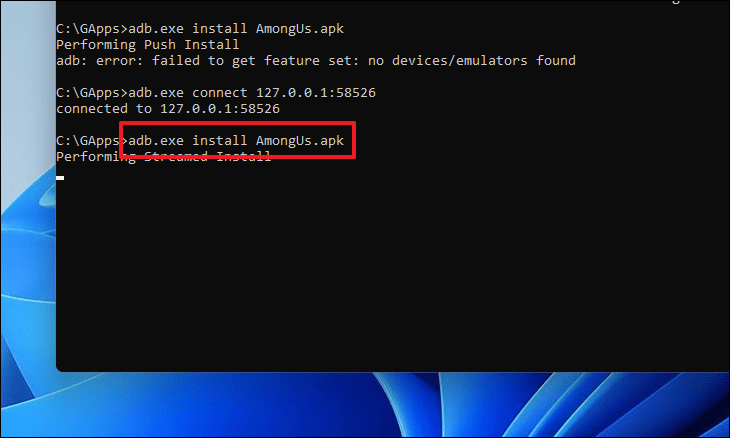
- Install the APK by typing the following command and pressing
Enter:
adb.exe install <file name>.apkNote: Replace <file name> with your APK’s exact file name.
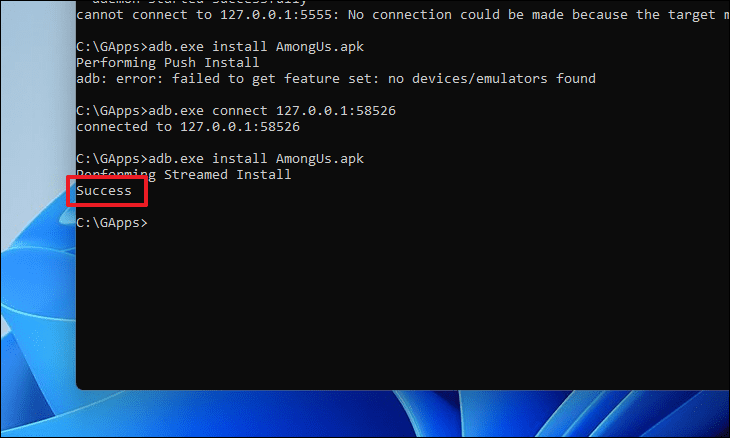
- Upon successful installation, you’ll see a ‘Success’ message in Command Prompt.
- Open the Start Menu, search for the installed app, and launch it.

By following these steps, you can sideload any Android app onto your Windows 11 PC using its APK file.


