
Whenever Apple showcases the newest lineup of its operating systems, a wave of excitement goes through the aficionados. And many users get the itch to try out the latest software immediately. The only problem – the stable versions of the OS aren’t available for many months.
Beta versions are the only way to get a hands-on experience. But the beta software that is available right away is chock full of bugs. Installing it on your main machine as your main OS is a risky venture and generally not advised. But if the lure of trying out the new features is too much for you to resist, Apple’s Virtualization Framework on Mac is the answer for you. Instead of risking your main OS, you create a separate virtual machine to test the OS.
What is Apple’s Virtualization Framework?
Apple’s Virtualization Framework is a set of high-level APIs that allow you to create and manage virtual machines on both Apple Silicon and Intel-based Mac computers. Before Apple introduced its own silicon chip, Intel-based Macs could use Boot Camp or Virtualization to run a virtual machine. But Boot Camp wasn’t an option with Apple silicon Macs that used the ARM architecture instead of the x86 architecture used by Intel-Macs.
Even Virtualization is rather complicated on Apple silicon macs, as Apple’s ARM chips can’t easily create virtual machines that mimic Intel’s x86 chips.
Fortunately, Apple introduced Virtualization Framework a couple of years ago in macOS Big Sur. Now, it’s not only possible for Apple Silicon Mac, like M1, to run virtual machines, but it’s also easier. Apple Silicons have special hardware that allows the virtualization of CPUs and memory.
Virtualization Framework can configure and create virtual machines using only Swift. You can use it to boot and run both macOS and Linux-based operating systems. It is an alternative to the Hypervisor Framework, but you can think of it as a high-level layer running on top of it. Unlike the Hypervisor Framework, you also don’t have to write every single detail of the virtual environment when working with the Virtualization Framework.
Of course, if you want to work directly with Virtualization Framework, there’s a lot of technical jargon since you have to configure the available APIs and need knowledge of Swift to do that. Apple has complete documentation and some sample projects to help you with creating and configuring a simple virtual machine, without any additional software if it’s your cup of tea.
But if you’re not a developer and have zero experience with APIs and programming languages, that’s not ideal. So, why would we suggest Virtualization Framework in the first place?
Because there are third-party apps that provide you with a simple GUI for interacting with the Virtualization Framework. All you have to do is select your settings from the app and it takes care of the rest of the stuff. There are many apps you could try, but we’ll list which we feel are the easiest to use. Let’s get on with it.
VirtualBuddy
If you have an Apple Silicon Mac, you need to look no further than VirtualBuddy. But for an Intel Mac, skip to the next section.
Using VirtualBuddy, you can virtualize macOS 12 Monterey and later on your Mac with an Apple Silicon chip, including the beta versions. So, you can use it to try even the latest macOS 13 Ventura on your Mac without risking your main OS install.
Using VirtualBuddy is easy as it offers a built-in installation wizard and makes the process of installing any version of macOS 12 or 13 – stable and beta versions –extremely easy. You also get access to other features, like:
- The ability to select from different restore images available on Apple’s servers
- Creating a custom restore image URL
- Use an IPSW file for a local restore image
- The ability to boot into recovery mode
- Support for networking and file sharing
- You can even customize the hardware configuration for your virtual machine
- You can also share the clipboard between the host and guest machine, i.e., your main OS and the VM.
Note: VirtualBuddy is an experimental project and there will be occasional bugs and things might even break sometimes.
Requirements: VirtualBuddy requires macOS 12.3 to run on an Apple Silicon Mac.
Preparing to use VirtualBuddy
If your goal is to virtualize macOS Monterey on top of macOS Monterey, there’s no additional preparation required and you can skip this step. But if you want to virtualize macOS Ventura on top of macOS Monterey – which is the most likely scenario here – you need to install the beta version of Xcode 14. The reason is that VirtualBuddy fails to download the extra software itself. You can go ahead and try to install macOS Ventura beta without first installing Xcode 14 beta manually, but that’ll most likely end up in a wastage of precious resources and time.
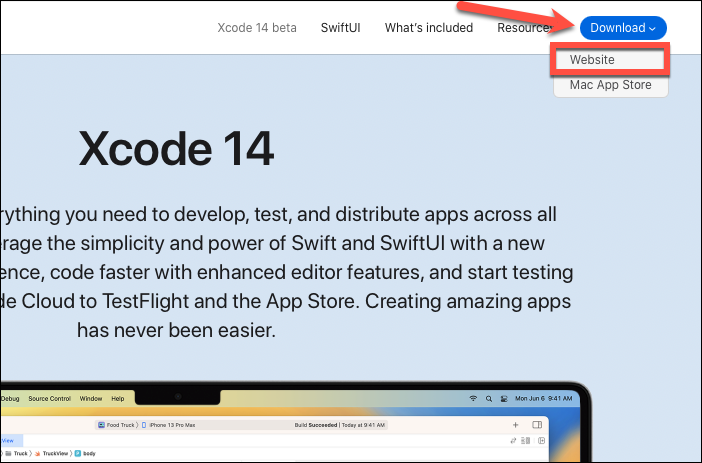
To install Xcode 14 beta, go to its link on Apple’s developer website. After you click the link, you’ll have to sign in with your Apple account; don’t worry, you don’t have to pay for the developer program to install Xcode 14 beta.
Then, click the ‘Download’ button and select ‘Website’ from the expanded options.
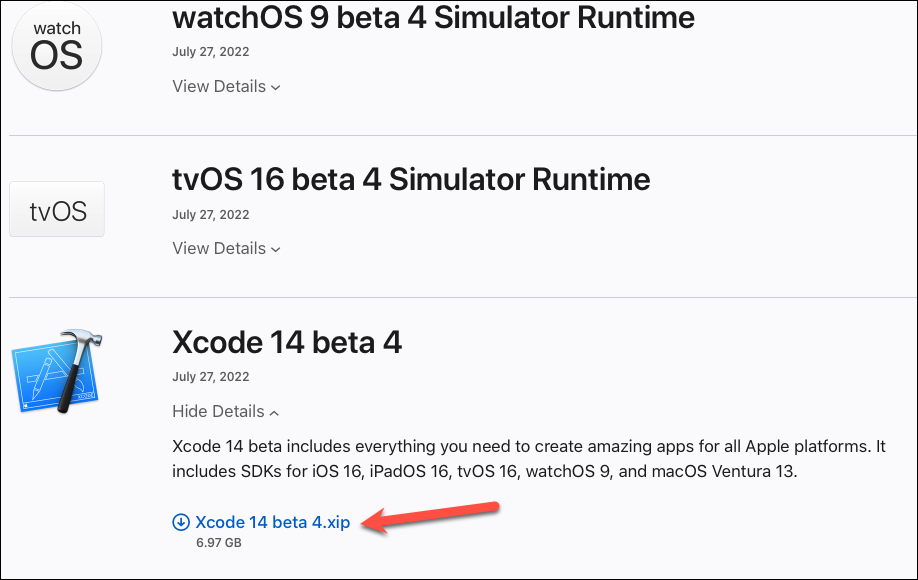
From the More Downloads page, download the latest version of Xcode 14 beta (which is Xcode 14 beta 4 at the time of writing this).
Other than that, you’ll also need to make sure you have enough space for creating the Virtual Machine. You’ll at least need to put aside 64 GB for the macOS Virtual Machine. You could also use an external SSD connected over a 5 or 10 GBPS USB connection or Thunderbolt bus. It will prove to be fast for most things you want to do on your VM.
Now, finally, let’s get on with it.
Installing VirtualBuddy
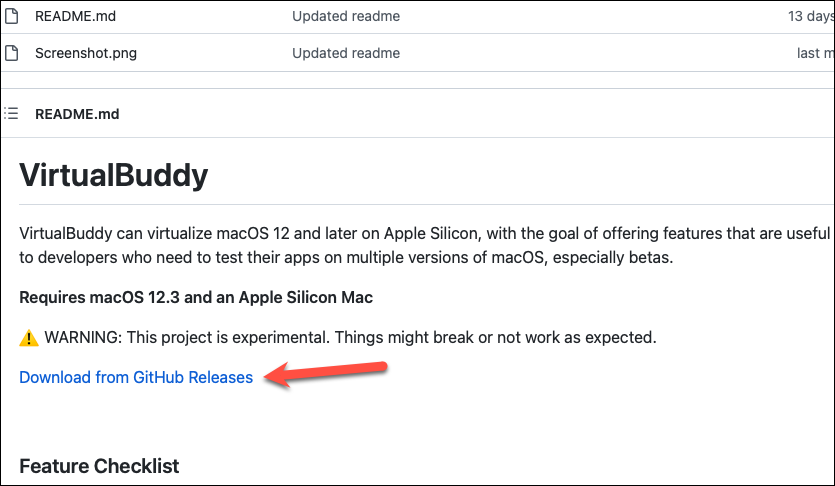
To install VirtualBuddy, head over to its link on GitHub. Scroll down and click the ‘Download from GitHub Releases’ link.
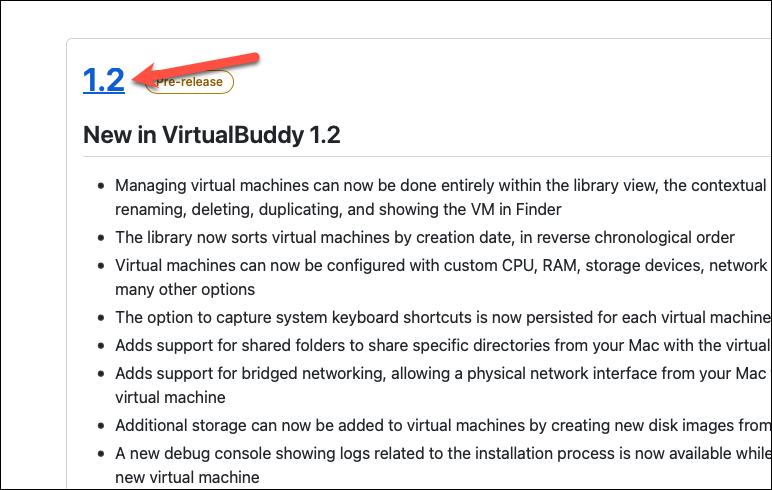
Find the version that you want to install and click its link. We’d go with the latest version here.
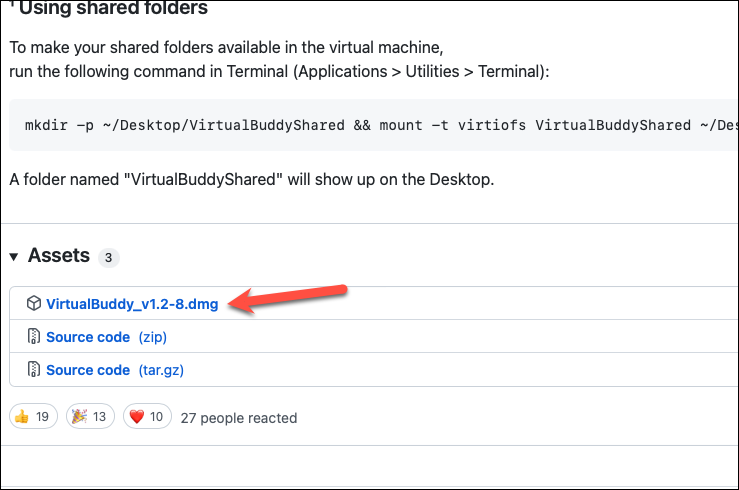
Then, scroll down to the very end and download the .dmg file.
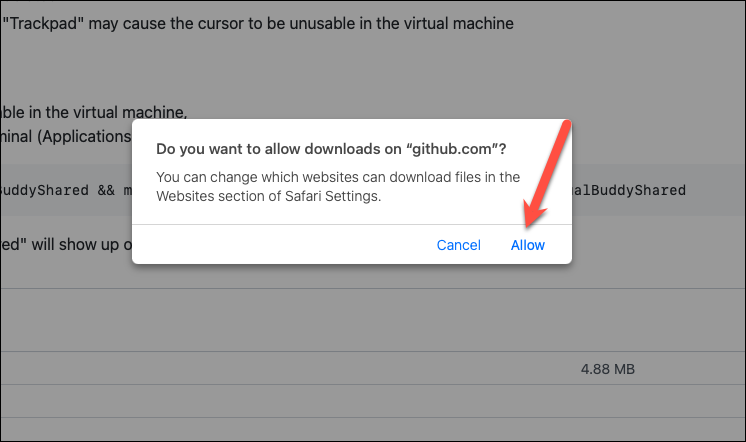
If a prompt appears for confirmation of download, click ‘Allow’.
Open the dmg file once it’s downloaded.
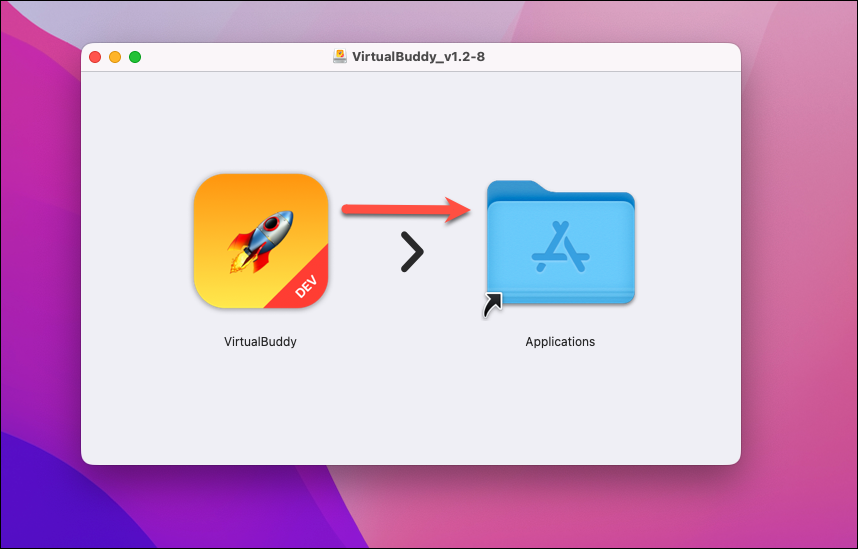
Then, drag the ‘VirtualBuddy’ icon onto the ‘Applications folder’ icon from the window that appears to add it to your applications so you don’t have to run it using the dmg file every time.
Using VirtualBuddy to Install macOS Ventura Beta
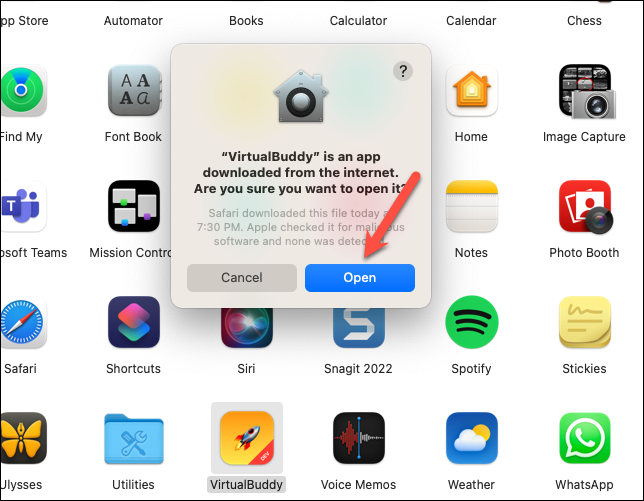
Open VirtualBuddy from your Applications.
A prompt will appear saying that VirtualBuddy is an app downloaded from the internet. Click ‘Open’ to continue.
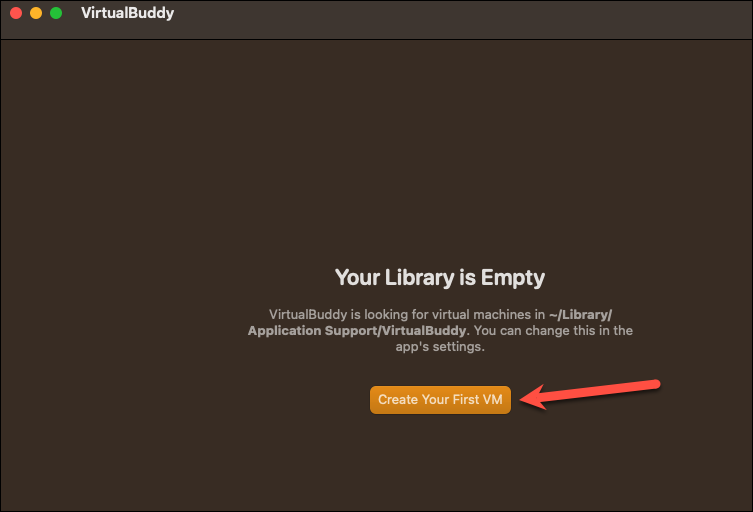
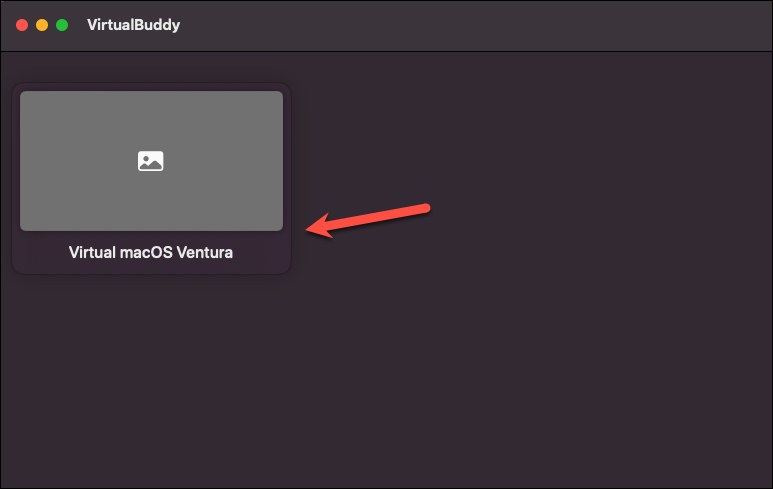
VirtualBuddy will open. Since your library will be empty at this time, click ‘Create your First VM’ to continue.
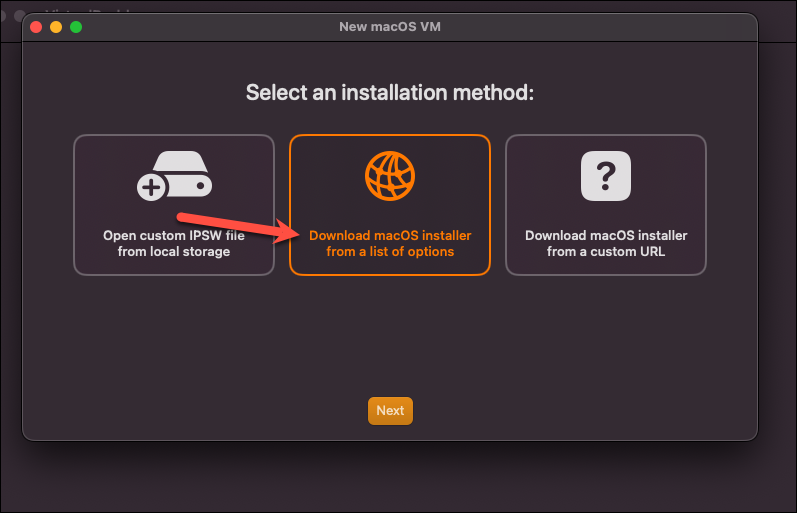
The interface for VirtualBuddy is extremely simple. You’ll see three options on the screen: ‘Open custom IPSW file from local storage’, ‘Download macOS Installer from a list of options’, and ‘Download macOS Installer from a custom URL’.
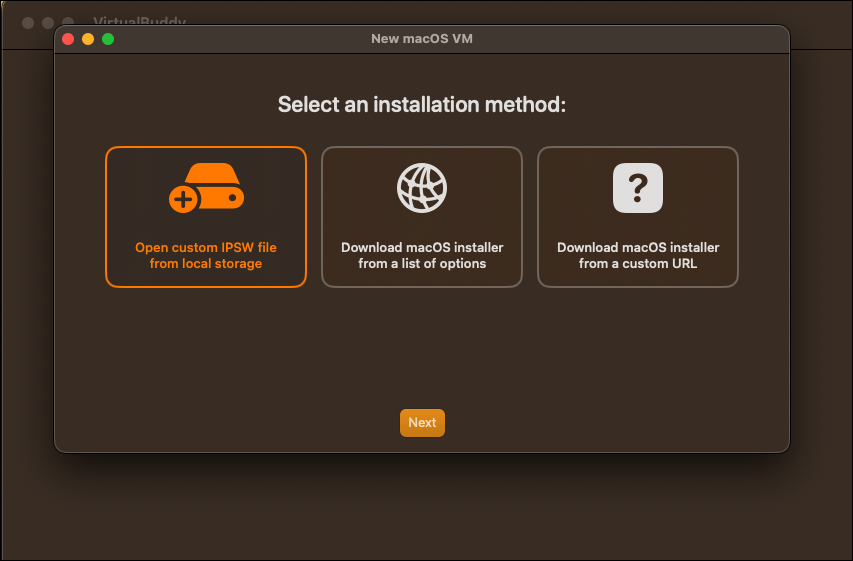
The easiest is the second option if you want to install one of the available versions in VirtualBuddy. Select it and click ‘Next’.
Click the drop-down menu next to the OS version and select the version you want to install. The available versions include iOS 13 developer betas 1-4 and iOS 12.5, 12.4, and 12.3.1. To install macOS Ventura beta, select iOS 13 developer beta 4 (the latest at the time of this writing) and click ‘Next’.

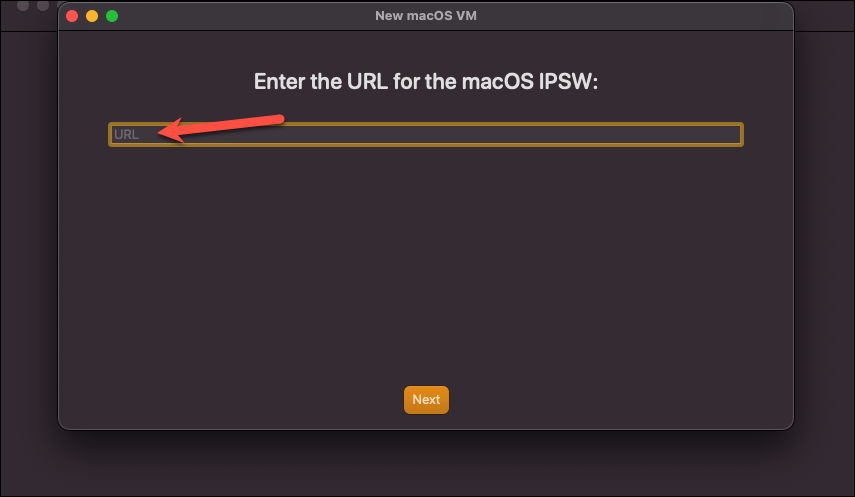
If you want to install any other OS version and you have a custom IPSW file, select the first option. Then, select the file from your Mac to proceed. Otherwise, if you have a link to the macOS Installer, select the third option and enter the URL from where you want VirtualBuddy to download the macOS.
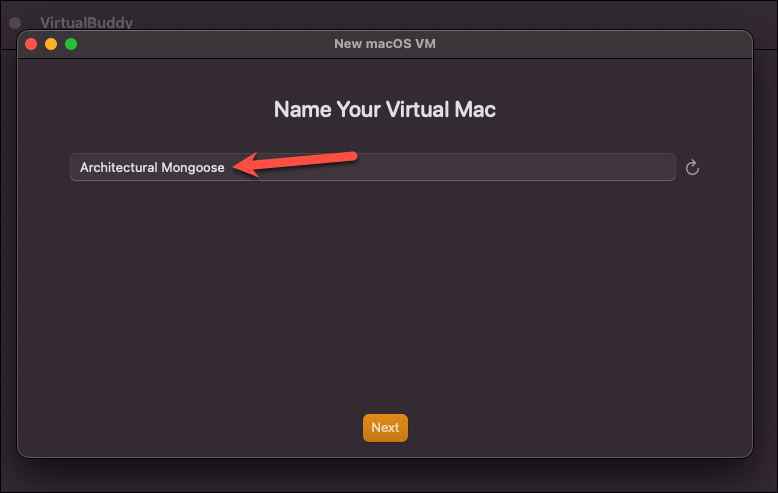
Enter the name of your virtual mac on the next screen and click ‘Next’.
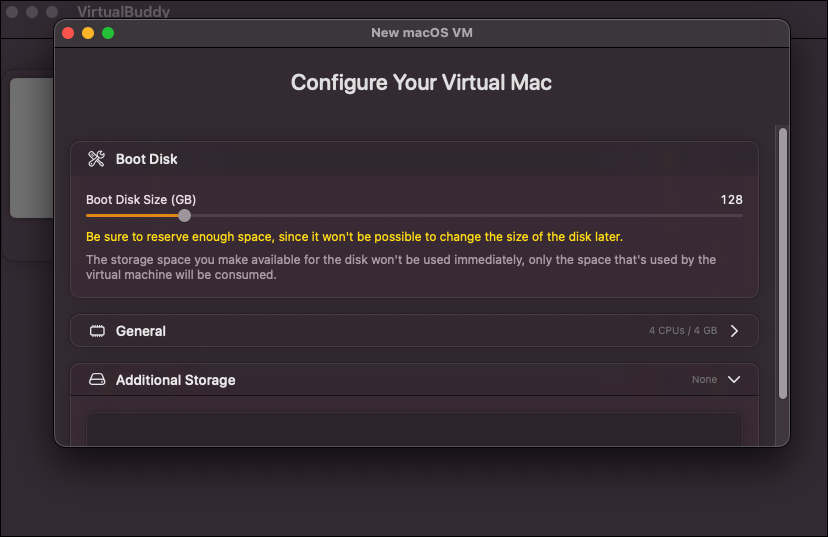
Then, configure the virtual machine, i.e., the boot disk size (it can’t be changed later), number of virtual CPUs and memory you want to allocate to it, any additional storage, display resolution, pointing device, and network. Then, close the window.
Note: In VirtualBuddy 1.2, setting the pointing device to ‘Trackpad’ may lead the cursor to be unusable in your virtual machine, so best stick to ‘Mouse’.
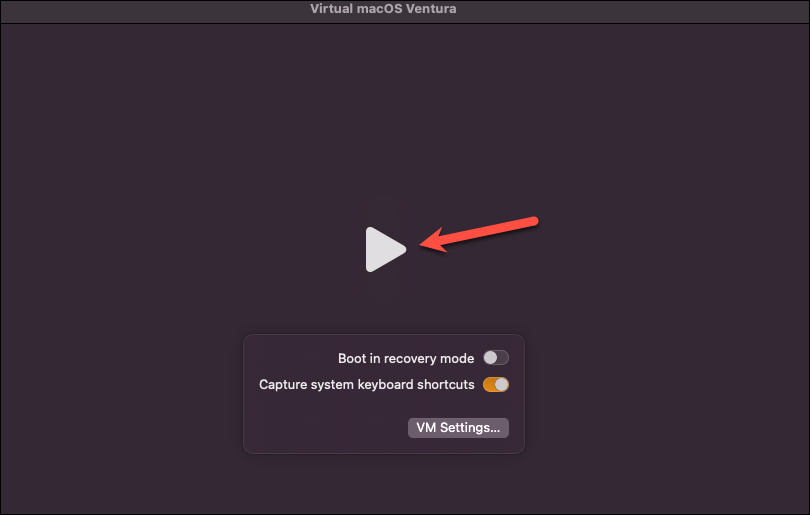
After you’ve configured everything, the virtual machine will appear in your library. Click it.
Then, click the ‘Play’ button to initialize it. VirtualBuddy will install the macOS with your specified disk size.
Once the installation is complete, the screen will boot to the setup screen you see when you set up a new Mac.

VirtualBuddy is an easy enough app to use. But there are a few drawbacks, such as you cannot sign into an iCloud account or hardware features like AirDrop or Continuity camera.
The next app – UTM – lets you sign in to an iCloud account even on your VM. Let’s check it out.
UTM
UTM is another alternative you can use for the virtualization of macOS beta on your system. It works on both Intel and Apple Silicon Macs and uses the Virtualization Framework to set up the macOS 12+ Virtual Machine on both types of machines.
With UTM, you can also install many other Operating Systems as it provides a wide range using QEMU emulation.
It is an open-source app available for download from its website, but there’s also an identical version available in the Mac App Store with the goal of getting funds for continued development. So, if you’re interested in becoming a patron, you can download it from the latter, otherwise, stick with the former option. With the App Store download, you also get the benefit of automatic app updates.
Before installing UTM, make sure that you can spare at least 64 GB of disk space required for the booting of the macOS Virtual Machine.
Installing UTM
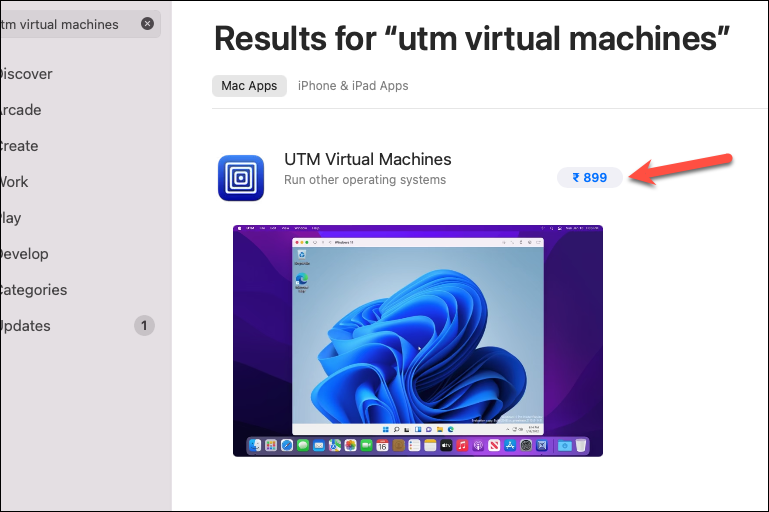
To install UTM from the Mac App Store, head to the App Store and search for UTM. Then, click the option that shows the price of the app to install it.
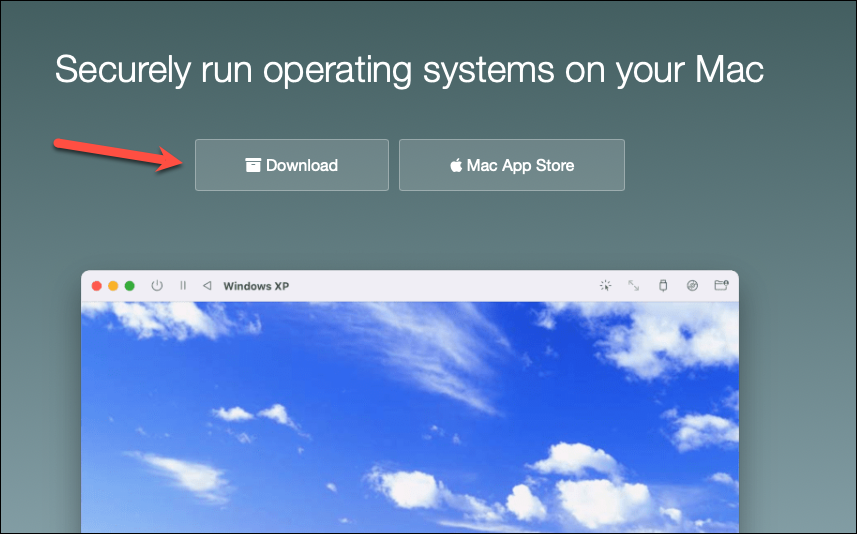
To get the identical, free version, go to its website and click the ‘Download’ button.
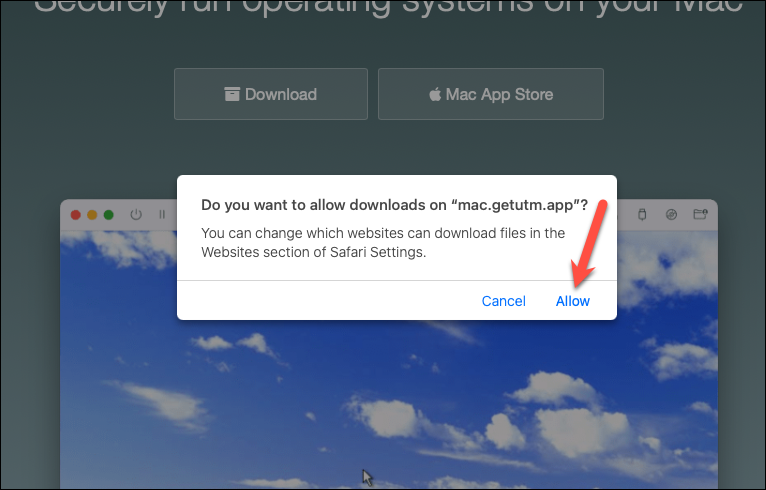
A confirmation prompt will appear. Click ‘Allow’ to start the download.
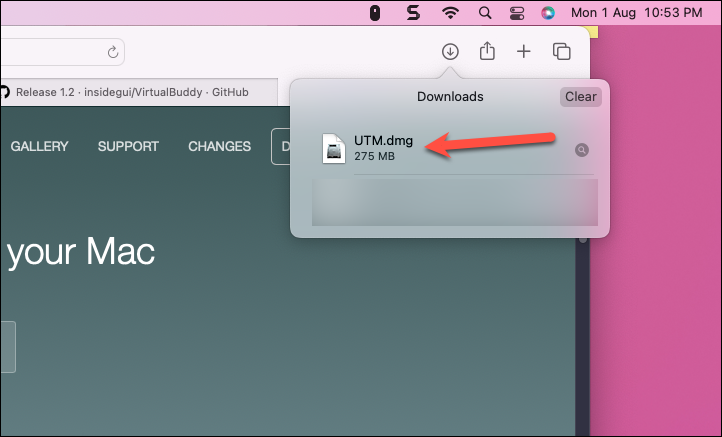
Then, open the dmg file from your downloads.
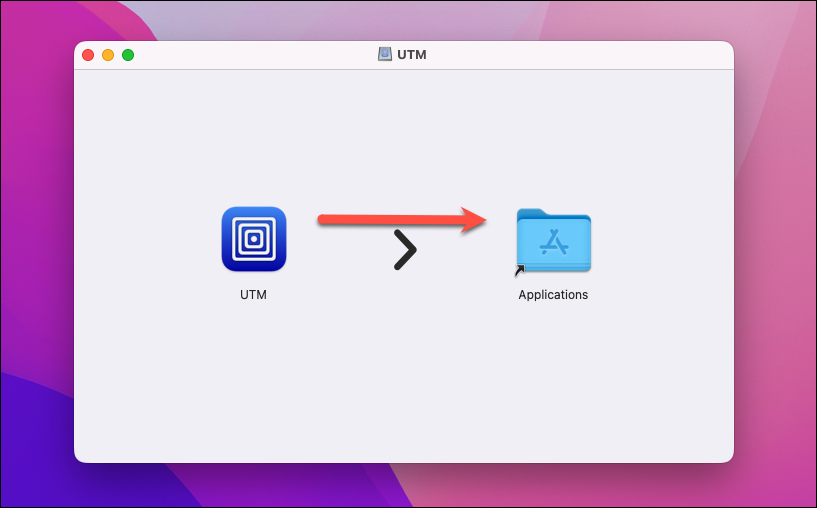
In the window that opens, drag the icon for ‘UTM’ onto the ‘Applications folder’ icon to add it to your applications. This way, you won’t have to run it from the dmg file every time.
Preparing to use UTM
Before using UTM to create a virtual machine to run macOS 13 Ventura beta, you’ll need to download Xcode 14 beta.
Go to this link for Xcode 14 beta on Apple’s developer website. Sign in with your Apple account and then click the ‘Download’ button. Select ‘Website’ from the expanded options.
Then download the latest version of Xcode 14 beta (which is Xcode 14 beta 4 at the moment).
Once Xcode 14 beta is installed, run it once to initialize.
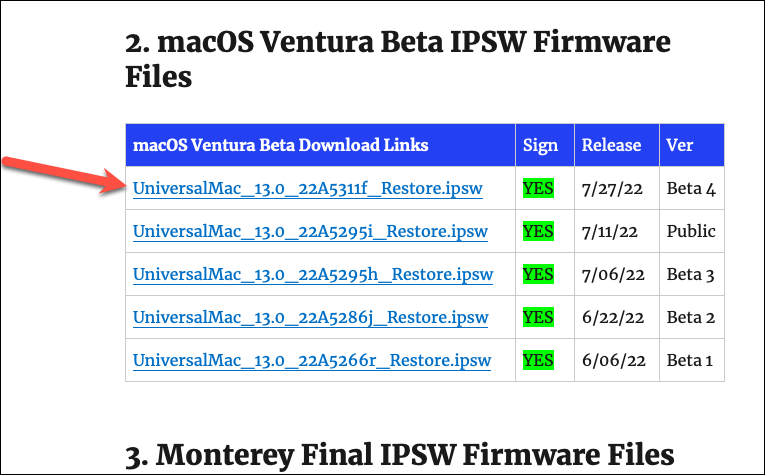
You’ll also need to download the IPSW restore file for macOS Ventura. It’s better to download the IPSW file manually since there have been reports of trouble when letting UTM download the IPSW file for Ventura automatically. If you want to virtualize Monterey, you can let UTM handle the download; it works perfectly fine in that case.
You can download the IPSW file for macOS Ventura beta from here. Open the link and download the latest signed IPSW file under macOS Ventura beta links.
Using UTM to Install macOS Ventura Beta
Run UTM from your applications folder or the launchpad. The first time you launch UTM, a warning will appear that it is an app downloaded from the internet. Click ‘Open’ to proceed.

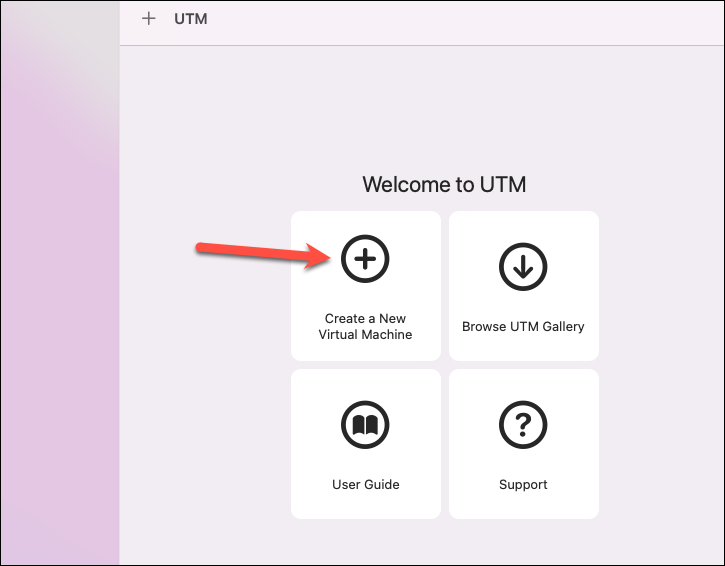
Click the option for ‘Create a New Virtual Machine’.
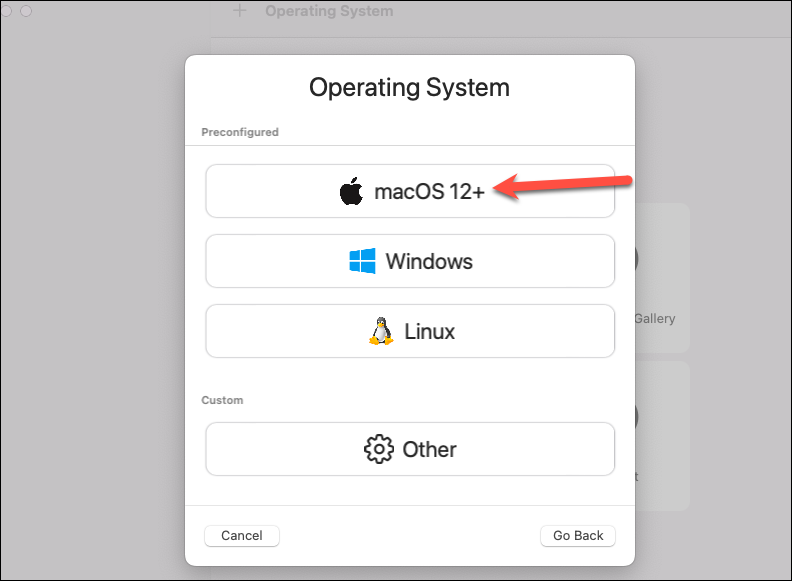
Select ‘Virtualize’ on the next screen.

Now, select ‘macOS 12+’ the Operating System options.
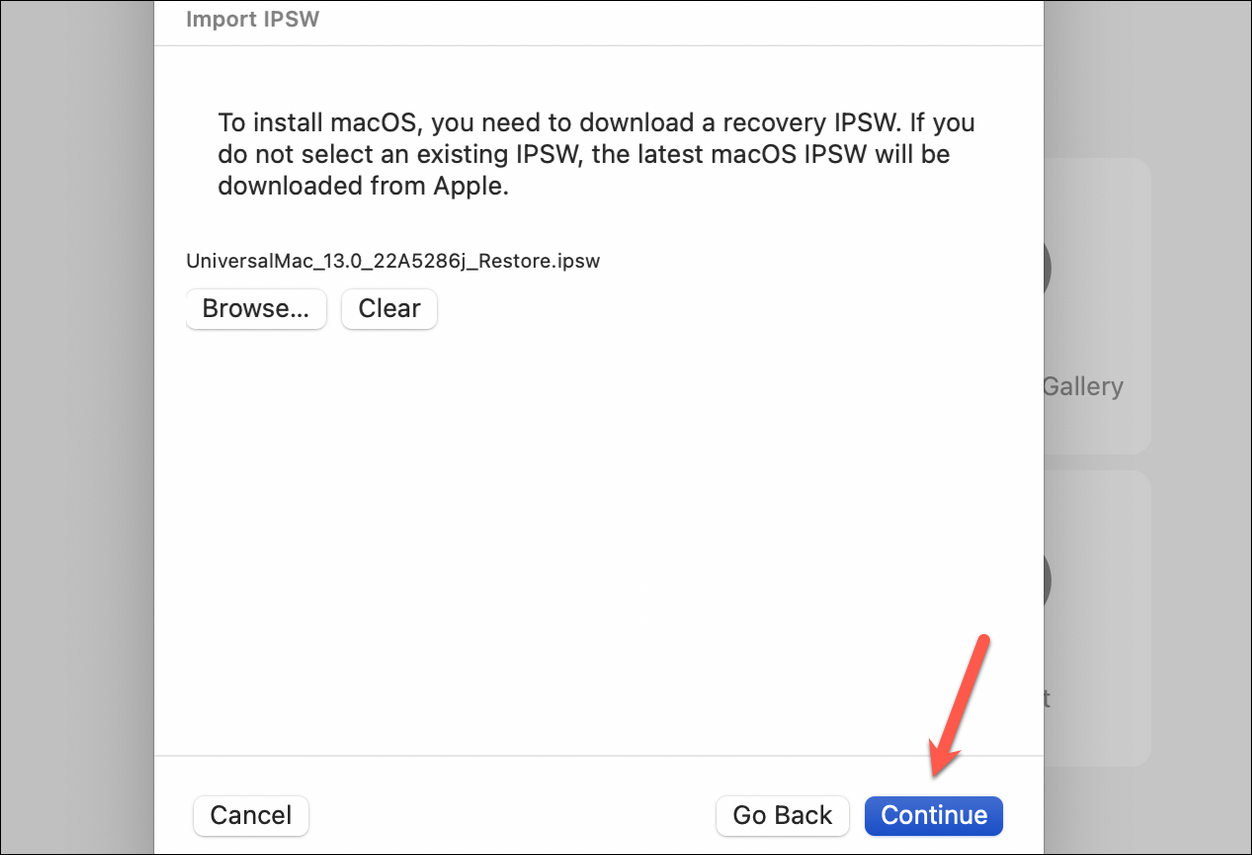
Click ‘Browse’ and select the IPSW file you downloaded in the previous section.

Then, click ‘Continue’.
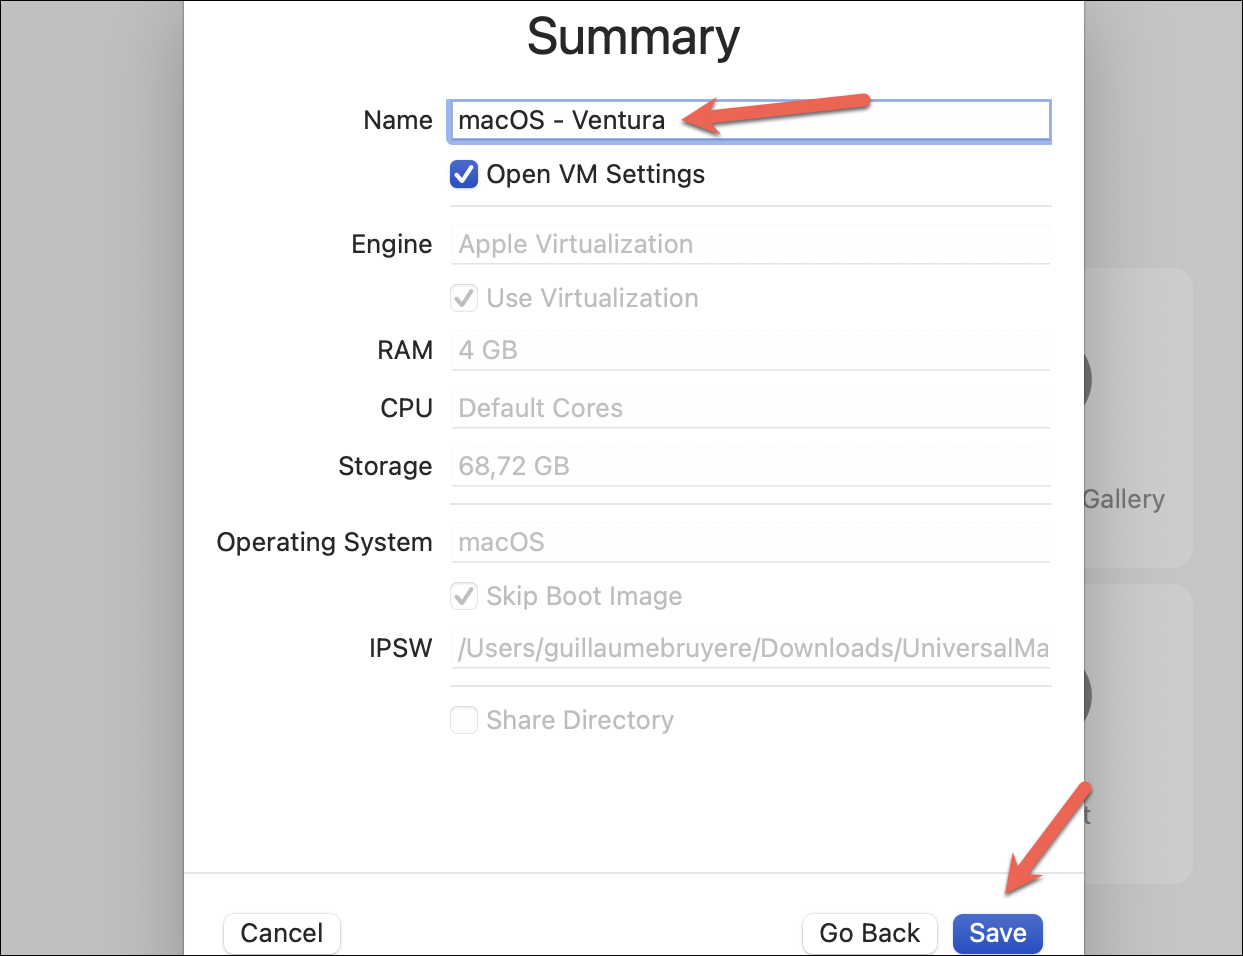
Then, you can either customize the hardware configuration, i.e., storage, memory, CPUs, etc. you want to allot or continue with the default configuration.
Enter a name for your Virtual Machine and click ‘Save’.
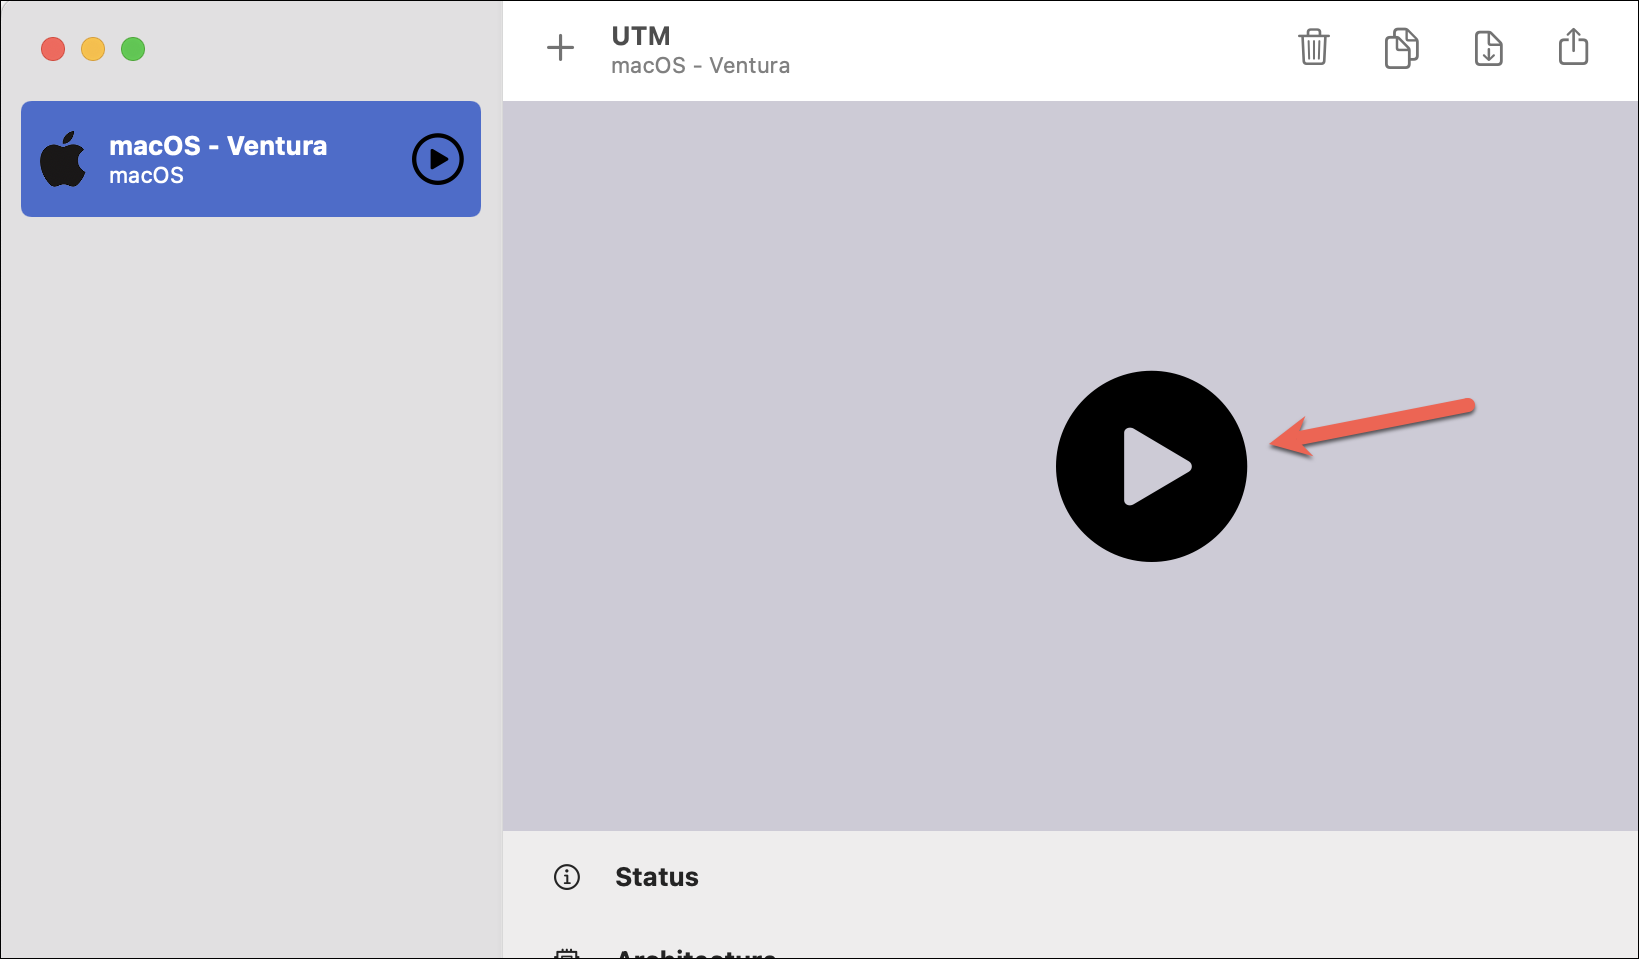
The virtual machine is created and ready to be initialized. Click the ‘Play’ button to initialize it.
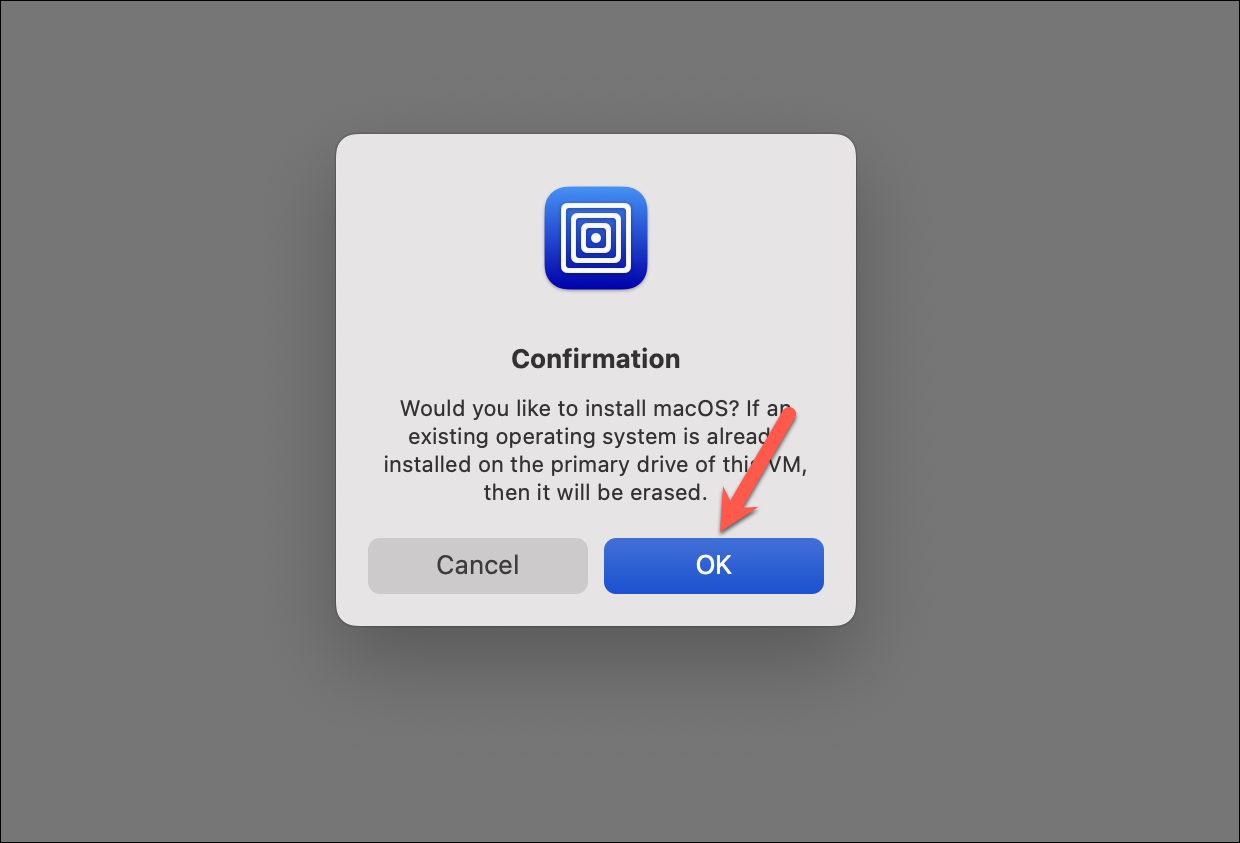
A confirmation prompt will appear asking you if you want to install the macOS, click ‘OK’. UTM will begin the installation of the macOS.
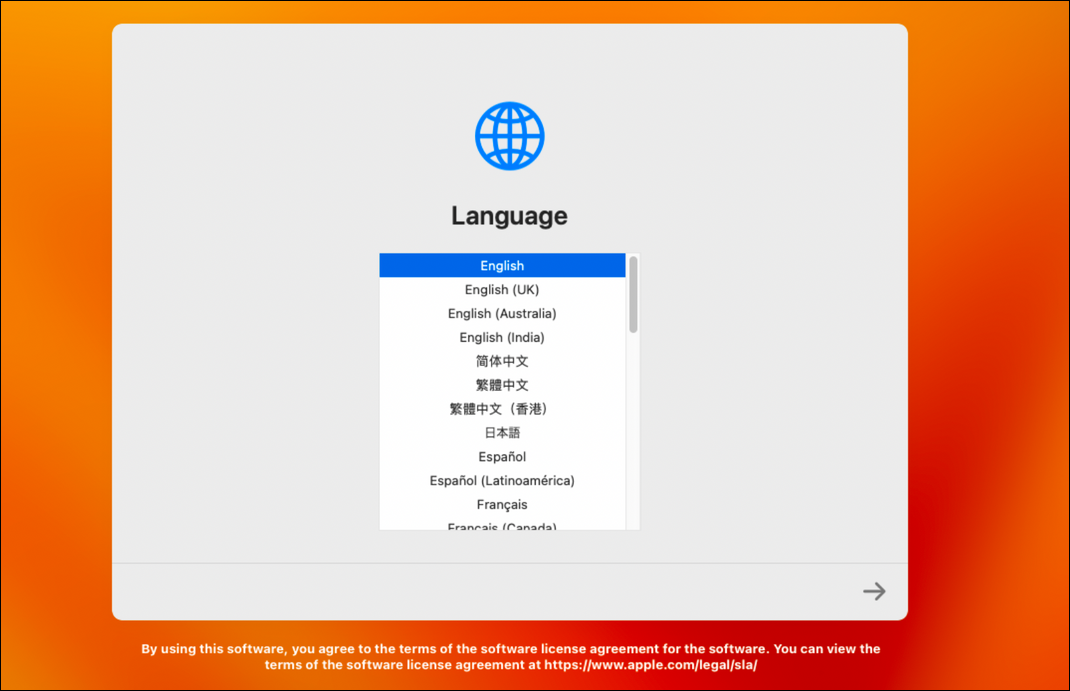
Once it completes, you’ll be greeted with the screen that appears when starting up a new Mac.
Note: If you encounter a problem and can’t install macOS Ventura beta this way on your Virtual Machine, you can go ahead and install macOS Monterey on it. And then, you can install the beta profile for macOS Ventura on your VM as you would on your physical machine.
Apple’s Virtualization Framework is a great tool when it comes to using a virtual machine on your Mac since it offers unparalleled performance. And with third-party apps that offer an easy-to-use interface for the virtualization framework, creating a virtual machine has never been easier.