macOS Ventura is bringing a lot of new features as well as some changes to the Mac operating system. One of the biggest additions to the lineup is the Continuity Camera.
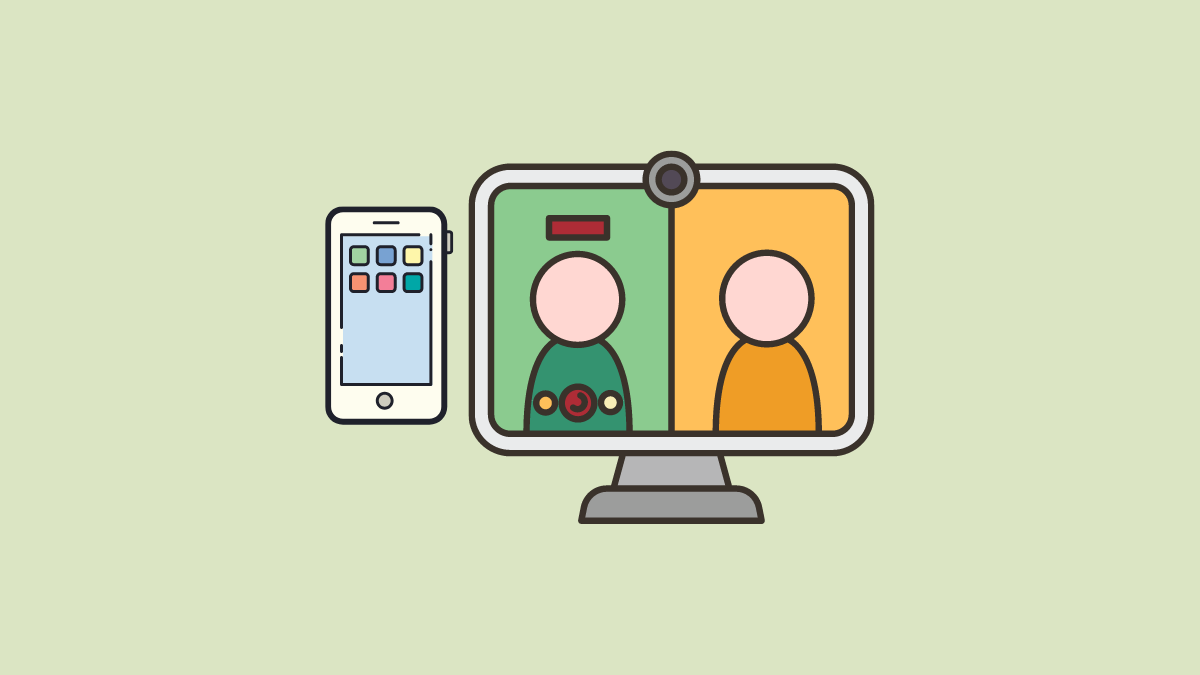
Another addition to the continuity features across the Apple ecosystem, the continuity camera uses your iPhone’s rear camera as a webcam for your Mac. For users who own both a Mac and an iPhone, this is definitely something to get excited about.
While Continuity Camera is amazing in itself, there’s one aspect of it that deserves its separate space because it’s just that wonderful. We’re talking about Desk View. It is one of the camera effects in this feature that practically feels like magic.
What is the Desk View?
As its name suggests, it shows the view of your desk using the ultra-wide camera on your iPhone, giving the effect of an overhead camera setup being used.
So, if you’re in a video call and would like to share the contents of your desk with other participants, you can easily do it without any additional equipment. Whether you want to show playing cards for a magic trick, a painting you’re currently drawing, or anything else really, you don’t have to hold up the contents to the camera anymore.
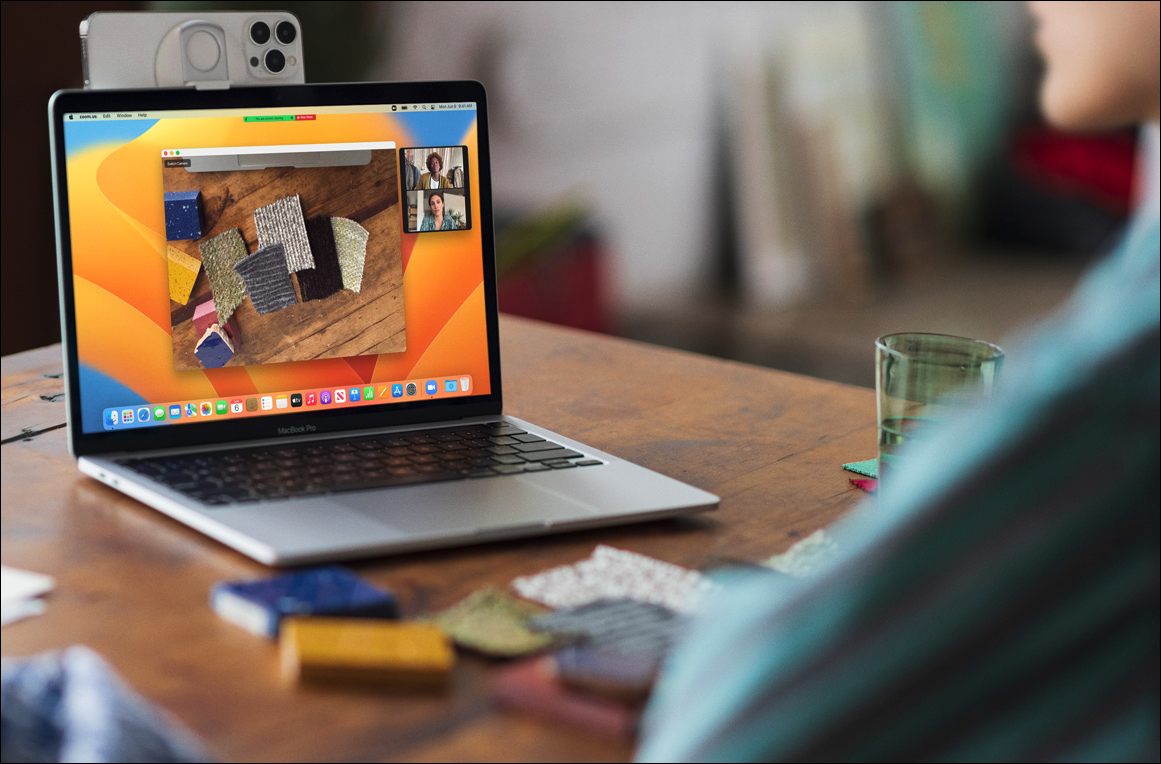
The best thing about it is that you don’t lose the video feed for your face. The continuity camera splits the feed between these two views, so other participants in the call see both. Since it uses screen sharing to share the view of your desk, it’s possible to have two separate feeds.
It works in both the landscape and portrait orientations of your iPhone. But it works the best when used in the latter since that offers a larger view of the desk.
You can also the desk view effect in tandem with other effects that Continuity Camera offers, namely Portrait, Studio Light, and Center Stage.
But Desk View is only available on iPhones 11 and newer devices since they are the ones with ultra-wide cameras. So, if you have an iPhone XS or XR, you still get access to the continuity camera, but not the Desk View effect.
Although using the Continuity Camera is extremely easy, it can get a little tricky to get the desk view down pat. So, without beating about the bush, let’s get to it.
Using the Desk View Effect with Continuity Camera
To use the desk view, you should first be using the continuity camera. Using the continuity camera is extremely easy given that your iPhone is using iOS 16 and your Mac is on macOS Ventura.
Open the video conferencing app where you want to use the continuity camera. For reference, we’ll use FaceTime, but you can use it any other app like Microsoft Teams, Zoom, Google Meet, etc.
If your iPhone is near your Mac and you have Bluetooth and Wi-Fi enabled on both, your Mac will automatically pick your iPhone as the webcam.
We cover the Continuity Camera in its entirety in a separate guide here.
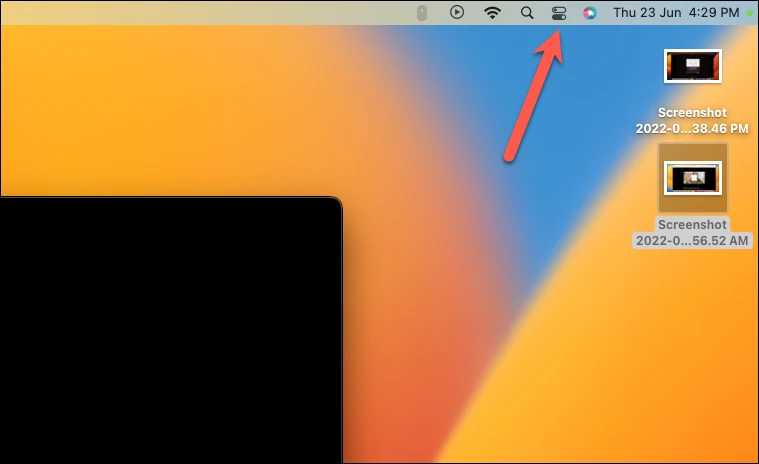
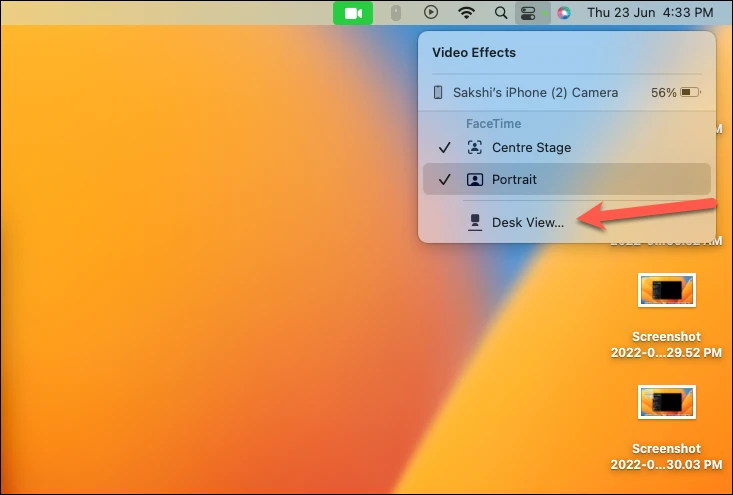
Once you’re in the call and want to use the desk view, click the ‘Control Centre’ icon from the menu bar.
Then, click the ‘Video Effects’ option from the Control Centre menu.
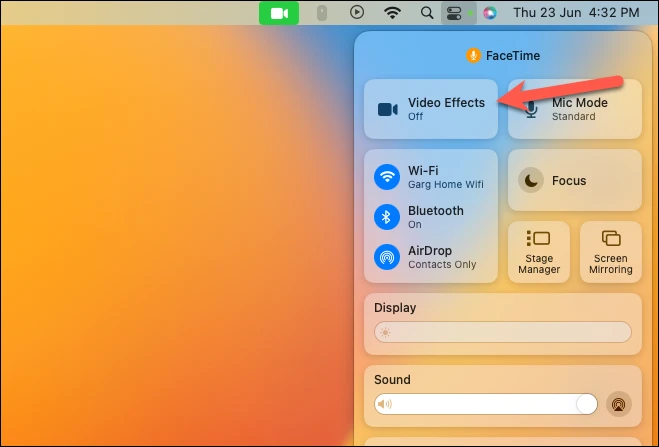
From the video effects, click the ‘Desk View’ option.
When you activate the desk view, the ‘Centre Stage’ effect is automatically activated to keep you in focus uninterruptedly as you share your desk. But you can disable it.
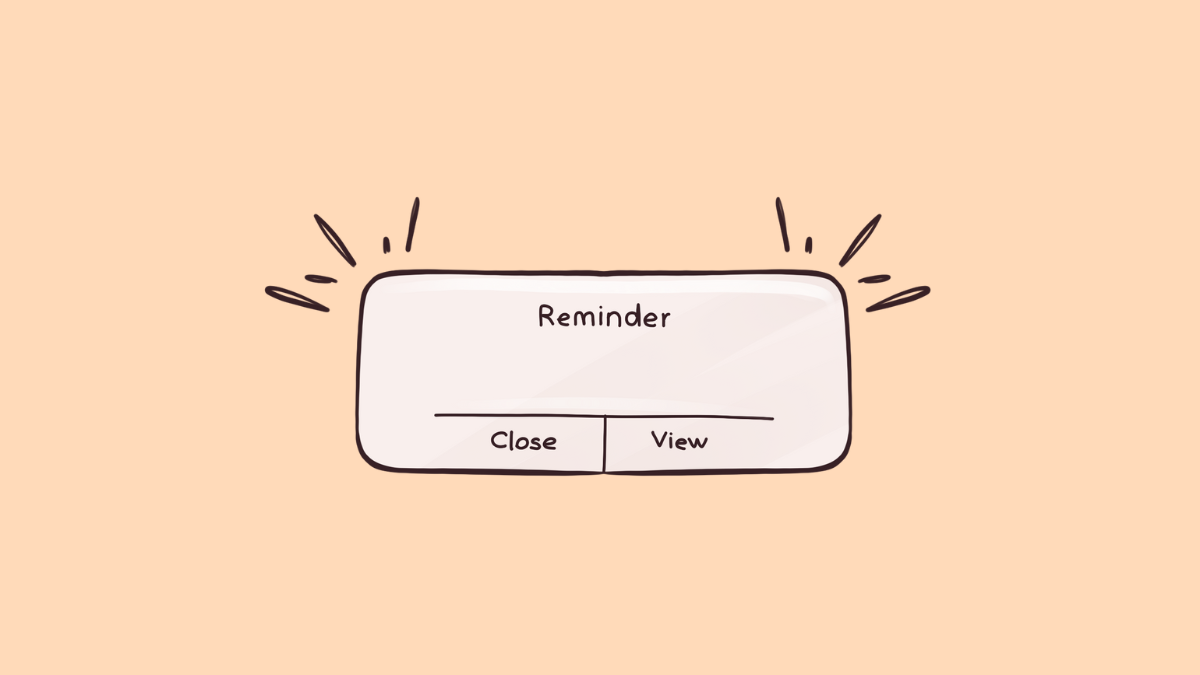
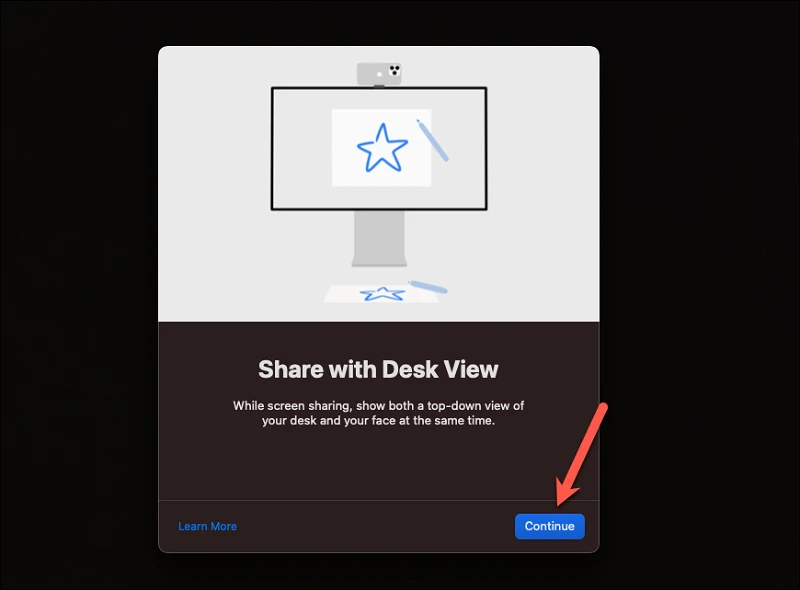
If you’re using the desk view for the first time, an onboarding dialog box will appear. Click the ‘Continue’ button in the bottom-right corner of the window to proceed.
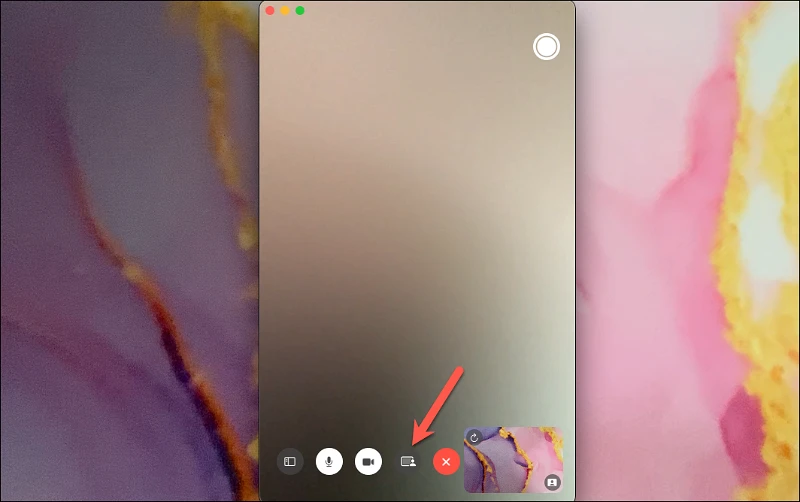
The view of your desk will open in a separate window. Once you share this window with the other participants in the call using the screen sharing feature, they’ll be able to see your desk view. So, if you’re using a video conferencing app that doesn’t support screen sharing, you won’t be able to share the desk view in it.
Since we’re using FaceTime for illustration purposes in this guide, we’ll be showing how to share your desk view in a FaceTime call in detail to give you the proper idea. But you can use it in any other video conferencing app following the app’s process for screen sharing.
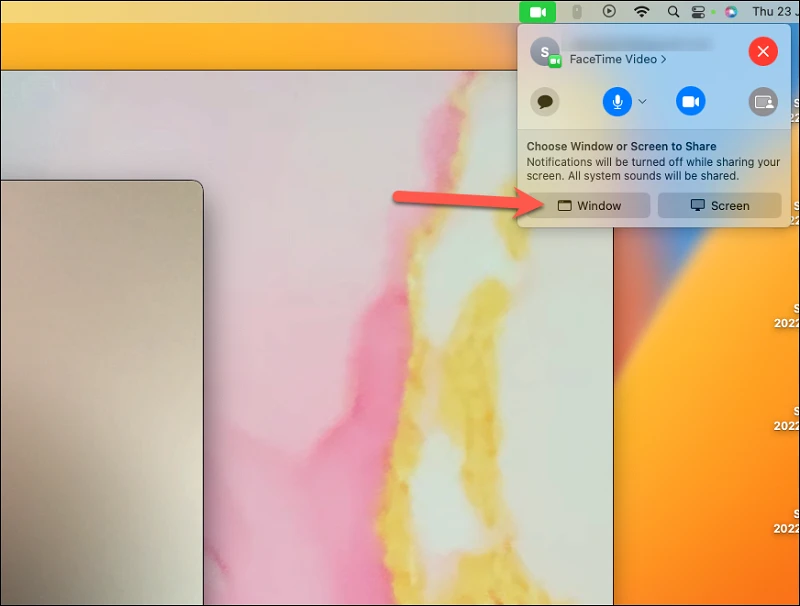
Click the ‘Screen Share’ button from the FaceTime window.
A pop-up menu for screen sharing will appear in the upper-right corner of the screen. Click the ‘Window’ option from the menu.
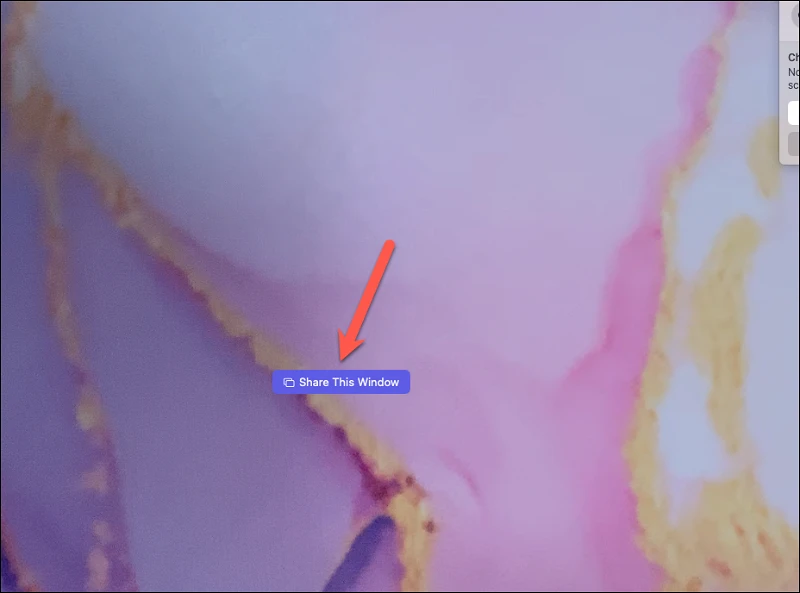
Go to the Desk View window, i.e., the separate window that’s showing the view of your desk, and click the ‘Share this Window’ button.
And voila! Other participants in the call will be able to see the view of your desk along with your video. If you want, you can turn off your camera to stop your video feed. The video feed for the desk view will remain unaffected.
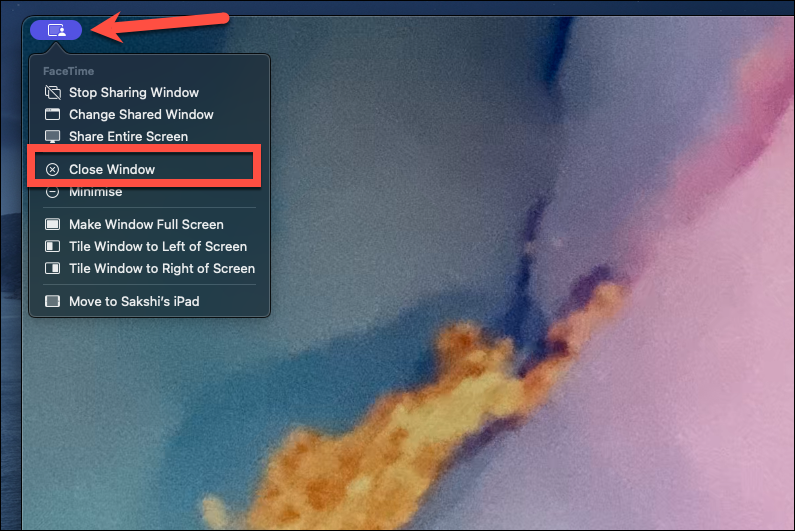
To stop sharing the desk view, go to the Desk View window and click the ‘Screen Sharing’ icon (purple pill) in the top-left corner. Then, click ‘Close this Window’ from the options. The screen sharing will end and the desk view window will close in one go.
That’s about it. Come to think of it, it’s not even that tricky to use the Desk View. And once you know exactly what to do, it’ll feel downright simple, even with the couple of extra steps involved.