Some apps in Windows 11 keep working even when their window is closed. They sync data, check for updates, and push notifications in the background. You can decide which ones are allowed to do this, and the controls live in a few different places depending on whether you want to change one app or all of them at once.
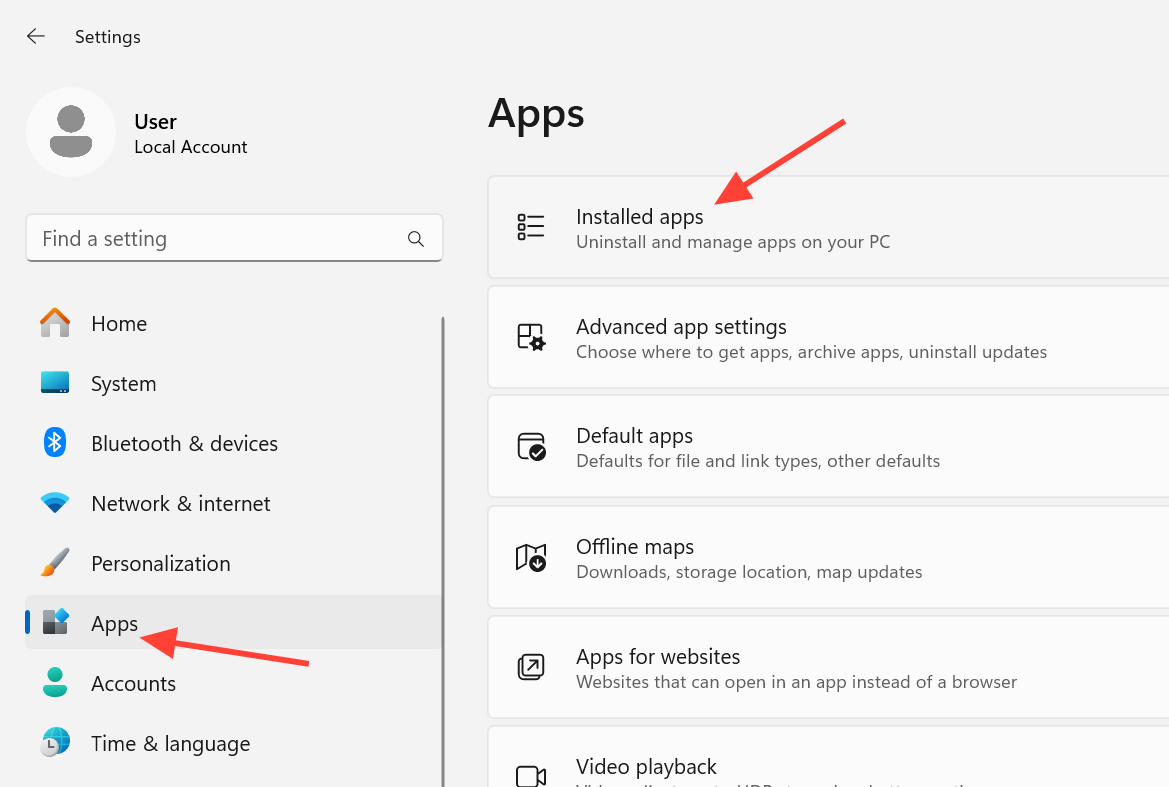
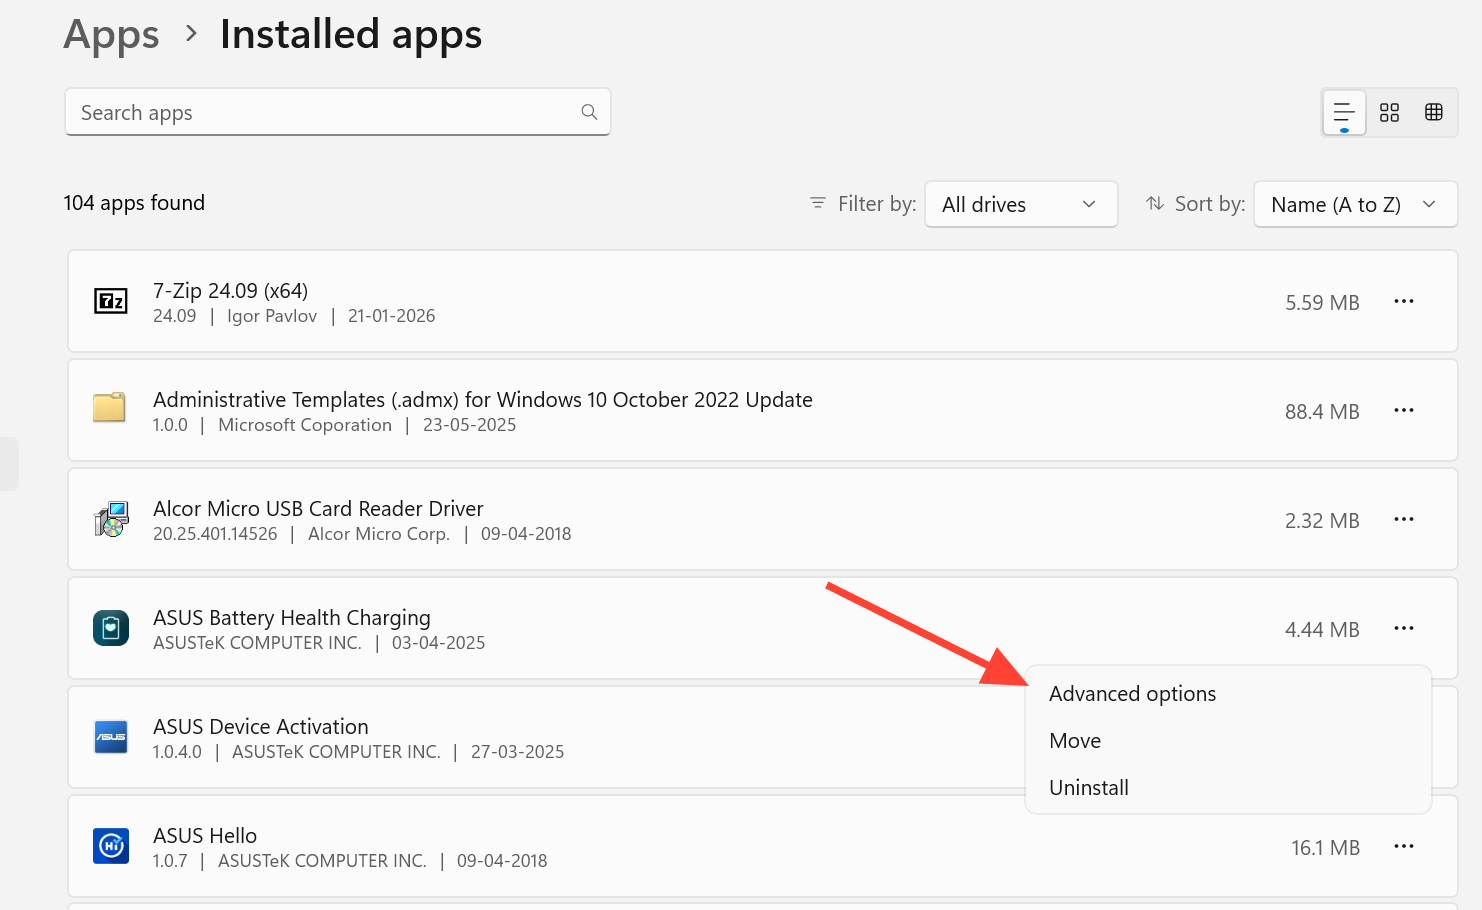
Quick answer: Open Settings > Apps > Installed apps, click the three-dot menu next to an app, choose Advanced options, then under Background apps permissions set Let this app run in background to Never.
Background app permission levels in Windows 11
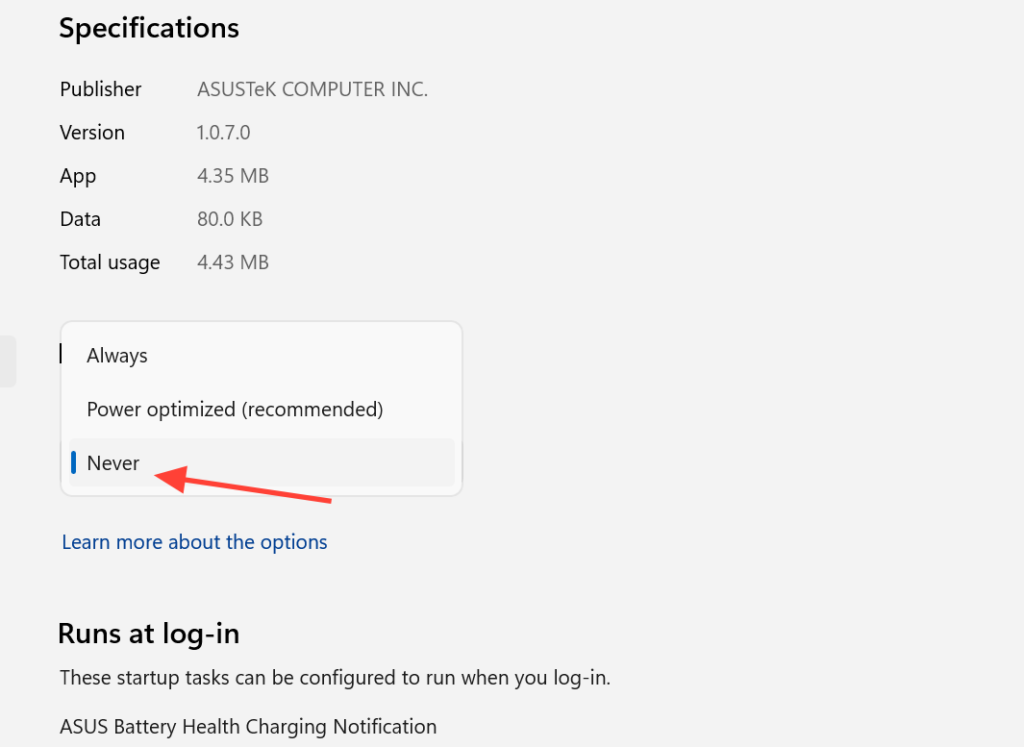
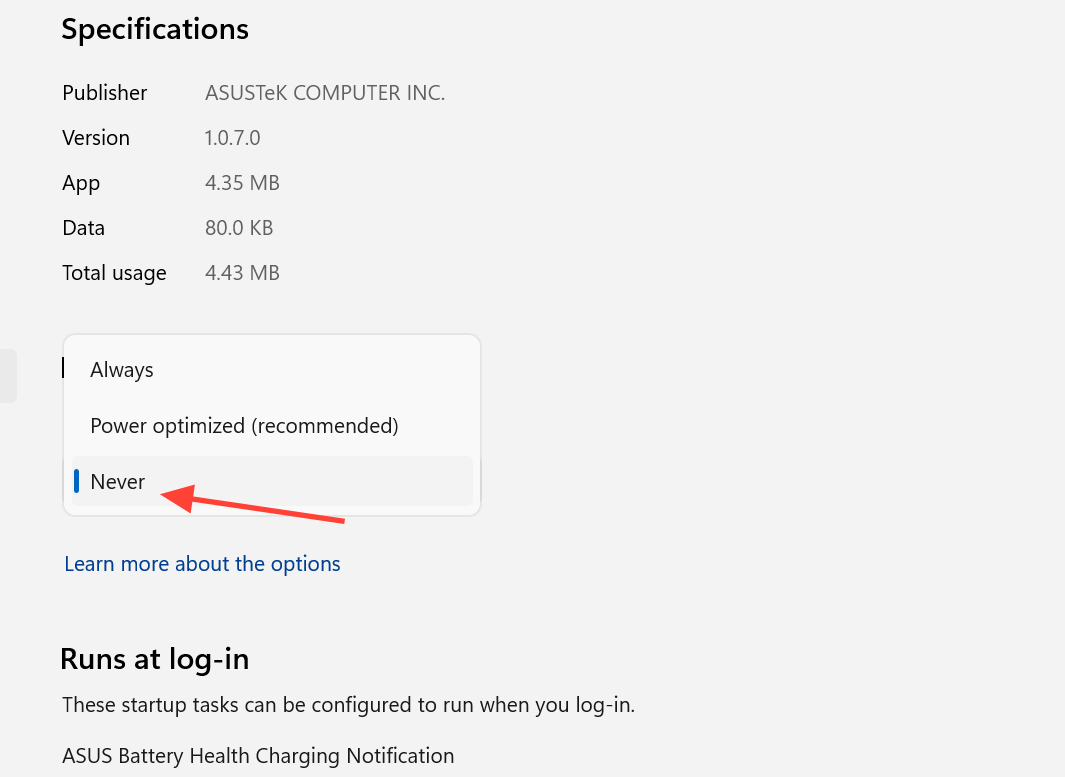
Each supported app has three settings for background activity. Choosing the right one decides whether the app stays active, runs only when Windows allows it, or stops completely when you are not using it.
| Setting | What it does |
|---|---|
| Always | The app runs in the background at all times, receiving info, sending notifications, and staying updated. It may use more power. |
| Power optimized (default) | Windows decides when to let the app run to save power, while still allowing periodic notifications and updates. |
| Never | The app does not run in the background when you are not using it. You get no notifications or updates from it, which saves the most power. |
Turn off background apps for one app in Settings
Tip: You can jump straight to these controls by typing Background apps into the Start search box.
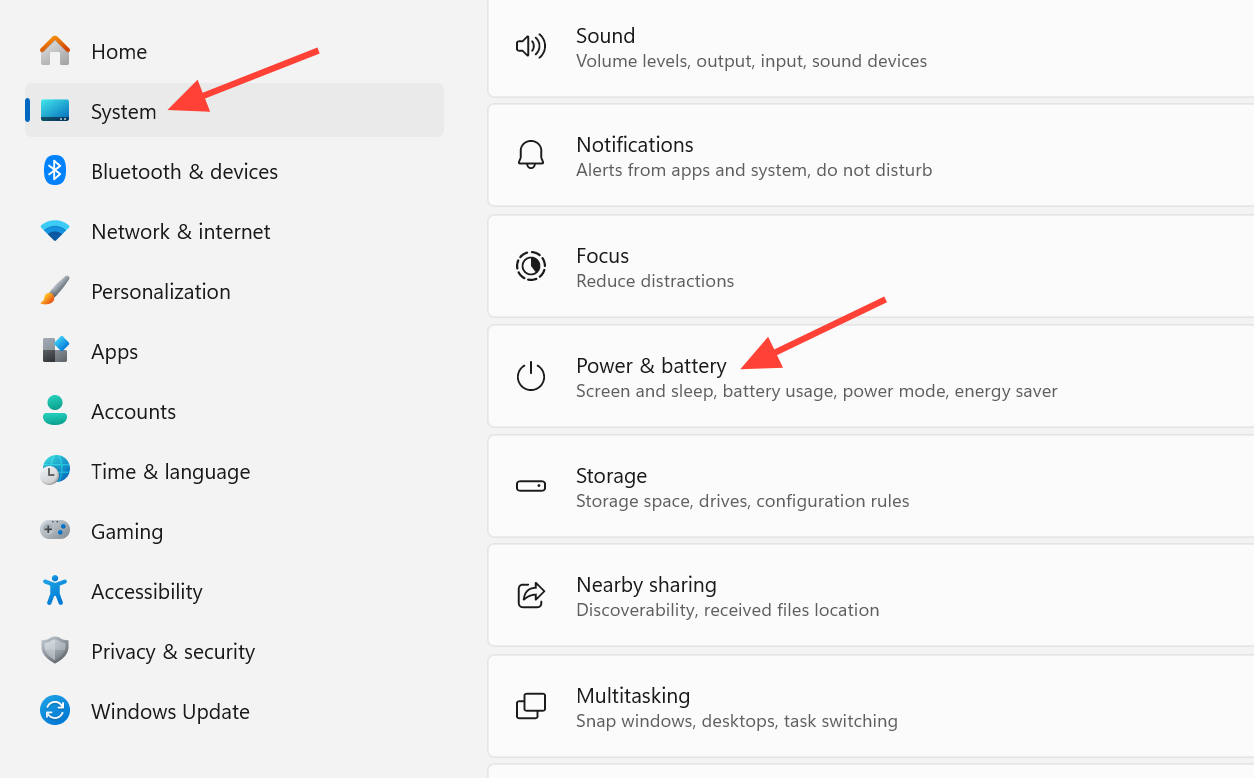
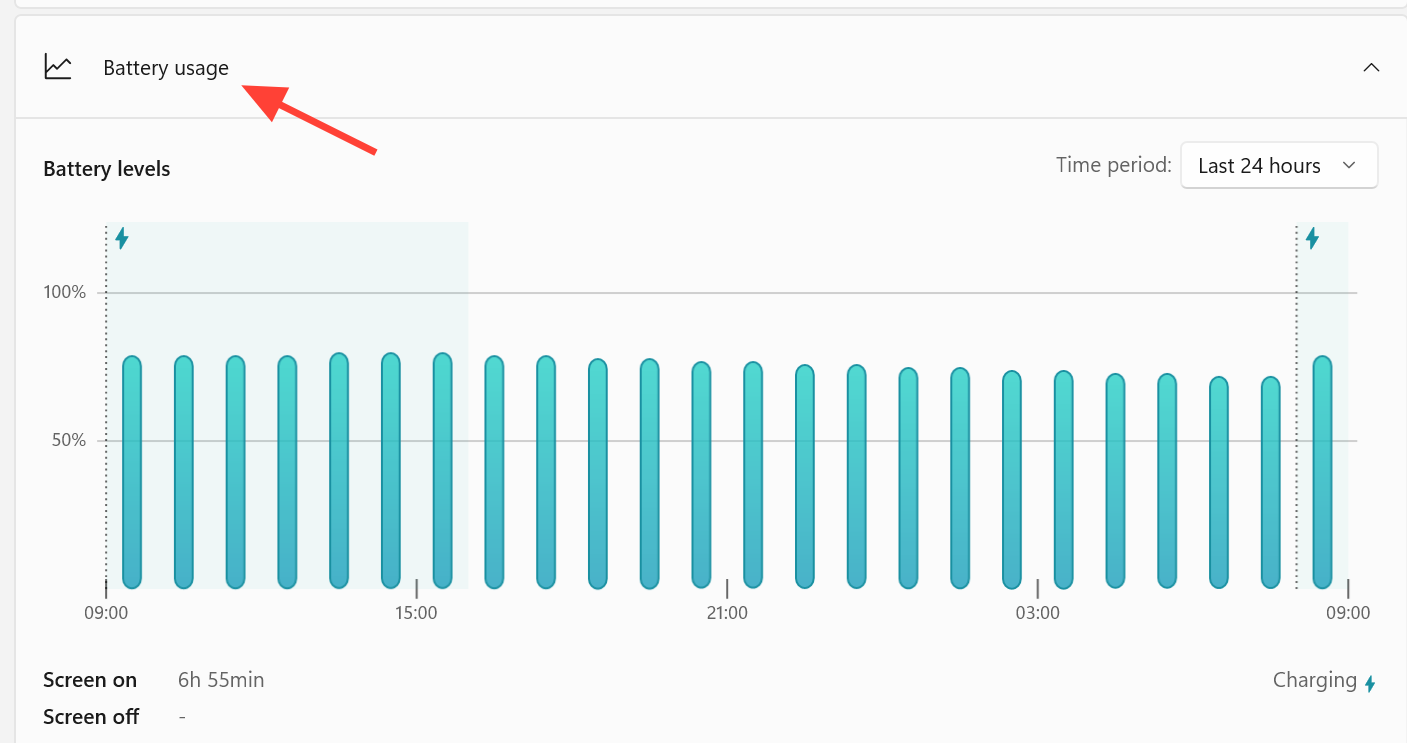
Manage background apps from Battery usage (laptops)
If your PC has a battery, there is a second route that also shows you which apps are draining power in the background. This makes it easier to target the worst offenders.
Stop most apps from running in the background at once
If you want a single switch instead of going app by app, the privacy controls let you cut off background activity globally. Open Start, then go to Settings > Privacy > Background apps. Turn Let apps run in the background to Off, and most apps stop running behind the scenes. You can read more about how this affects notifications and syncing on the Windows background apps support page.
Use Task Manager to see and stop background processes
The permission settings only cover apps from the Microsoft Store. To see everything running right now, including system tasks, open Task Manager with Ctrl+Shift+Esc. The Processes view groups items under Background processes, where you can right-click an app and choose End task to close it immediately. The Performance tab shows what is using your CPU and RAM if you want to confirm an app is actually causing a slowdown.
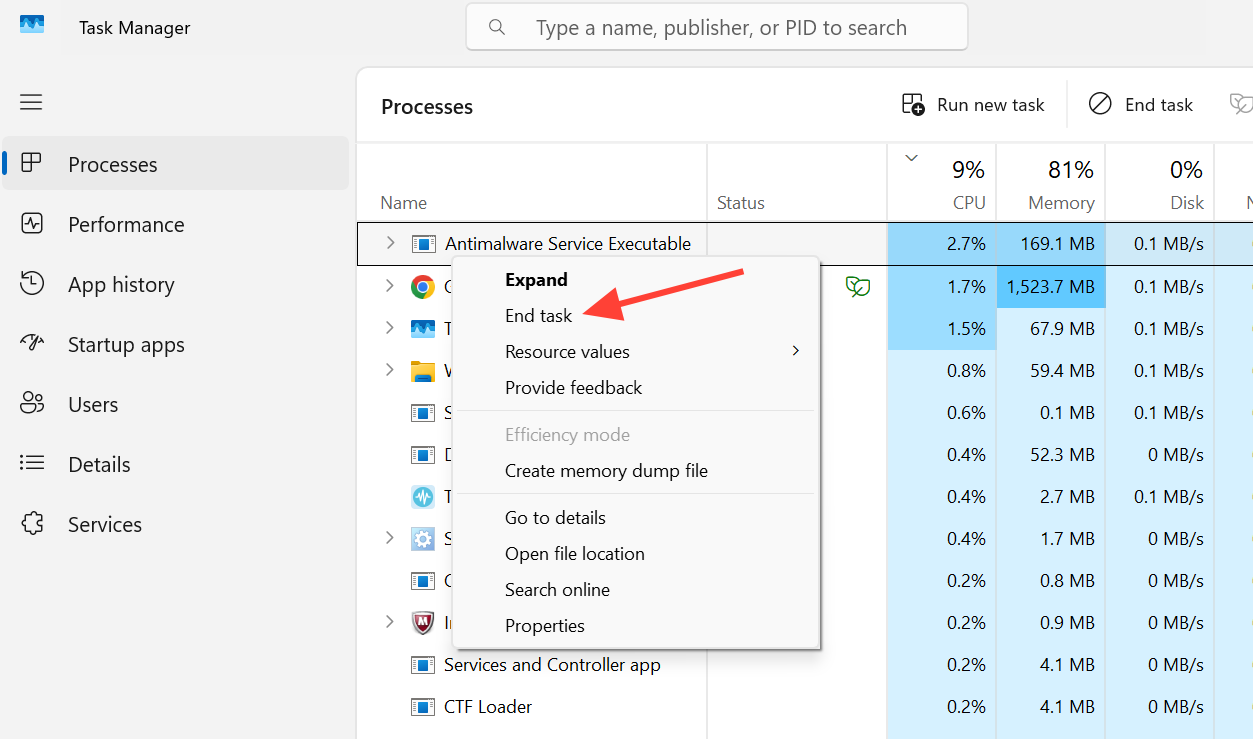
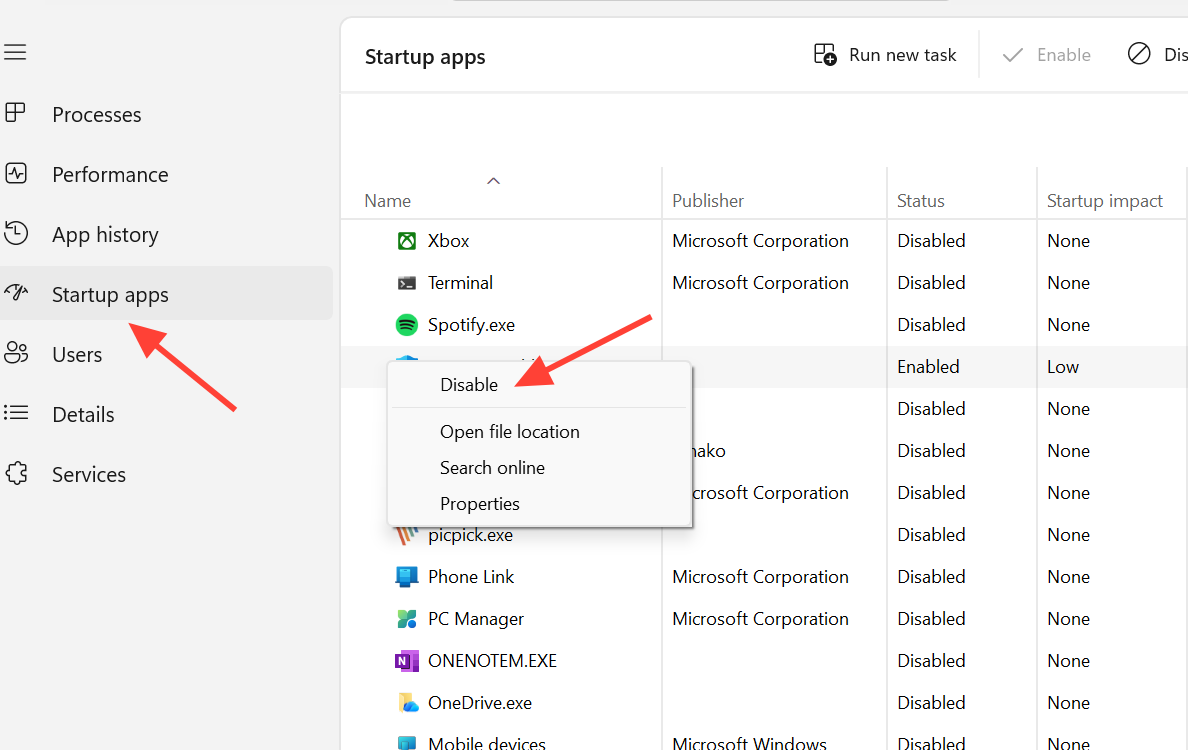
Ending a task is temporary. If an app is set to start with Windows, it can relaunch on the next boot or restart on its own. To stop that, go to the Startup apps tab in Task Manager, select the apps you do not want, and choose Disable.
Note: High RAM usage by itself is not always a problem. Windows 11 keeps frequently used apps cached in memory to speed things up, and it prioritizes the app you are actively using, so background apps are often throttled automatically.
Disable background apps for all users with Group Policy
On Windows 11 Pro, Enterprise, and Education, you can force the setting for every account at once. You need to be signed in as an administrator, and the Local Group Policy Editor is not available on Home.
Why some apps keep running anyway
Desktop programs installed from the internet or from a disc, the ones launched through .EXE or .DLL files, do not appear in the Choose which apps can run in the background list. The global Let apps run in the background switch does not affect them either. To stop those, open the app’s own settings and look for an option like minimize to system tray when closed and turn it off, or disable it from the Startup apps tab.
You can confirm a change worked by reopening Advanced options for the app and checking that the permission still reads Never, and by watching Task Manager to see whether the app reappears under background processes. If an app is missing the Advanced options entry entirely, it does not support these permissions, and Task Manager’s Startup tab or the app’s internal settings are your best tools. A faster, lighter PC after the change is the clearest sign it took effect, though a single lightweight app like Microsoft To Do will not noticeably move performance on its own.


