
- Smart Charging is a feature implemented by PC manufacturers to maximize your device's battery health by preventing it from charging to 100%.
- There's no direct option to disable Smart Charging in Windows 11 settings but you can disable it from the manufacturer's app.
- If the manufacturer's app proves unhelpful, you'll need to enter the BIOS/ UEFI settings on your PC to disable smart charging.
What is Smart Charging
Lithium-ion batteries wear over time. As your battery ages, its charging capacity as compared to when it was new will reduce. There's nothing you can do about it. However, if you have bad charging habits, this will all happen much faster.
One such bad charging habit includes keeping your laptop plugged in long after the battery has charged fully. Even if you don't keep it plugged after it has fully charged, but are frequently charging it to 100%, you're causing damage to your device's battery. Unfortunately, an average user rarely concerns herself with her charging habits. Smart Charging comes to your rescue in this case.
Smart Charging in your laptop handles the charging for you and prevents the battery from charging to 100%. Generally, it limits charging to a number such as 80 or 85 percent, even if the device is still plugged in which can sometimes lead users to believe there's something wrong. Rest assured, there's nothing wrong, it's just your device working to minimize battery deterioration. But this does mean that you will get less usage between charges.
While Smart Charging is fine when you're near a power outlet, say at your desk, you might want to turn it off when you're traveling.
However, there's one slight problem. Turning off Smart Charing on Windows isn't a simple feat. You cannot go into Settings and simply disable it. Navigating to Settings > System > Power & battery will let you know that Smart Charging is enabled (on a compatible device) but won't provide an option you can just toggle off.
It will lead you to a Microsoft support page that'll tell you what Smart Charging is, and why you should keep it enabled, with only information about how to turn it off being "refer to manufacturer's website".
But there's no need to fret. Most manufacturer software will let you manage the feature, though they may have a different name for it than Microsoft. Depending on your PC, here's what you can do.
Pause Smart Charging on a Microsoft Surface Device
If you own a Surface laptop from Microsoft, smart charging is easy to handle.
If you discharge your battery below 20%, it will automatically disable Smart Charging. It will also pause automatically if you frequently use your battery.
However, you can also pause it manually from the Surface app.
- Go to the search option and type
Surfaceto open the app. If no such app exists on your PC, download it from the Microsoft Store. - The Surface app will display the status of your Surface and any other connected devices. Make sure you've selected the Surface device.
- Then, expand the option for 'Smart Charing'. If you can't find it, look for a 'Battery & charging' section in the app where the Smart Charging option has been moved to in new updates.
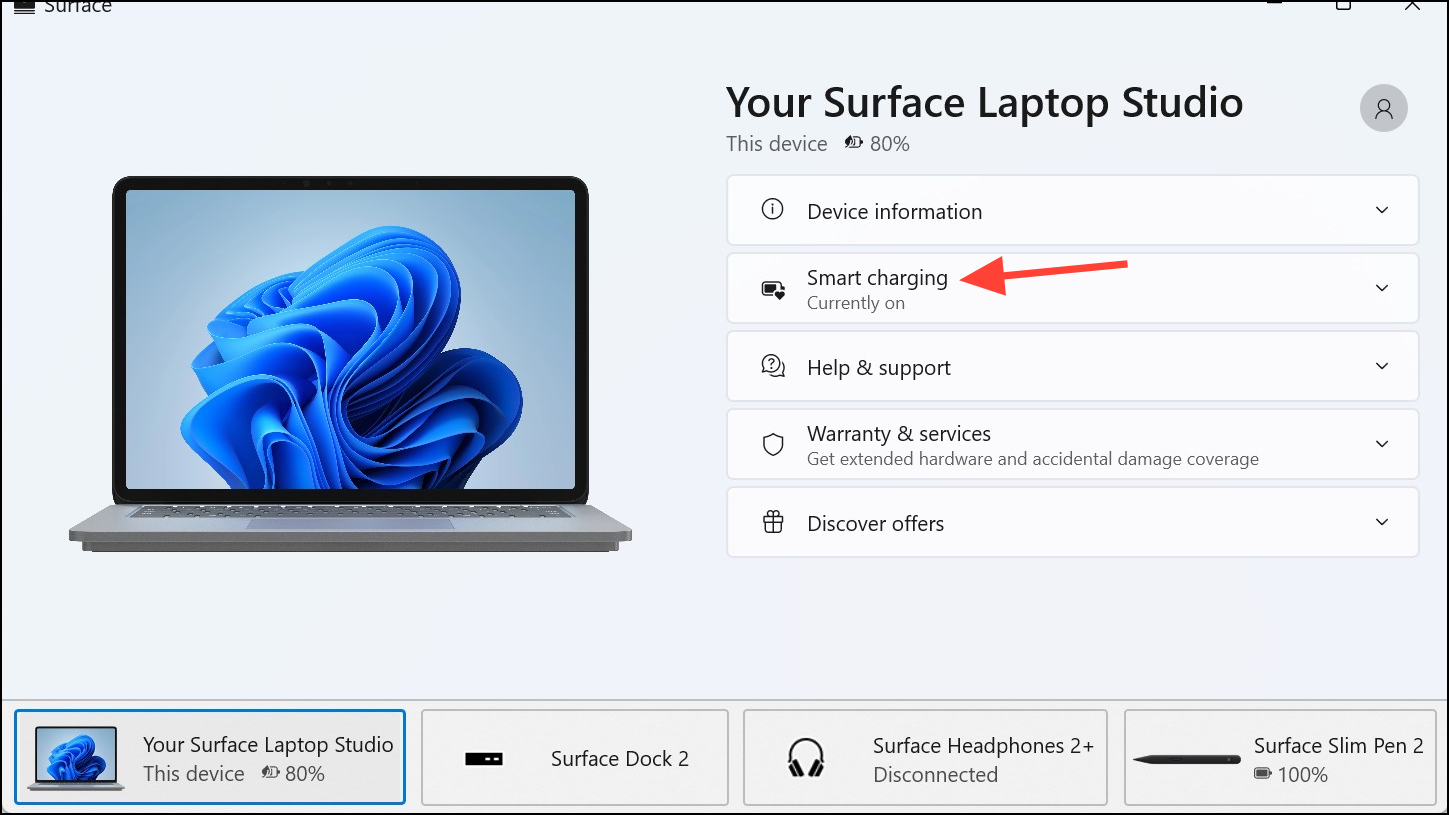
- Finally, select 'Pause'/ 'Charge to 100%' from the tile.
Things to know:
- That's one of the caveats with smart charging on Surface devices, though. You can only pause Smart Charging on your Surface device and not turn it off indefinitely. It will turn on again after a few days, depending on your battery usage patterns.
- So, if you're still using your battery too frequently and not charging it often, indicating that you're working away from your desk, it might not turn on again too soon. However, it also could, since Microsoft says to pause Smart Charging a few hours before you'll need the full battery and not too soon since it might turn on again.
- And that's another problem with this implementation. There's no direct option to enable Smart Charging for Surface devices. Your PC will enable the option automatically only.
- You can always check whether Smart Charging is on or not by peeking at your battery icon in the taskbar or the Power & battery settings page; it will have a heart icon when Smart Charging is on. You can also open the Surface app to verify the status.
Disable Smart Charging on a Samsung PC
If you own a Samsung device with Smart Charging, or Battery Life Extender as Samsung calls it, you can turn it off from the Samsung Settings app.
- Depending on your device, one of these apps will be available for download from the Microsoft Store: Samsung Settings, Samsung Settings 1.1, or the Book Settings app (for Galaxy Book models).
- If you can download neither app, you'll need to recover the app that was preinstalled on your PC using the Samsung Update app. If that doesn't work either, you'll need to perform a factory reset.
- Once you have the app installed on your PC, simply open it, navigate to 'Power Management' from the left menu, then turn off the toggle for 'Battery Life Extender'.
Disable Smart Charging on an ASUS PC
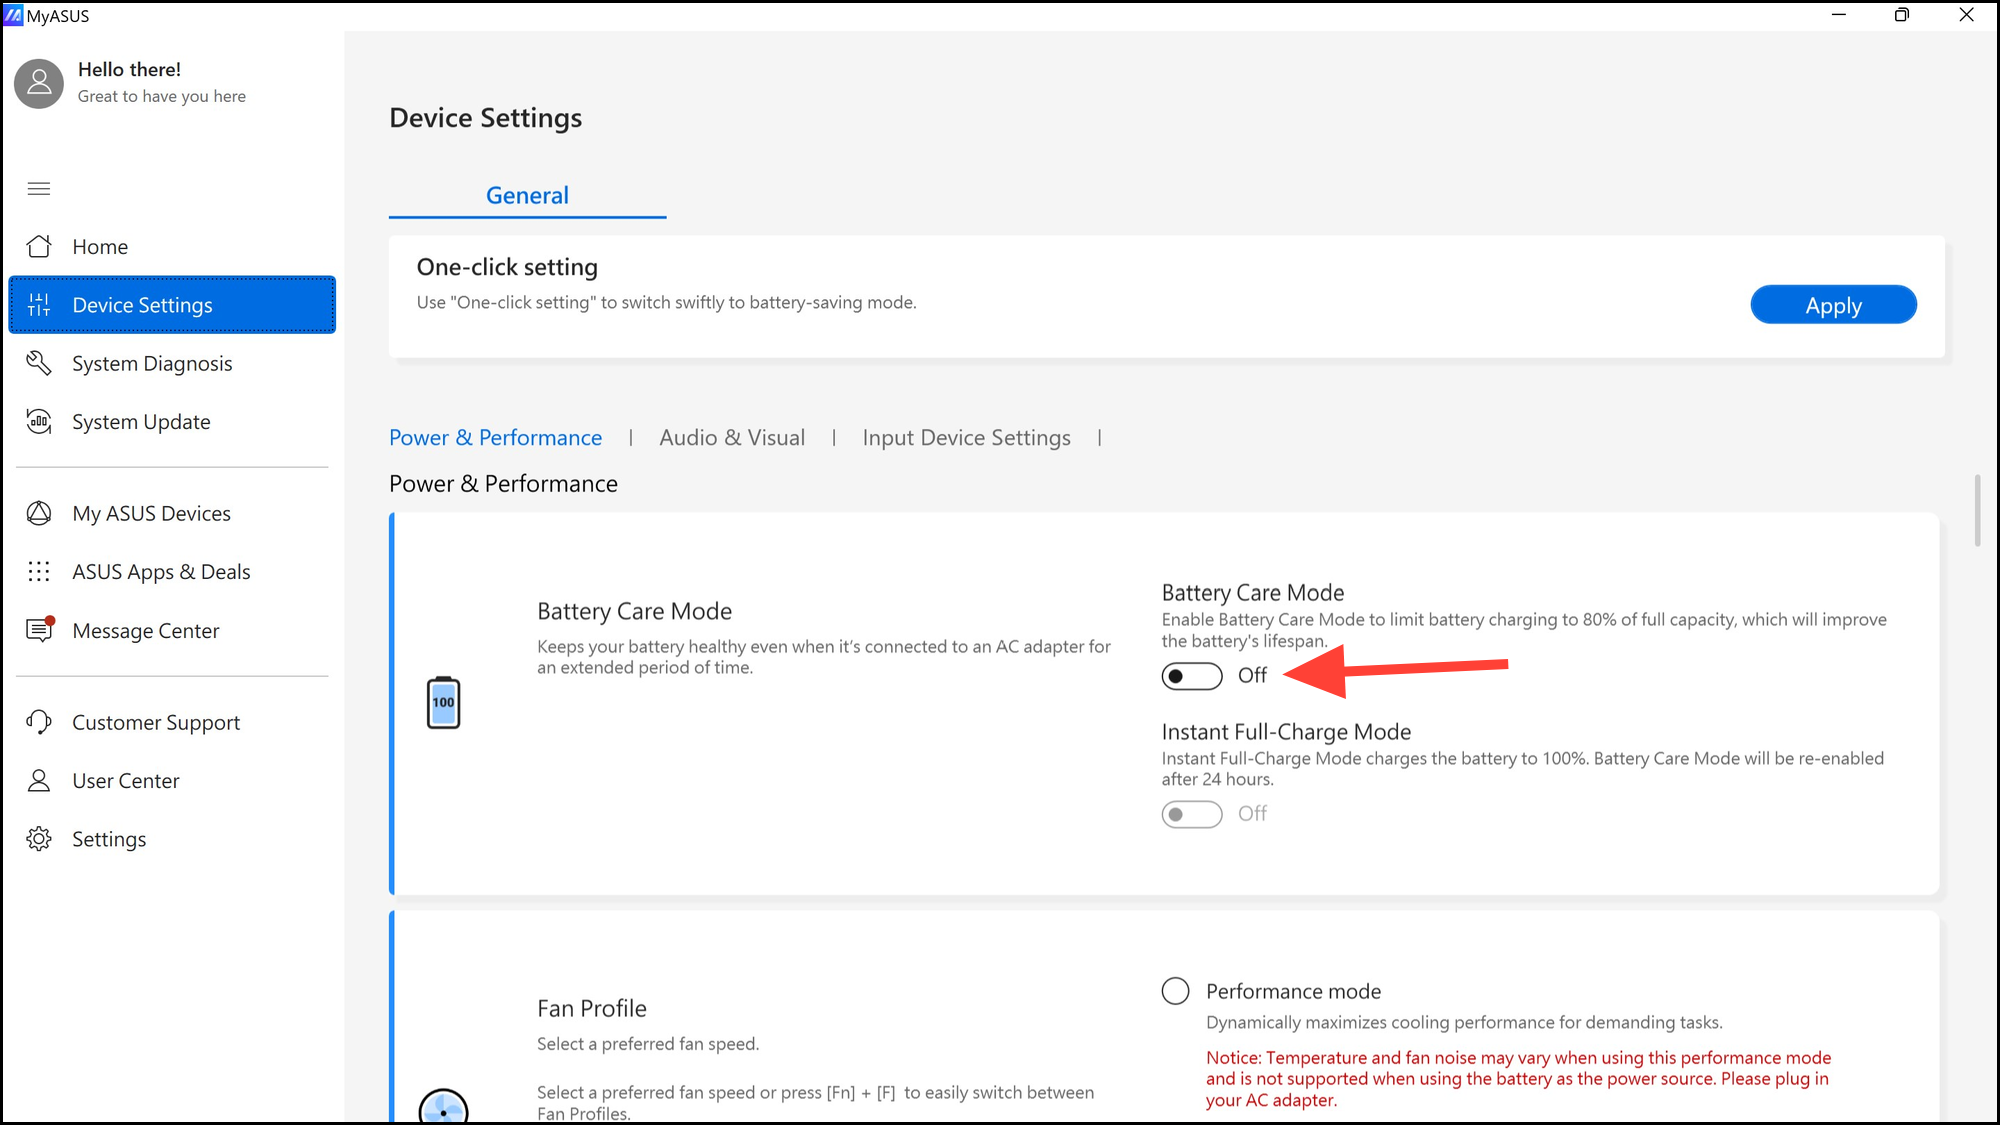
- Open the MyAsus app on your PC, or get it from the Microsoft Store here.
- Then, navigate to 'Device Settings'.
- Next, in the 'Power & Performance' settings, turn off the toggle for 'Battery Care Mode'.
Similarly, you'll need to install the app from your PC's manufacturer to manage the battery settings. If you cannot find the option for it in the app, you can manage and disable Smart Charging from the BIOS/ UEFI settings for most laptops.
Go into BIOS settings
You can disable Power Management settings in BIOS if your PC implements any form of smart charging and you cannot disable it from the PC manufacturer's app.
- To do that, you'll need to boot into UEFI settings on your PC either at startup or from the Settings menu. Follow the instructions in the guide below to enter UEFI settings.

- Then, look for 'Advanced' or 'Power' section in the settings.
- Next, disable the option for 'Power Management' or 'Battery Limit' or something similar. Different manufacturers implement settings differently so you'll need to find the correct option.
Now, when you boot your PC, your battery should charge to 100%. If it still doesn't, you can try resetting the battery by turning off your PC, removing the charger, and then holding down the power button for more than 15 seconds.
Smart charging is good for your laptop's battery health in the long run. So, we'd recommend that you keep the feature on when you can readily access a power outlet, even if it means plugging in your laptop more frequently. Only disable it when you need every second of life you can squeeze out of your laptop and re-enable it again when you're no longer traveling.