While Google Chrome is one of the most popular web browsers available, you might have found another browser that better suits your needs or simply want to free up system resources on your Windows 11 PC. Uninstalling Chrome can help you achieve that, and fortunately, the process is straightforward and can be done in a couple of ways.
Remove Chrome Using the Settings App
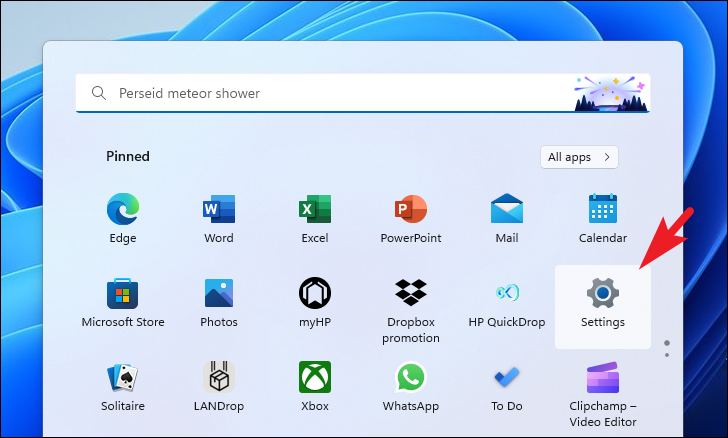
Step 1: Open the Settings app on your Windows 11 PC. You can do this by clicking on the Start menu and selecting the Settings app tile. Alternatively, press Windows + I on your keyboard to launch it directly.
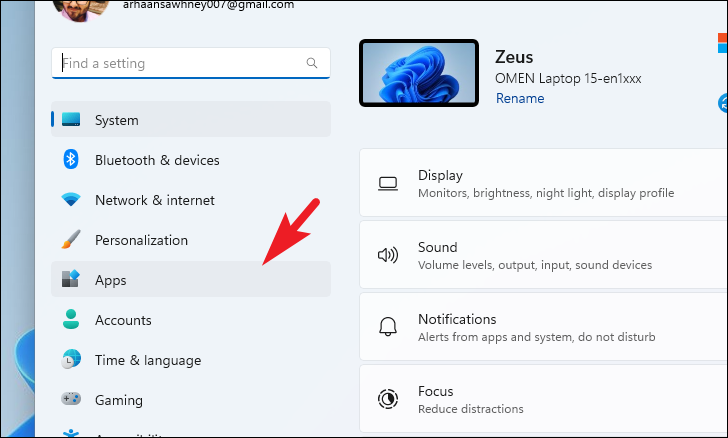
Step 2: In the Settings window, navigate to the left sidebar and click on the Apps tab.
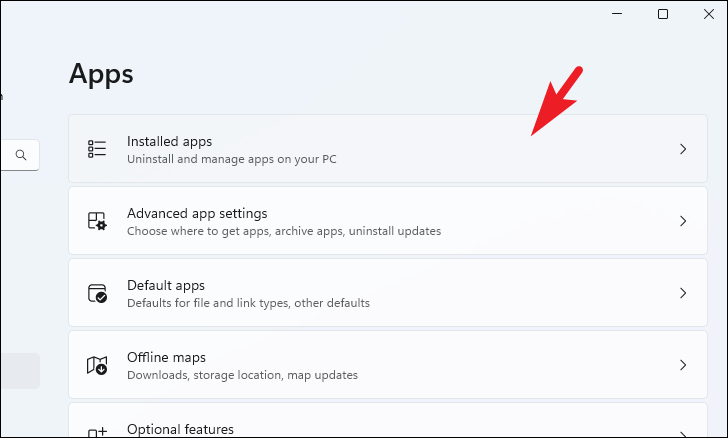
Step 3: On the right pane, select the Installed apps option. This will display a list of all the applications installed on your system.
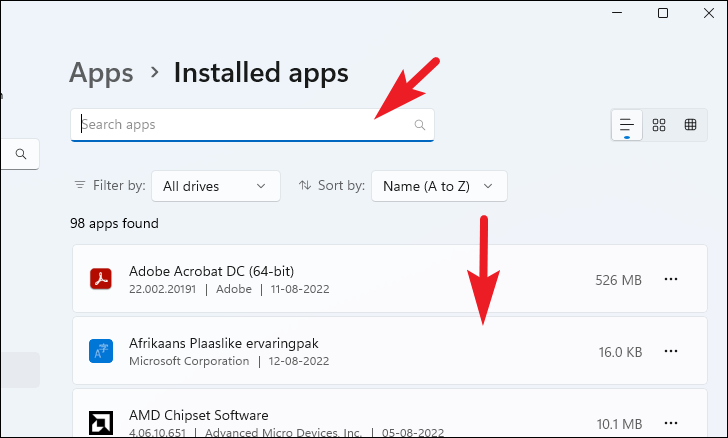
Step 4: Scroll through the list to find Google Chrome, or use the search bar at the top to locate it quickly by typing "Chrome".
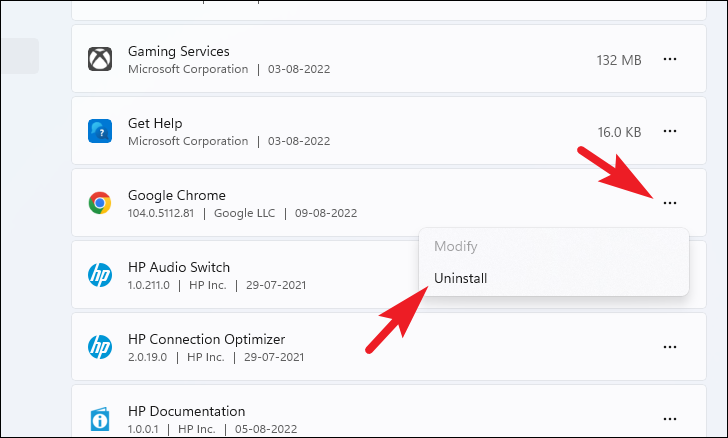
Step 5: Once you've found Google Chrome in the list, click on the three horizontal dots (ellipsis) next to it, and select Uninstall from the dropdown menu.
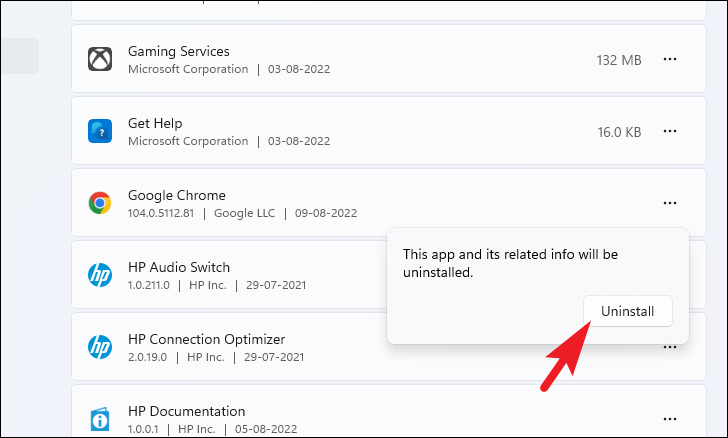
Step 6: A confirmation prompt will appear. Click on Uninstall again to proceed with removing Chrome from your system.
After completing these steps, Google Chrome will be uninstalled from your Windows 11 PC.
Remove Chrome Using the Control Panel
If you prefer using the Control Panel, you can also uninstall Chrome through the Programs and Features utility. This method is just as effective and might be more familiar to users who have used previous versions of Windows.
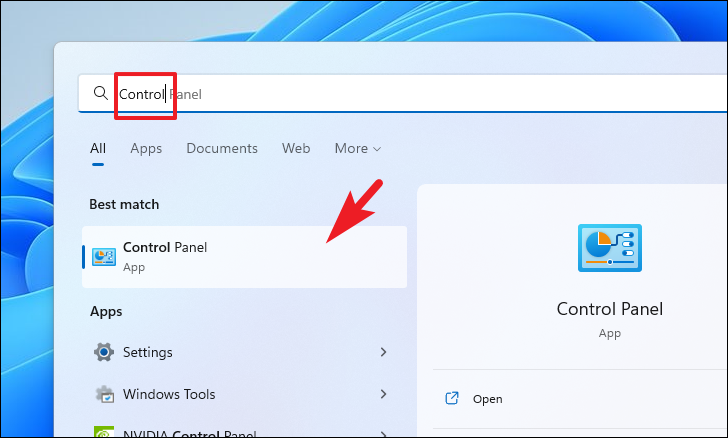
Step 1: Open the Control Panel by clicking on the Start menu and typing Control Panel in the search bar. Click on the Control Panel app from the search results to open it.
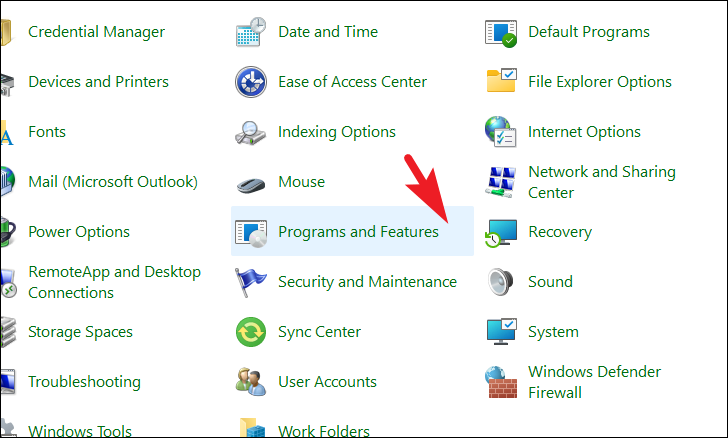
Step 2: In the Control Panel window, click on the Programs and Features option. If you don't see this option, make sure the "View by" setting is set to Large icons or Small icons.
Step 3: A list of all installed programs will appear. Scroll down to locate Google Chrome.
Step 4: Click on Google Chrome to select it, and then click on the Uninstall button at the top of the list. You can also right-click on Google Chrome and select Uninstall from the context menu.
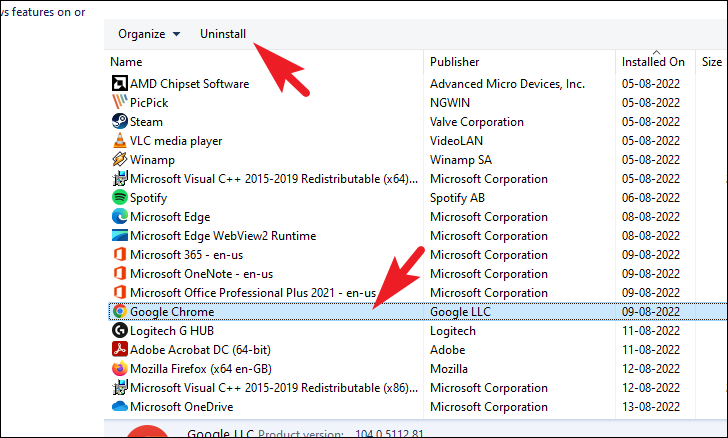
Step 5: Follow any additional on-screen prompts to complete the uninstallation process.
Once the process is finished, Google Chrome will be completely removed from your computer.
Uninstalling Google Chrome from Windows 11 is a simple process that can be done via the Settings app or the Control Panel, depending on your preference. This allows you to free up resources or switch to a different browser with ease.


Member discussion