
Windows has a built-in anti-virus to protect your computer from malware and keep it secure. However, the anti-virus has to be accessed either from the ‘Settings’ or by searching in the ‘Start Menu’, which most pro users are not very much a fan of. If you are one of those, Windows 10 allows you to use Microsoft Defender Antivirus from the command line on Windows 10.
It’s a fairly simple process and you just have to remember the command to use the antivirus or you could jot it down. Once you get a grasp of it, you wouldn’t be browsing your way through the settings to run a scan, rather you would use the command for it. This consumes considerably lesser time than the conventional approach and is equally effective, which draws users towards it.
You can run not just a scan but perform various others functions as well, which we will discuss in the following sections.
Running a Quick Virus Scan with Command Prompt
A quick virus scan looks for malware and viruses in folders and Windows Registry and not throughout the system, which makes it slightly less effective than a full scan but if you are running low on time, this could be your go-to option.
To run a quick virus scan, search for ‘Command Prompt’ in the Start Menu, right-click on it, and then select ‘Run as administrator from the menu.
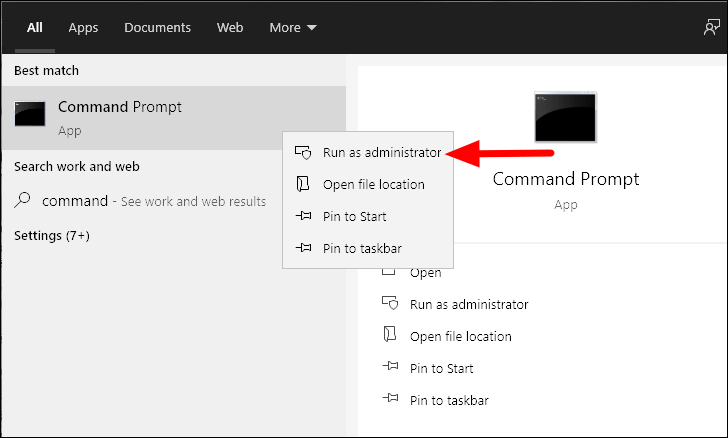
You will now receive a prompt, click on ‘Yes’ to run the Command Prompt as administrator.
In the command prompt window, enter the following command to run a quick virus scan.
"%ProgramFiles%\Windows Defender\MpCmdRun.exe" -Scan -ScanType 1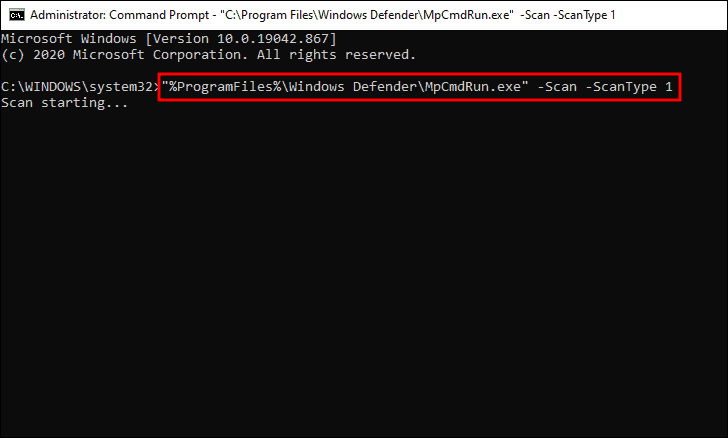
As soon as you enter the command, a quick scan will start which will take a couple of minutes to complete, depending on the data stored in your computer.
Running a Full Virus Scan with Command Prompt
A full virus scan is comprehensive and checks your system thoroughly for viruses and malware. This scan consumes more time than a quick one but should be performed periodically to keep your computer and data safe.
To run a full scan, enter or paste the following command in the Command Prompt and then press ENTER.
"%ProgramFiles%\Windows Defender\MpCmdRun.exe" -Scan -ScanType 2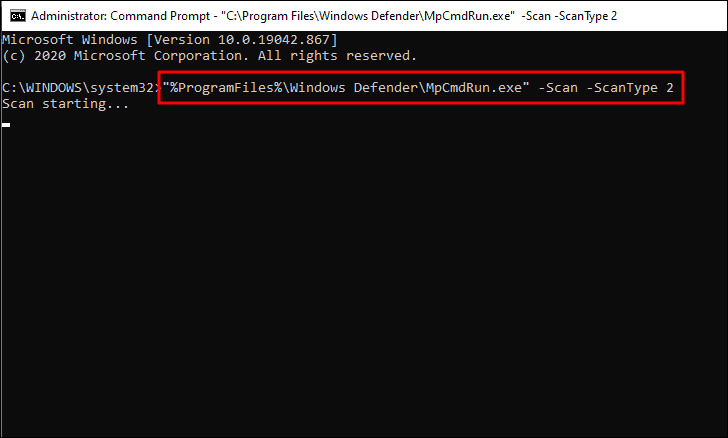
Running a Custom Virus Scan with Command Prompt
Many a time, there arises a need to scan a particular folder or location on your hard drive. To do so, you do not necessarily have to run a full scan, rather you can scan that particular location using the command prompt.
To run a custom virus scan, enter the following command in ‘Command Prompt’.
"%ProgramFiles%\Windows Defender\MpCmdRun.exe" -Scan -ScanType 3 -File "Address"
All you have to do is just replace ‘Address’ in the above command with the actual path of the folder or file that you intend to scan. For this article, we will be scanning the folder with the following path. You can similarly use the address for the folder that you want to scan and add it to the command in place of ‘Address’.
D:\Random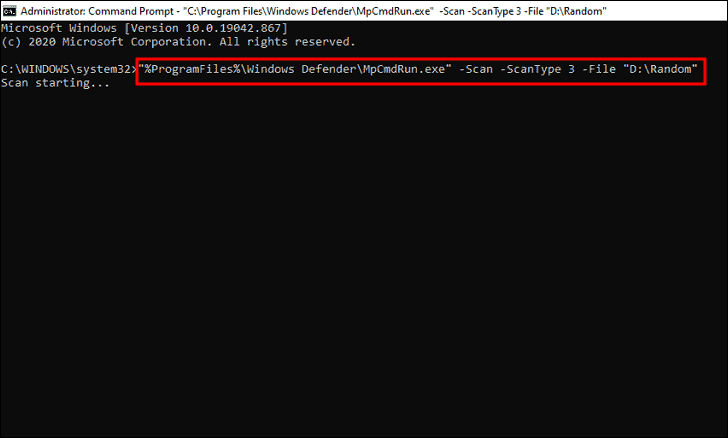
Also, you can cancel any scan while it’s in progress using the CTRL + C keyboard shortcut.
Running a Scan for the Boot Sector Files
The boot sector in your computer stores all the files that are responsible for boot-up. In case you are having trouble booting the system, you must run a scan on the boot sector files. This generally happens when a virus or malware infects the boot sector, thus affecting the boot-up.
To run a scan for the boot sector, enter the following command in the Command Prompt and then press ENTER.
"%ProgramFiles%\Windows Defender\MpCmdRun.exe" -Scan -ScanType -BootSectorScan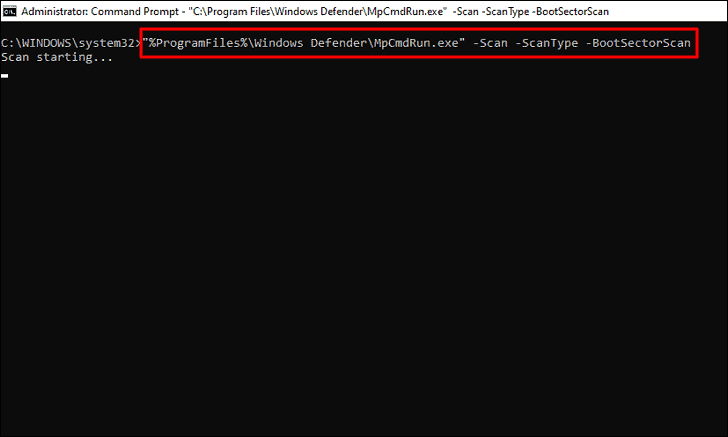
Restore File with Command Prompt
Microsoft Defender Antivirus quarantines the files that have the potential to harm your computer, however, you may require them at a later point and want to restore/retrieve the file. This too can be achieved using a couple of simple commands in the command prompt. Also, sometimes the antivirus moves certain files which we trust to the quarantine folder, another reason to know how to restore files.
Before you start restoring files, you will need to first view the list of files that have been moved to quarantine. Use the following command to view these files.
"%ProgramFiles%\Windows Defender\MpCmdRun.exe" -Restore -ListAll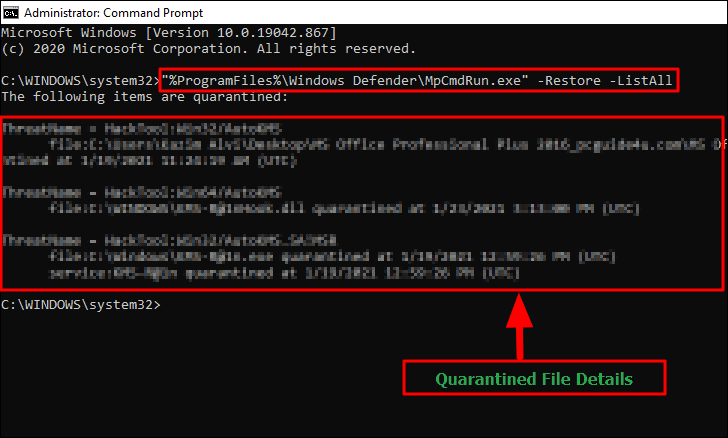
Once you have the list of files or programs name that has been quarantined, you can restore it using the following command by replacing ‘File’ in the command below with the name of the app or file that you want to restore.
"%ProgramFiles%\Windows Defender\MpCmdRun.exe" -Restore -Name File Updating Microsoft Defender Antivirus Using Command Prompt
Windows look for updates for Microsoft Defender Antivirus regularly and update it if any is available but you too can search for it using the command prompt. This enhances its effectiveness by adding new viruses and malware to the list, thus making your system more secure than ever.
To update Microsoft Defender Antivirus, enter the following command and then press ENTER.
"%ProgramFiles%\Windows Defender\MpCmdRun.exe" -SignatureUpdate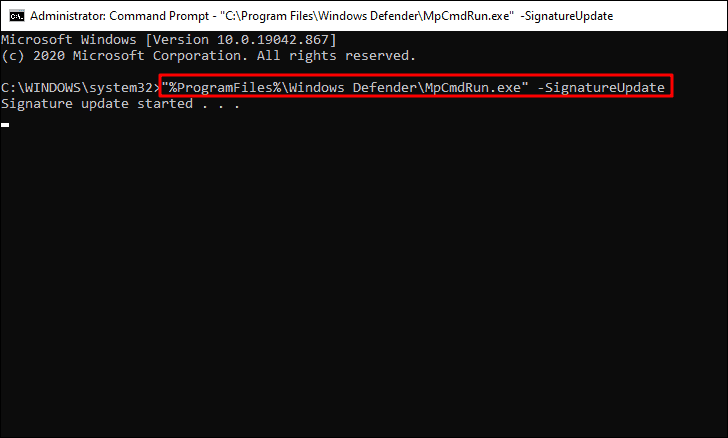
The update will start right after you press ENTER and will continue until the signature update is finished.
Once you are done reading this article, you will definitely switch to the command prompt when running scans. Also, you will end up saving some precious time that you earlier wasted locating the various options in the anti-virus program.


