

If you go back in time just a year, Microsoft Teams used to be complicated in its own right. Apart from use in the professional environment, not many people were fans of it. Then the pandemic hit, and users from every wake of life flooded to the app.
People weren’t using it for just offices or schools anymore, but to meet with friends and family too. From birthday parties, weddings, baby showers to movie nights, people were using it for everything. To make things easier, Microsoft introduced Teams Personal for friends and family. Microsoft Teams Personal peeled away all the complexities of the app that are required in a professional environment. And what remained was a simple video conferencing app that anyone could learn to use for personal usage in a jiffy.
But fast-forward to the release of Windows 11, and Microsoft Teams has officially become one of the most complicated aspects of the OS. With the introduction of Chat in Windows 11, Microsoft Teams now has more versions than sequels in most movie franchises. It has even become somewhat of a controversy, with a lot of users voicing their disapproval.
If you’re not disapproving, just confused, here’s a complete rundown of how to use the app going forward in Windows 11.
How is Microsoft Teams Different in Windows 11
Microsoft has included a Teams integration, namely Chat, in Windows 11. This integration makes Teams a pre-installed app in Windows 11 as opposed to Windows 10, where you had to download Microsoft Teams yourself.
But there’s still an instance of Microsoft Teams that you have to install in Windows 11, too, if you want to use it. And this is where the confusion begins. The taskbar entry point for Teams, i.e., Chat, is only for personal use. It uses the Microsoft Teams Personal version, and you can only use it with a personal Microsoft account.
On Windows 10, whether you wanted to use Teams with a Personal or Work account, you had to install the app, and there were no separate apps even though both accounts opened in different windows. There was a single app from where you could access all accounts, personal and work/ school alike.
In Windows 11, there are two separate apps: Microsoft Teams for Personal Use (that Chat uses) which comes pre-installed, and Microsoft Teams for Work and School which you have to download. If you had the Microsoft Teams app on Windows 10, though, and updated to Windows 11 instead of a clean install, you’ll have both apps on your PC.
How can you differentiate between two apps of the same name? From their icons. Although the icons for both apps are awfully similar, there’s one subtle difference. Not the best strategy, we know. The icon Microsoft Teams for Personal Use is the one with the white tile under the letter T, whereas Teams for Work or School has a blue tile under the letter T. No wonder there’s this much confusion!

Now that we have (hopefully) cleared some of the confusion, here’s how to use these apps in Windows 11.
How is Chat or Teams Personal Different from Teams for Work
Microsoft Teams was made to be a Workstream Collaboration app, not just a video conferencing app. As such, it has scores of features made solely to make collaboration easier. From channels to apps, there are a lot of features in Microsoft Teams engineered especially to foster collaboration even when working remotely.
But for someone looking to use Microsoft Teams for Personal Use, that’s a lot of clutter, which just complicates things. In Teams personal, there is no more clutter. Teams Personal is a toned-down version of Microsoft Teams with only features for chat, video and audio calls, scheduling meetings, and mild collaboration. Even the complicated bits of scheduling a meeting in Teams for Work are absent. You can use it with a personal Microsoft account only which is free to create.
Chat is a further lite version of Microsoft Teams Personal that brings the bare minimum necessities of a video conferencing app to your taskbar. Features like chat, audio and video calling, and instant meetings are now a native part of the Windows 11 experience via Chat. Teams is replacing Skype going further as Microsoft’s choice of video conferencing app for Windows.
A quick overview of some important features from Microsoft Teams for Work or School that are missing from Microsoft Teams Personal, and by extension, Chat:
- Teams or Channels
- Command Bar
- Breakout Rooms
- App Integration
- Captions and Live transcripts
- Meeting notes
But all these features are ones that people rarely, if ever, need to use in personal communications. Take, for instance, breakout rooms: you don’t need to break into smaller groups to discuss something when talking to friends and family. So the choice to exclude it is completely justified. These are just a few popular features from the Teams Work app off the top of our heads that have been dropped from Teams Personal. Teams Personal has been stripped down a lot!
Of course, there are still features that are common in both that you don’t see at first glance:
- Status
- Together mode
- Tasks tab in chats
- Focus mode in meetings
- Share Content
How to Use the Chat app in Windows 11 for Personal Teams Use
To use Microsoft Teams for Personal use, you can either use the new Chat integration of Windows 11, or you can use it directly from the app. Although Chat and the personal Teams app are both a means to use Teams with a personal Microsoft account, both have a few differences.
Setting Up Chat in Windows 11
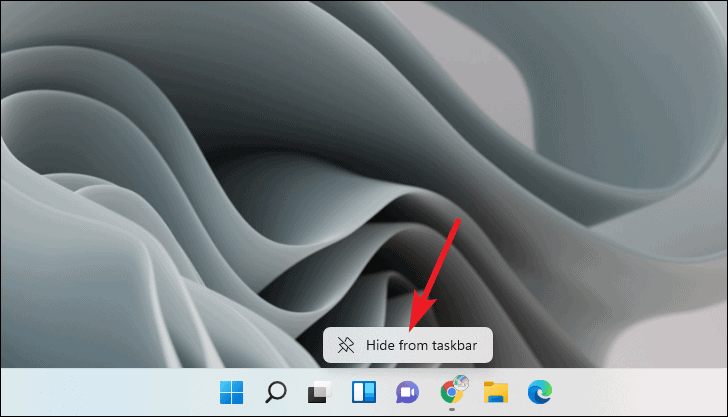
Although Chat is a pre-installed integration, you can opt not to use it and even remove it from your Taskbar. The simple way to do this is from the Taskbar itself. Right-click the Chat icon and click the ‘Hide from Taskbar’ option.
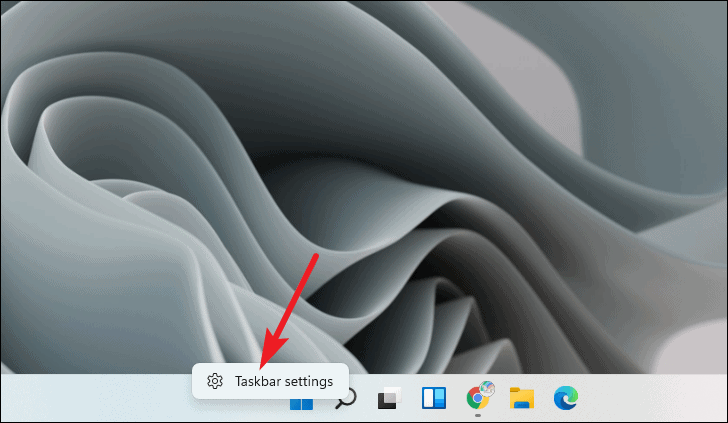
To enable it again, right-click anywhere on the taskbar and click ‘Taskbar Settings’.
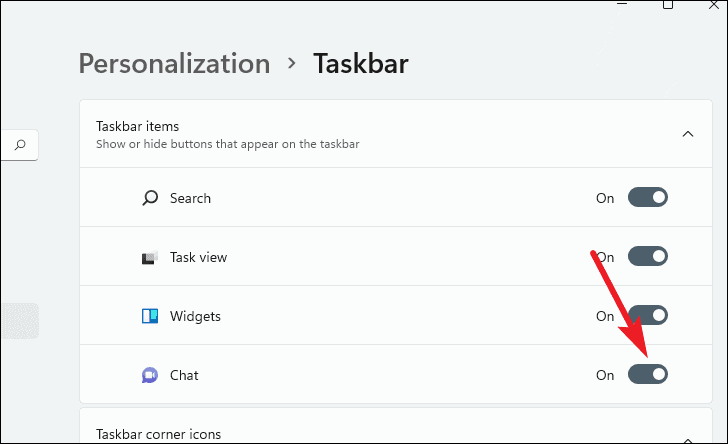
Personalization Settings for the Taskbar will open. Turn on the toggle for ‘Chat’.
To use Chat, you have to set it up initially. Click the ‘Chat’ button from the taskbar or use the Windows logo key + C keyboard shortcut.

Chat will open in a flyout window instead of a full-fledged app window. Click the ‘Get Started’ button to set up Chats for your Personal Microsoft account.

Note: You cannot use the Chat integration with a Microsoft work or school account.
Now, if you are logged in to your PC with a Microsoft account, your account appears in Chat as well. And you won’t even need to log in. Just click the account to continue with it. But you can also choose to use another account. Click the ‘Use another account’ option and enter the login details on the next screen.

Then, choose your display name for Chat. You can also see the number and email address that other people can use to find and contact you on Teams. To change these details, sign in to your Microsoft account on account.microsoft.com. You can also select to sync your Outlook and Skype contacts to find users who are also on Teams. You can alter this choice any time from settings. Once you’re satisfied with all the information, click ‘Let’s Go’ to finish the setup.

Alternatively, you might get the setup details all there in the Chat flyout window instead of the above windows. But the information will all be the same. You can either choose the Microsoft account shown and click ‘Let’s Go’ or choose to use another account for Chat.

Once you have set up Chat, you can directly use it in the future without ever having to sign in again until you manually log out.
Using Chat in Windows 11
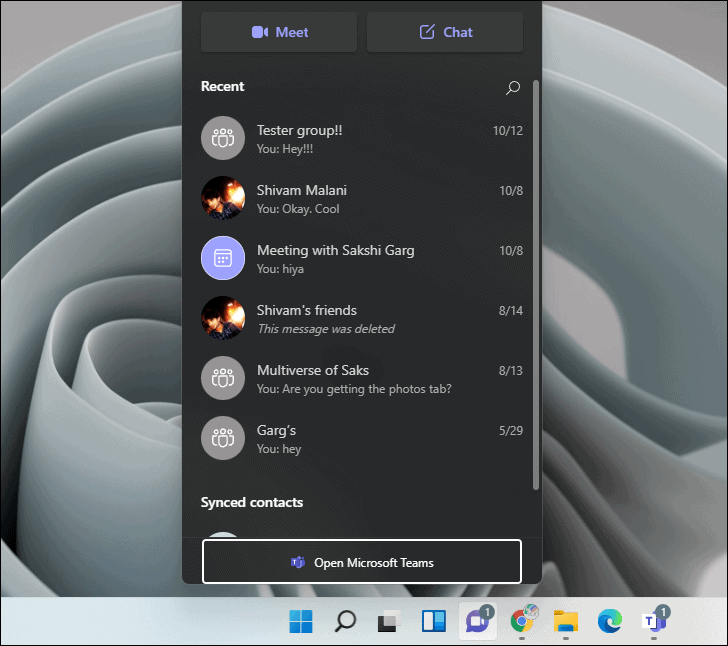
To use Chat, simply click the Chat icon from the taskbar or use the Windows + C keyboard shortcut from anywhere, whether you’re on the desktop or have another app open. Chat will open in its flyout window right there and you can click the Chat icon to tuck away the flyout window again.
The main part of the flyout window will be covered with your recent chats. Below recent chats, you’ll find your synced contacts from Outlook and Skype that you can hit up for a quick chat in a jiffy.
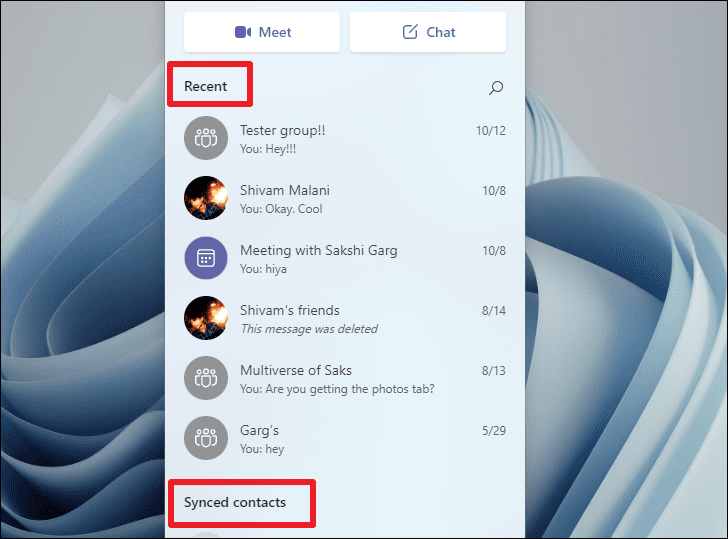
If you’ve never used Microsoft Teams Personal or Chat before to chat with someone, there won’t be any recent chats yet. You’d only have synced contacts. When you have no recent chats, neither any synced contacts, the flyout window will be empty except for the ‘Meet’ and ‘Chat’ buttons.
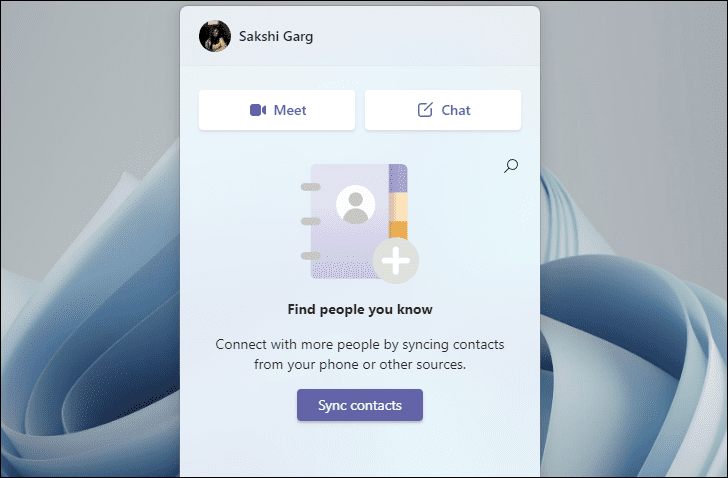
The main purpose of the Chat flyout window is to provide easy and quick access to communicate with others, which Microsoft has been trying to offer for some time now. But alas, the previous attempt with the People tab in Windows 10 fell flat on its face.
But with Chat, things will (hopefully) change. It certainly looks like that right now because of how quick Chat is. As you don’t have to open the Teams app to use Chat, the load time for all the features is a lot less; it’s practically non-existent.
Chatting using the Chat app
From the Chat flyout window, you can quickly communicate over chat, audio, or video call. To chat with someone, click their chat thread from the Recent chats. You can also have group chats in Microsoft Teams.

Chat will open in a pop-out window that still opens independently of the Teams app. So, again, it’ll load a lot faster than opening the app to chat with someone.

If the chat thread for someone is out of reach from the flyout window, use the ‘Search’ button above the recent chats in the right corner. The search button is only for searching for existing chat threads, though; you cannot search for a message within a chat.

To start a new chat with someone, click the ‘Chat’ button at the top of the flyout window.

Then, enter the name, email address, or phone number of the person you want to start the chat with. In the message box at the bottom, compose your message and click the Send button. If you enter a phone number or email address for someone and the person doesn’t have a Teams account, they’ll get an SMS or email for your message and an invite to join Teams.

Note: You cannot chat with or call a Microsoft Teams Work or School account if their organization doesn’t allow it.
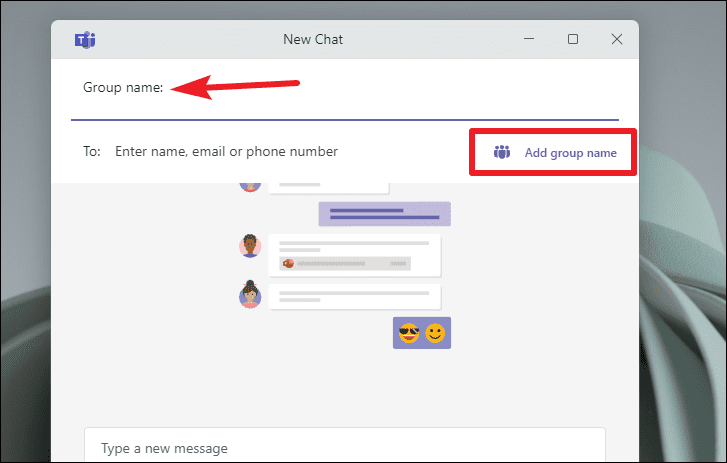
You can also start a new group chat from the Chat pop-up window. Enter the contact details for all the people you want to add to the group in the ‘To’ textbox. Then, click the ‘Add group name’ button to give the group a name.
Video/ Audio Calling and Meetings from the Chat app
To call someone, individual, or a group, go to their chat thread and hover over it. When you hover over a chat, icons for a video camera and a phone appear. Click the camera icon to start a video call and the phone icon to start an audio call.

Just like with chat, the call window will open in a pop-up window outside of the Chat flyout window. But still, it’ll open independently of the app. A Teams Personal meeting has far fewer options than a traditional Teams meeting. But you can still see the participant list, meeting chat, share content, or have emoji reactions from the meeting toolbar.
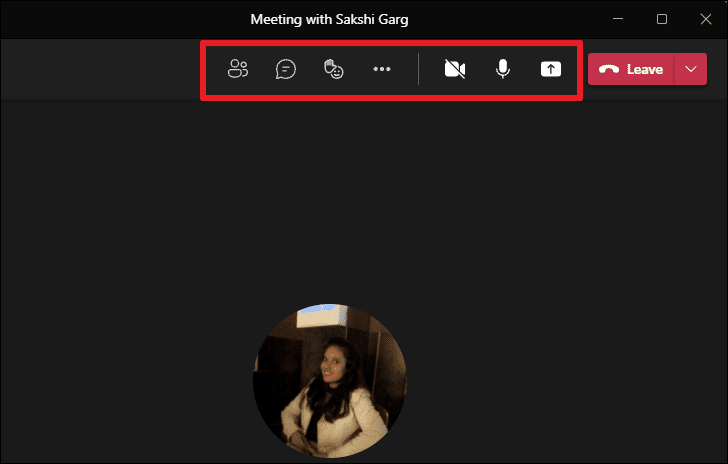
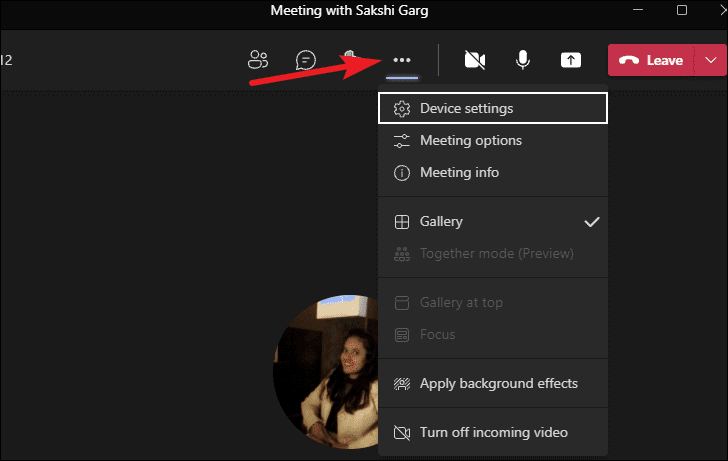
There are also additional options that you can access from the ‘More options’ (three-dot) menu. You can use Together Mode, switch to gallery view, use the new Focus Mode, and background effects.
To start a meeting independently of any chat, i.e., which anyone can join with the meeting link, click the ‘Meet Now’ icon at the top of the flyout window.

You can then either copy the meeting link or send the invite through Outlook calendar, Google calendar, or via your default email.

How to Use the Microsoft Teams Personal app
Although Chat offers a lot of features at your fingertips (or, rather the taskbar), you can have the full-fledged experience in the Microsoft Teams app. To open the app, either click the ‘Open Microsoft Teams’ button at the bottom of the Chat flyout window.

Or open it the traditional way like any other app from the Start menu, Search option, or any desktop shortcuts you have. Remember to open the app with the white tile in the icon.

In Windows 11, if you have already logged into Chat, your account will be logged in and available for use in the Teams Personal app, as well. But if you did not set up Chat, you have to log in to the Teams Personal app.
The screens to log in to the Teams Personal app are the same as the Chat app, and if you log in here, Chat will automatically be set up for the same account. That’s how interconnected both apps are!
The app has a navigation bar on the left. But unlike the other Teams app, it only has three tabs. As it has far fewer features than the traditional Teams app, it also loads a lot faster.
Note: Just like in Windows 10, you can still use your personal Teams account from the other Microsoft Teams app (work or school) in Windows 11, i.e., the one with the blue tile if you’re using the old version of the app. The latest update does not have this provision. But as the Teams Personal app loads a lot faster and you can access it from the Chat flyout window, it’s better to use the dedicated Personal app. With the work or school app, the number of steps needed to access the personal account is increased.
Navigating the Teams Personal App
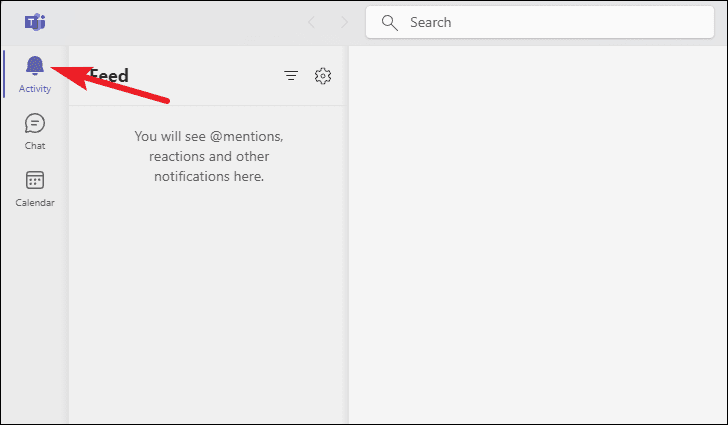
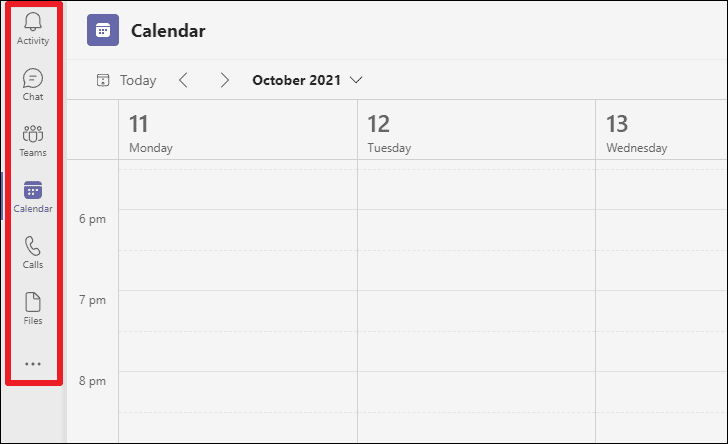
The Teams Personal app has tabs for ‘Activity’, ‘Chat’, and ‘Calendar’.
From the Activity tab, you can see any @mentions for you in chats, reactions, and other notifications like unread messages or missed calls. It’s a feed of everything you need to stay on top of in Teams Personal.
For users with a very hyperactive feed, you can use the ‘Filter’ option to select notifications for only one type of category. You can also search for particular notifications within those categories by typing the keyword in the filter textbox.

From the Chat tab, you can see the list of all your active chats and not just recent chats that the Chat flyout window displays.
Click on a Chat thread from the list to open a chat. The chat interface has added functionality that the chat pop-out window does not. In addition to your chats, the app will also have separate tabs for ‘Photos’ or ‘Files’ depending on the type of media exchanged in the chat. So any photos or files that you have sent or received in the chat will all be available in a single place.

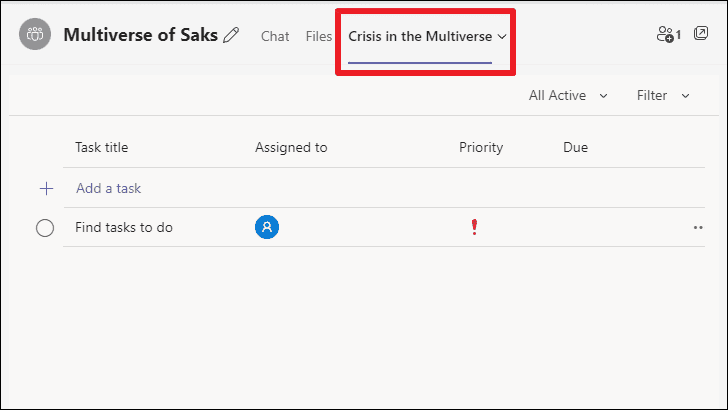
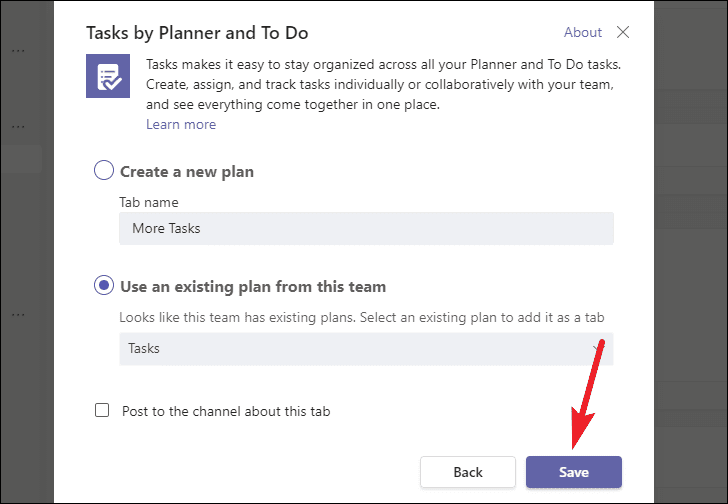
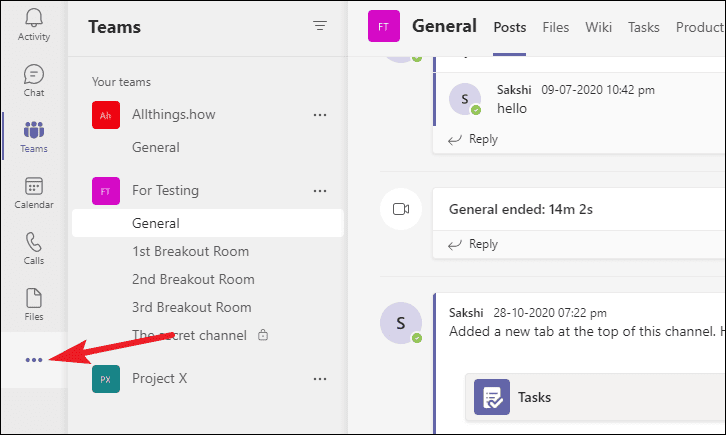
You can also add a Tasks tab and collaborate on tasks in the Teams app, which isn’t possible in the pop-out chat from the Chat app. Whether you want to plan a vacation, surprise birthday parties, or whatever else, you can all collaborate on tasks that need to be done. Click the ‘+’ icon next to the present tabs at the top of chats. Then, select ‘Tasks’ to add it.

A layover window for Tasks will open. Enter the name for the tasks tab. By default, the tab will be named ‘Tasks’ and click ‘Save’.

The Tasks tab will be added to the chat where you can now add new tasks. And as Tasks are collaborative, any person in the chat or the group regardless of whether they were the one to add the tab can add and edit tasks in the list.
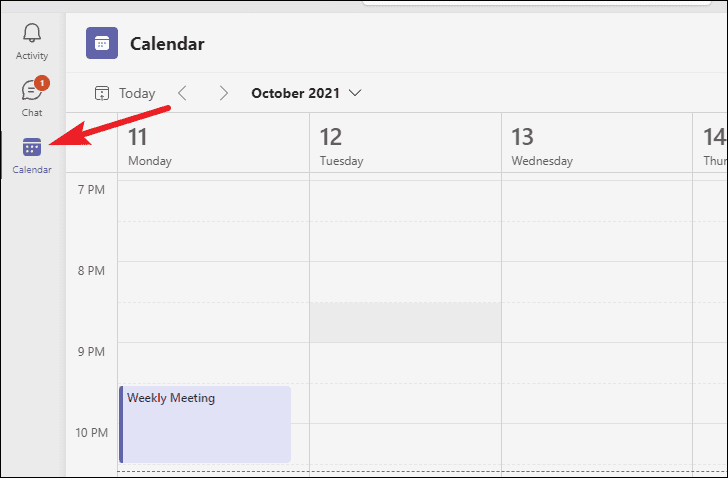
The last tab is the Calendar tab. Similar to the traditional Teams app, the Calendar tab helps you keep track of any upcoming meetings and lets you schedule meetings. You’ll find that even scheduling meetings UI is simpler in this app. For starters, you can’t add any participants to the meeting while scheduling. Of course, that’s because there are no participants to add, as there is no organization and this is a personal account.
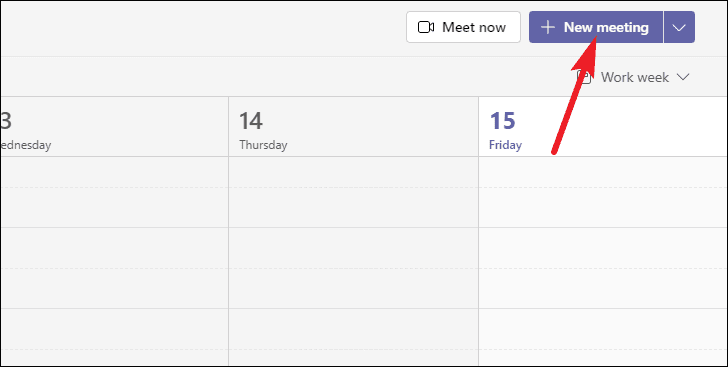
You have to send the invite after scheduling the meeting. Click the ‘New Meeting’ icon in the top-right corner.

Then, enter all the details in the meeting details page like the meeting name, date and time, recurrence details, any notes, etc., and click the ‘Save’ button.

Once you click Save, options for sharing the meeting will appear. You can either copy the link and send it then or use the external Google Calendar app to send out invites. Using the Google Calendar app, you’ll be able to add the participants’ names and track their RSVPs in the Teams app itself.

The Teams app also has a search bar that you can use to search for not just people and chat threads but messages within chats, as well. This again offers additional functionality than the Chat app. But unlike the Teams Work or School app, it’s not a command bar.

Managing Settings and more for the Teams app
Using the Teams Personal app, you can manage settings like the appearance, notifications, when to start Teams, set your status, and even log out of your account; all of this is only possible from the Teams and not the Chat app.
To open the settings, go to the Title bar and click the ‘Settings and more’ icon (three-dot menu) and select ‘Settings’ from the menu.

The Settings overlay window will open. On the left is the navigation menu. From the ‘General’ tab, you can choose whether Teams should start automatically when you turn on your PC. When you turn off the option for ‘Auto-start Teams’, Teams won’t start automatically and the first time you click ‘Chat’ after turning on your PC, it’ll take a few seconds to load as the app will still be starting up.

To edit preferences for notifications, go to ‘Notifications’. By default, the notifications for the Chat and Teams app will include a preview of the message. You can disable it by turning the toggle for ‘Show message preview’ off.

To manage how you get your notifications, click the ‘Edit’ option next to Chat.

Here, you can decide what you get notifications for and how. For example, by default, notifications for @mentions are delivered through desktop banners and in your activity feed. But you can confine those notifications to only the feed. Click the drop-down menu and select ‘Only show in Feed’ from the options.
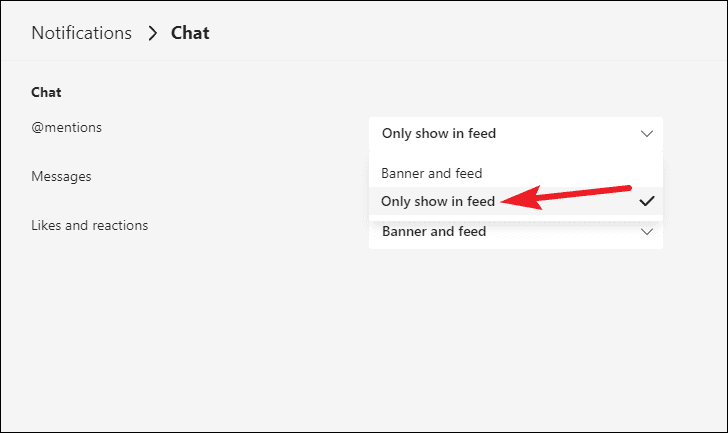
For messages, you can either get notifications as banners or turn them off completely.

From the ‘Appearance and accessibility’ option, you can change the theme of the Teams personal as well as the Chat app. Or you can set it to follow the theme of the Operating System.
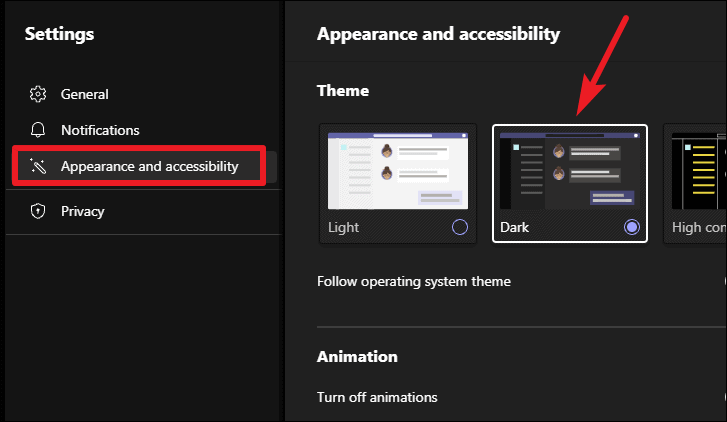
Whatever theme the Teams Personal app follows, the Chat app will follow suit.
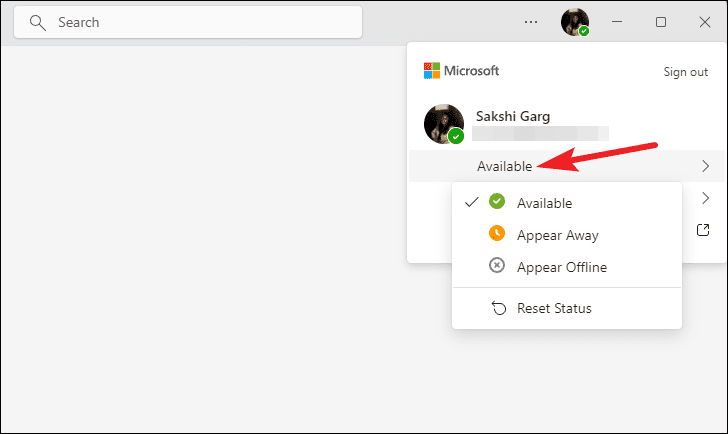
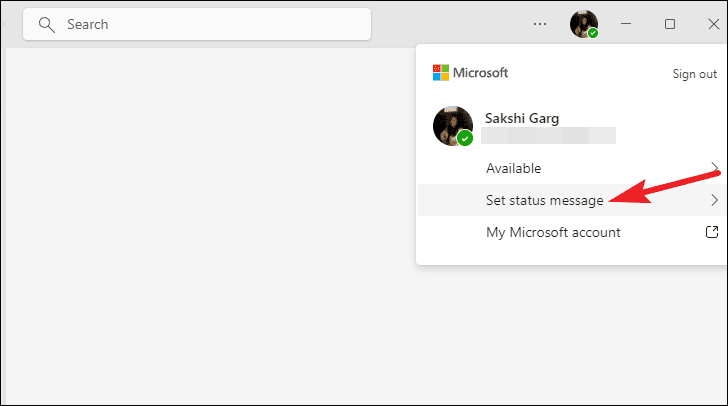
You can also set a status for your contacts from the Teams app. Go to your profile icon from the Title bar.
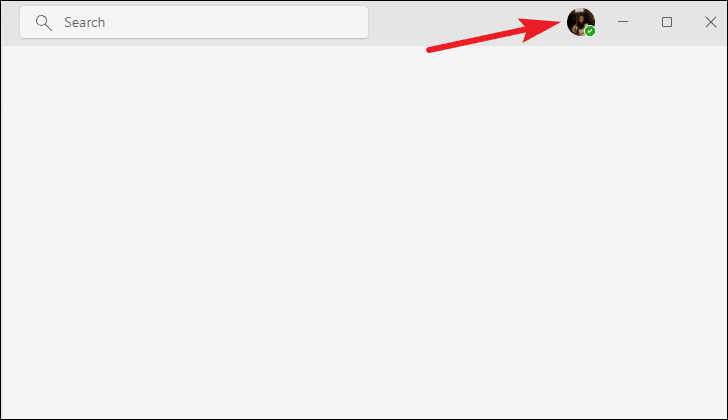
A menu will open. To change the availability status, i.e., available, offline, away, etc., click the current status option. So, if your current status is set to ‘Available’, click it from the menu. Then, select the appropriate status from the sub-menu.
To set a custom message for your contacts, select ‘Set status message’ from the options and enter your message. Your contacts can see your status when they hover over your profile icon in the Chat and Teams apps. You can use it to indicate if you’re unavailable for some reason, for instance, and they’ll know why you aren’t replying.
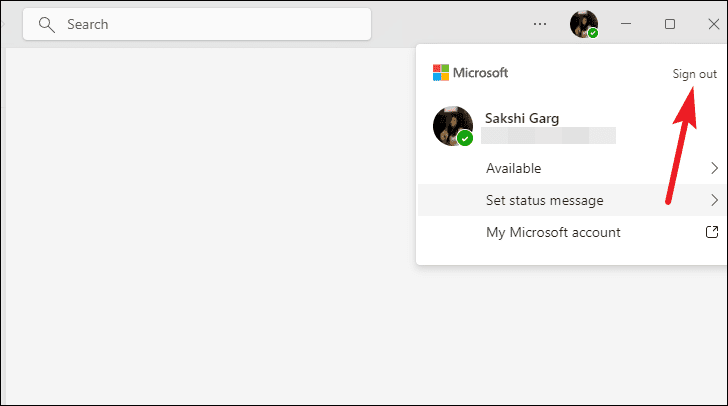
You can also log out of your Teams account from here. Click the ‘Sign out’ option in the upper-right corner of the menu. This will sign you out from the Teams as well as the Chat app. You can then sign in using a different account or sign back into the same account when you want to.
How to Use the Microsoft Teams (Work or School) app in Windows 11
Microsoft Teams for Work is a collaboration app with a slew of features like teams, channels, app integration in channels, and personal chats. Even video calls are engineered to maximize productivity in a remote environment with features like transcripts, meeting notes, breakout rooms, screen sharing, etc.
To use Microsoft Teams Work or School app, you either need an organization account given by your work or school or you can use a Microsoft Teams Free account.
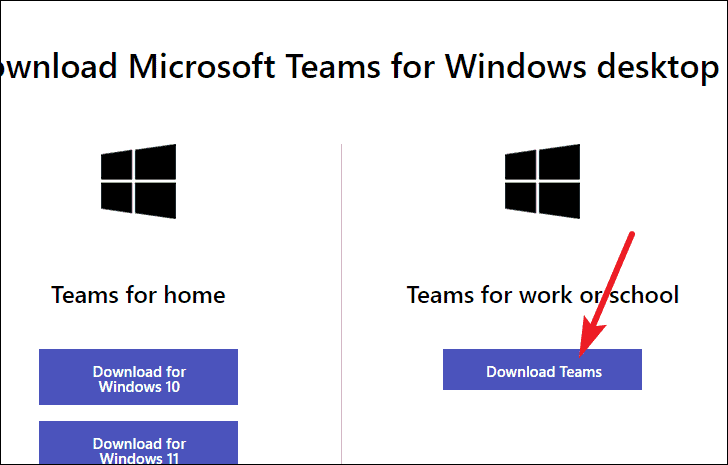
If you don’t already have the app, go to microsoft.com and download Teams. Or, simply click here to land directly on the download page for the app. Then, go to the Download for Desktop section and click the ‘Download Teams’ button under Teams for work or school.
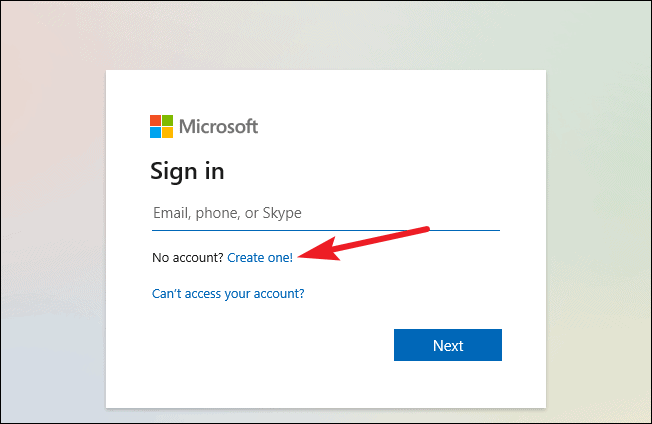
Run the downloaded file to install Microsoft Teams Work or School app; the app will install on its own without any additional steps. Then sign in using either your organization, school, or a Microsoft Teams Free account. If you don’t have an account, click ‘Create One’ to create a Microsoft Teams Free account.
Enter your email account and password and choose ‘For Work’ to set up a Microsoft Teams Free work account when prompted.

Then, enter your name, organization’s name, and Country or region and click ‘Set Up Teams’ and you’re all good to go.

Managing Teams and Channels in Microsoft Teams
Once you’ve signed in to Microsoft Teams Work or School app, you’ll see that it has a lot more options on the navigation bar on the left. In addition to Activity, Chat, and Calendar, you’ll find tabs for Teams, Calls, Files, and an option to add Apps. You can also add any apps you use as tabs to the sidebar.
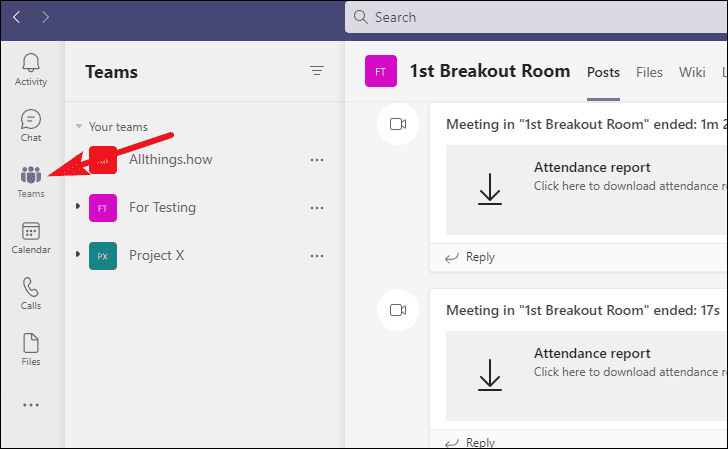
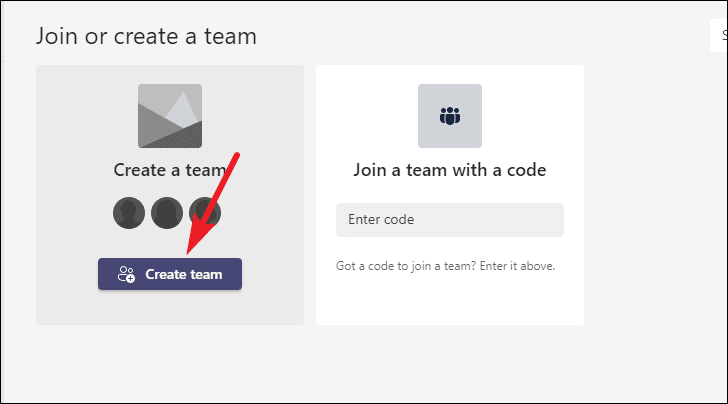
If you’re using an organization or school account, chances are you’d already be a part of one or more teams. Click the ‘Teams’ button from the navigation bar to access your teams. If your organization has given you access, you can also create a team yourself.
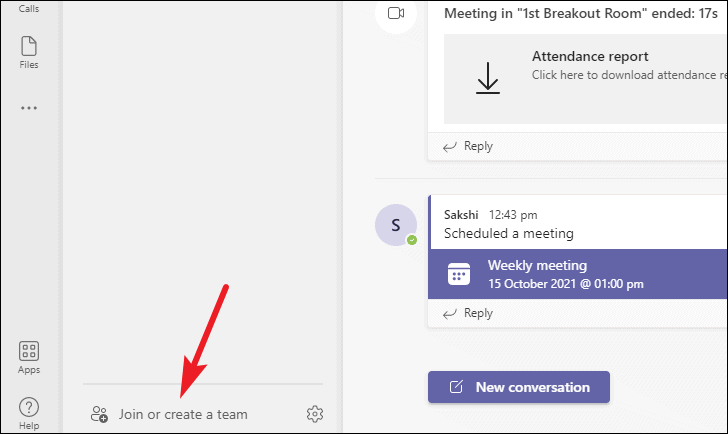
Click the ‘Join or Create a team’ button at the bottom of the teams panel.
Then, click the ‘Create team’ button to create a team. You can either create a new team from scratch, use a Microsoft 365 group or a template.
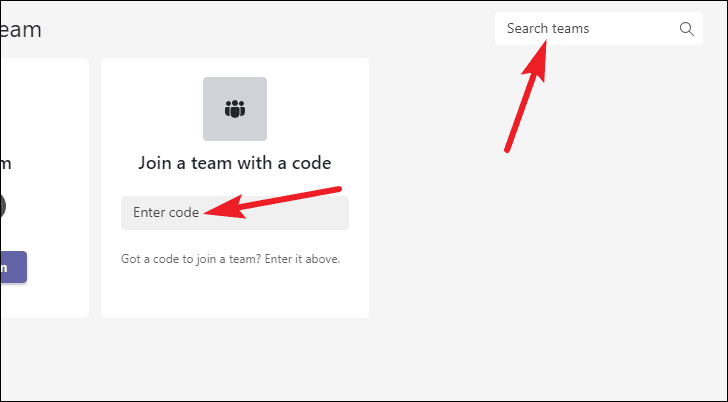
You can also join a team by searching for the team using its name or entering its code if you have that information.
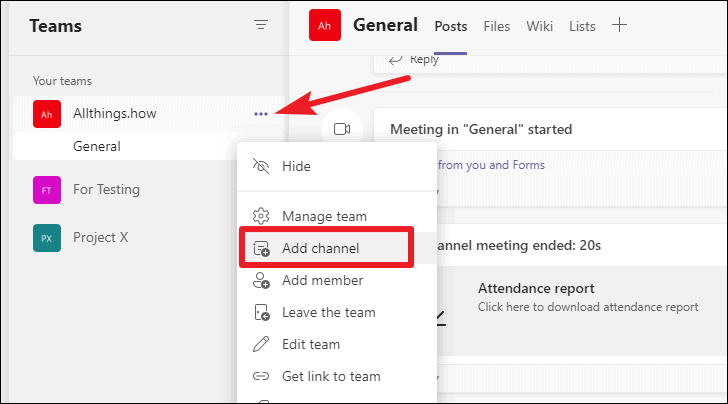
Teams further have channels. Each team will have a ‘General’ channel by default. But you can create new channels at any time. Channels are created based on different topics, departments, events, etc. that the team needs to handle separately. You can also add only select members from the team instead of adding everyone; it depends on your requirement.
To create a channel, click the ‘More options’ icon (three-dot menu) next to the team name and select ‘Add channel’ from the menu.
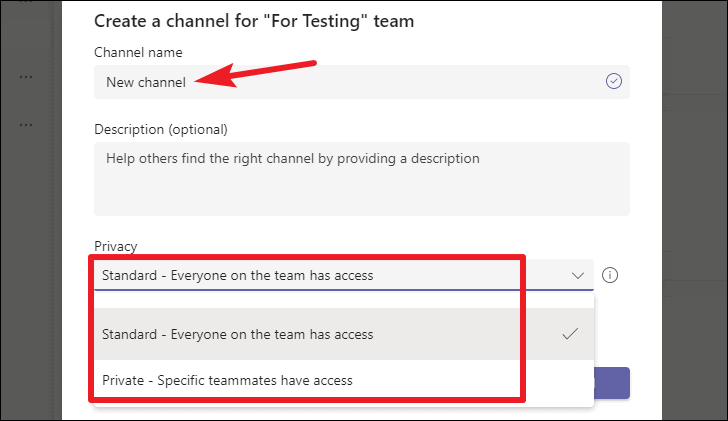
Then, enter the channel’s name, description (optional) and choose whether the channel will be open to everyone on the team or only select people, i.e., create a private channel. When you create a standard channel, all team members have access to it by default, but you have to add members to the private channel by inviting them separately.
Using Tabs in Microsoft Teams
Tabs in Microsoft Teams for Work or School sets it quite apart from Micorosft Teams Personal. Even though Chats have a File or Tasks tab in Teams Personal, they don’t even come close to the potential tabs hold here.
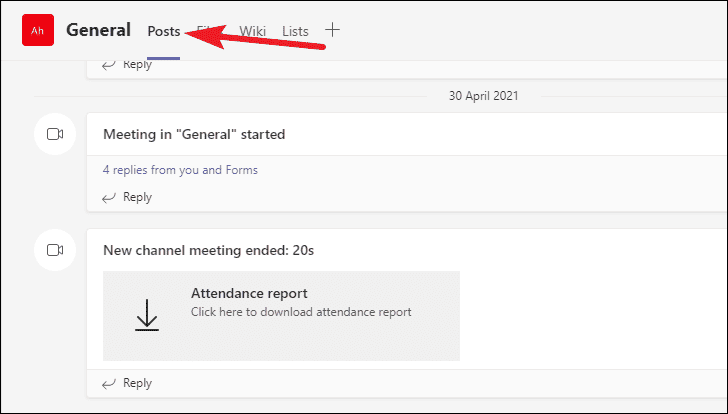
Tabs are the categories you can see next to the channel name. All channels have a ‘Posts’ tab by default. This tab is the place where all the communication takes place in that channel.
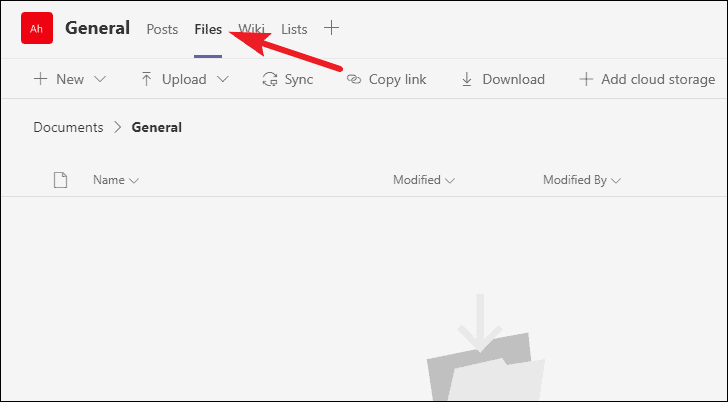
Channels and chats in Microsoft Teams for Work or school also have a Files tab where you can find all the files shared in that particular channel or chat easily. But it’s the apps that make tabs truly great.
Apart from teams and channels, countless apps that Teams for Work offers are what make it a perfect place to collaborate and get things done. With the seamless integration of apps, you can either use them personally or have them as tabs in channels and personal or group chats. When you add compatible apps as tabs to channels or chats, you can instantly collaborate with other team members in the app.
To add an app as a tab to a channel or a chat, click the ‘+’ icon next to the existing tabs.
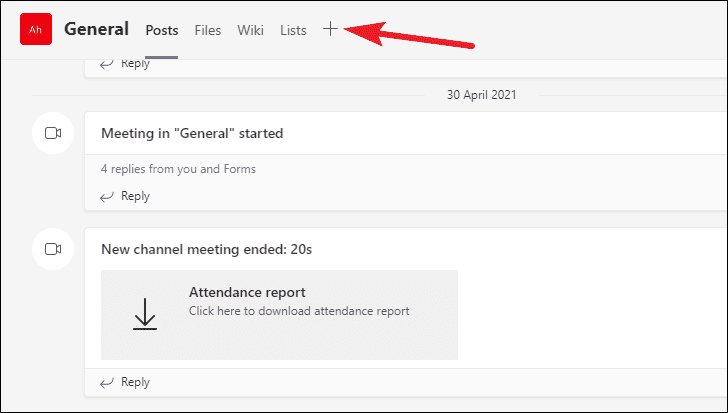
Then, either find the app from the apps that appear or go to the search option for the app you want to add. Then, depending on the app, the next steps may vary; follow the instructions on the screen and click ‘Save’ to add it as a tab.
Using Apps in Microsoft Teams
If you don’t want to add an app for collaboration, but instead want to keep it for personal use, then go to the navigation pane on the left and click the three-dot menu icon.
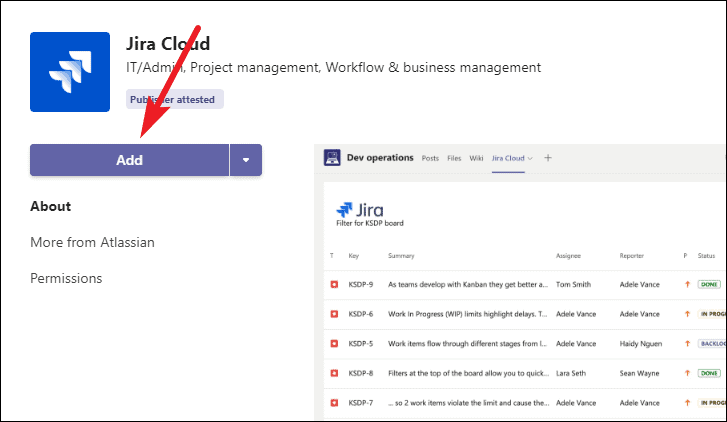
Then, search for the app you want to use and click the ‘Add’ button.
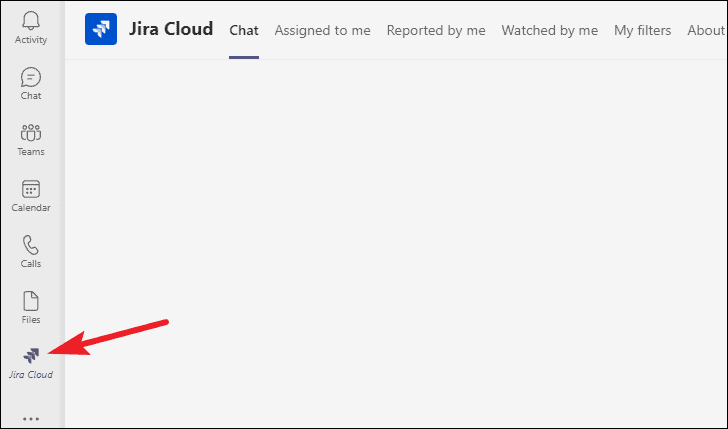
The app will be added only to your navigation bar for personal use.
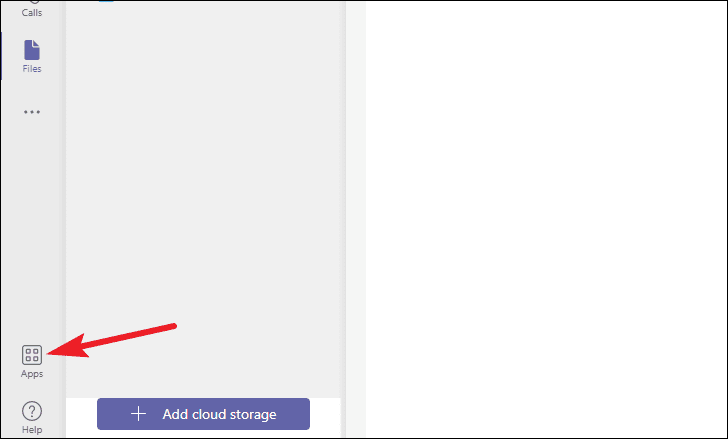
From the navigation bar, you can also go to ‘Apps’ to explore apps according to the category in Microsoft Teams.
Teams has thousands of apps so it can be a little overwhelming, though. Click the app you want to add. If you simply click the ‘Add’ button, it’ll be added to your navigation bar for personal use.
Click the downward arrow next to the Add option and you’ll find more ways to use the app. You can add it as a tab in a team channel or chat directly from here.
Some apps also let you add them to a scheduled meeting so they’ll be available for use when the meeting starts.
Meetings in Microsoft Teams for Work
Meetings in Microsoft Teams for Work are slightly different than Teams Personal due to the various locations you can have them.
Basically, there are two types of meetings: channel meetings and private meetings.
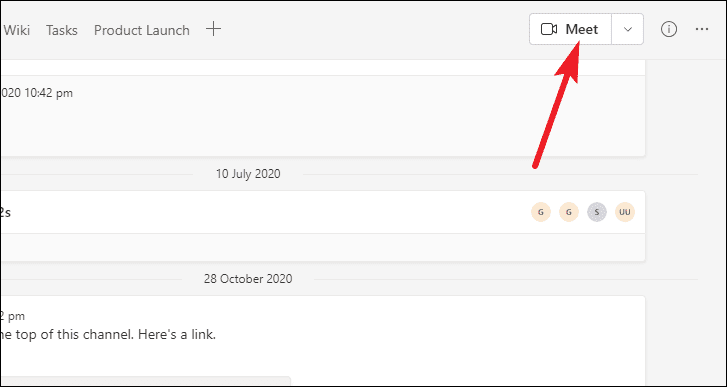
Channel meetings occur in the channel and are open to everyone who’s part of that channel. They can join at any time and the host doesn’t have to let them in. To start a meeting in a channel, open that channel and click the ‘Meet now’ button in the upper-right corner of the screen.
You can also schedule meetings in a channel directly from the channel. Click the down-arrow next to the Meet now button and select ‘Schedule a meeting’ from the options that appear.
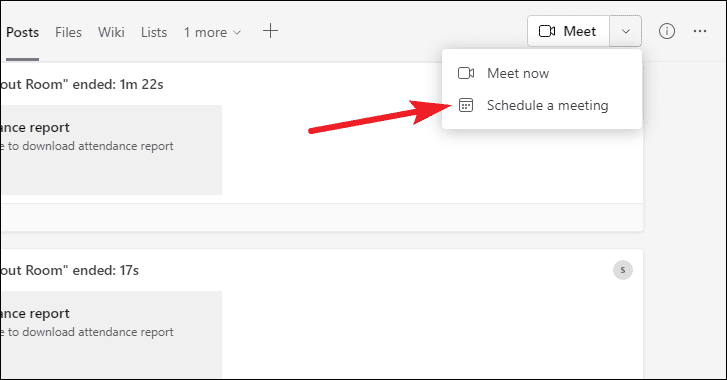
The meeting details screen will open where the channel will already be added. Enter the rest of the details like the meeting name, date and time, any required attendees, etc., and click the ‘Send’ button.
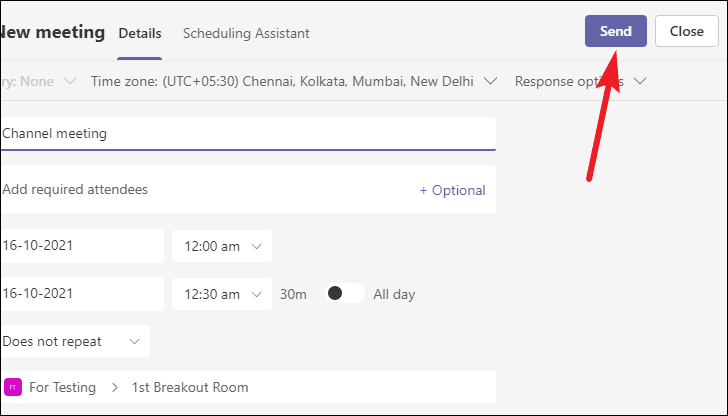
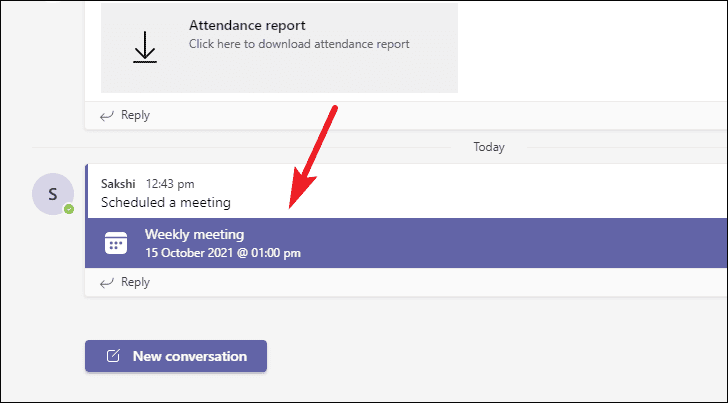
The update for the scheduled meeting will be posted to the channel and the event will also appear in your calendar.
To have private meetings, impromptu as well as scheduled, go to the Calendar tab from the navigation panel on the left.
For an impromptu meeting, click the ‘Meet now’ button.
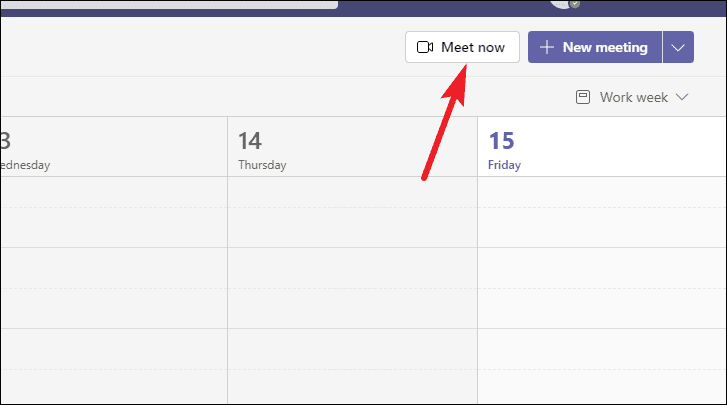
To schedule a meeting, click the ‘New meeting’ option and schedule the meeting.
In both instances, you get to decide who can be a part of the meeting and other people on your team won’t even know there’s a meeting underway unlike channel meetings.
Using Microsoft Teams in Windows 11 can be confusing at first glance, but it isn’t all that different from Windows 10. Especially the Personal and Work/ School apps still work the same even if there are two separate apps.


Member discussion