
Managing user accounts in Windows 11 can be simple and efficient with the right tools. The net user command offers administrators a powerful way to handle user accounts directly from the command line. Whether you’re looking to add new users or modify existing ones, this command-line utility saves time by eliminating the need to navigate through multiple menus.
The net user command functions as a versatile tool for managing user accounts on your system. Accessible through the Command Prompt or Windows PowerShell, it allows for swift account management without the hassle of navigating multiple settings screens.
Key parameters of the net user command
net user: Displays a list of all active user accounts on the system.username: Shows details for a specific user when used asnet user username./add: Adds a new user account. Use it likenet user username /add./delete: Deletes an existing user account withnet user username /delete.password: Sets or changes the password for a user account./: Prompts for password entry./domain: Executes the command on a domain controller, useful for server administrators./help: Provides a list of available commands and their descriptions./active:{yes | no}: Activates or deactivates a user account./comment:"text": Adds a comment for a user account./passwordchg:{yes | no}: Enables or disables a user’s ability to change their own password.
Practical examples
Adding a new user
cmd in the Start menu, right-clicking on Command Prompt, and selecting Run as administrator.net user [username] [password] /add, replacing [username] with the desired username and [password] with the password you want to set. Press Enter to execute the command.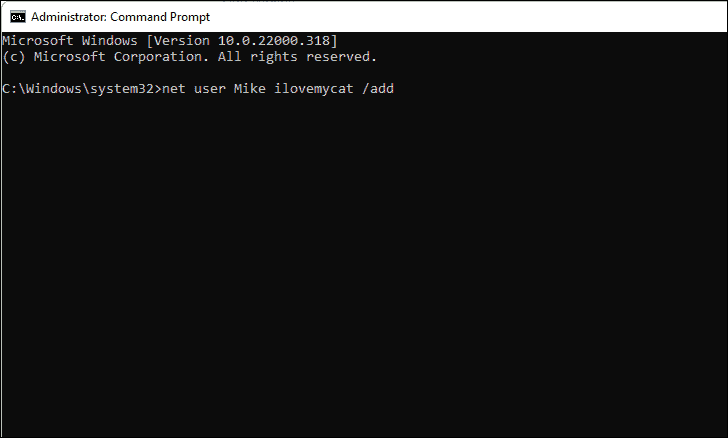
Removing a user
cmd in the Start menu, right-clicking, and selecting Run as administrator.net user [username] /delete, replacing [username] with the name of the user account you wish to delete. Press Enter to execute the command.
Checking user details
net user and press Enter. This will display a list of all active user accounts on your system.net user [username], replacing [username] with the user’s name, and press Enter.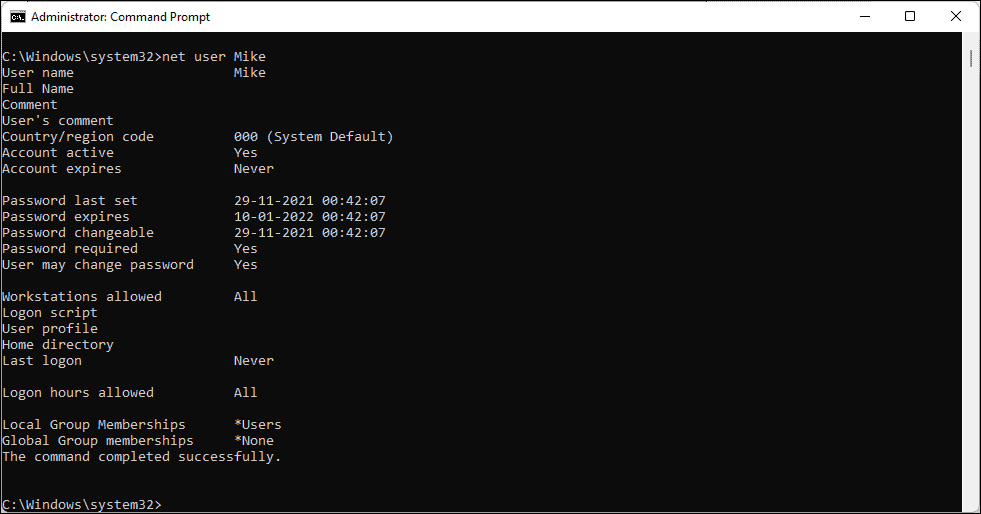
Changing a user’s password
net user [username] [new password], replacing [username] with the user’s name and [new password] with the new password you want to set. Press Enter to apply the change.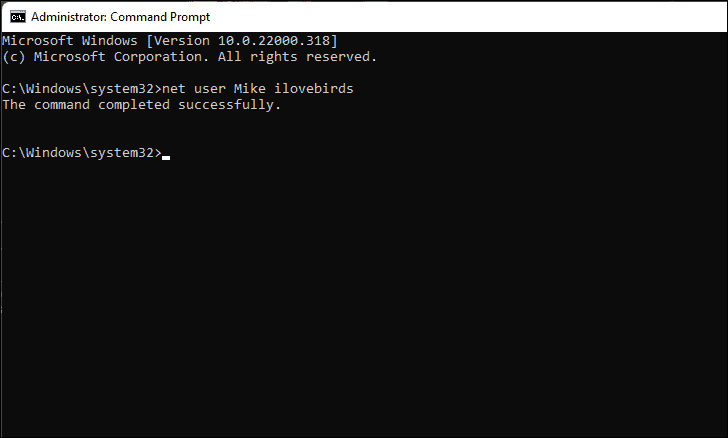
Remember that accounts created with the net user command are local accounts. They exist only on your machine and are not linked to any online Microsoft accounts.
Using the net user command empowers administrators to efficiently manage user accounts directly from the command line, streamlining the process and saving valuable time.


