If you’re looking to transform your Windows 11 desktop into a personalized and interactive workspace, Rainmeter might be the tool for you. Rainmeter is a free, open-source application that allows you to customize your desktop with skins—functional widgets that can display system information, launch applications, and much more.
With Rainmeter, your desktop becomes more than just a static background with icons. You can add clocks, weather forecasts, system monitors, and interactive elements that make your desktop both aesthetically pleasing and highly functional. In this guide, we’ll walk you through everything you need to know about using Rainmeter on Windows 11, from installation to customization, and troubleshooting common issues.
Rainmeter terminologies
Before diving into Rainmeter, it’s helpful to understand some basic terms associated with the application:
Skin: In Rainmeter, a skin is essentially a widget or a small application that resides on your desktop. Skins can display information like system stats, weather updates, clocks, and more. They are the functional units that make up your customized desktop.
Skin suite: A skin suite is a collection of skins that share a common theme or design. These suites are typically created by the same developer and are packaged together for a cohesive look. While you can mix and match skins from different suites, combining skins from the same suite often results in a more visually harmonious desktop.
Layouts: Layouts are configurations that save the positions and settings of your loaded skins. You can save a particular arrangement of skins as a layout and reload it whenever you want. This is especially useful if you like to switch between different setups for work, gaming, or personal use.
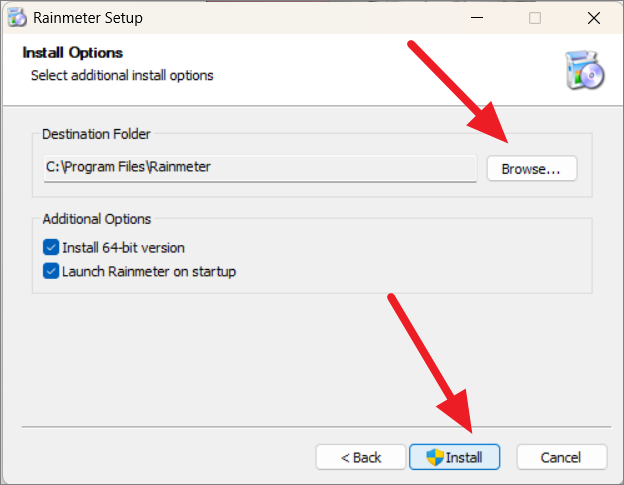
Installing Rainmeter on Windows 11
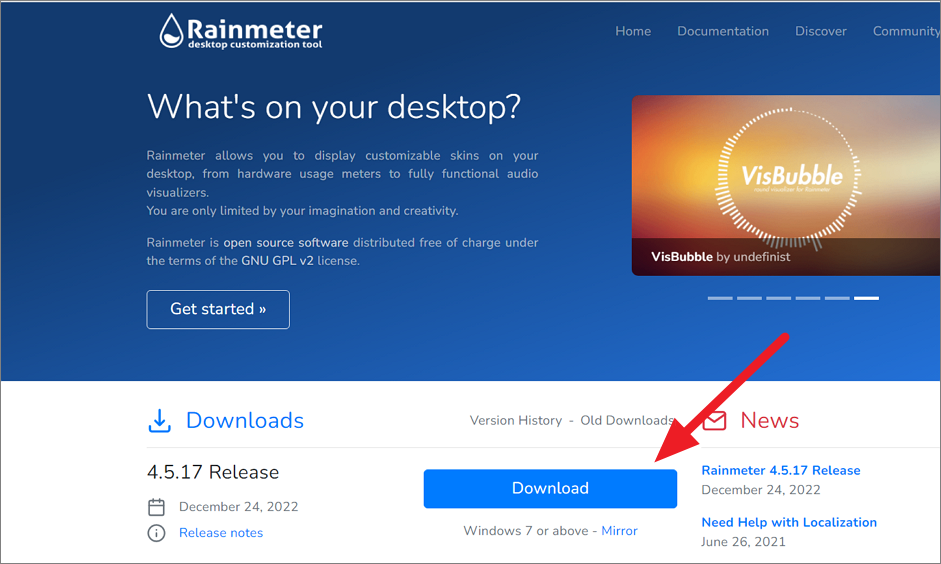
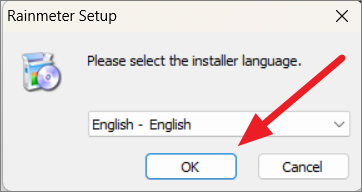
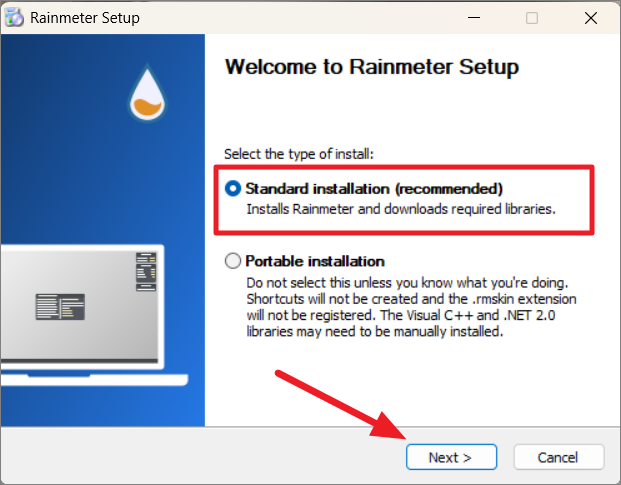
To get started with Rainmeter, you’ll need to download and install the application on your Windows 11 PC.
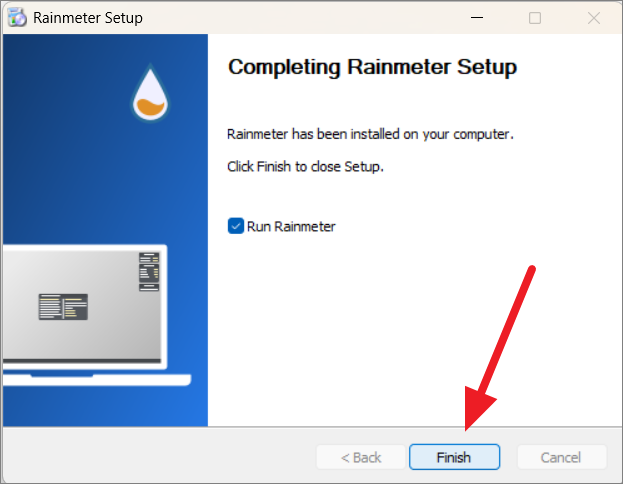
You can launch Rainmeter from the Start menu or by searching for it in the Windows search bar.
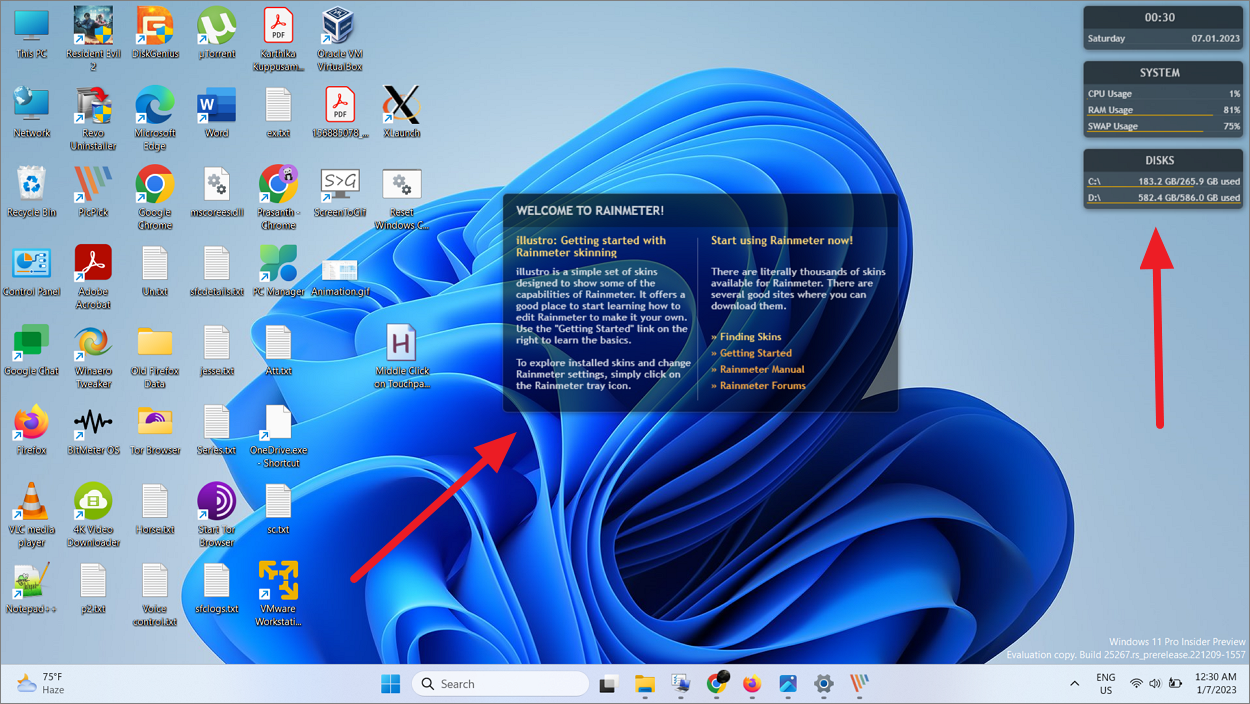
Upon first launch, Rainmeter will display a welcome message along with some default skins from the ‘illustro’ suite. You’ll see widgets like Clock, Disk Usage, and System Stats positioned on your desktop.
Finding and downloading Rainmeter skins
The true power of Rainmeter lies in its skins, and there’s a vast community creating and sharing them. While the official Rainmeter website doesn’t host skins, there are several trusted sources where you can find a variety of skins to suit your style:
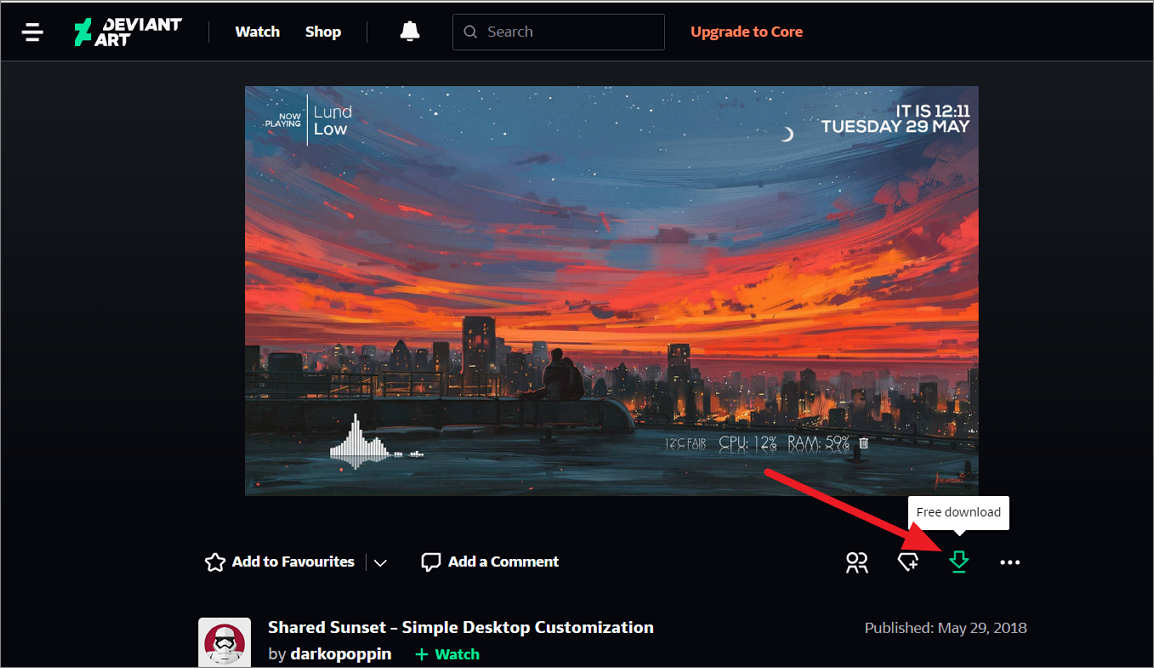
DeviantArt is particularly popular for Rainmeter skins. Here are some noteworthy skins and suites you might want to try:
- Sonder
- PaperThin (Suite)
- Shared Sunset
- Rusa Jantan (Suite)
- IronMan-Jarvis
- Wisp
- Jarvis Shield
- The Gemini Suite
Installing skins on Rainmeter
Once you’ve downloaded skins, you’ll need to install them in Rainmeter. Skins typically come in two formats: .rmskin files and compressed archives (.zip or .rar). Here’s how to install each type.
Install skin from the .rmskin file

The skin will now be installed and added to your list of available skins in Rainmeter.
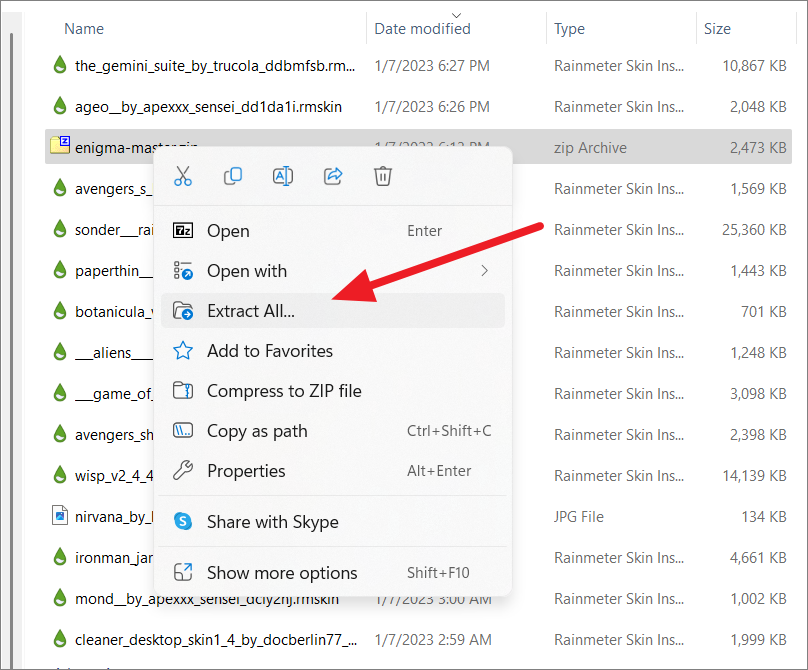
Install skins from .zip or .rar archive
If your downloaded skin is in a compressed archive, you’ll need to extract it manually.
Documents\Rainmeter\Skins. Extract the contents of the archive into this folder.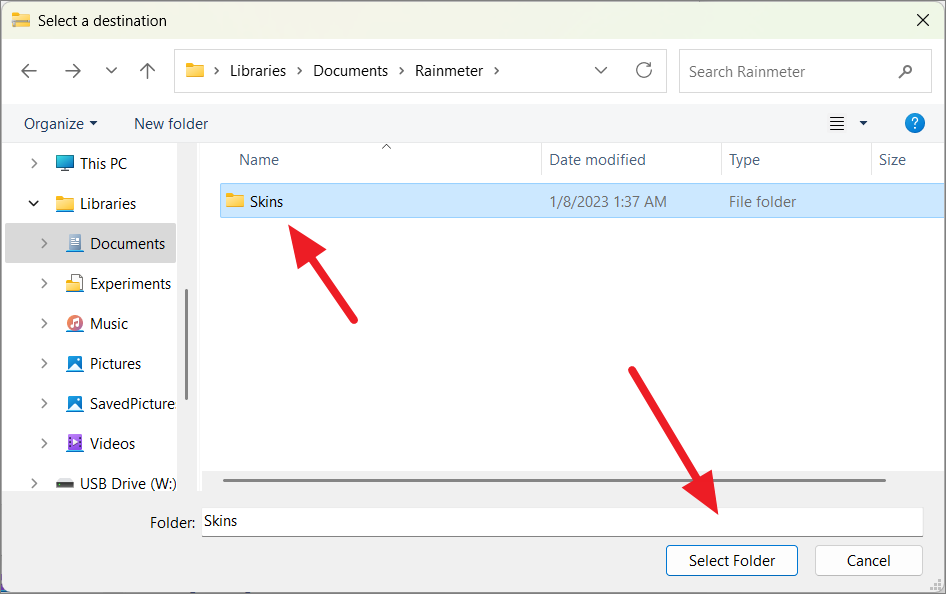
Unloading skins on Rainmeter
Before applying new skins, it’s a good idea to unload any existing ones to prevent clutter or conflicts. There are several ways to unload skins in Rainmeter.
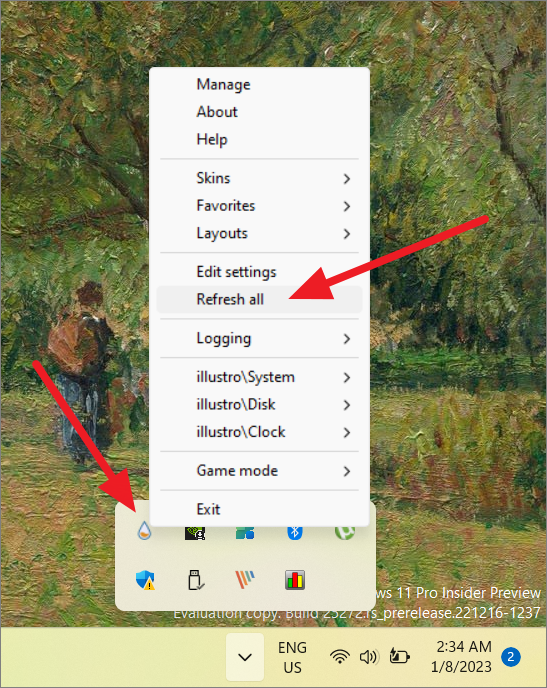
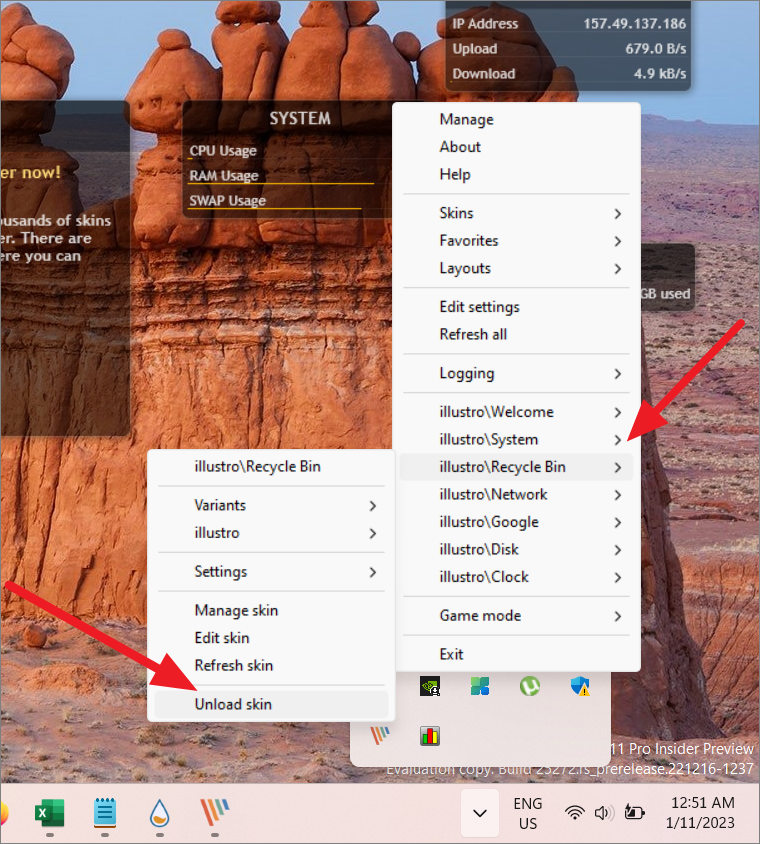
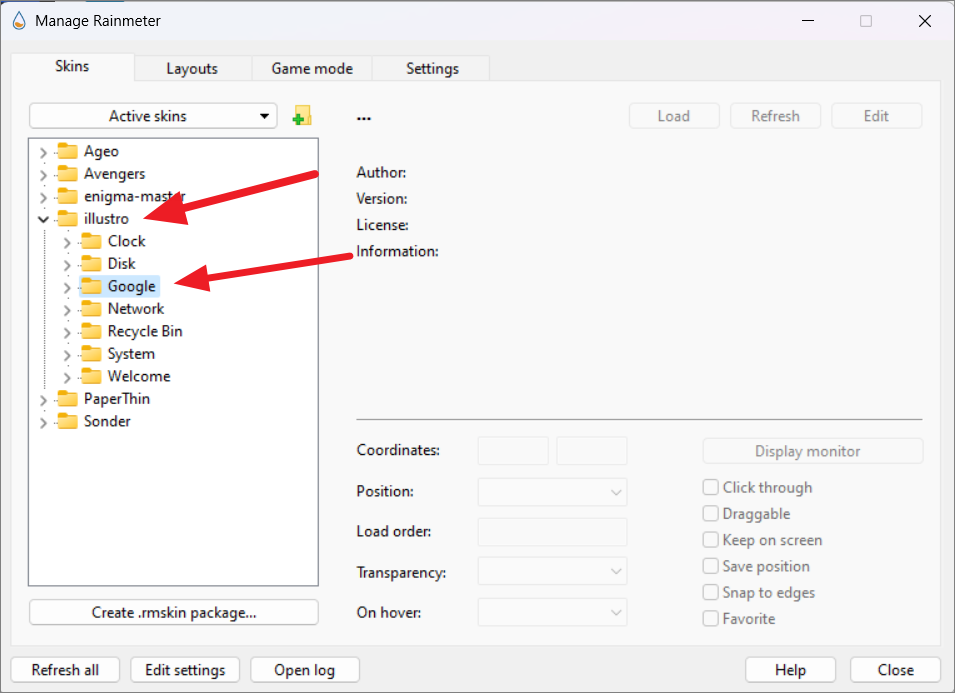
Unload individual skins from the context menu
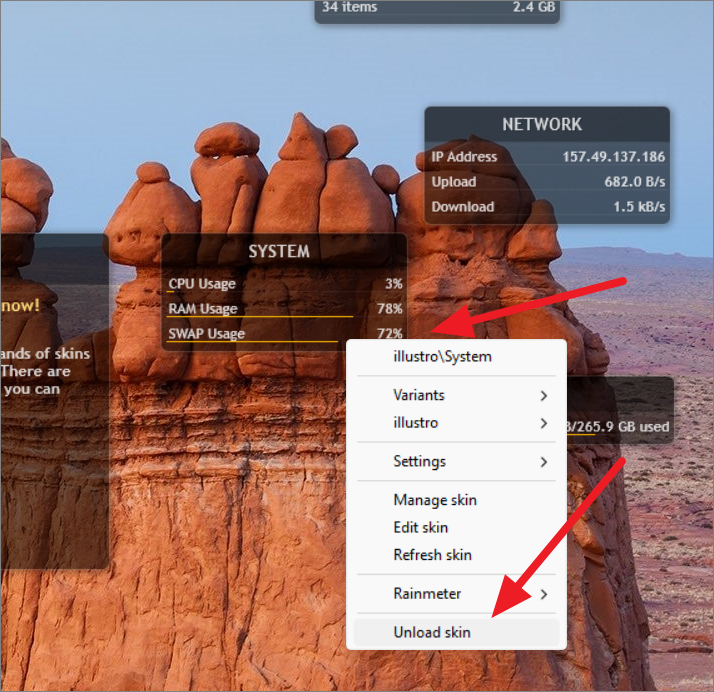
Repeat this process for each skin you wish to unload.
Unload skins from the taskbar
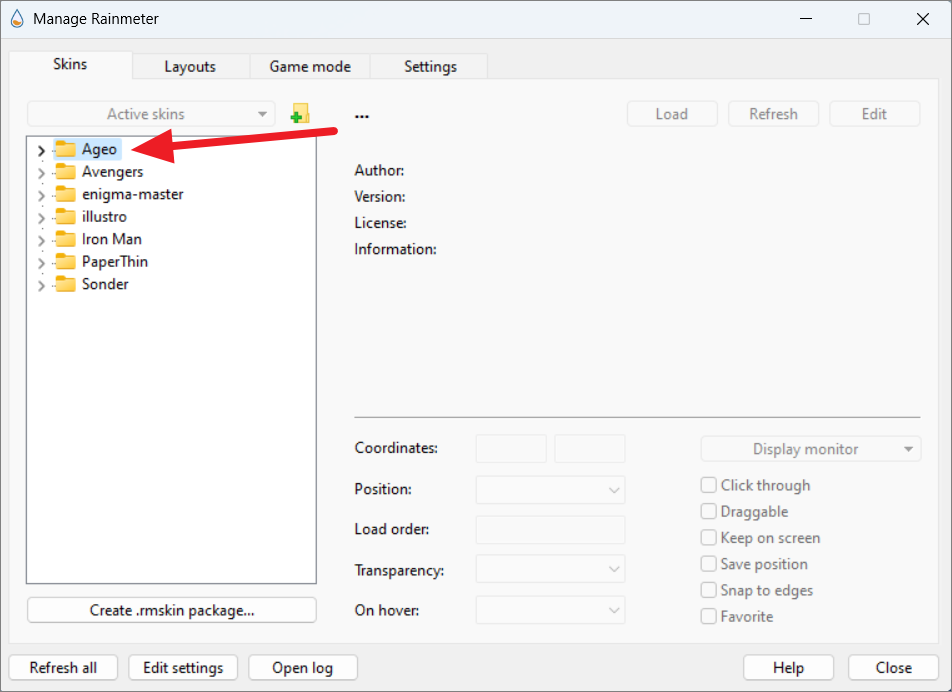
Unload skins from the Rainmeter settings
Repeat this for any additional skins you want to unload.
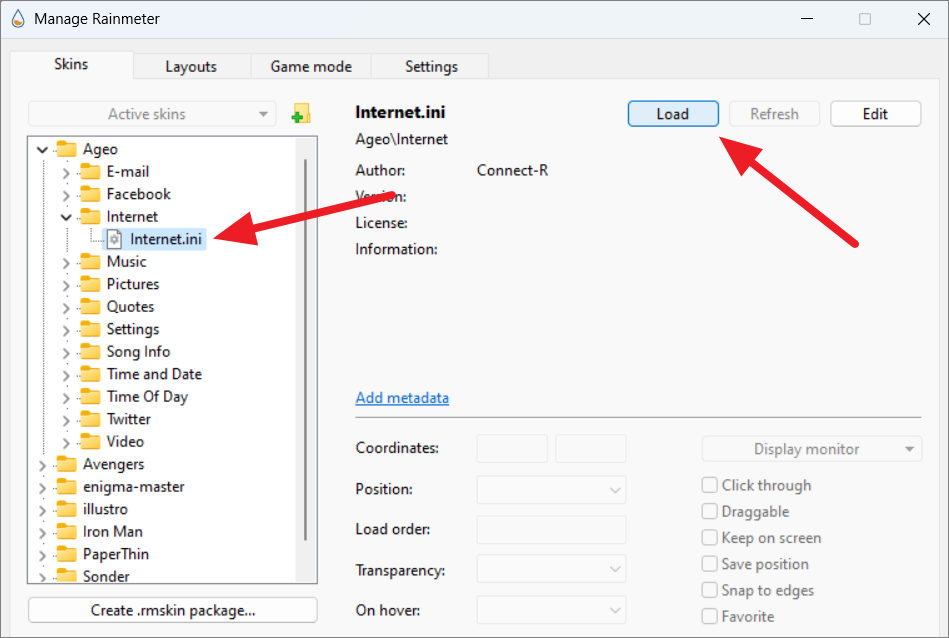
Loading and applying new skins in Rainmeter
With your previous skins unloaded, you can now load new skins to customize your desktop.
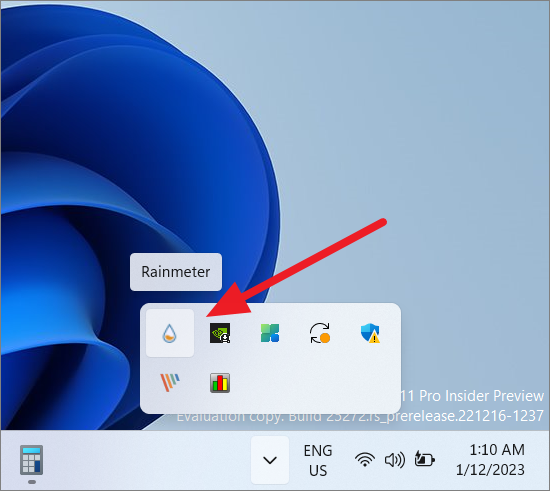
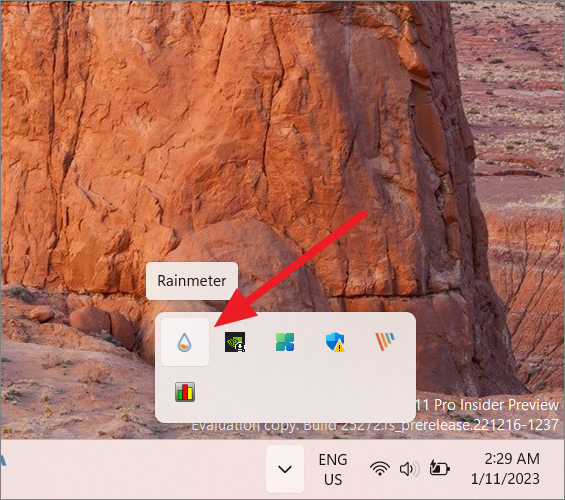
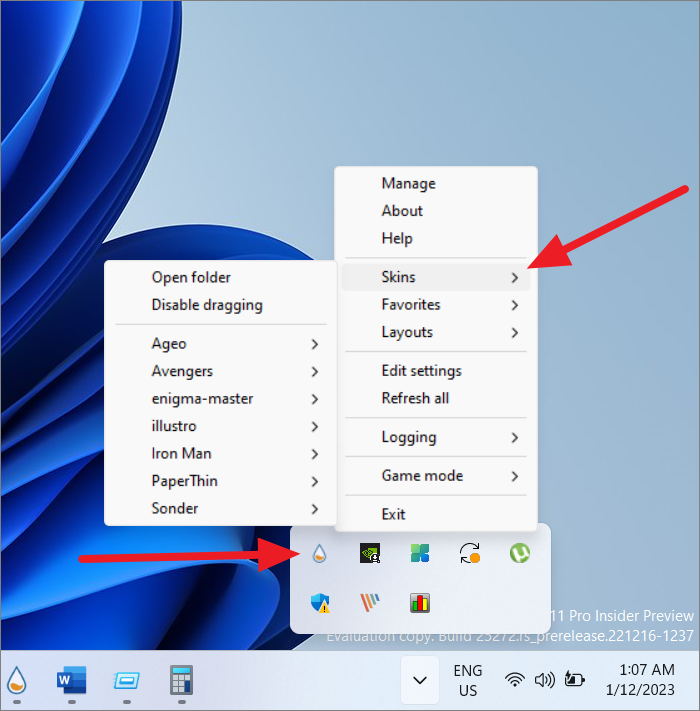
You can also load skins by right-clicking the Rainmeter icon in the system tray, navigating through the ‘Skins’ menu, and selecting the skin you want to load.
Once loaded, you can drag the skins to arrange them on your desktop as desired.
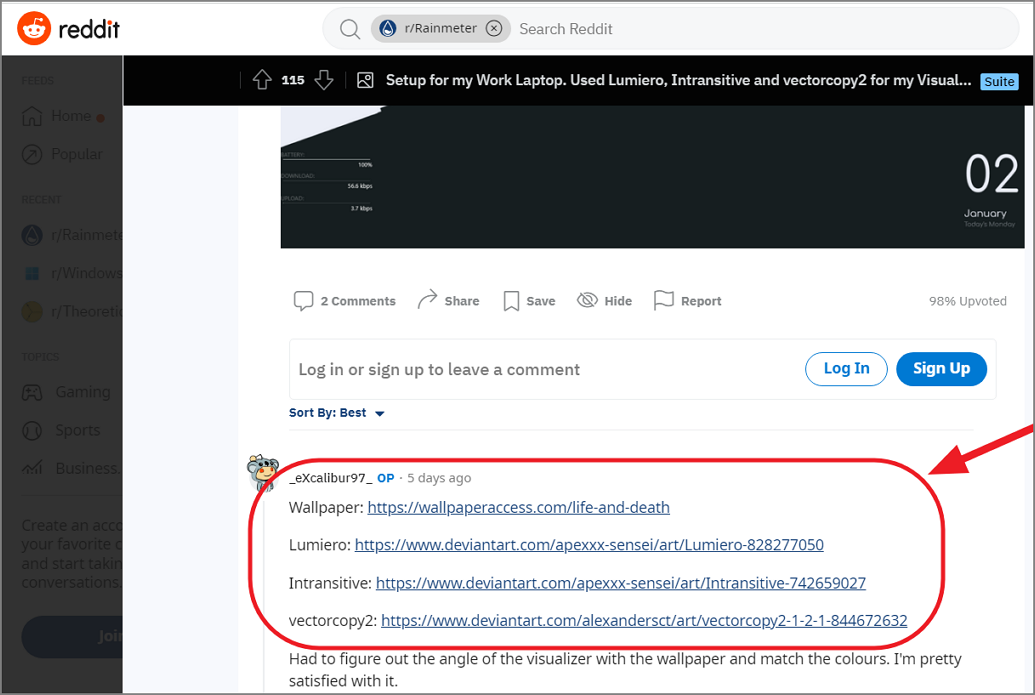
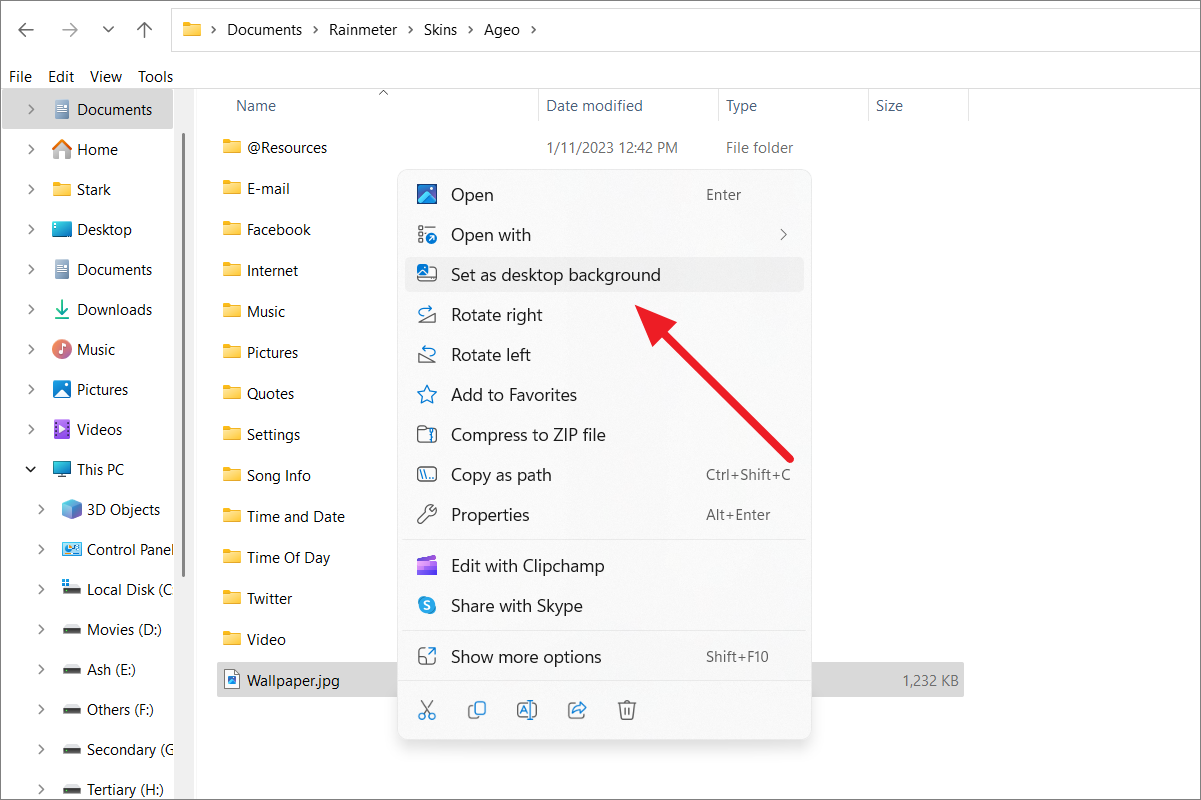
Note that some skins may not automatically change your wallpaper. To match the skin’s theme, you might need to manually set the wallpaper provided with the skin package. Typically, wallpapers are included in the skin’s directory under ‘Resource’ or ‘Wallpapers’. Right-click the image file and select ‘Set as desktop background’.
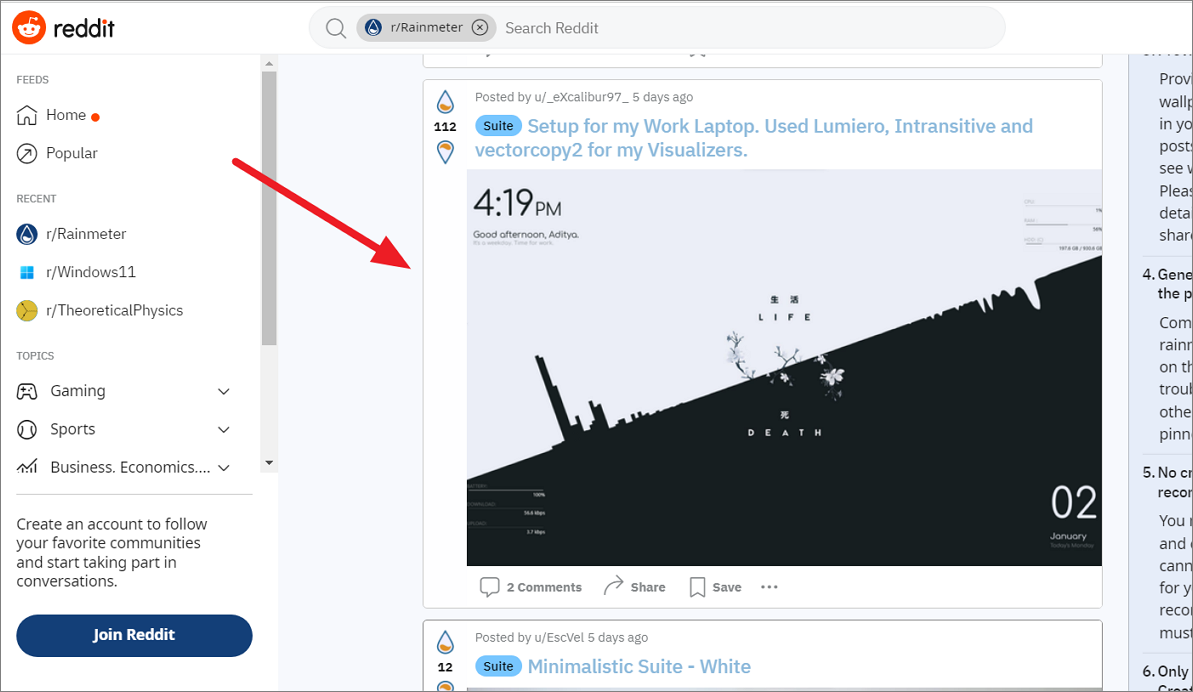
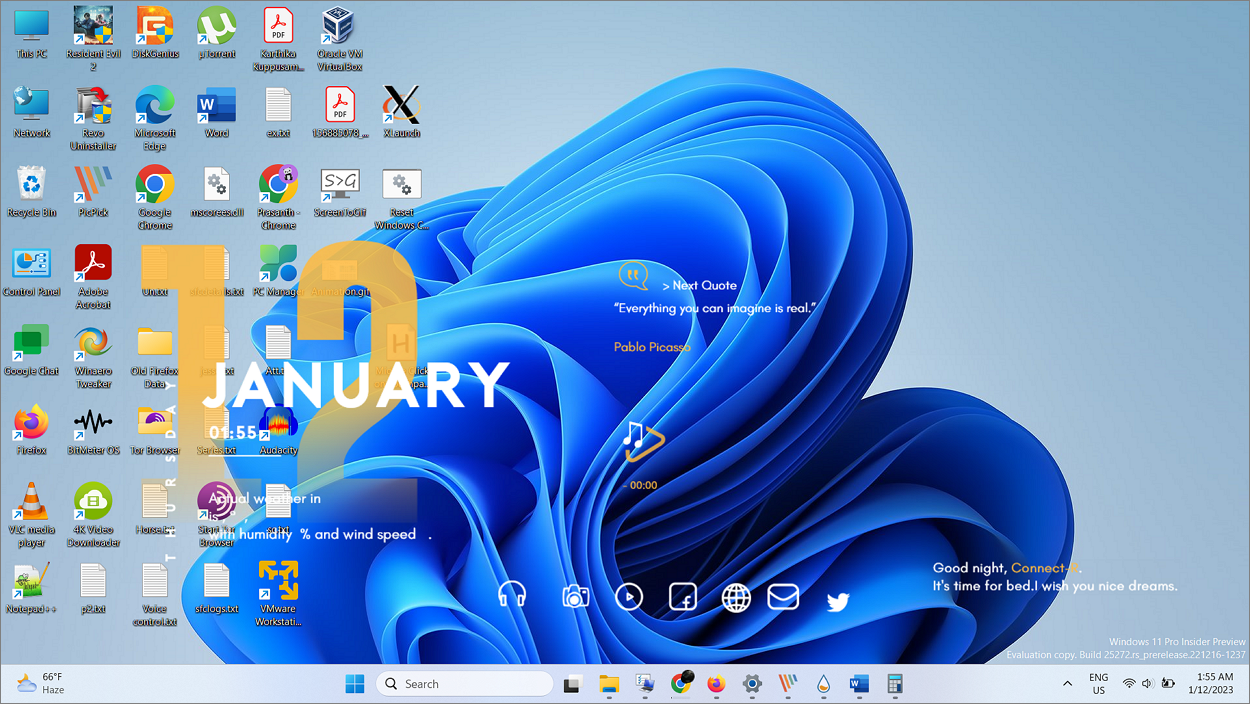
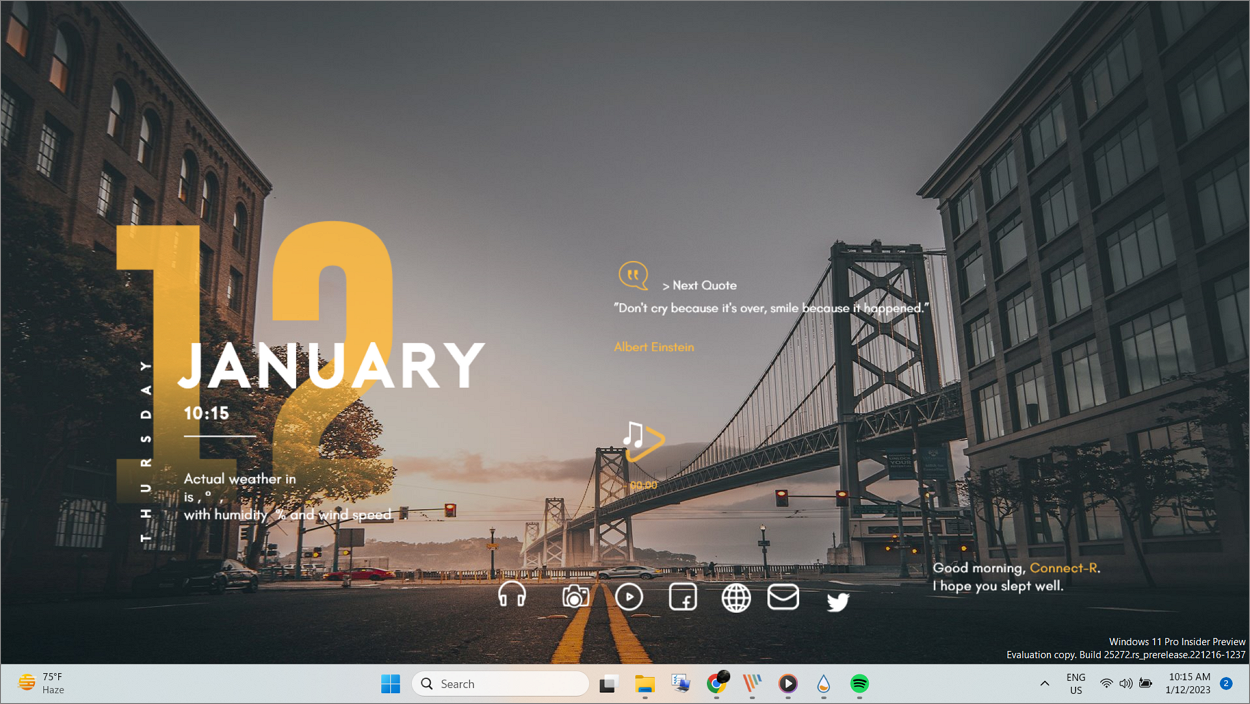
Here’s how your desktop might look after applying a new skin and wallpaper:
To achieve a cleaner look, you might want to hide your desktop icons. Right-click on the desktop, hover over ‘View’, and uncheck ‘Show desktop icons’.
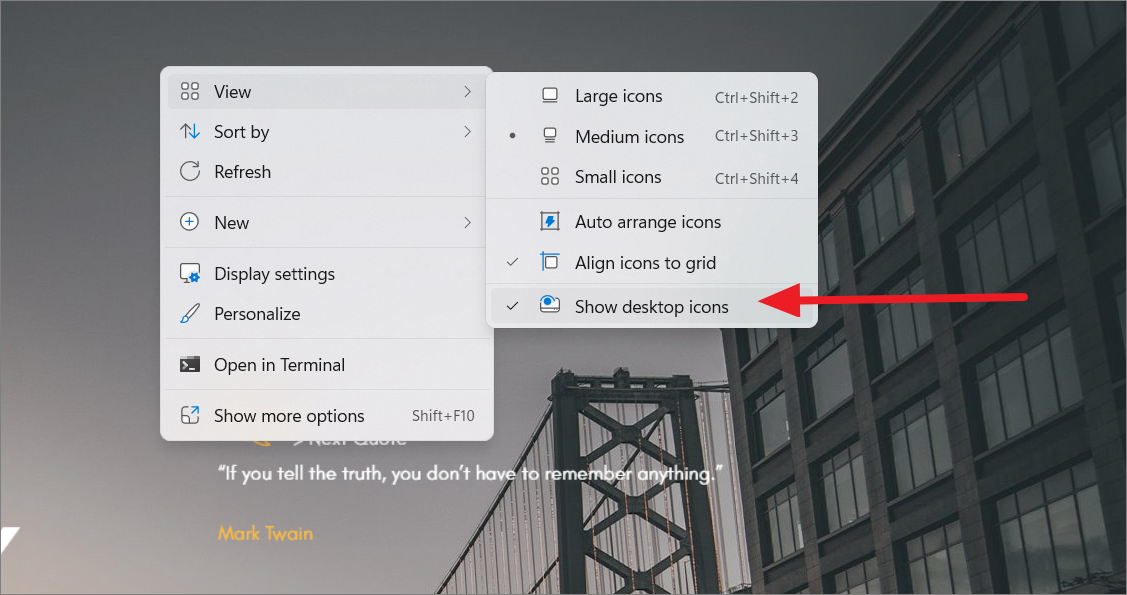
Now, your desktop showcases the new skin without any distractions.
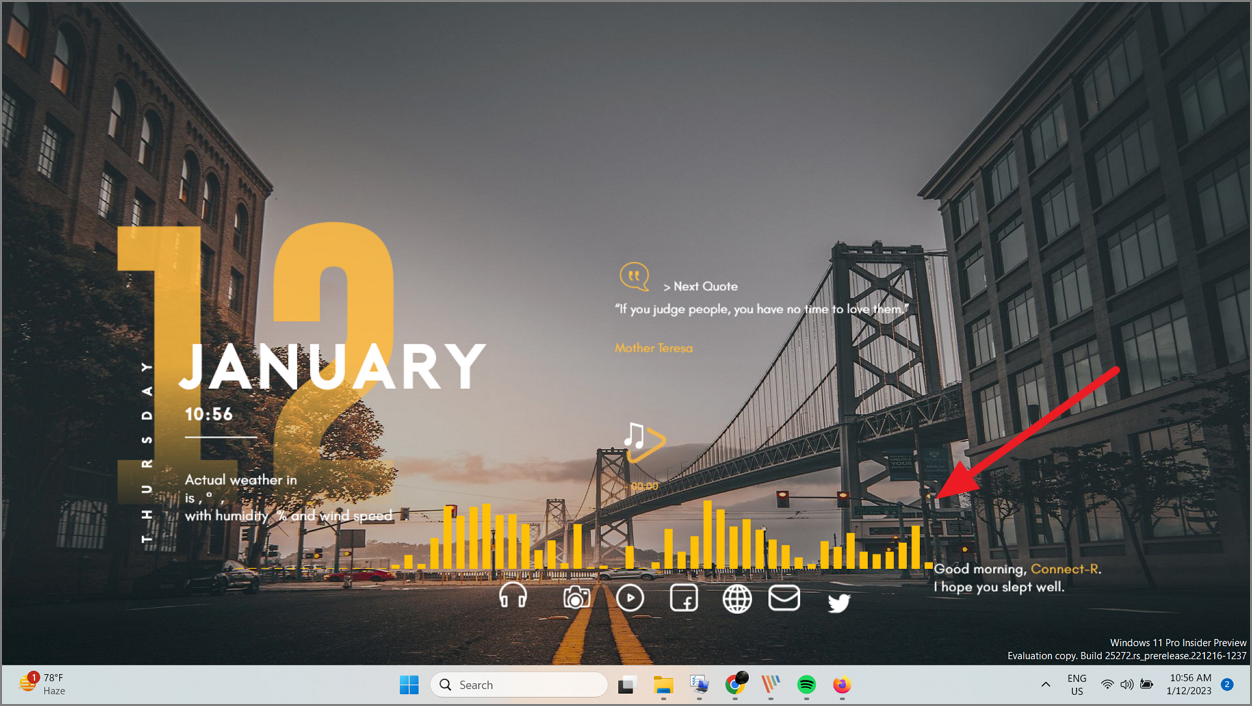
If you’re a music enthusiast, consider adding a music visualizer to your desktop. There are numerous visualizers available that sync with your media player to display audio levels in real-time. Some skins include their own visualizers, or you can download standalone ones.
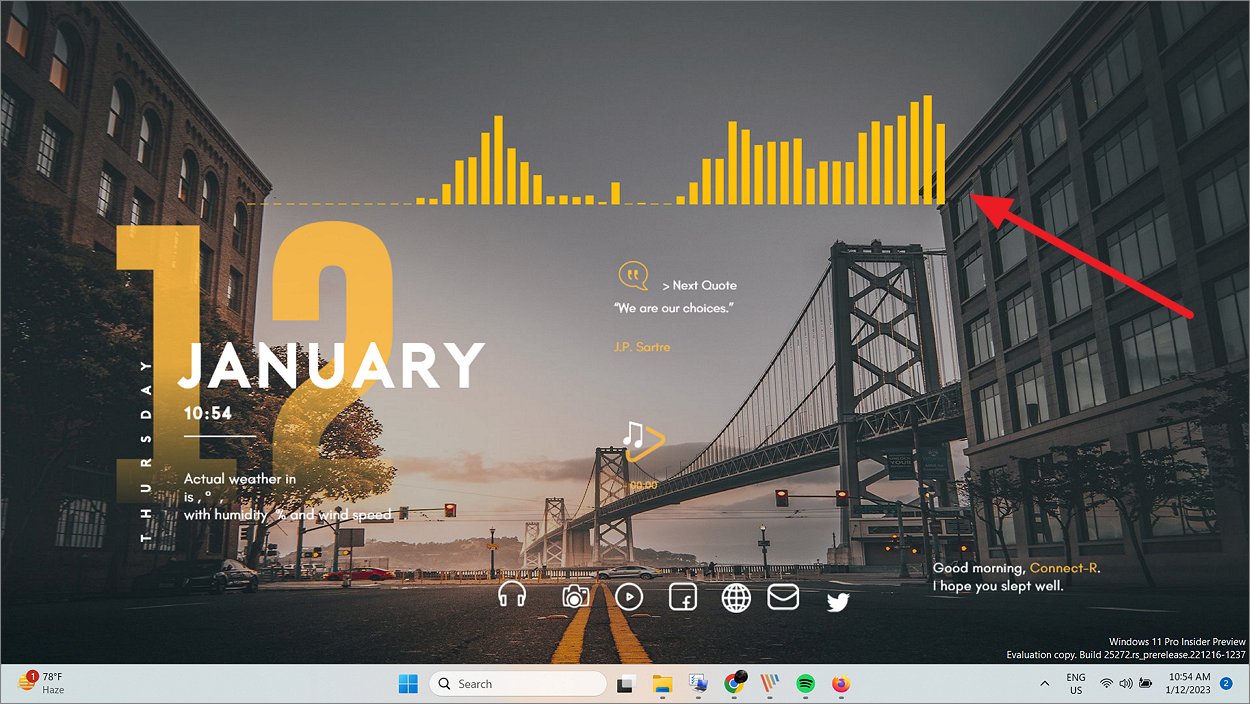
These visualizers are often highly customizable, allowing you to adjust settings like sensitivity, color, and position.
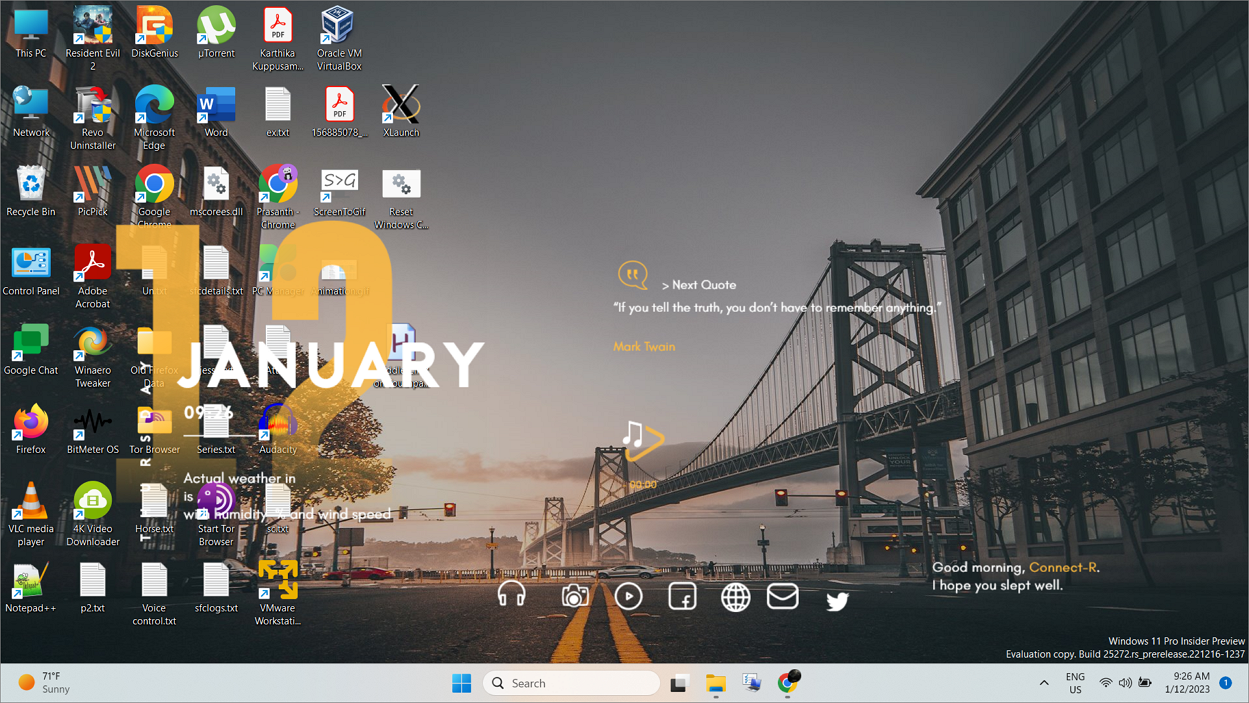
Another skin option offers a more comprehensive set of widgets for your desktop:

If you prefer a minimalist look, consider making your taskbar transparent or hiding it altogether to maintain the aesthetic of your skin.
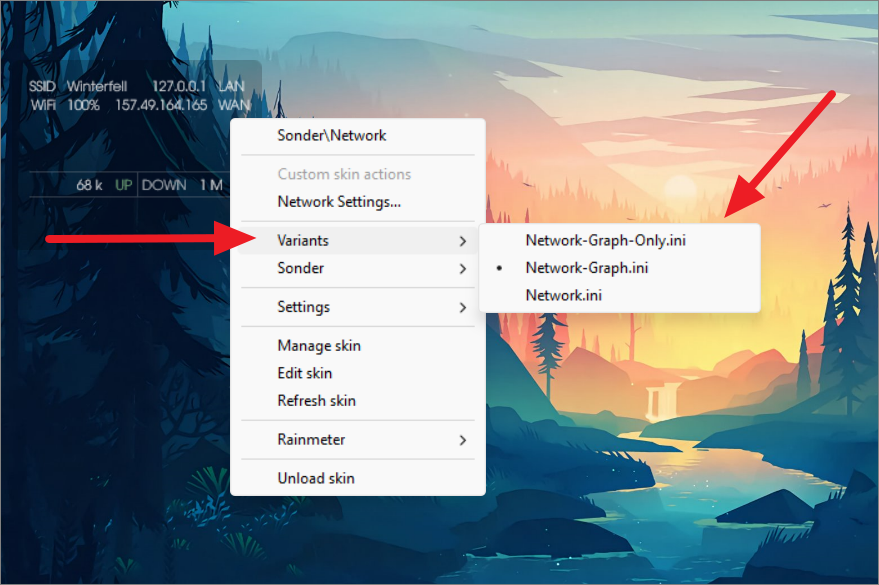
Load skins variants
Some skins come with variants—different versions of the same widget that offer alternative styles or functions. Only one variant can be active at a time.
Mixing and matching skins and saving custom layouts
You don’t have to limit yourself to skins from a single suite. You can combine skins from different suites to create a unique desktop that fits your preferences.
For example, you can add app launcher skins from the Honeycomb suite to your existing setup.

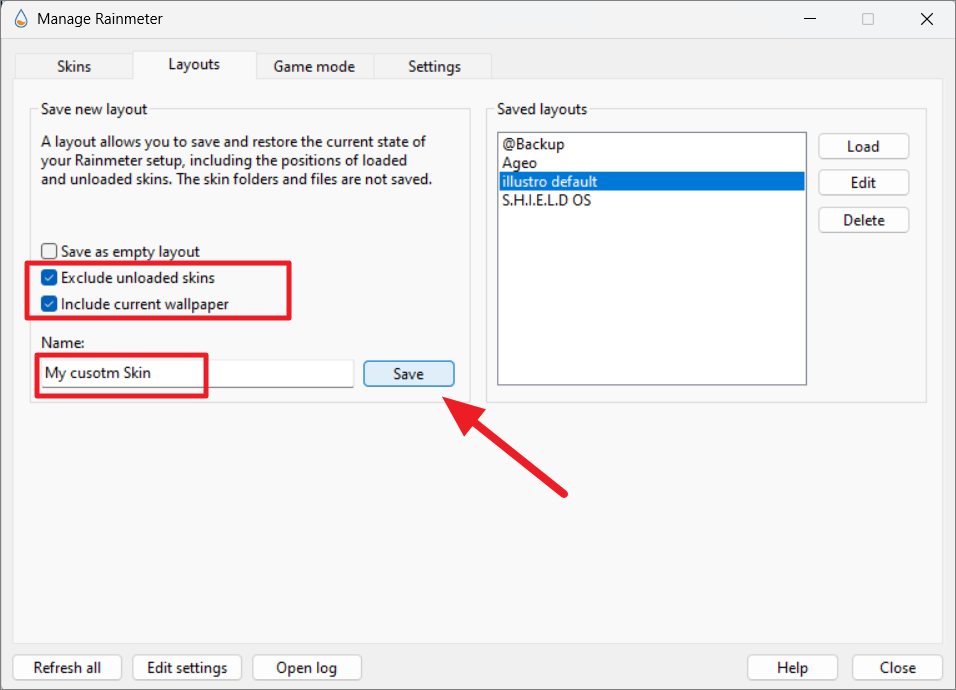
Save custom layouts on Rainmeter
After arranging your skins just the way you like them, you can save your setup as a layout. This allows you to easily switch between different configurations.
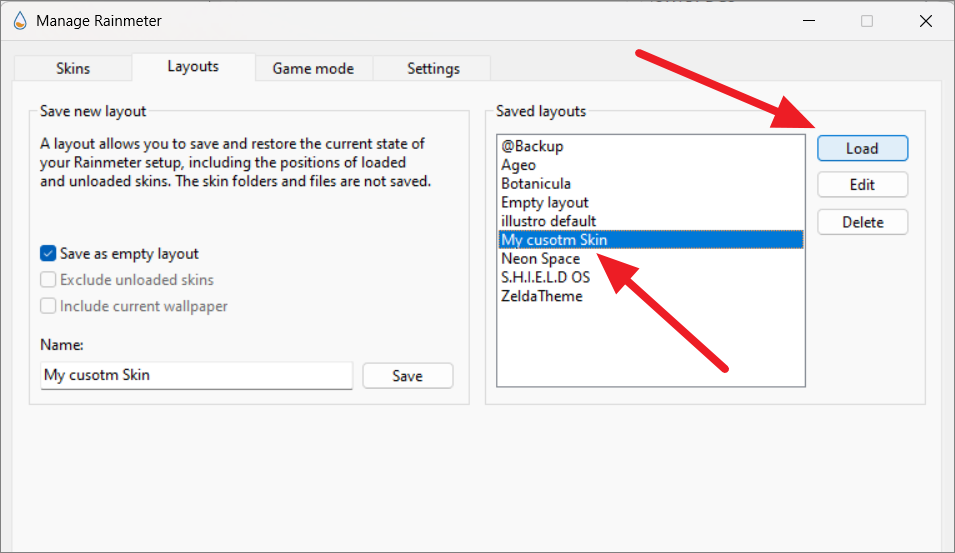
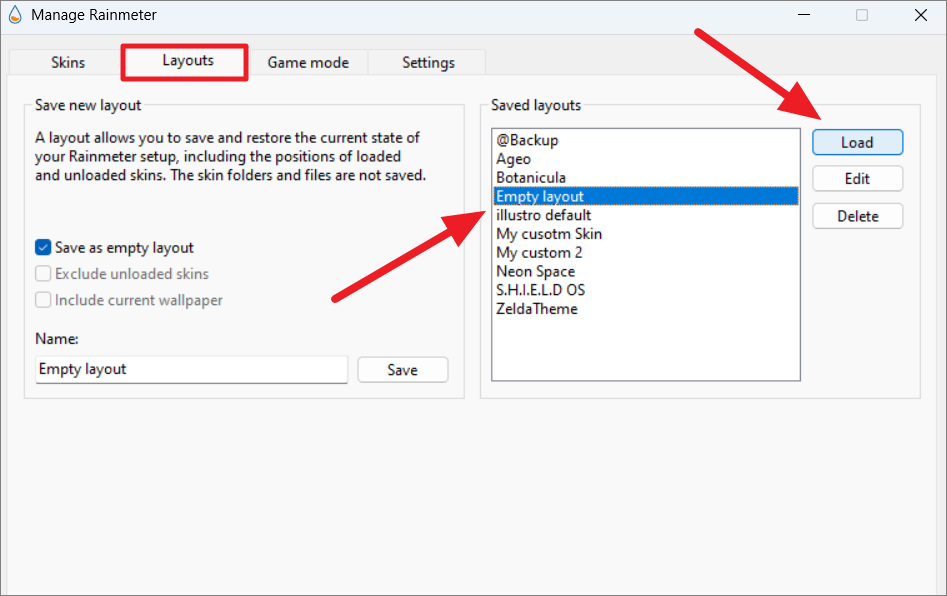
Your layout is now saved and can be reloaded at any time from the ‘Layouts’ tab by selecting it and clicking ‘Load’.
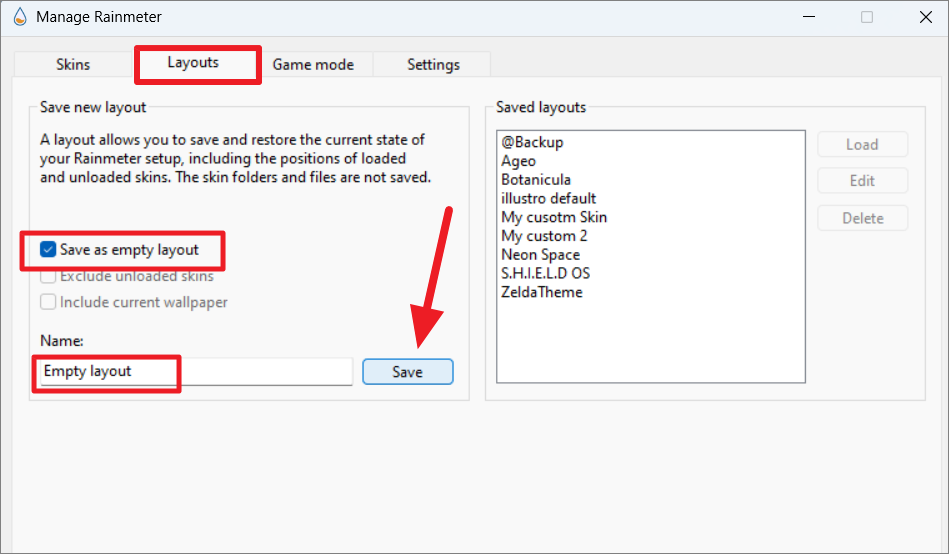
Unloading all skins on Rainmeter
If you need to quickly remove all skins from your desktop, you can create an empty layout and load it when necessary.
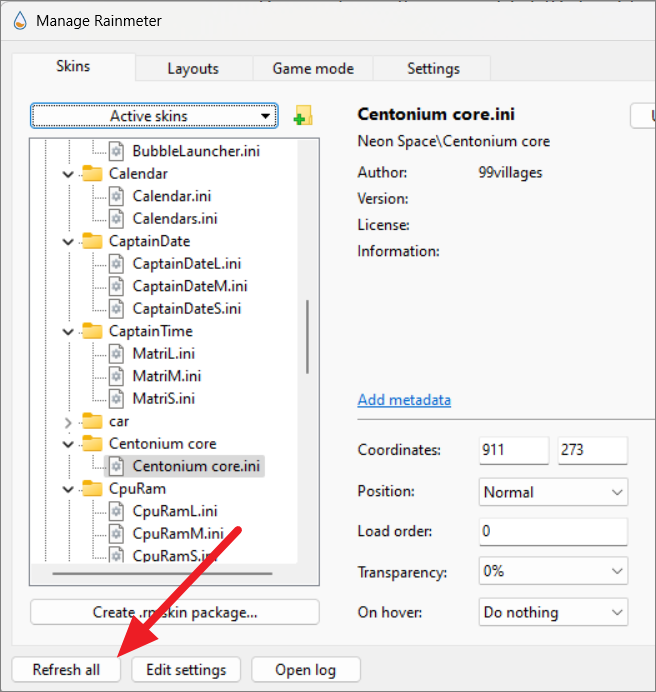
Customizing Rainmeter skins
Rainmeter offers extensive customization options, allowing you to tailor skins to your liking. You can adjust settings like size, position, transparency, and more.
Change Rainmeter skin settings
To modify a skin’s settings, you can use either the context menu or the Manage window.
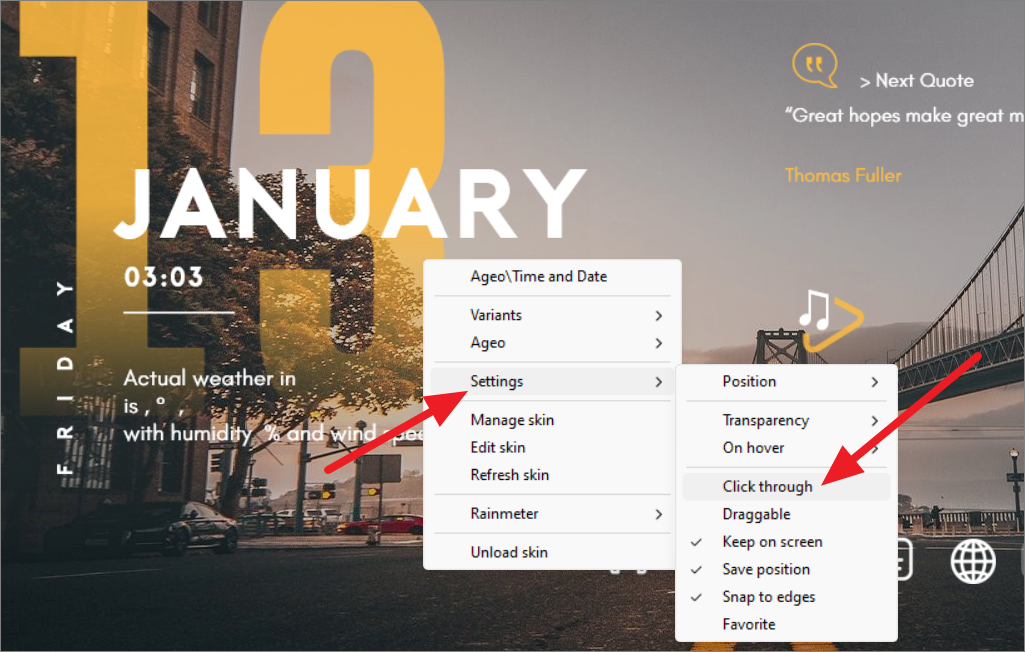
For example, disabling ‘Draggable’ will lock the skin in place, preventing accidental movement.
Enabling ‘Click through’ makes the skin ignore mouse clicks, allowing you to interact with items behind it.
You can also adjust the ‘Position’ to keep skins on top of other windows or behind them.
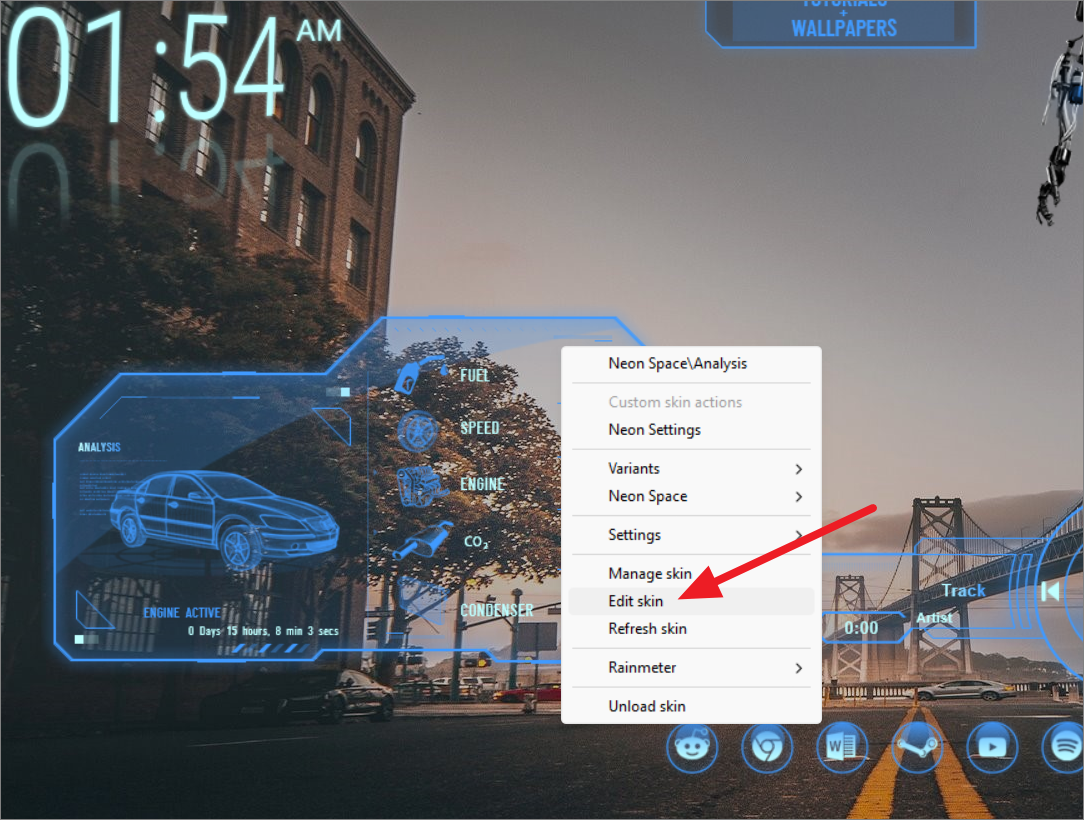
Edit Rainmeter skins using the INI files
For deeper customization, you can edit the skin’s INI configuration files.
Change skin color in Rainmeter
To alter a skin’s color, you can modify the RGB values in the INI file.
Game mode in Rainmeter
If you’re experiencing performance issues while gaming, Rainmeter offers a Game Mode that temporarily unloads skins to free up system resources.

To manually start or stop Game Mode, right-click the Rainmeter icon in the system tray, hover over ‘Game mode’, and select ‘Start game mode’ or ‘Stop game mode’.
Configuring Rainmeter settings
Rainmeter’s Settings tab allows you to adjust application-wide preferences.
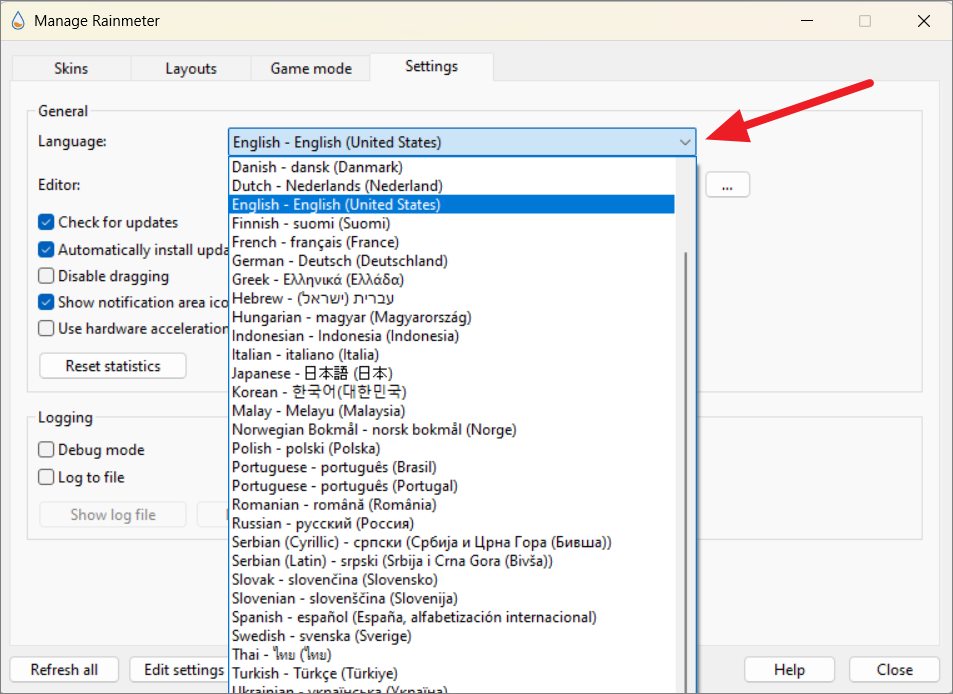
General settings
In the ‘Settings’ tab, you can change the application language, set your preferred text editor, manage update settings, and toggle options like ‘Disable dragging’ to lock all skins in place.
Logging
The ‘Logging’ section allows you to enable ‘Debug mode’ and ‘Log to file’ options for troubleshooting purposes. This can be helpful when diagnosing issues with skins or the application itself.
Creating new skins on Rainmeter
Feeling creative? You can design your own skins using Rainmeter.
For detailed guidance on creating skins, refer to the Rainmeter manual, which offers tutorials and examples.
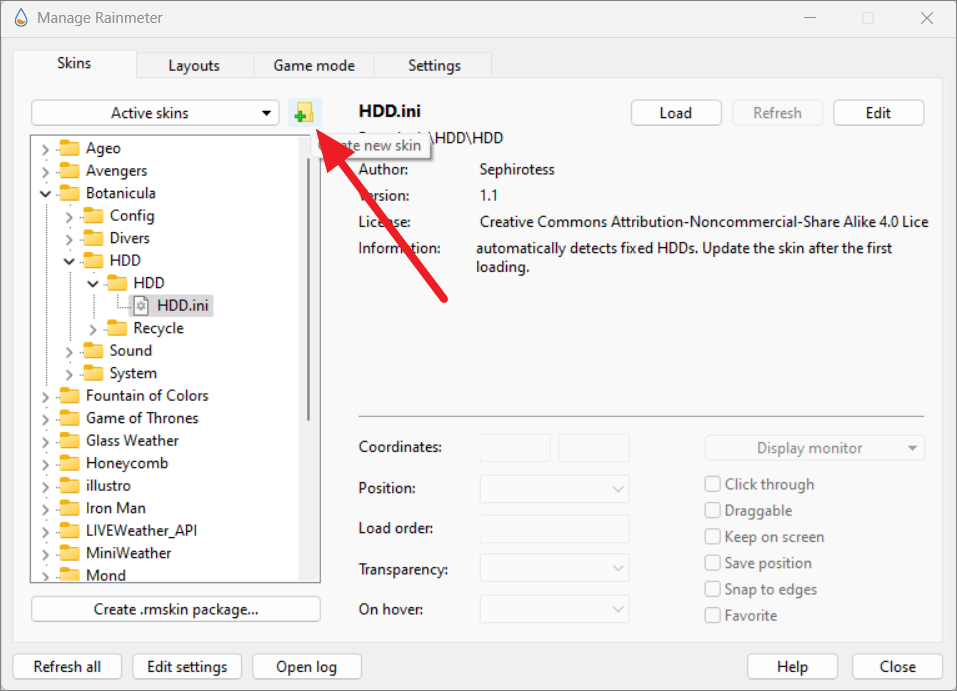
Create a .rmskin file for sharing or distributing skin
If you’d like to share your skin with others, you can package it into an .rmskin file.
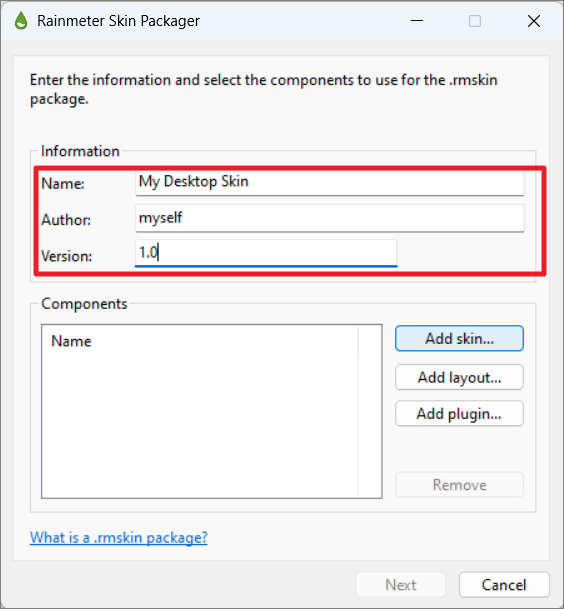
The packaged skin can now be shared and installed by others using the Rainmeter Skin Installer.
Rainmeter app or skin not working?
If you encounter issues with Rainmeter or specific skins, here are some troubleshooting steps to help you resolve common problems.
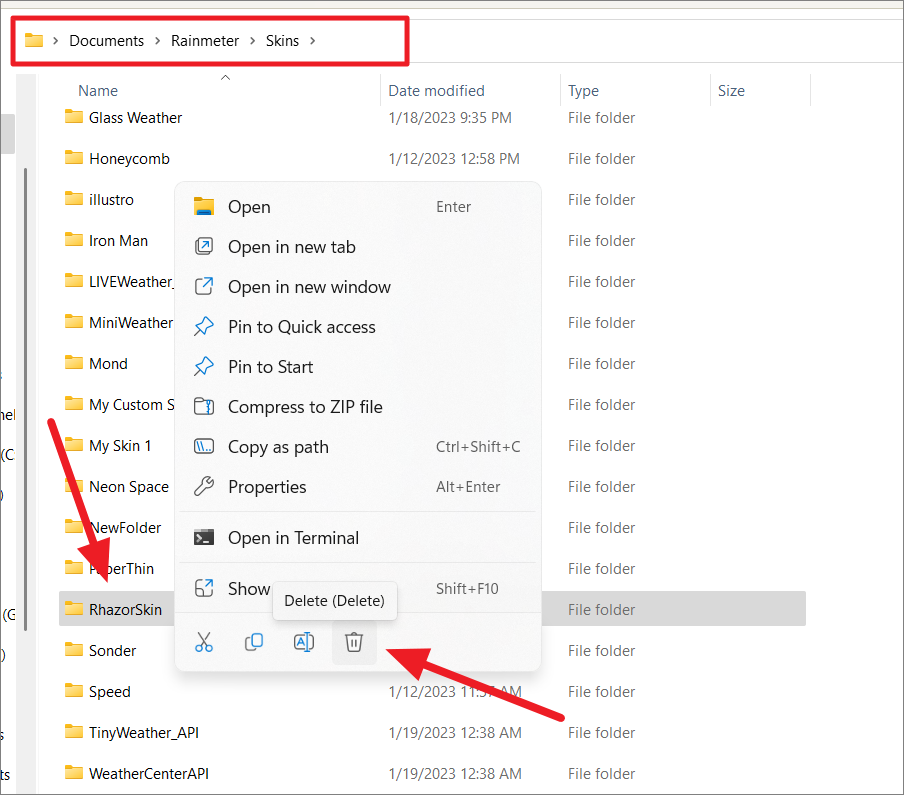
Remove the bugged skin
If a particular skin is causing issues, it’s best to remove it.
Reinstall skin package
If a skin isn’t functioning properly, try reinstalling it.
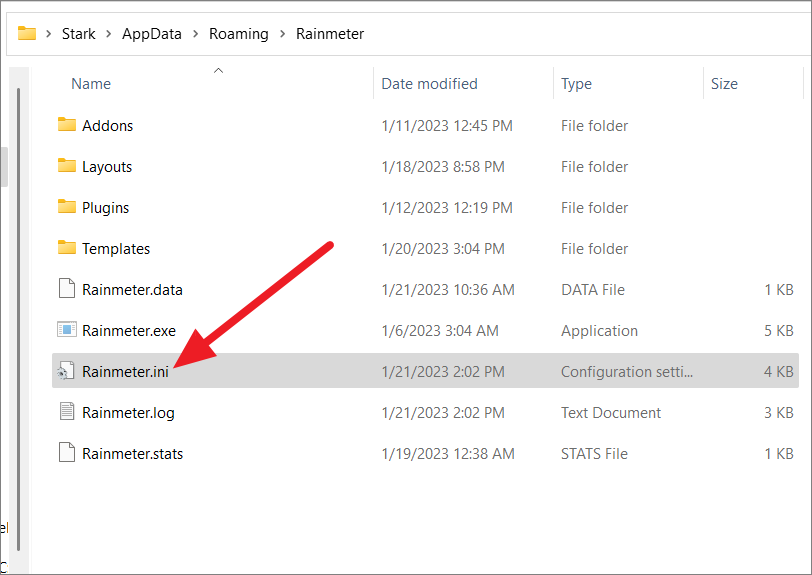
Clear Rainmeter settings cache
Clearing the settings cache can resolve issues caused by corrupted configuration files.
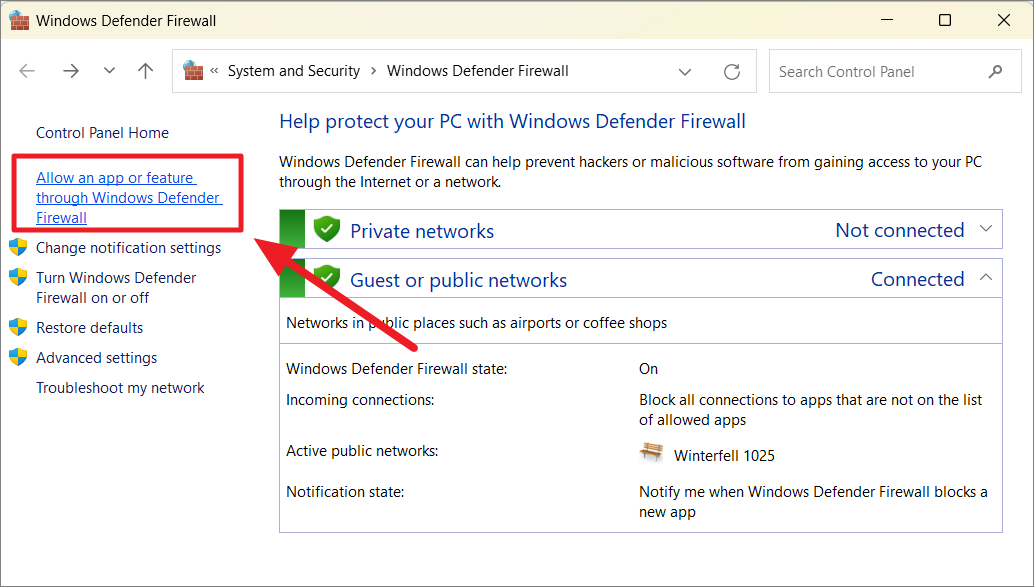
Check if your firewall is blocking Rainmeter
If web-based skins aren’t updating, your firewall might be blocking Rainmeter’s internet access.
Disable anti-virus
Some antivirus programs may interfere with Rainmeter. Try temporarily disabling your antivirus software to see if it resolves the issue. If it does, add Rainmeter to the antivirus’s exception list.
Change the API key
If weather skins aren’t displaying data, the API key might be outdated.
@Resources folder, and named something like Variables.inc.Clean reinstall Rainmeter app
If problems persist, consider performing a clean reinstallation of Rainmeter.
With Rainmeter, the possibilities for customizing your Windows 11 desktop are nearly endless. By following this guide, you’re well on your way to creating a personalized and functional desktop environment that reflects your style and needs.


