Madden 27’s default difficulty tends to swing hard, giving the CPU exaggerated advantages while your own team makes baffling mistakes. Adjusting the sliders fixes most of that, letting you keep the challenge of All-Madden while producing scores and stats that look like real football. The values below are tuned for a Franchise, simulation-style experience.
Quick answer: In Franchise mode, open the Options tab (or the Settings icon on the main menu), choose Edit Settings, and enter the Player Skill, CPU Skills, Special Teams, Game Options, and Wear and Tear values listed below. Leave any slider not listed at its default.
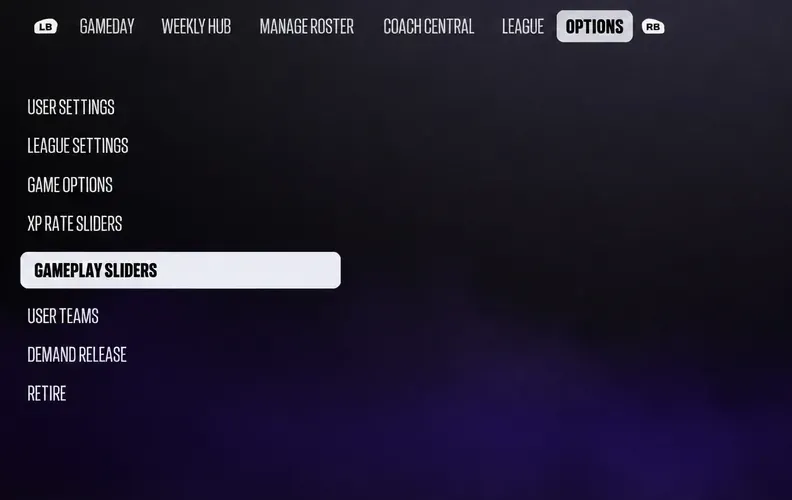
Where to change sliders in Madden 27
Sliders live in the same place whether you are on the main menu or inside a Franchise. If you want the changes to apply only to your Franchise, set them from within Franchise mode so they don’t touch your other game modes.
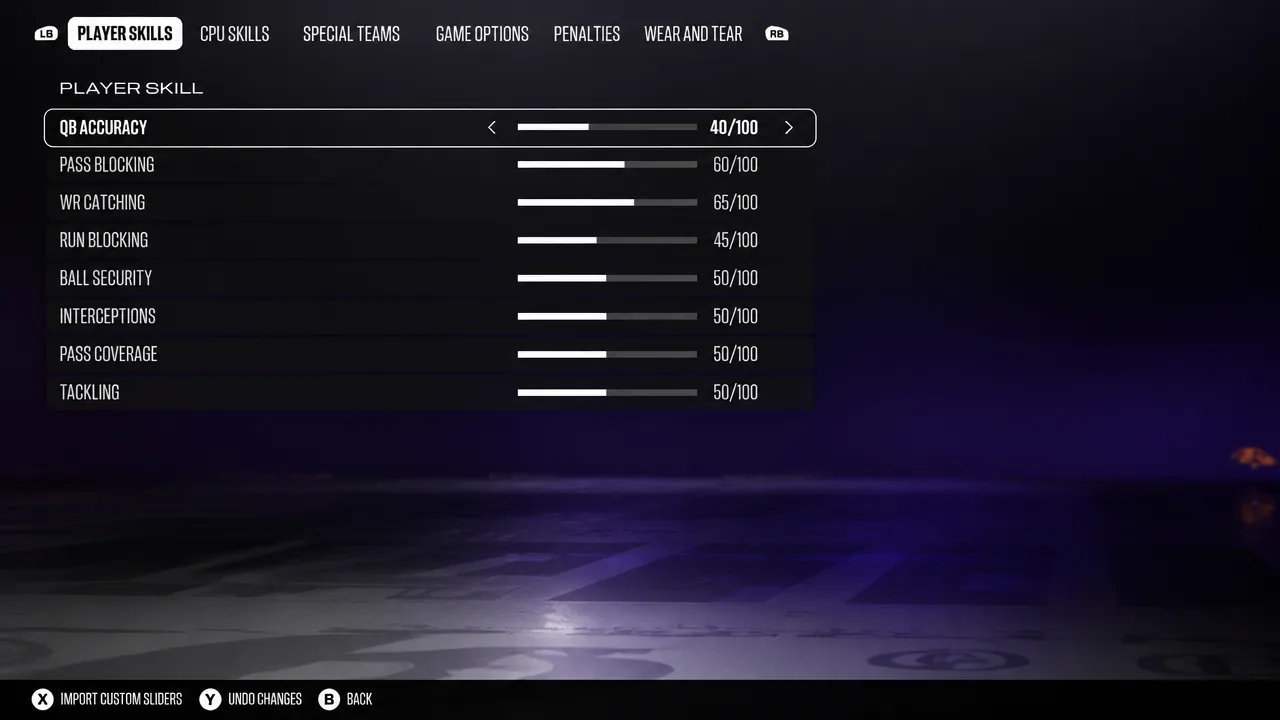
Player Skill and CPU Skills sliders
These two categories control how well you and the computer perform in each phase of the game. Lowering QB Accuracy for both sides forces more incompletions, while trimming CPU Interceptions keeps the AI from picking off your passes at an unrealistic rate.
| Slider | Player | CPU |
|---|---|---|
| QB Accuracy | 40 | 40 |
| Pass Blocking | 60 | 40 |
| WR Catching | 65 | 50 |
| Run Blocking | 45 | 55 |
| Ball Security | 50 | 50 |
| Interceptions | 50 | 35 |
| Pass Coverage | 50 | 50 |
| Tackling | 50 | 50 |
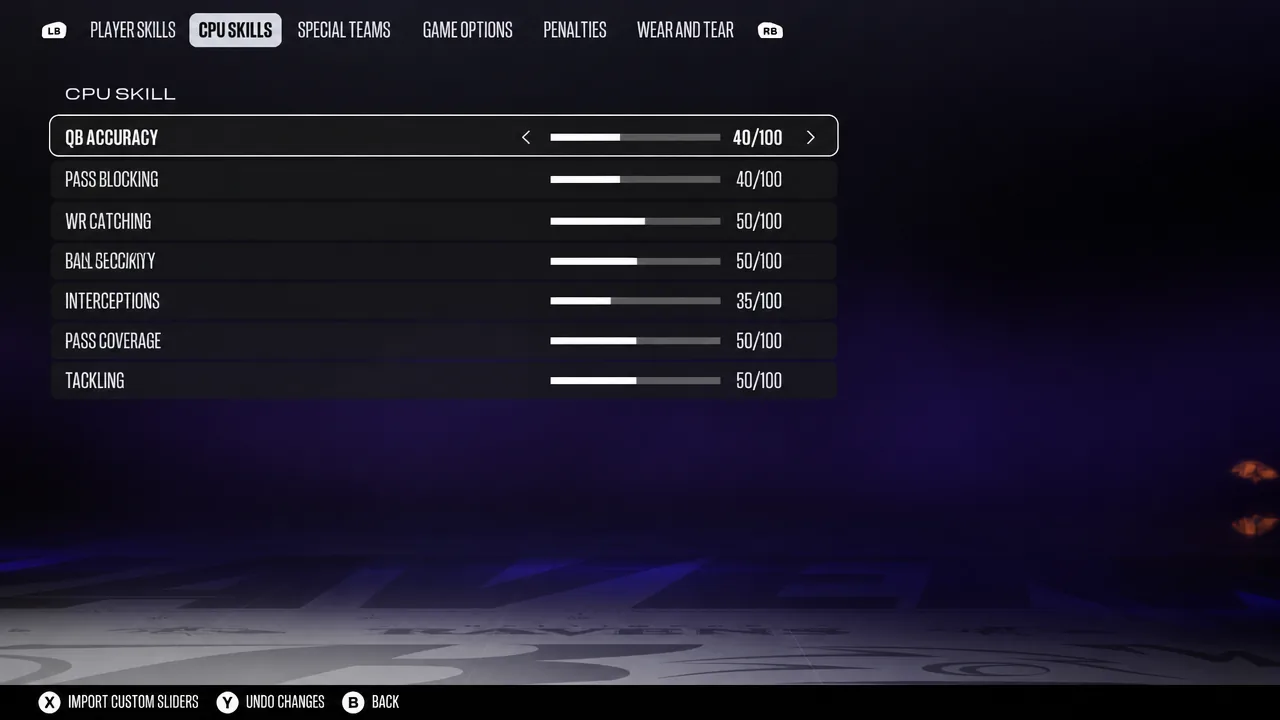
The higher Player Pass Blocking and lower CPU Pass Blocking work together to relieve some of the constant pressure on your quarterback while still letting your pass rush get home against the AI.
Special Teams sliders
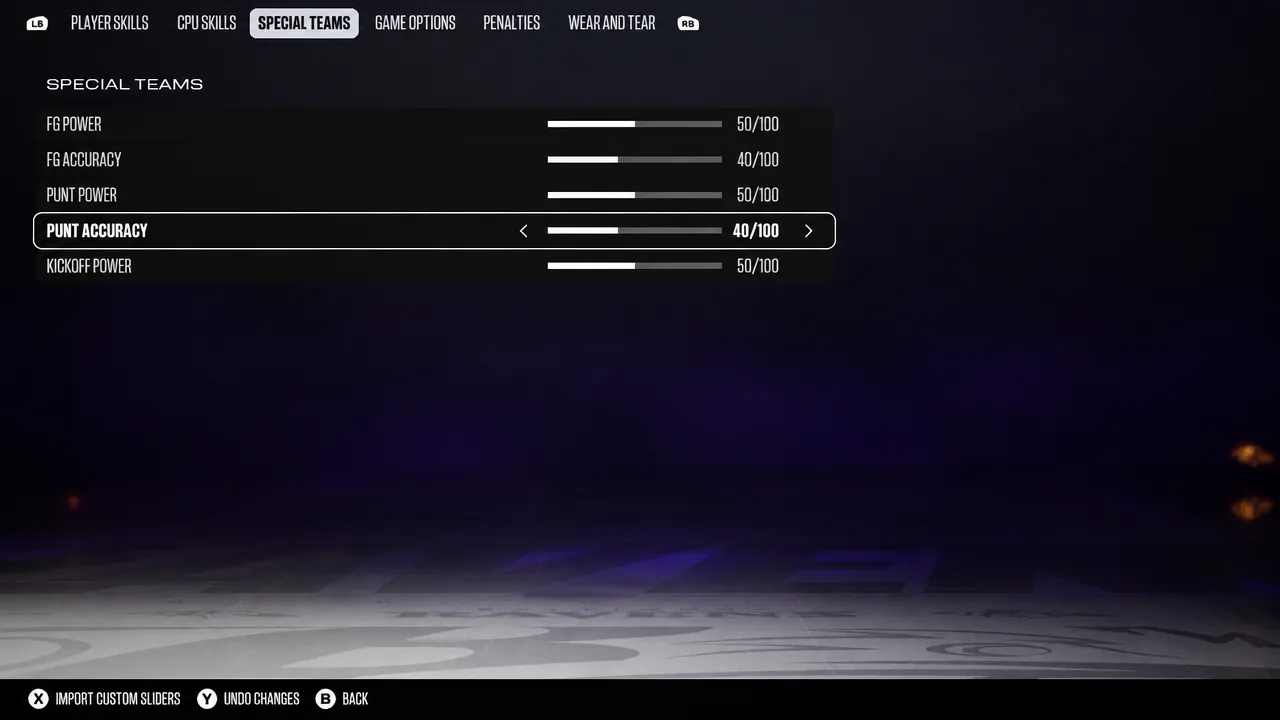
Only two special teams values need adjusting. Dropping both accuracy sliders makes long field goals and pinpoint punts harder to nail, which matches how those plays actually turn out in the NFL.
| Slider | Value |
|---|---|
| FG Accuracy | 40 |
| Punt Accuracy | 40 |
Game Options sliders
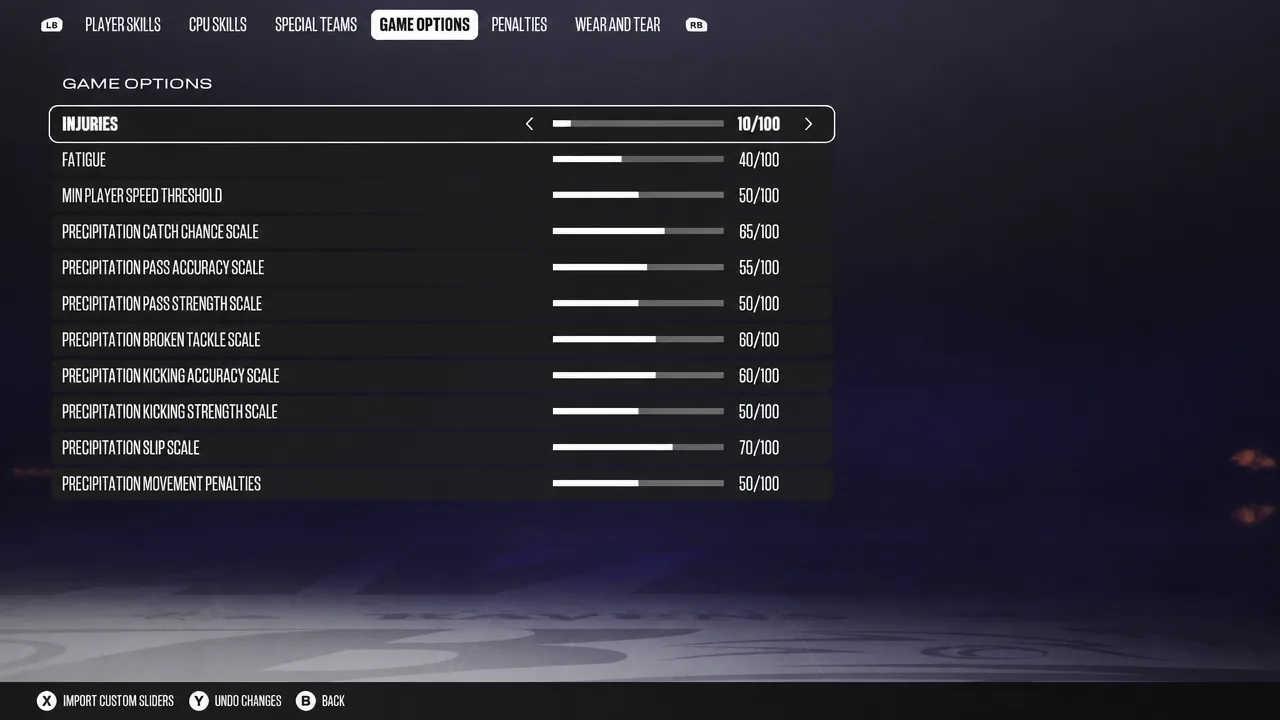
These control fatigue and weather effects. Lowering fatigue keeps rotations sensible, while the precipitation scales change how rain and snow affect catching, passing, tackling, kicking, and slipping.
| Slider | Value |
|---|---|
| Fatigue | 40 |
| Precipitation Catch Chance Scale | 65 |
| Precipitation Pass Accuracy Scale | 55 |
| Precipitation Broken Tackle Scale | 60 |
| Precipitation Kicking Accuracy Scale | 60 |
| Precipitation Slip Scale | 70 |
Wear and Tear sliders
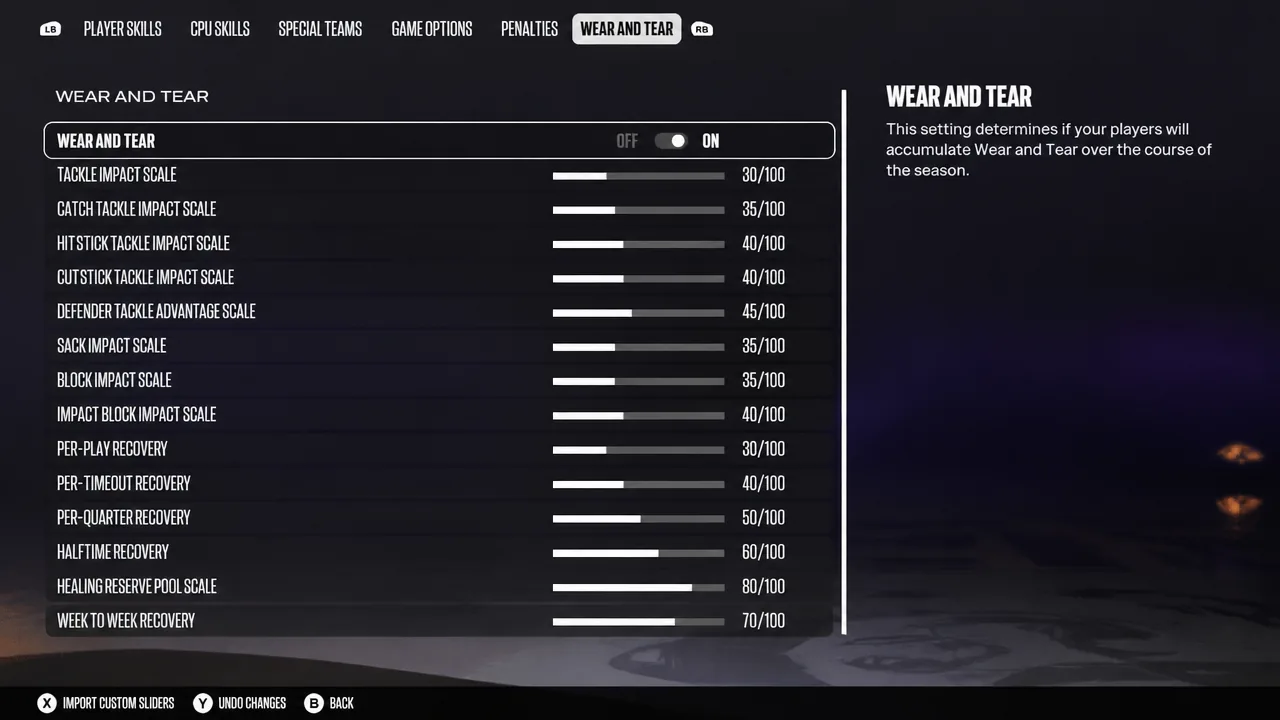
The Wear and Tear system tracks how impacts and recovery build up across plays, quarters, and weeks. Lowering the impact scales reduces the punishment from each hit, while the recovery values control how quickly players bounce back between plays, timeouts, quarters, and games.
| Slider | Value |
|---|---|
| Tackle Impact Scale | 30 |
| Catch Tackle Impact Scale | 35 |
| Hitstick Tackle Impact Scale | 40 |
| Cutstick Tackle Impact Scale | 40 |
| Defender Tackle Advantage Scale | 45 |
| Sack Impact Scale | 35 |
| Block Impact Scale | 35 |
| Impact Block Impact Scale | 40 |
| Per-Play Recovery | 30 |
| Per-Timeout Recovery | 40 |
| Per-Quarter Recovery | 50 |
| Halftime Recovery | 60 |
| Healing Reserve Pool Scale | 80 |
| Week-to-Week Recovery | 70 |
Franchise gameplay settings for realism
The sliders do a lot, but a few core game settings decide how challenging and authentic the experience feels overall. All-Madden with the Simulation game style is the combination that rewards player ratings and delivers real consequences.
| Setting | Value |
|---|---|
| Skill Level | All-Madden |
| Game Style | Simulation |
| Kick Meter Style | Multi-Meter |
| Quarter Length | 15 Minutes |
| Accelerated Clock | On |
| Minimum Play Clock Time | 18 |
| Home Field Advantage | On |
On Simulation, player ratings carry more weight than they do on Competitive, so weaker teams and low-rated players are genuinely harder to win with. Competitive removes injuries across the season and dampens fatigue, which is why it is the wrong choice for a realistic run.
Quarter Length is a matter of time. Full 15-minute quarters mirror real NFL clock management, but 10 minutes still produces reasonable results if you have less time. Accelerated Clock trims the overall length, and you can lower Minimum Play Clock Time to 13 seconds if you know your playbook well.
Home Field Advantage makes kicking harder in hostile stadiums, since the crowd narrows the accuracy window on the kick meter. If you are new to Madden, dropping the Skill Level to All-Pro or Pro is reasonable, but returning players chasing realism should stay on All-Madden and let the sliders tame the CPU.
Team, Commissioner, and Dev Trait options
A handful of league settings shape how your Franchise plays out beyond the field. Full Control keeps every decision in your hands, while Auto Progress Players hands off the tedious job of upgrading each roster spot to the CPU, which does a solid job based on practice and game performance.
| Setting | Value |
|---|---|
| Season Experience | Full Control |
| Auto Progress Players | On |
| Coach Mode Enabled | Off |
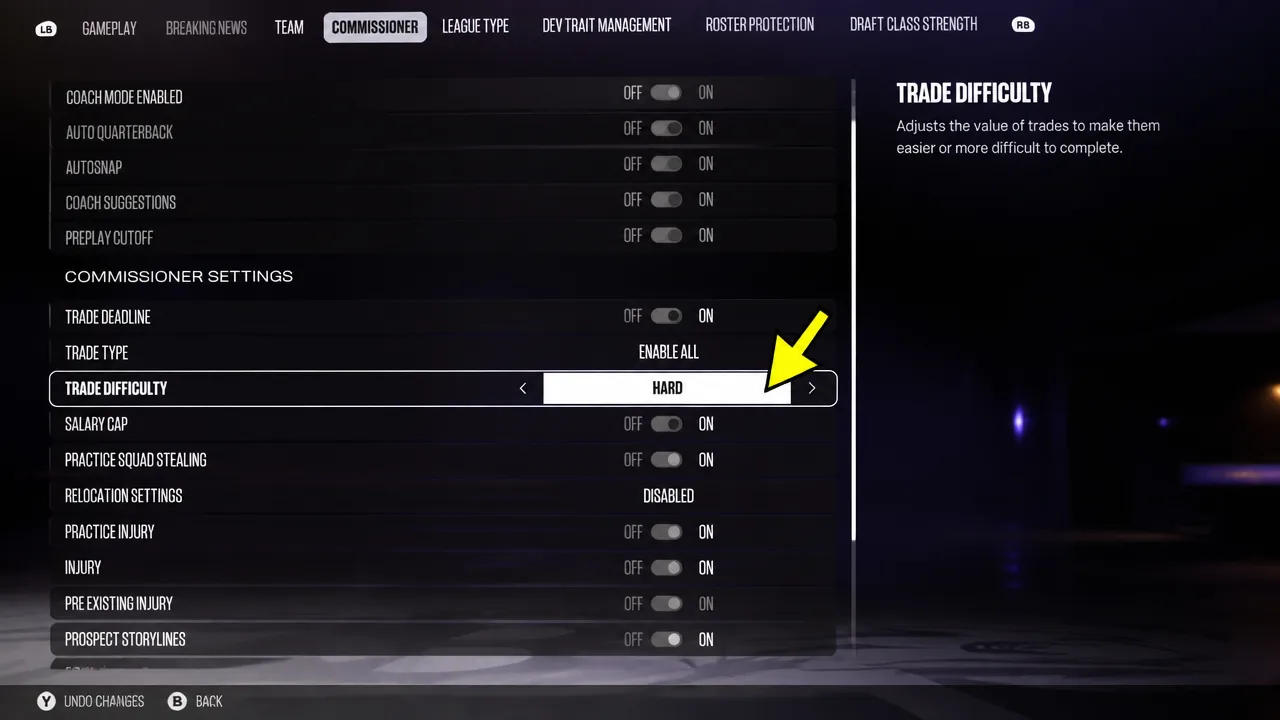
| Trade Difficulty | Hard |
Turning Coach Mode off keeps you fully in control of plays on the field rather than just calling them as a manager. Raising Trade Difficulty to Hard increases trade values and prevents lopsided, unrealistic deals, which makes budget management more demanding.
For Dev Trait Management, leave the values at their defaults. Breakout Scenarios are one-game chances to elevate a player from Star to Superstar to X-Factor, triggered by standout performances but never guaranteed.
| Setting | Value |
|---|---|
| Breakout Scenarios | On |
| Desired X-Factor Dev Players | 75 |
| Desired Superstar Dev Players | 100 |
| Desired Star Dev Players | 500 |
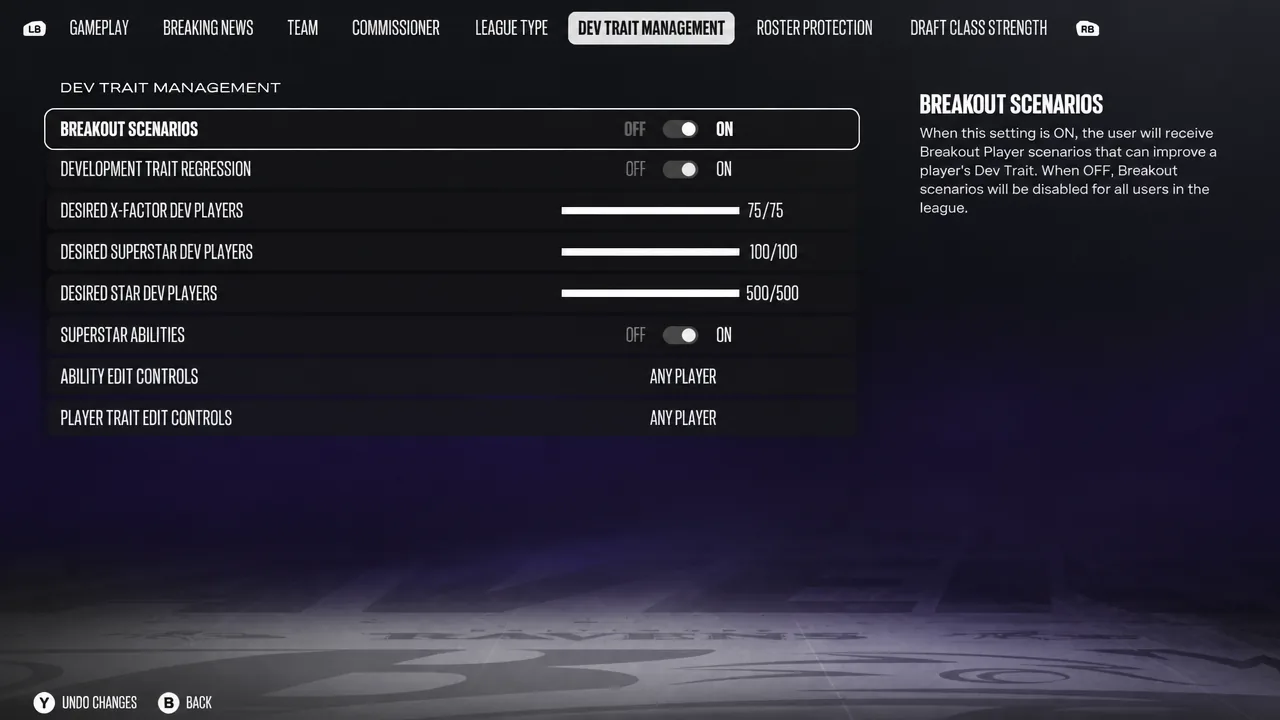
You can turn Breakout Scenarios off and disable Superstar Abilities if you want a stricter simulation, but keeping them on preserves the gap between elite and merely good players and matters more if you also play online.
Coin toss, passing, and catching adjustments
The Game Options menu also holds a few gameplay-shaping choices worth setting deliberately. For the coin toss, electing to kick means you receive in the second half, which gives you a chance to answer if you trail at the break. If you lose the first choice, taking Against Wind puts the wind at your back in the fourth quarter for easier late field goals.
| Setting | Value |
|---|---|
| Coin Toss 1st Choice | Kick |
| Coin Toss 2nd Choice | Against Wind |
| Passing Type | Revamped Passing |
| Passing Slowdown | Off |
| Pass Lead Increase | Normal |
| Reticle Speed | 6 |
Revamped Passing is faster and simpler, and with Pass Leading you still place throws in a tight radius around your target. Normal for Pass Lead Increase widens that placement radius, which helps most on deep passes. Reticle Speed works like mouse sensitivity, so 6 is a starting point you can tune to your comfort.
The catching settings are the biggest realism fix. The CPU is unusually good at forcing incompletions and interceptions, so turning off Timing Based Catching for both offense and defense removes one of the main reasons AI teams disrupt your passes so effectively.
| Setting | Value |
|---|---|
| AI WR For User Teams | On |
| Timing Based Catching Min Throw Distance For Offense | Off |
| Timing Based Catching Min Throw Distance For Defense | Off |
Keeping AI WR on makes your computer-controlled receivers play intelligently rather than like dummies, which supports the authentic feel rather than making the game easier.
Coach Adjustments
Leave most Coach Adjustments at their defaults, but set Offense General Blocking to Aggressive. On All-Madden your quarterback faces heavy pressure, and holding blocks longer buys a little extra time on pass plays.
Enter all of these values, play a few full games, and check your box scores. If completion percentages, sacks, or interception totals still look off for your play style, nudge the relevant sliders a few points in either direction until the numbers settle into a realistic range. Any slider not covered here can stay at its default while you fine-tune.