The museum in Moonlight Peaks is Jada’s long-term project, and finishing it means feeding five themed rooms with crops, fish, bugs, crafted goods, and rare artifacts you dig or dive for. It sits at the top-left corner of town, west of the Crest Garden and next to the exit toward the Moonlit Pines. Completing it is one of the longest goals in the game, so knowing exactly what each room wants saves a lot of wasted harvests.
Quick answer: Enter the room that matches your item, walk up to the collection’s exclamation-mark sign, interact with it, pick the item, and confirm the donation. Farming crops must be two-star quality and fish must have no stars, or the sign will not accept them.

How to unlock the museum
The museum does not exist from day one. It opens after the Henderson family moves into town and you finish a short chain of story quests tied to Jada. For many players this lands around the start of Autumn in year one.
How donating works
You never hand items to Jada directly. Instead, step through the portal in the main room to reach one of the five collection rooms, then interact with the exclamation-mark sign beside the exhibit you want to fill. A fish only goes in the aquarium, a fresh bug only goes in the critter room, and so on.
Any item that still needs donating shows a museum icon over its inventory slot, which is a reliable way to avoid selling or cooking something you still need. Two collections also require a specific color variant, and two item types have strict quality gates.
| Room | Collections inside |
|---|---|
| Supernatural | Witch, Vampire, Seer, Werewolf, Mermaid |
| Deity | Deity |
| Farming | Farming crops |
| Aquarium | Fish |
| Critter | Bugs and butterflies |
Supernatural room collections
This room holds five separate collections, each with its own sign. They mix everyday items like flowers and cooked dishes with one-time artifacts you only find by digging shiny spiral spots or diving into water bubble spots. The Fur Chair must be the Brown variant and the Aquatic Cabinet must be Blue, or they will not count.
Witch collection
| Item | How to get |
|---|---|
| Googly Soup (two-star) | Learn the recipe and cook a two-star version |
| Witch’s Hat | Dig shiny spiral spots |
| Cosmic Globe | Dig shiny spiral spots |
| Mystic Cauldron | Dig shiny spiral spots |
| Mana Extractor | Craft from its blueprint and donate a spare |
Vampire collection
| Item | How to get |
|---|---|
| Bloody Mana Mary (two-star) | Unlock the recipe and craft it |
| Red Wine (two-star) | Make wine from grapes in a keg |
| Gothic Mirror | Unlock the recipe and build at the workbench |
| Black Azalea | Forage in the wild near the Khazan Temple |
| Blood Chalice | Dig shiny spiral spots |
| Malakar’s Coffin | Dig shiny spiral spots |
| Bat Skull | Dig shiny spiral spots |
Seer collection
| Item | How to get |
|---|---|
| Moon Crystal | Mine from the Crystal Cave |
| Decorative Glass Pane | Unlock the recipe and build at the workbench |
| White Rose | Forage in the wild in Moonlight Pines |
| Blue Moonlight Flower | Forage growing wild |
| Seer Board | Dig shiny spiral spots |
| Third Eye Hand | Dig shiny spiral spots |
| Coil of Fate | Dig shiny spiral spots |
Werewolf collection
| Item | How to get |
|---|---|
| Farmer’s Stew (two-star) | Unlock the recipe and cook it |
| Mana Moon Cupcake (two-star) | Unlock the recipe and cook it |
| Fur Chair (Brown) | Unlock the recipe and craft the Brown variant |
| Wolfsbane Powder | Grow Wolfsbane, dry it, then grind with the Enchanted Mortar |
| Moonreaver | Dig shiny spiral spots |
| The Timber Beast | Dig shiny spiral spots |
| Wolf’s Prey | Dig shiny spiral spots |
Mermaid collection
| Item | How to get |
|---|---|
| Fishy Milkshake (two-star) | Unlock the recipe and make it |
| Aquatic Cabinet (Blue) | Unlock the recipe and craft the Blue variant |
| Beach Lantern | Unlock the recipe and craft at the workbench |
| Dried Seaweed | Catch seaweed while fishing, then dry it on the Drying Rack |
| Shell Lantern | Dive water bubble spots |
| Seahorse Sculpture | Dive water bubble spots |
| Poseidon’s Trident | Dive water bubble spots |
| Altar Ornament | Dive water bubble spots |
Deity collection
The deity room needs just four items, but none of them are farmed or dug up. Each one comes from reaching maximum friendship with a deity, so keep giving them gifts they love to move these along.
| Item | How to get |
|---|---|
| Death’s Tomb | Reach max friendship with Death |
| Chakra Tuner | Reach max friendship with the Moon Goddess |
| Sun God’s Halo | Reach max friendship with the Sun God |
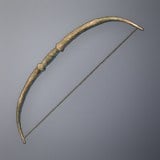
| Llemi’s Bow | Reach max friendship with Llemi |
Farming collection: all 55 crops
The farming room is the largest single collection, and every crop you donate must be two-star quality. Season windows matter, since several crops only grow in one season and a few must be harvested in a specific mood.
| Crop | How to grow |
|---|---|
| Amanita | Summer and Autumn |
| Angry Mandrake | Autumn, harvest while Angry |
| Black Sun Currant | Winter |
| Blackberry | Winter |
| Blood Grapes | Summer and Spring |
| Blood Orange | Tree, harvest in Summer or Spring |
| Blood Tomato | Any season |
| Blueberry | Winter and Spring |
| Carrot | Spring |
| Clawy Vera | Winter |
| Cocoa Beans | Tree, harvest in Spring or Summer |
| Coffee Beans | Tree, harvest in Summer or Spring |
| Common Mushroom | Autumn or Summer |
| Cranberry | Winter or Autumn |
| Cruelcumber | Spring |
| Dark Strawberry | Winter |
| Drikker | Spring and Summer |
| Eggplant | Spring |
| Frosteria | Winter |
| Glow Ginger | Herb garden, harvest in Summer |
| Glowglammer | Summer and Winter |
| Gobbler | Summer |
| Googly Garlic | Herb garden, harvest in Autumn, Spring, or Summer |
| Happy Mandrake | Autumn, harvest while Happy |
| Henbane | Herb garden, harvest in Spring |
| Hold-Me-Close | Winter and Spring |
| Lava Pepper | Autumn |
| Lemon | Tree, harvest in Spring and Summer |
| Melon | Summer and Autumn |
| Moonfruit | Any season |
| Muse Nut | Tree, harvest in Spring and Winter |
| Nightshade | Herb garden, any season |
| Onion | Any season |
| Pumpkin | Autumn |
| Purple Lavender | Herb garden, Spring or Winter |
| Radish | Autumn |
| Raspberry | Spring and Summer |
| Red Corn | Summer and Autumn |
| Red Lavender | Herb garden, Spring or Winter |
| Sage | Herb garden, Summer |
| Skunktail | Herb garden, Summer |
| Strawberry | Spring and Summer |
| Suffrain | Herb garden, Autumn |
| Sugarbone | Spring and Summer |
| Sunburst | Summer and Autumn |
| Sweet Wicca | Same seed as Weeping Wicca, harvest the Happy version |
| Unmilled Rice | Spring, Summer, or Autumn |
| Void Radish | Winter |
| Volacio | Summer or Winter |
| Weeping Wicca | Spring or Winter, harvest the Sad version |
| White Grapes | Spring or Summer |
| Wild Potato | Spring |
| Wily Wheat | Any season |
| Wolfsbane | Herb garden, any season |
| Yellow Glowhammer | Summer |
Aquarium collection: all 22 fish
Every fish in the game can be donated, but only regular, no-star fish qualify. A one-star or two-star catch will be refused, so keep a plain version aside for the museum. Some of the larger fish also require the Enchanted Fishing Rod, since the basic rod cannot land them.
| Fish | Where to catch |
|---|---|
| Amour | Rare, Pink Grove |
| Brickle | Uncommon, Howling Marshes |
| Daybreaker | Uncommon, Forest River |
| Fortipod | Rare, Silverveil Lake |
| Furybud | Rare, Luna Bay |
| Glammer | Common, Pink Grove |
| Glibby | Uncommon, river |
| Gloy Gloy | Rare, Howling Marshes |
| Gnasher | Uncommon, river |
| Goldy | Uncommon, river |
| Goliath | Legendary, Forest River |
| Leftsee | Uncommon, caverns and Twilight Catacombs |
| Missing | Random chance to spawn while fishing |
| Moonflutter | Uncommon, Luna Bay |
| Mouthout | Uncommon, Silverveil Lake |
| Orbis | Uncommon, Silverveil Lake |
| Skullfin | Rare, caverns and Twilight Catacombs |
| Snuffy | Uncommon, Luna Bay |
| Splotch | Common, Silverveil Lake |
| Twilight | Uncommon, Luna Bay |
| Violet | Uncommon, Forest River |
| Whisper | Common, most bodies of water |
Critter collection
The critter room is the biggest hunt of all, with 95 bugs and butterflies to catch and donate. Your net is the tool for the job, and each species has its own habitat and timing. This is a long grind, so keep the net handy whenever you spot something new fluttering around town.
Museum milestone rewards
Rewards are tied to overall museum completion, not individual rooms. You can check your progress at the sign in the lobby, and when you cross a milestone Jada stops you as you leave the collection rooms to hand over the prize. Payouts come every 5% early on, then shift to every 10% after the 30% mark.
| Progress | Reward |
|---|---|
| 5% | Vampsters Playing Poker painting |
| 10% | Firefly Pollinator and Firefly Sanctuary blueprints |
| 15% | Basic Fertilizer x32 |
| 20% | Rapid Reel Potion x2 |
| 25% | Dracula Insignia Key (unlocks Twilight Catacombs) |
| 30% | Animal Feeder Temple and Pillow Cat House |
| 40% | Mana Essence x5 |
| 50% | Arcane Flame x1 (increases max mana) |
| 60% | Seed Sequencer blueprint (craft your own seeds) |
| 70% | Mana Potion x3 |
| 80% | Unlock Greenhouse (build it by talking to Ridge in the Howling Hammer) |
| 90% | Museum Relic Replica x13 |
| 100% | “One Collection to Rule Them All” achievement |
You know a donation registered when its museum icon disappears from the inventory and the exhibit fills in. The two most common reasons the sign rejects an item are quality and color. Farming crops need two stars, fish need zero stars, and the Fur Chair and Aquatic Cabinet must be the Brown and Blue variants. On Nintendo Switch 2, the final 100% reward is only an achievement, and since that platform has no achievement system, hitting the last milestone there is optional unless you want the full clear.