
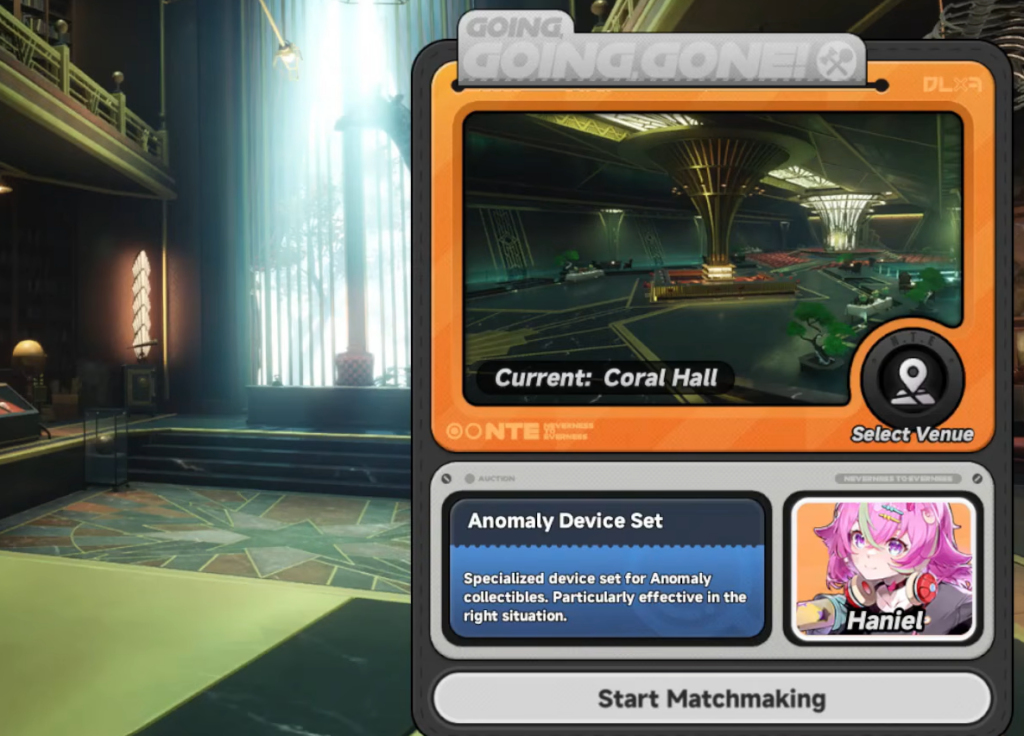
The Going, Going, Gone! auction event in Neverness to Everness pays you a hidden bonus every time another player overpays for a lot. You do not need to win a single auction to profit from it. By pairing the assistant Haniel with a cheap device set inside Coral Hall, you can gather enough intel to know when opponents are bidding into a loss, then step back and let them do it while you collect a cut.
Quick answer: Buy a 10,000-shell device set, pick Haniel as your assistant, and enter Coral Hall. Use your devices each round to estimate the box’s real value, then bid only to keep the round alive. When an opponent wins above the true value, you receive a Bonus Reward equal to 10% of their loss, which covers your 5,000-shell entry and 10,000-shell device cost with room to spare.
Why the combo profits: the 10% loss bonus
The mechanic that makes this work is the loss payout. Each match puts you against three other players bidding for a shared lot of collectibles. Whoever meets the winning condition takes every item in the box. If that winning bid is higher than the box’s actual value, the winner ends up in the negative, and the other three players each receive 10% of that negative amount as profit.
That payout is passive. You earn it simply by being in the match when someone overpays. Because opponents routinely misjudge value and push bids far above what a box is worth, a single overbid can hand you tens of thousands of shells. Your only real cost is the 5,000-shell Coral Hall entry fee and the 10,000-shell device set, and one good bonus wipes both out.
In practice this produces a steady gain. A run where an opponent loses roughly 412,000 shells returns about 41,000 in bonus, leaving a net profit near 26,000 after costs. Even smaller overbids of 140,000 to 240,000 still clear your expenses and leave a few thousand shells behind.
What you need before starting
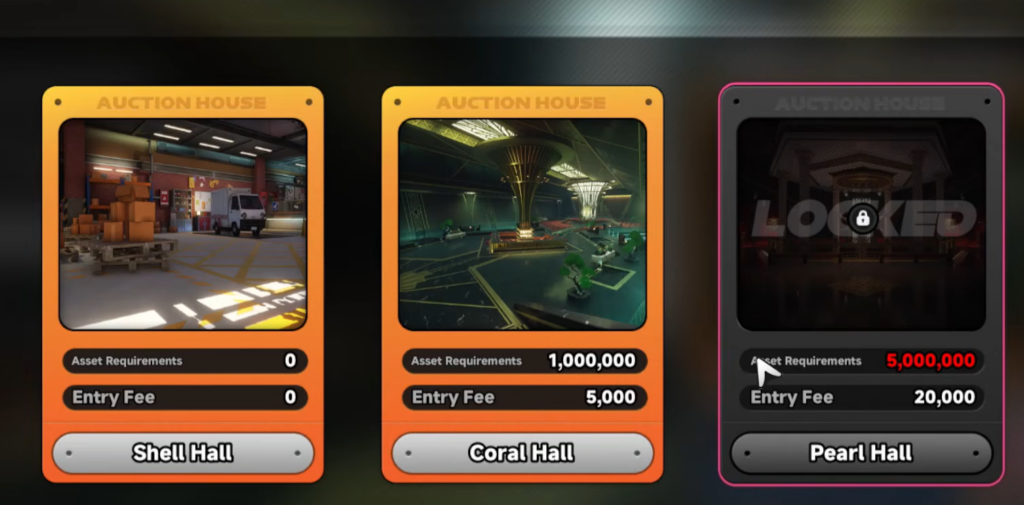
Coral Hall is the venue that makes this profitable. It requires a minimum asset threshold to enter and a small entry fee, but its higher-value lots mean opponent overbids are large enough to generate meaningful bonuses. The three venues break down like this.
| Venue | Required Assets | Entry Fee |
|---|---|---|
| Shell Hall | 0 | 0 |
| Coral Hall | 1,000,000 | 5,000 |
| Pearl Hall | 5,000,000 | 20,000 |
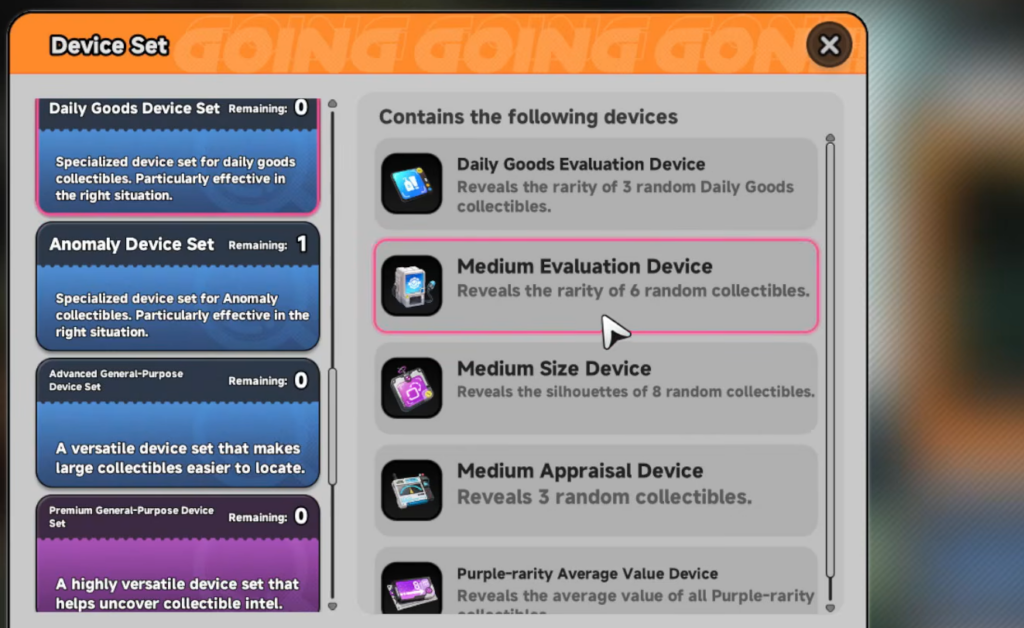
For the device set, skip the expensive tiers. A 10,000-shell set is all you need, and options such as the Anomaly Device Set or the Antique Device Set work well. Both hold a full spread of appraisal, evaluation, and size devices, and every device is single-use, so cheaper sets give you the same round-by-round intel without wasting shells. Devices are not consumed until you actually activate one during a match, and you can carry unused devices into your next run.
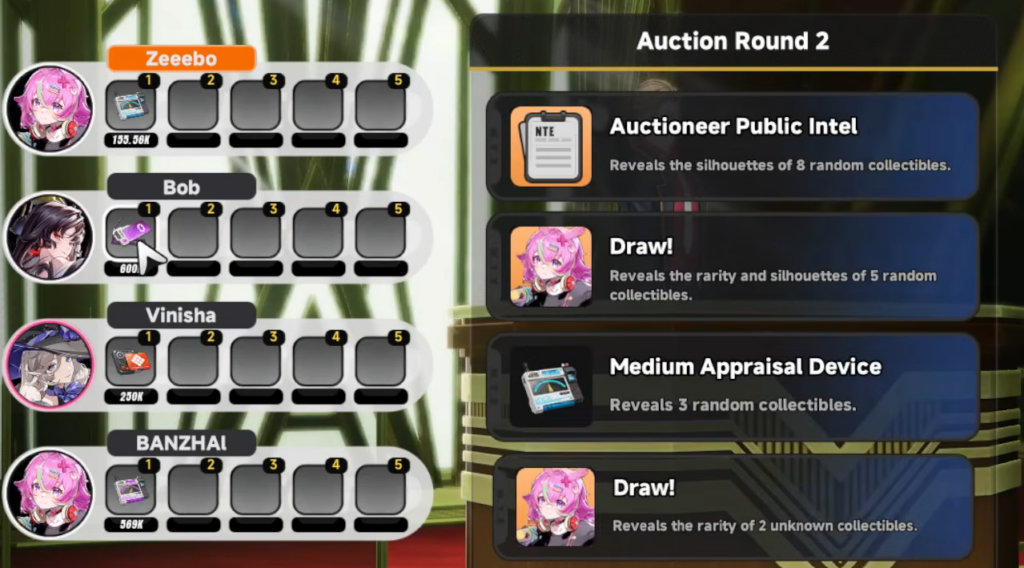
Haniel is the assistant that ties it together. Her skill, Draw!, reveals the rarity of 5 random collectibles at the start of the auction, then reveals the rarity of 2 unknown collectibles every round after. You do not need to own her to select her, and that constant flow of information is what lets you value a box accurately before deciding whether to walk away.
Running the combo step by step

Round win conditions to watch
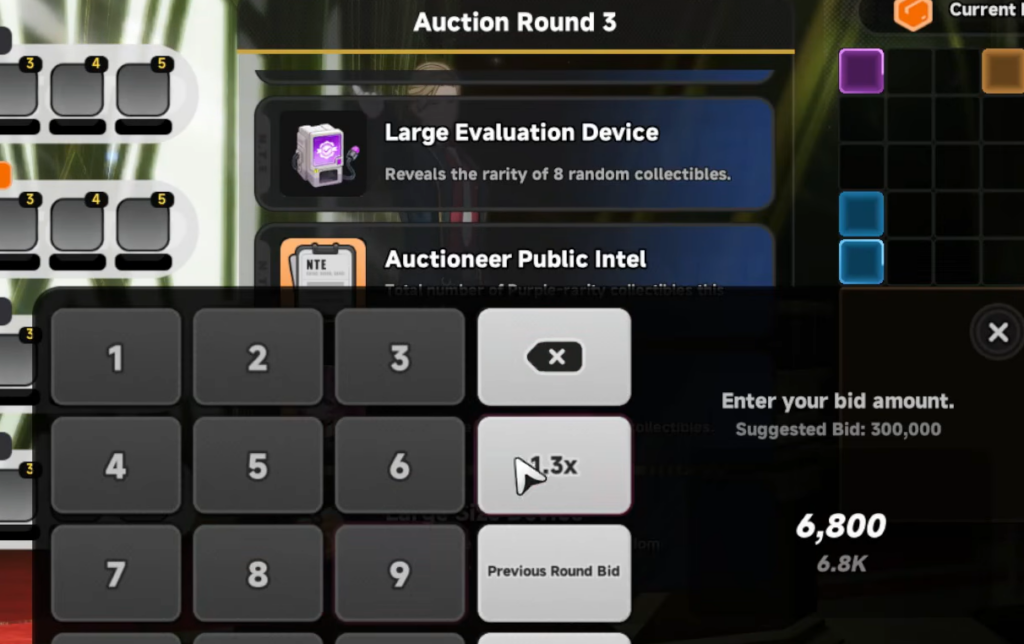
Knowing when a bid instantly wins keeps you from accidentally taking a box you meant to avoid. Each round has a multiplier over the second-highest bid, and it loosens as the match goes on.
| Round | Winning condition |
|---|---|
| 1 | Bid at least 2x the second-highest bid |
| 2 | Bid at least 1.6x the second-highest bid |
| 3 | Bid at least 1.3x the second-highest bid |
| 4 | Bid at least 1.1x the second-highest bid |
| 5 | The highest bidder wins all lots |
Because Round 5 hands the box to whoever bids highest with no multiplier, this is usually where a greedy opponent locks in their loss. Keep your Round 4 bids under the amount you expect them to throw down so the win lands on them, not you.
How to confirm the profit landed
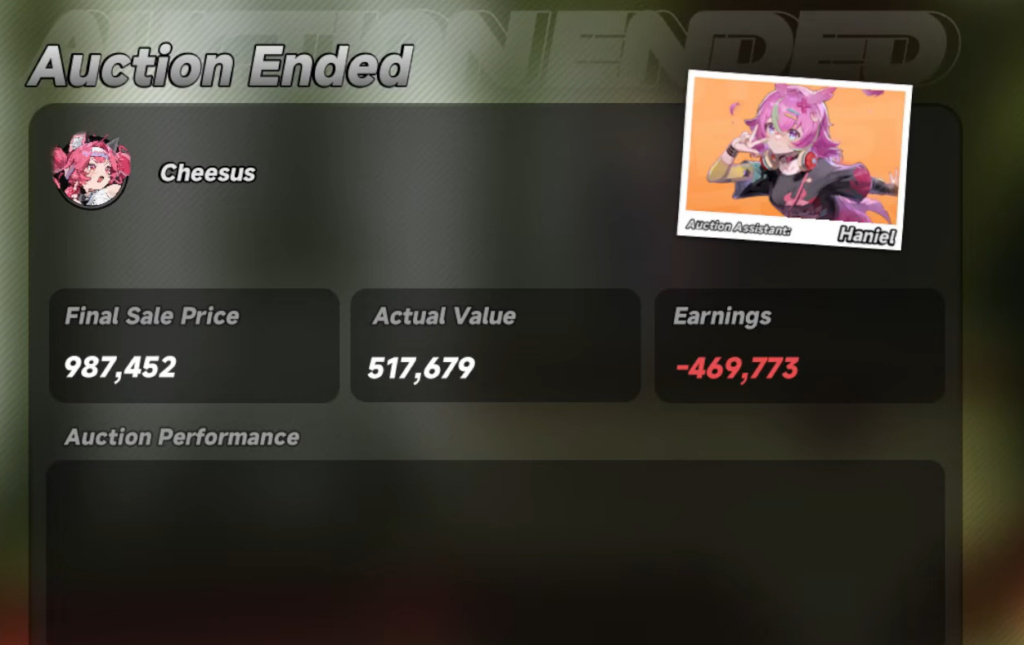
The Auction Ended screen tells you everything. It names the winner, their final bid, the box’s actual value, and the resulting loss. Directly below, you will see your Bonus Reward listed as 10% of that loss. Compare your assets before and after the match. If they rose by more than the 15,000 shells you spent on entry and devices, the combo worked.
The combo fails to profit in only a few situations. If you win the box yourself above its true value, you take the loss instead of collecting a bonus, so never let your own bid meet a winning condition on an overpriced lot. If every opponent bids at or under the box’s real value, no one goes negative, and there is no bonus to share. And if the winning overbid is small, your 10% cut may not fully cover the 15,000-shell cost, leaving a slim loss that round.
Hold onto any Red-rarity collectibles you do end up winning. Displaying them in your Collectibles Warehouse generates Gold Shells over time, and claiming that income before reorganizing your display keeps you from resetting unclaimed earnings.
Going, Going, Gone! runs until August 19, 2026, which leaves plenty of time to repeat this loop. Each clean run nets somewhere between a few thousand and 20,000-plus shells depending on how badly your opponents misprice their bids, and none of it requires you to win an auction at all.