

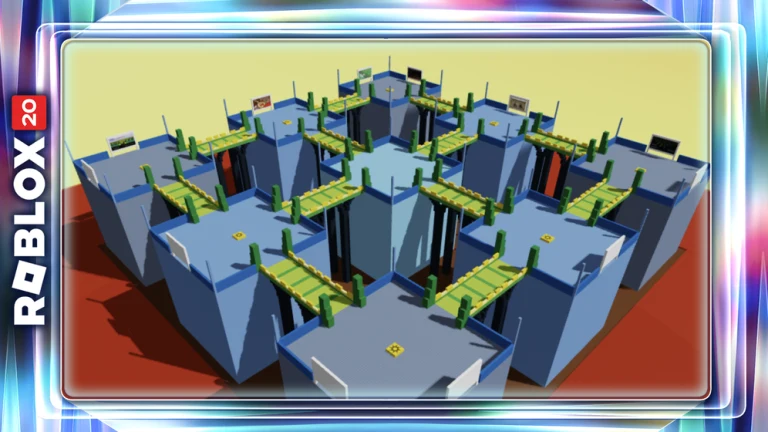
In The Hunt: Roblox 20, Rocket Arena represents the 2008 stop and secretly awards an extra badge that the game never mentions. Its concealed challenge combines a phone-number sequence, a timed flying course, and a plunge through a hollow black tower. The game gives no directions, and the hidden interactables remain inactive until you have already been recognized as a Rocket Arena winner.
Quick answer: Earn the 5 KO badge, rejoin, walk the spawn pads in the order printed on the billboard (usually 7-4-8-3-9-1-2-6-3-4), clear the jet boot obby, then drop down the black chimney.
Requirement: Win a round first (5 KOs)
The secret quest does not exist on your account until you have finished Rocket Arena’s normal Hunt objective, which is five knockouts in a single round. The counter sits in the upper-left of the screen and starts at 0/5. Every player spawns with the same three tools, but only one of them scores kills.
| Tool | Effect | Use it for |
|---|---|---|
| Rocket Launcher | Damage and knockback, 3-second cooldown | The only tool that scores KOs |
| Wall | Places a destructible barrier | Blocking incoming missiles |
| Jetpack | Lift and hover time | Repositioning between shots |
Aim into busy bridges and the middle platforms instead of waiting for perfect shots. A player sent into the void is counted just like one killed directly, making rapid fire more useful than careful accuracy. At 5/5, a win message appears and the badge is added to your profile.
Once the badge appears, leave the experience and join again. The concealed areas only register after a fresh entry, and a quieter server makes the code far easier to walk without a rocket landing on your head.
Find the phone number on the JET BOOT REPAIR sign
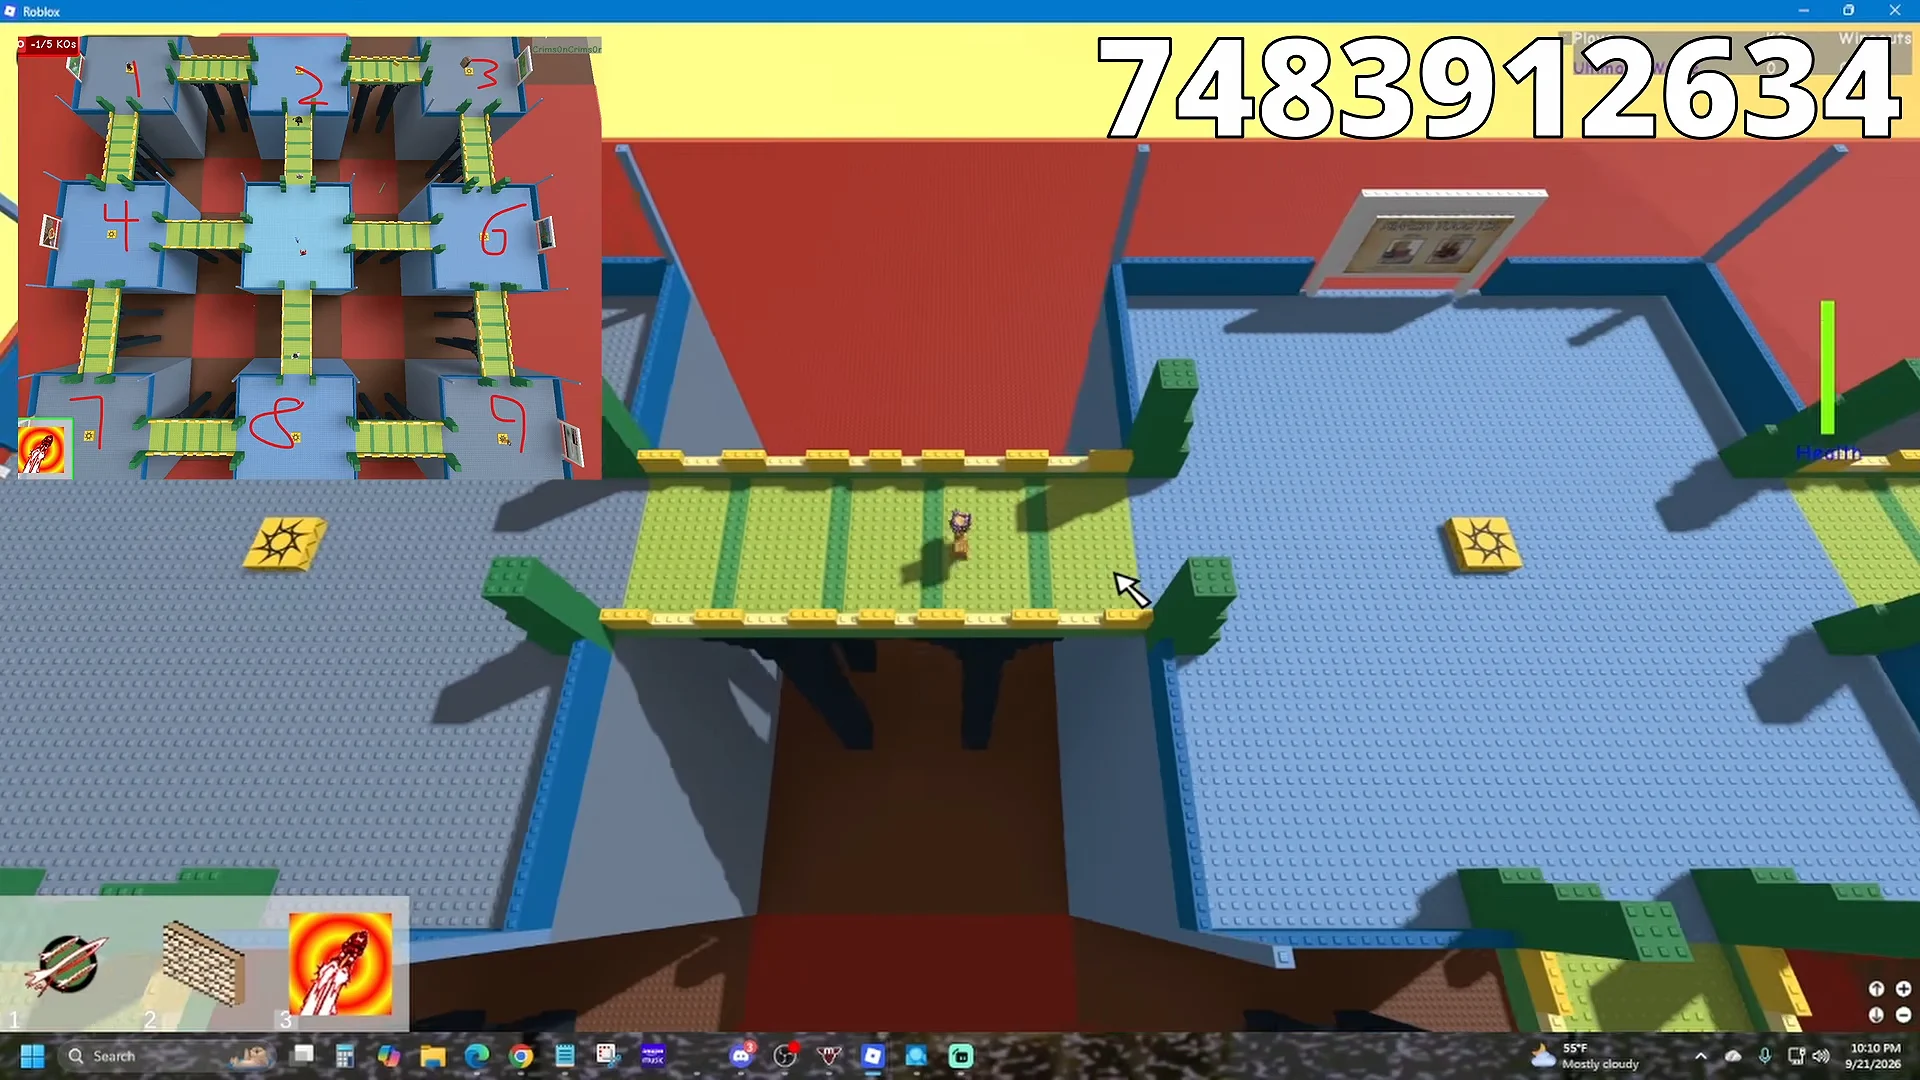
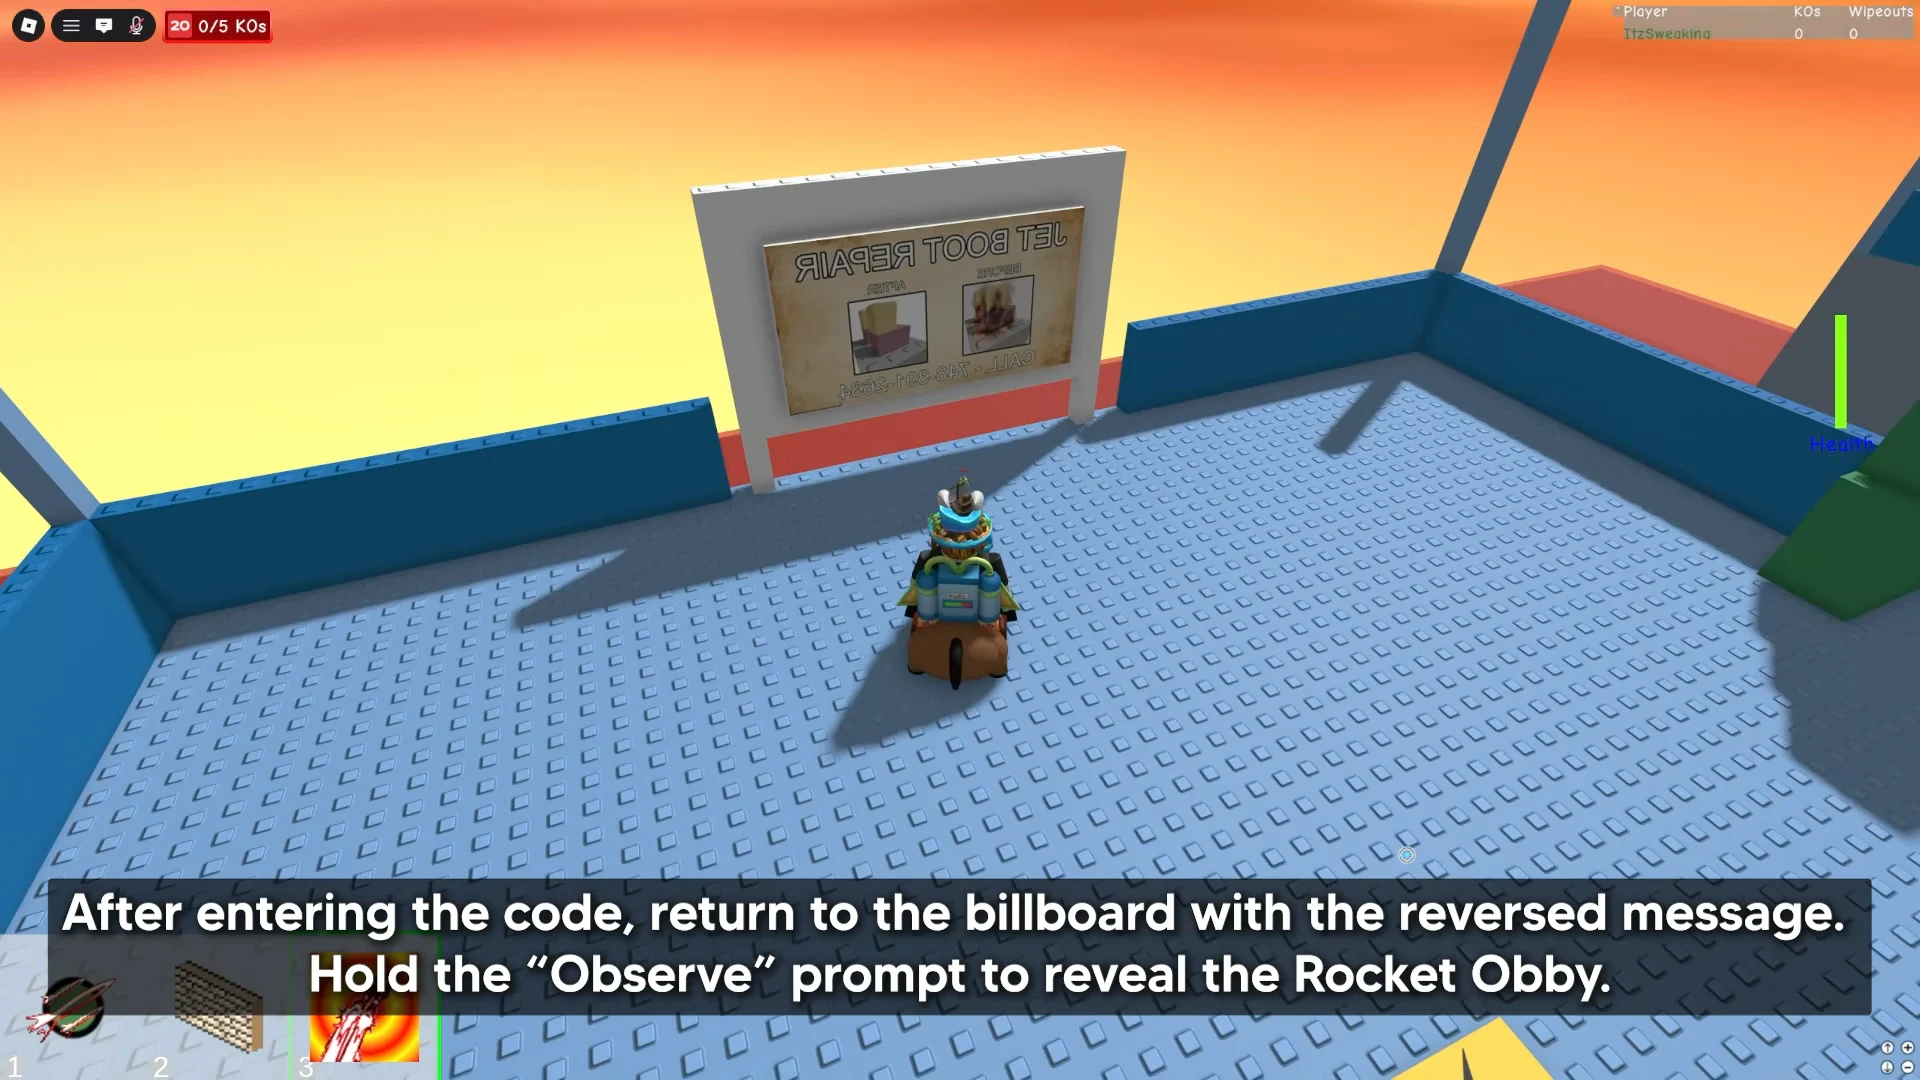
Joke billboards fill the arena, including “NUKES FOR KIDS,” armor advertisements, and a property listing, but only one matters. Head across the bridges toward the outside platform and find JET BOOT REPAIR, the board showing before-and-after panels with a number below them.
Because the lettering appears reversed from one side, mentally flip it before recording it. The number is 748-391-2634; it is the spawn-pad input, not a joke. In some servers, a numbered sign near spawn displays the order instead, so use whatever digits appear on your own board.
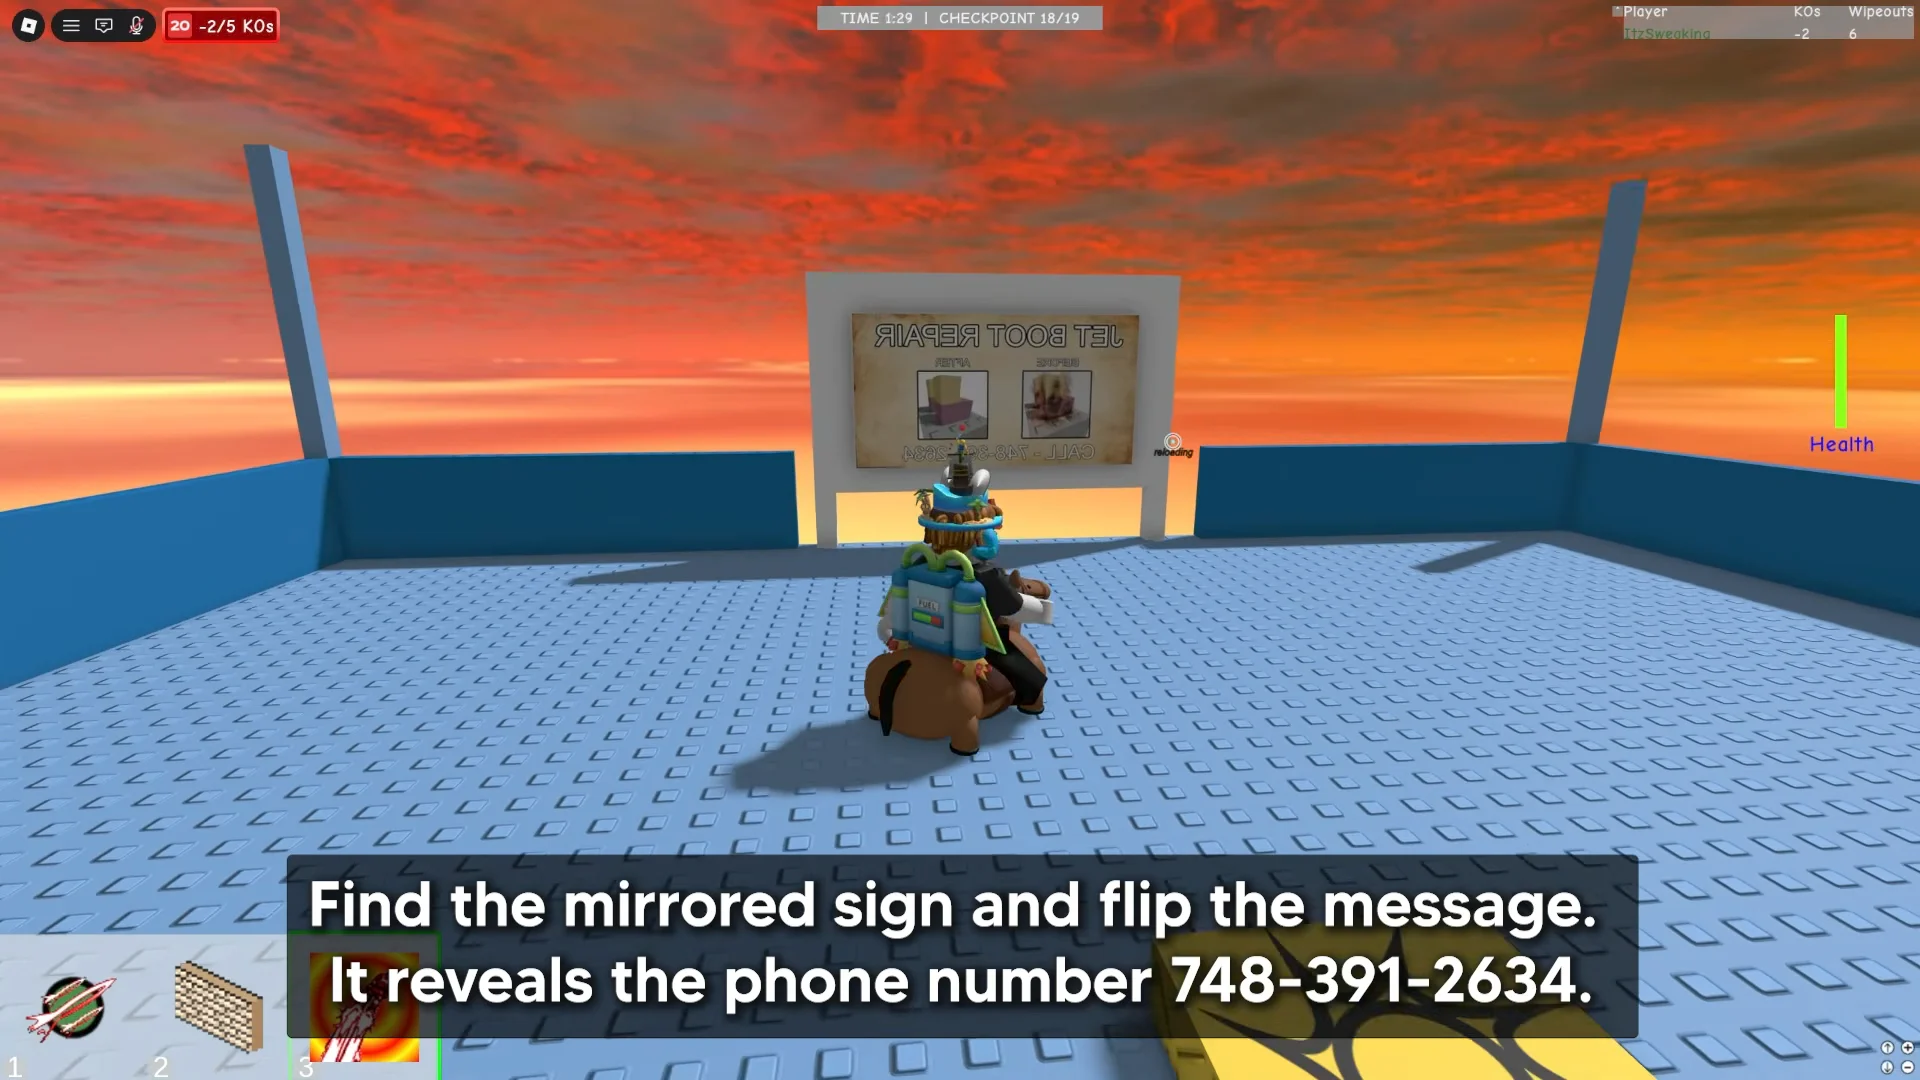
Read the number before touching a spawn pad. An incorrect touch burns the attempt, so memorize the entire order before setting off. When the sign shows nothing, rejoin or switch servers; a private server is valid as well.
Rocket Arena spawn pad layout (the arena is a phone keypad)
Viewed from overhead, the nine platforms form a 3×3 arrangement with telephone-dial numbering. Stand facing the billboard and pull the camera back; the layout then becomes clear.
| Row | Left | Middle | Right |
|---|---|---|---|
| Top | 1 | 2 | 3 |
| Middle | 4 | 5 | 6 |
| Bottom | 7 | 8 | 9 |
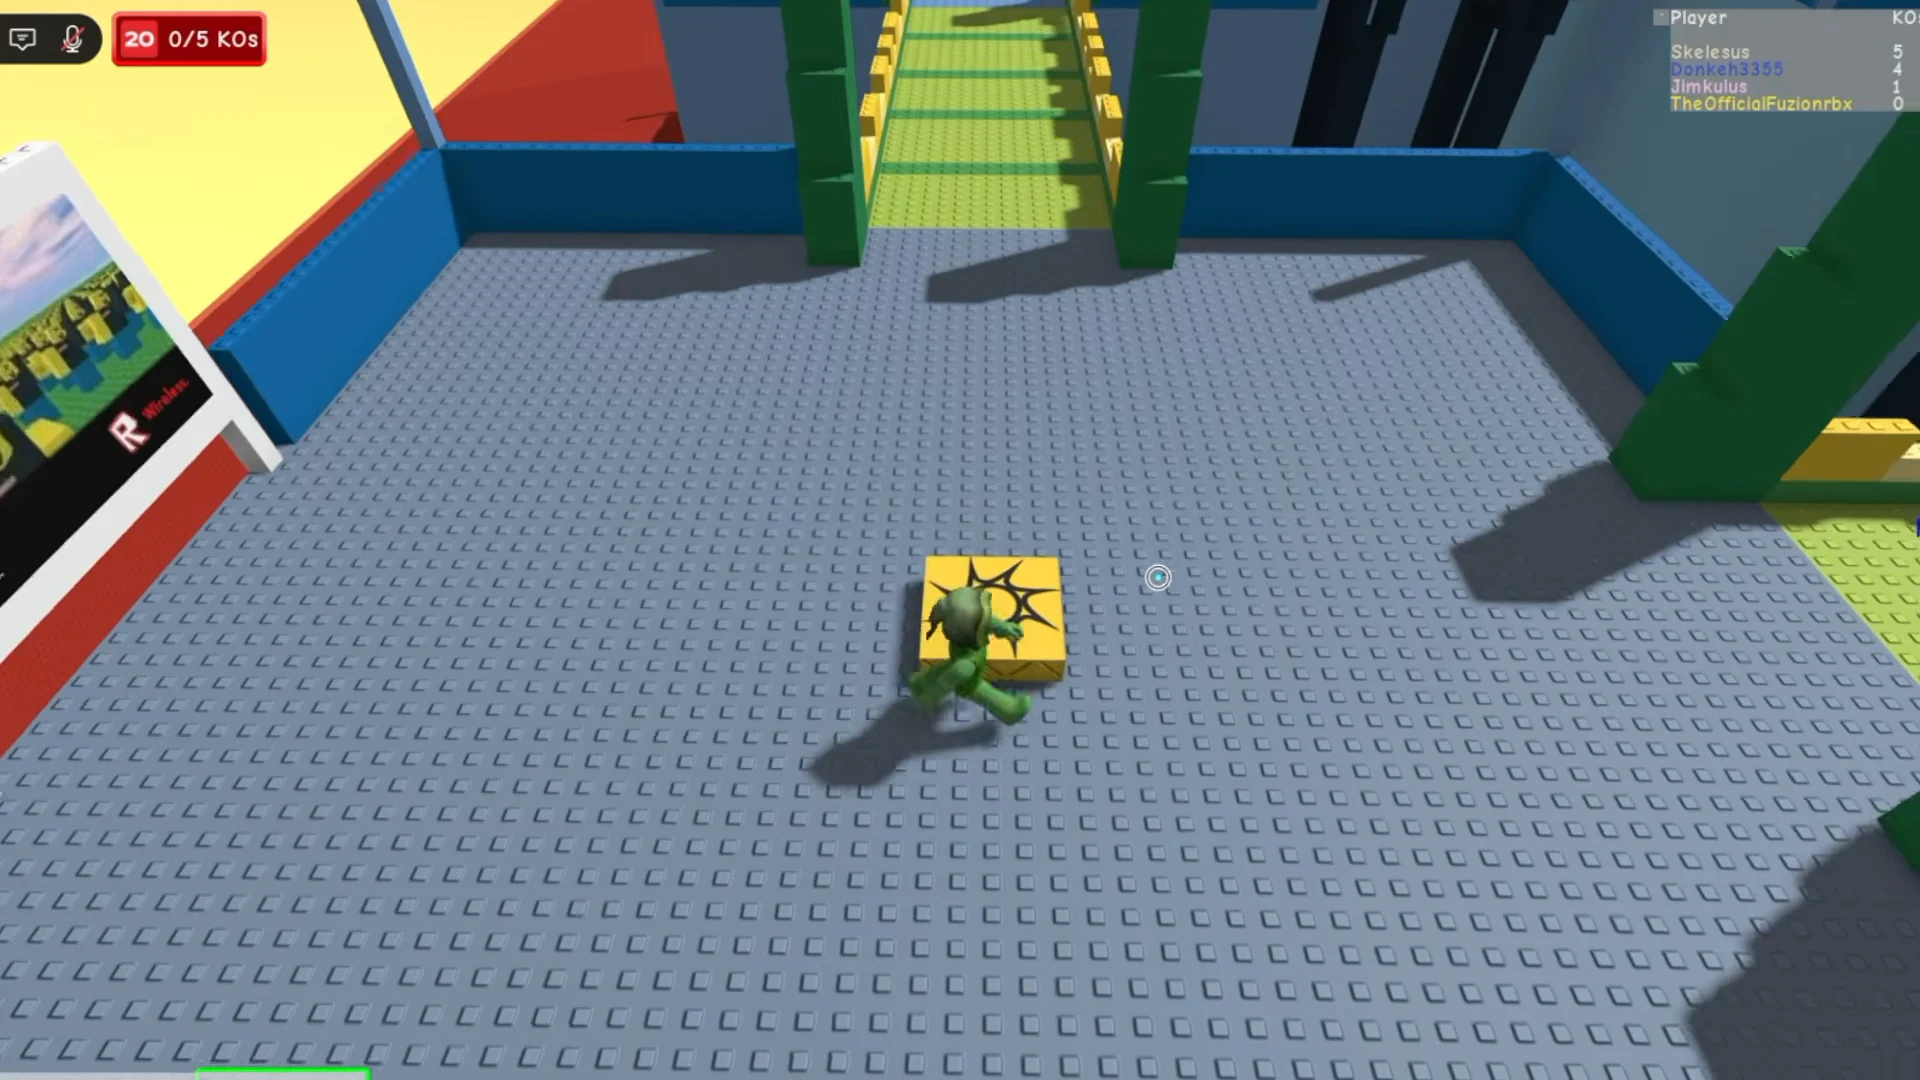
The center 5 position has no usable pad in this puzzle, which is fine — the standard code never calls for it. You do not click anything, either. Walking over a pad is what registers the input.
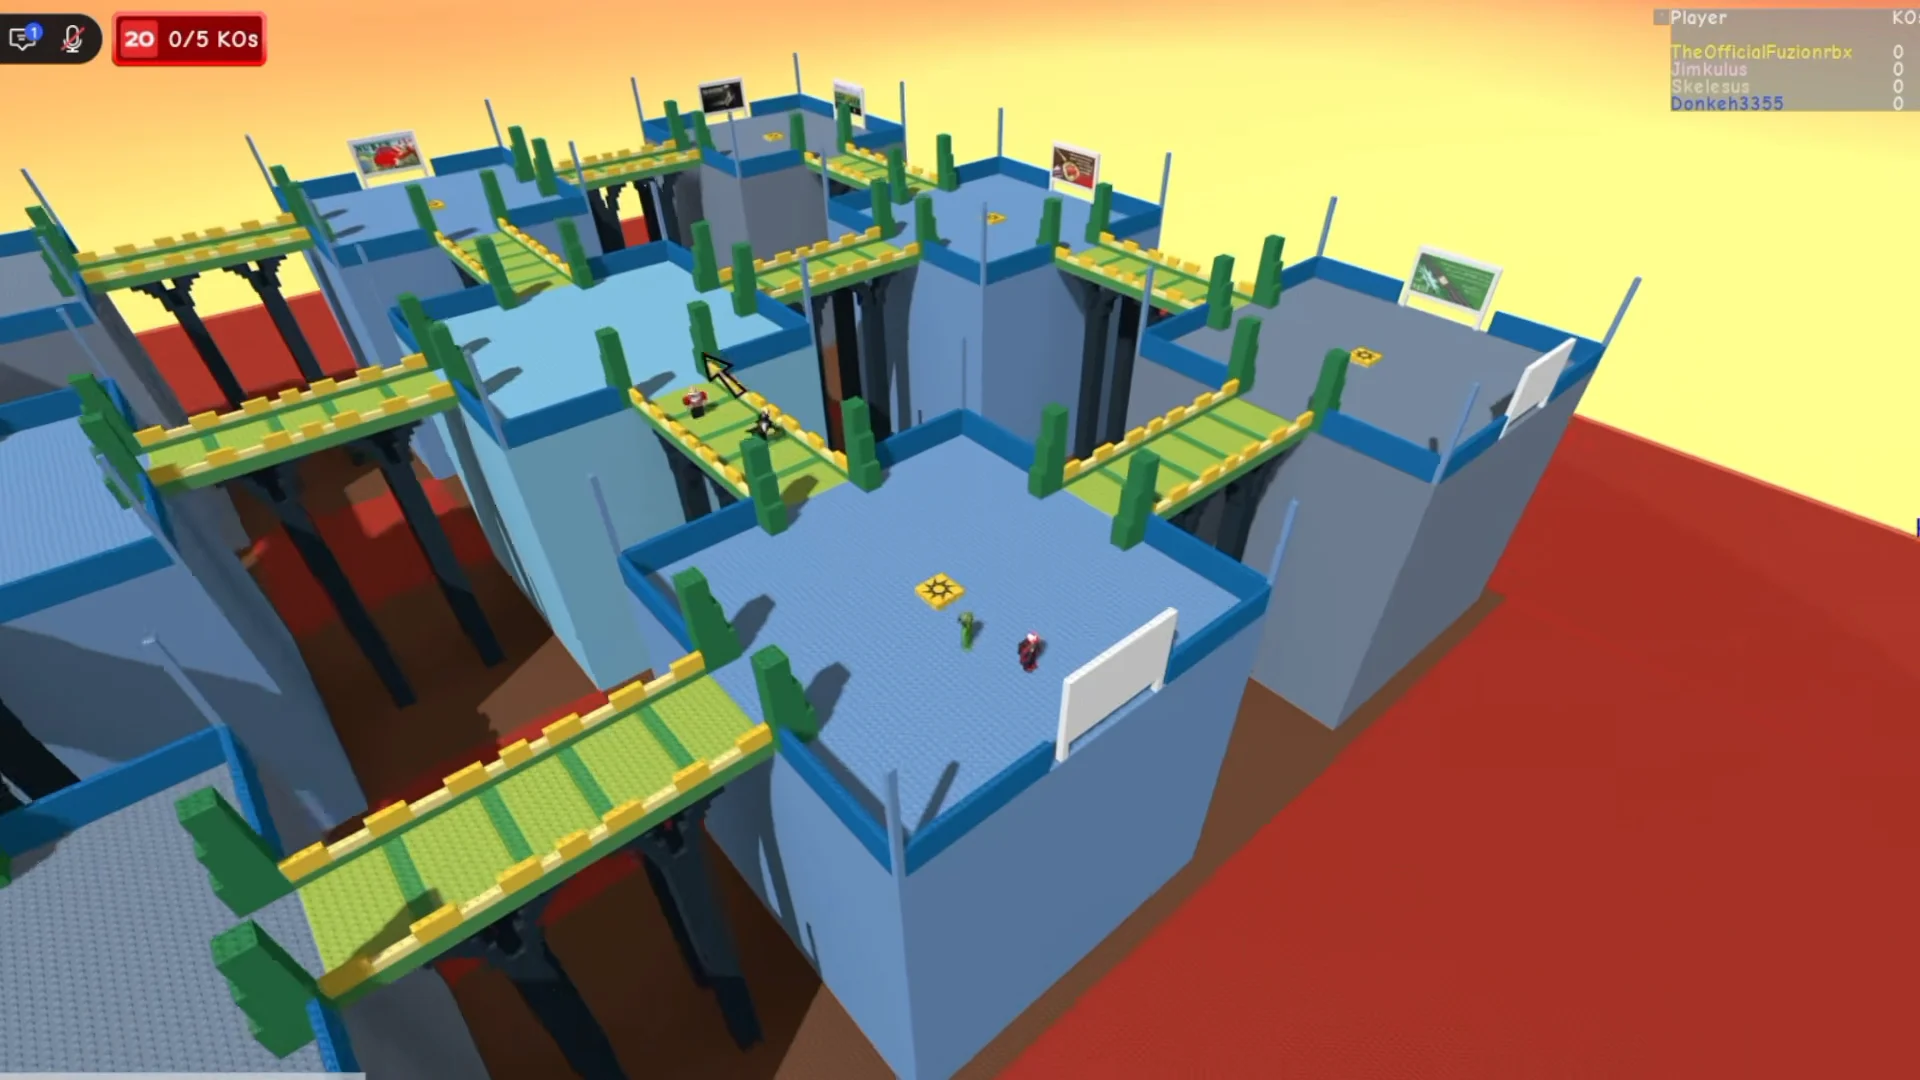
Enter the code: 7-4-8-3-9-1-2-6-3-4
Take the jet boots and clear the 19-checkpoint obby
Once the code is accepted, the billboard changes. Approach it to reveal an interaction, either a Receive button or a hold-E Observe prompt, depending on your approach. Claiming it grants the jet boots and begins a timed aerial course over the arena.
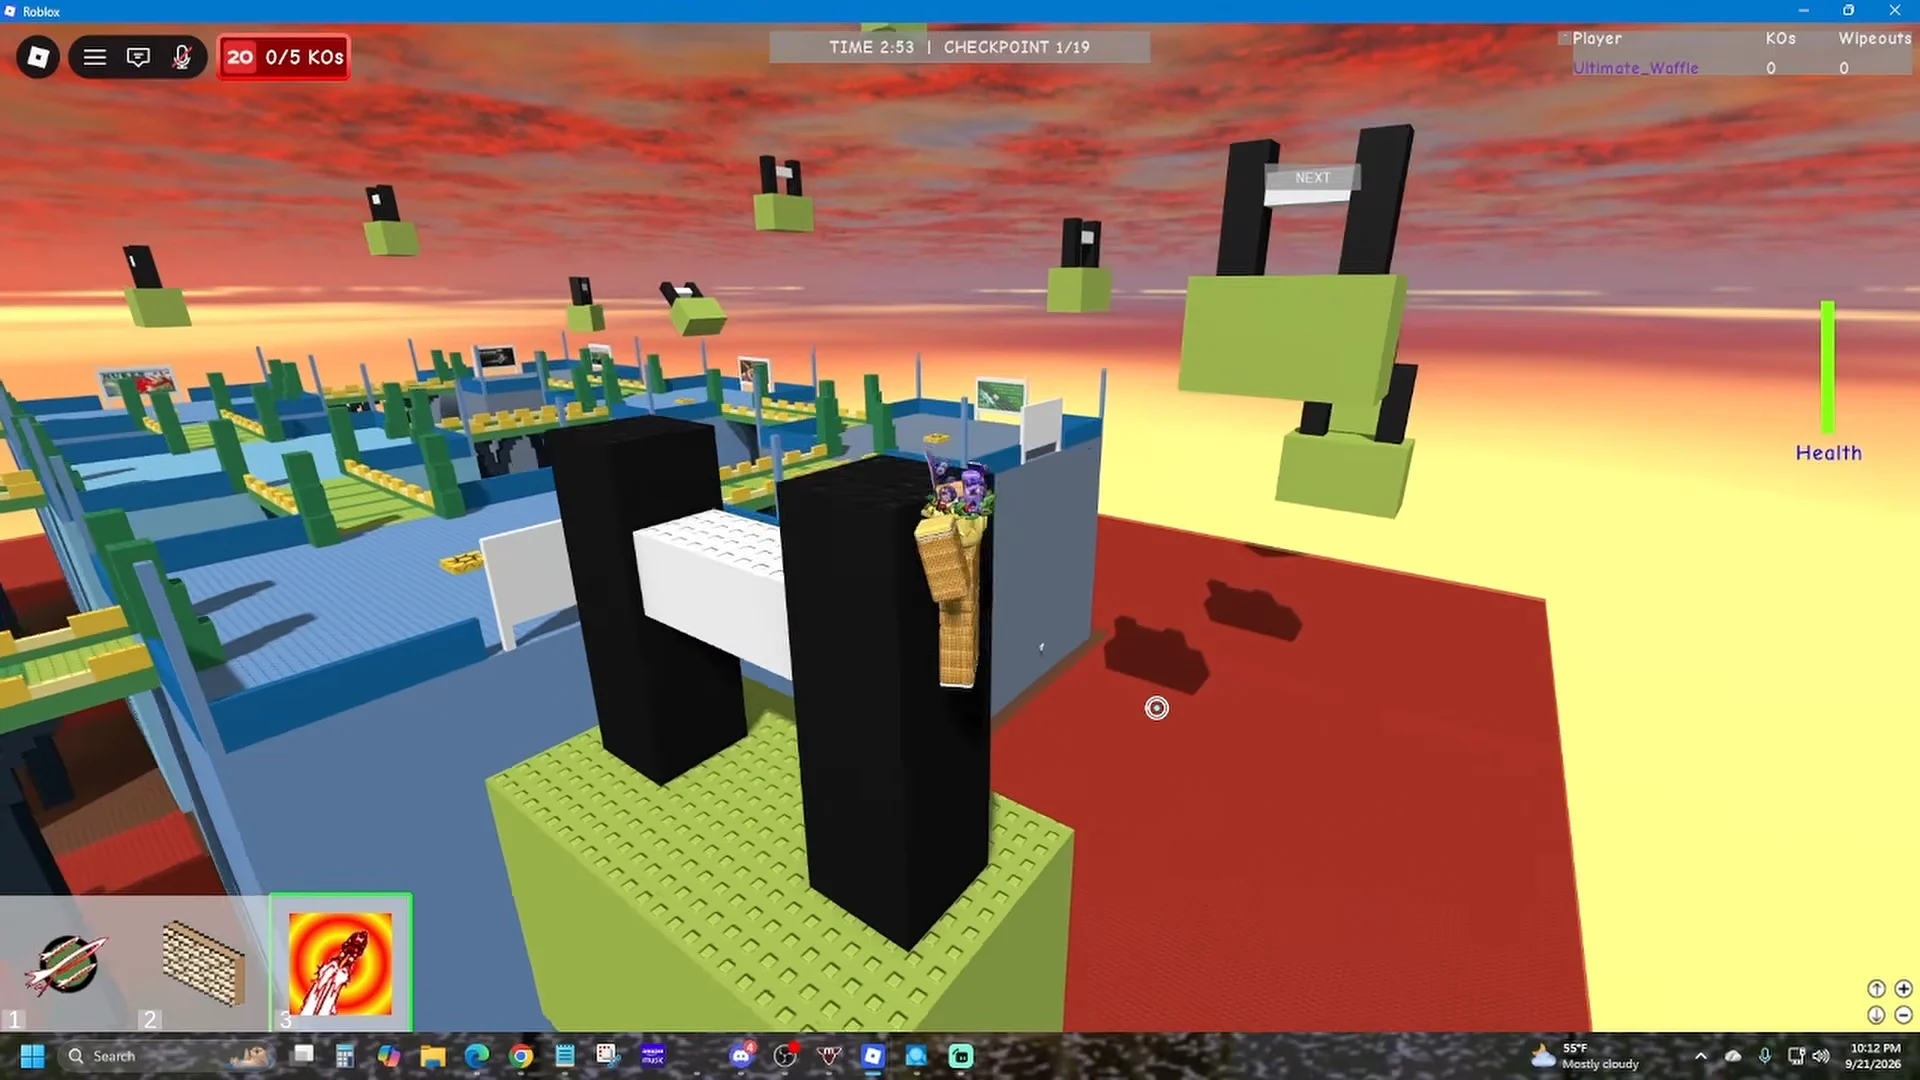
chimney huh?; with F9 open, the developer console displays it too. Seeing that line confirms the order was accepted.In some attempts, the same trigger uses letters instead of numbers. The white-brick portions of the floating platforms form characters, and touching them in sequence to spell PEYTON (or PAYTON in some runs) works the same way as 15-4-13-1-18-9. The order still matters: touching an incorrect character means resetting your character and beginning again with the first letter.
Drop down the black chimney for the Secret Quest badge
Take the clue at face value: the obby’s green starting platform has two tall black towers, and both are hollow.
Do not remove the badge after receiving it. The game specifically warns against deleting badges, and doing so may prevent a later claim from working.
Alternate route: The blank white sign and the hidden door
There is a second way into a hidden area, built around the one billboard in the arena that carries no writing at all. Every other board is a gag ad; this one is plain white on both faces.
After earning the 5 KO badge, rejoin and explore the map peacefully while checking its signs. When you locate the blank board, inspect all around the structure: the button is tiny and pressed against the frame, so look across the front, each side, and the ground at its base. Activating it does not reveal anything beside the button. Instead, it opens a door elsewhere, commonly on a lower platform or in the area beneath the bridges and pillars, appearing as a clean break in the geometry.
If the button has no effect, verify that the 5 KO badge appears on your Roblox profile. The concealed quest remains inactive until that badge is present.
Claim the 2008 secret item in The Hunt Hub
The badge serves as proof of completion rather than the reward itself. For definite confirmation before leaving, open your Roblox profile and inspect its badge list.
Once the badge is attached to your account, use the 2008 portal to return to the lobby, then go to Rocket Arena. Walk behind the large red castle, climb its stairs, and activate the podium at the top. A purple hat then floats there, but it appears only after the badge has registered to your account.
Coloring the 10 eggs spread around the 2008 lobby is a separate task for the Brick-Blast Jetpack UGC reward. It does not affect the secret badge.
Once the knockouts are finished, the hidden route takes only a few minutes; code entry is usually what slows players down. Complete the five KOs in a busy server, then return to a quieter arena and cross the pads without pressure. You can access The Hunt: Roblox 20 hub until September 28, 2026, so the time to claim both the badge and the item is limited.





