The three scales tucked into the back room of the Shorefront Family Clinic look like a weighing puzzle, and they are not. Nothing gets balanced, nothing gets measured, and there is no timer. Each plate accepts exactly one key item, and the Resignation Letter sitting in the same room tells you which item goes where.
Quick answer: Use the left scale for the Broken Stethoscope, put the Prescription Dosage Error Note on the middle scale, and reserve the right scale for Zoe’s Lanyard. The cutscene begins as soon as the final object is placed properly.
Where the scales are in the Shorefront Family Clinic
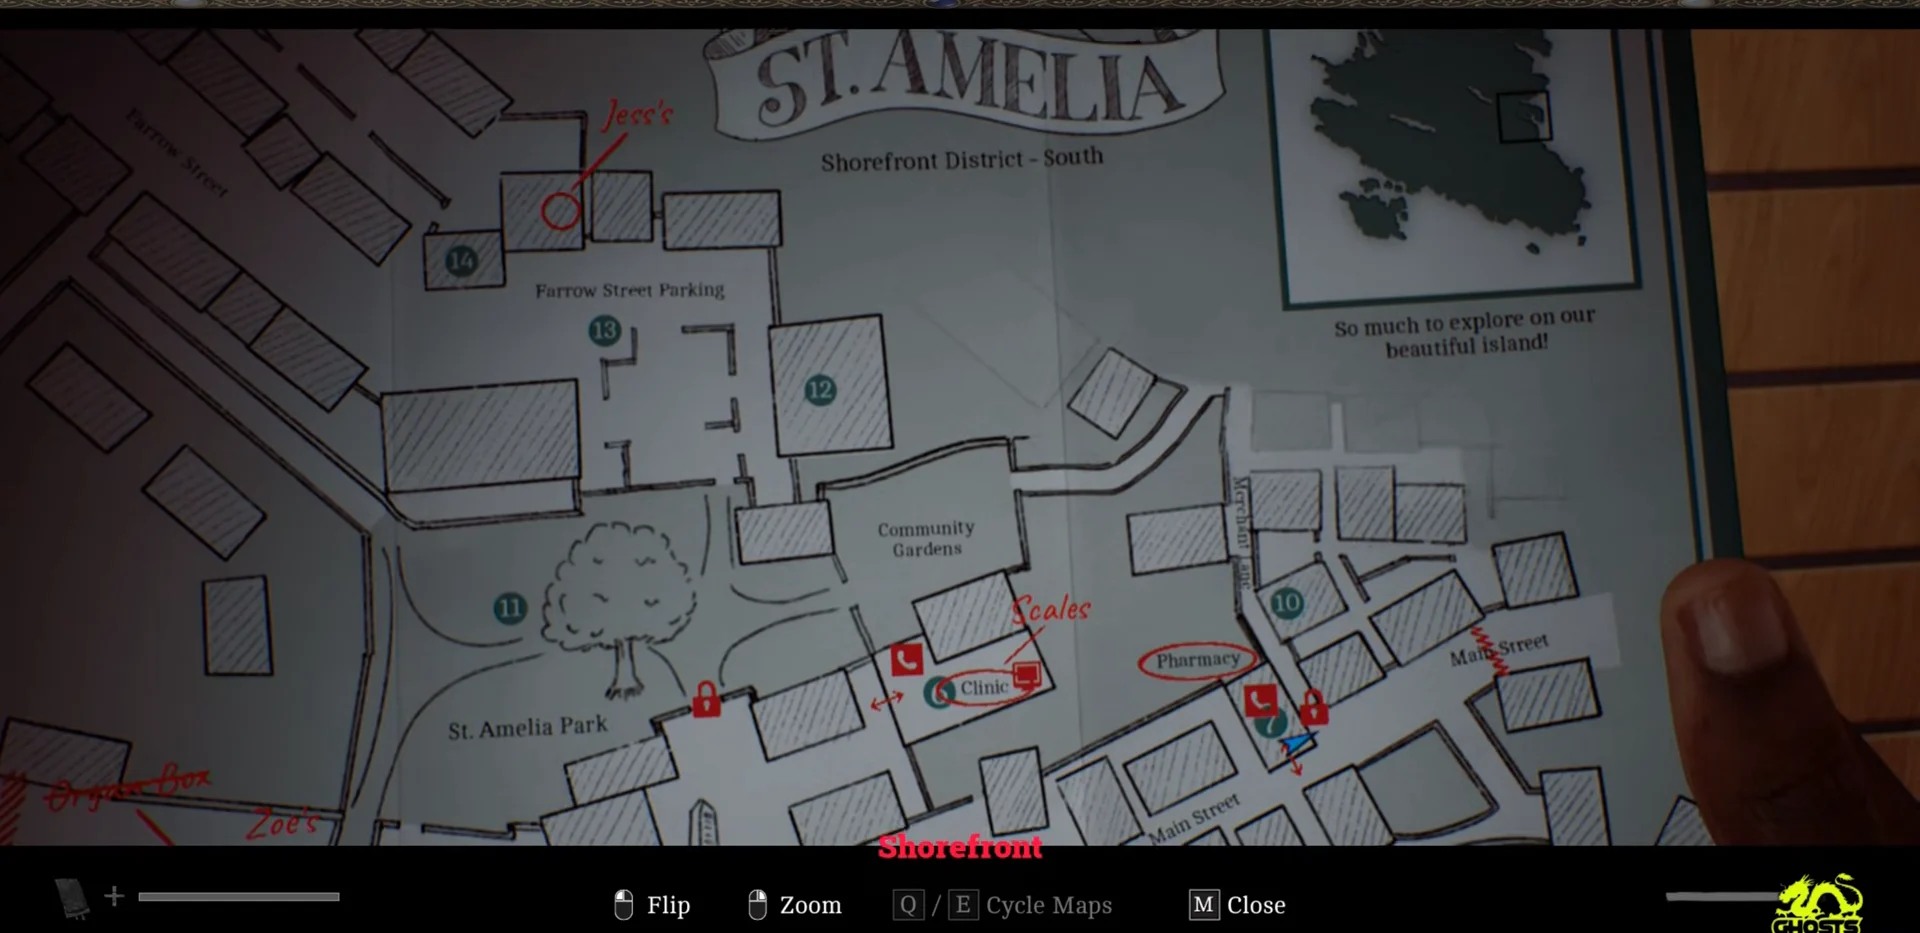
The Shorefront Family Clinic sits in Shorefront District — South, just off the town square. Follow the corridor inside to the room marked Z. Ellis at the end, a storeroom stacked with cardboard boxes. The three scales sit on those boxes under the window. You can interact with them right away, but nothing happens until all three items are in your Key Items.
Scales puzzle solution: which item goes on which scale
| Scale | Item | Resignation Letter line |
|---|---|---|
| Left | Broken Stethoscope | “I didn’t listen closely enough” |
| Middle | Prescription Dosage Error Note | “I made mistakes and couldn’t focus” |
| Right | Zoe’s Lanyard | “I’m not fit for this role any longer” |
Read those three lines literally and the mapping falls out. A stethoscope is what a nurse listens through. The dosage note is the recorded mistake, addressed to Nurse Zoe Ellis about Mr. Stewart’s prescription. The lanyard is an access ID that lists her role as District Nurse. Weight is irrelevant, and the order you place them in does not matter either — the puzzle resolves as soon as all three plates hold the right object.
Grab the Scalpel in the Z Ellis room before you leave
Of the three items, two are located beyond rusty doors that have a central hatch, and the same tool handles every one. In the Z Ellis room with the scales, remove the Scalpel from the green medical case sitting on the desk beside the computer. Also collect the Resignation Letter from the box for the three lines above, then power up the computer and read Zoe’s email; it gives Jessica White’s address as 21 Farrow Street.
Without the Scalpel, both the Pharmacy door and the south gate into St. Amelia Park stay shut, which puts two of the three scale items out of reach.
Zoe’s Lanyard location: the organ transport box in Zoe’s House
You almost certainly have this one already, since the lanyard is what unlocks the clinic door in the first place. If you somehow skipped ahead, here is the whole chain.
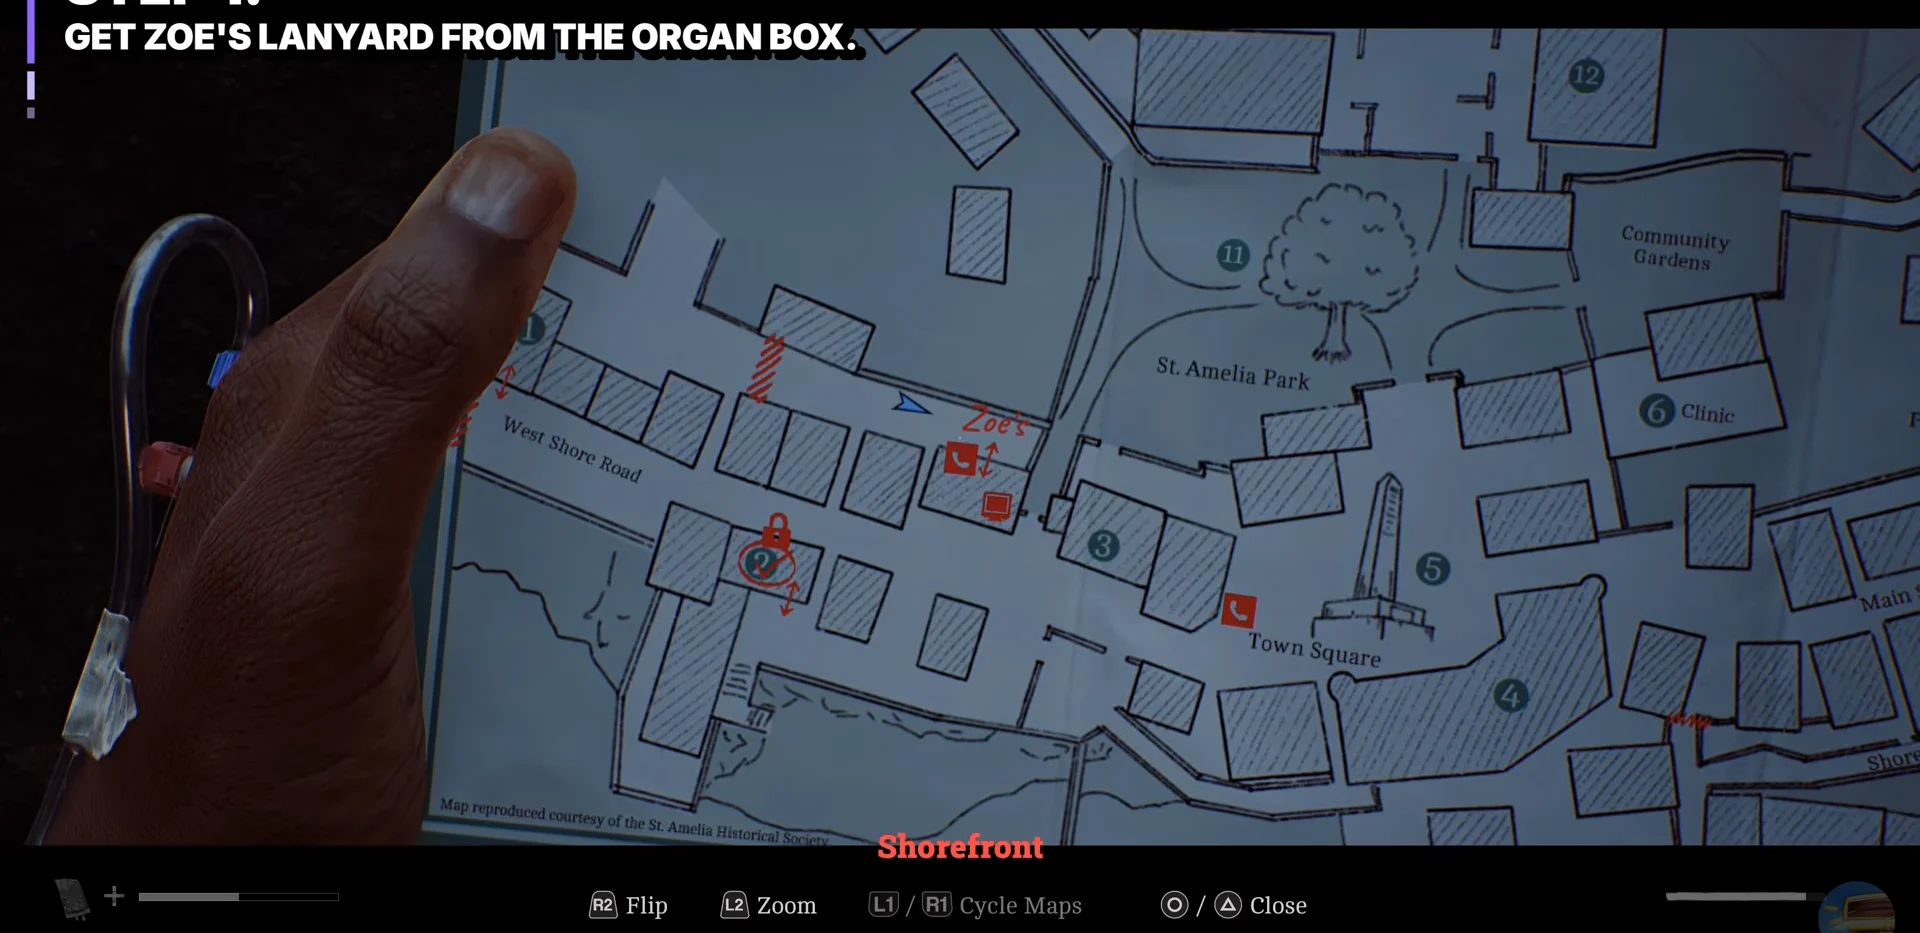
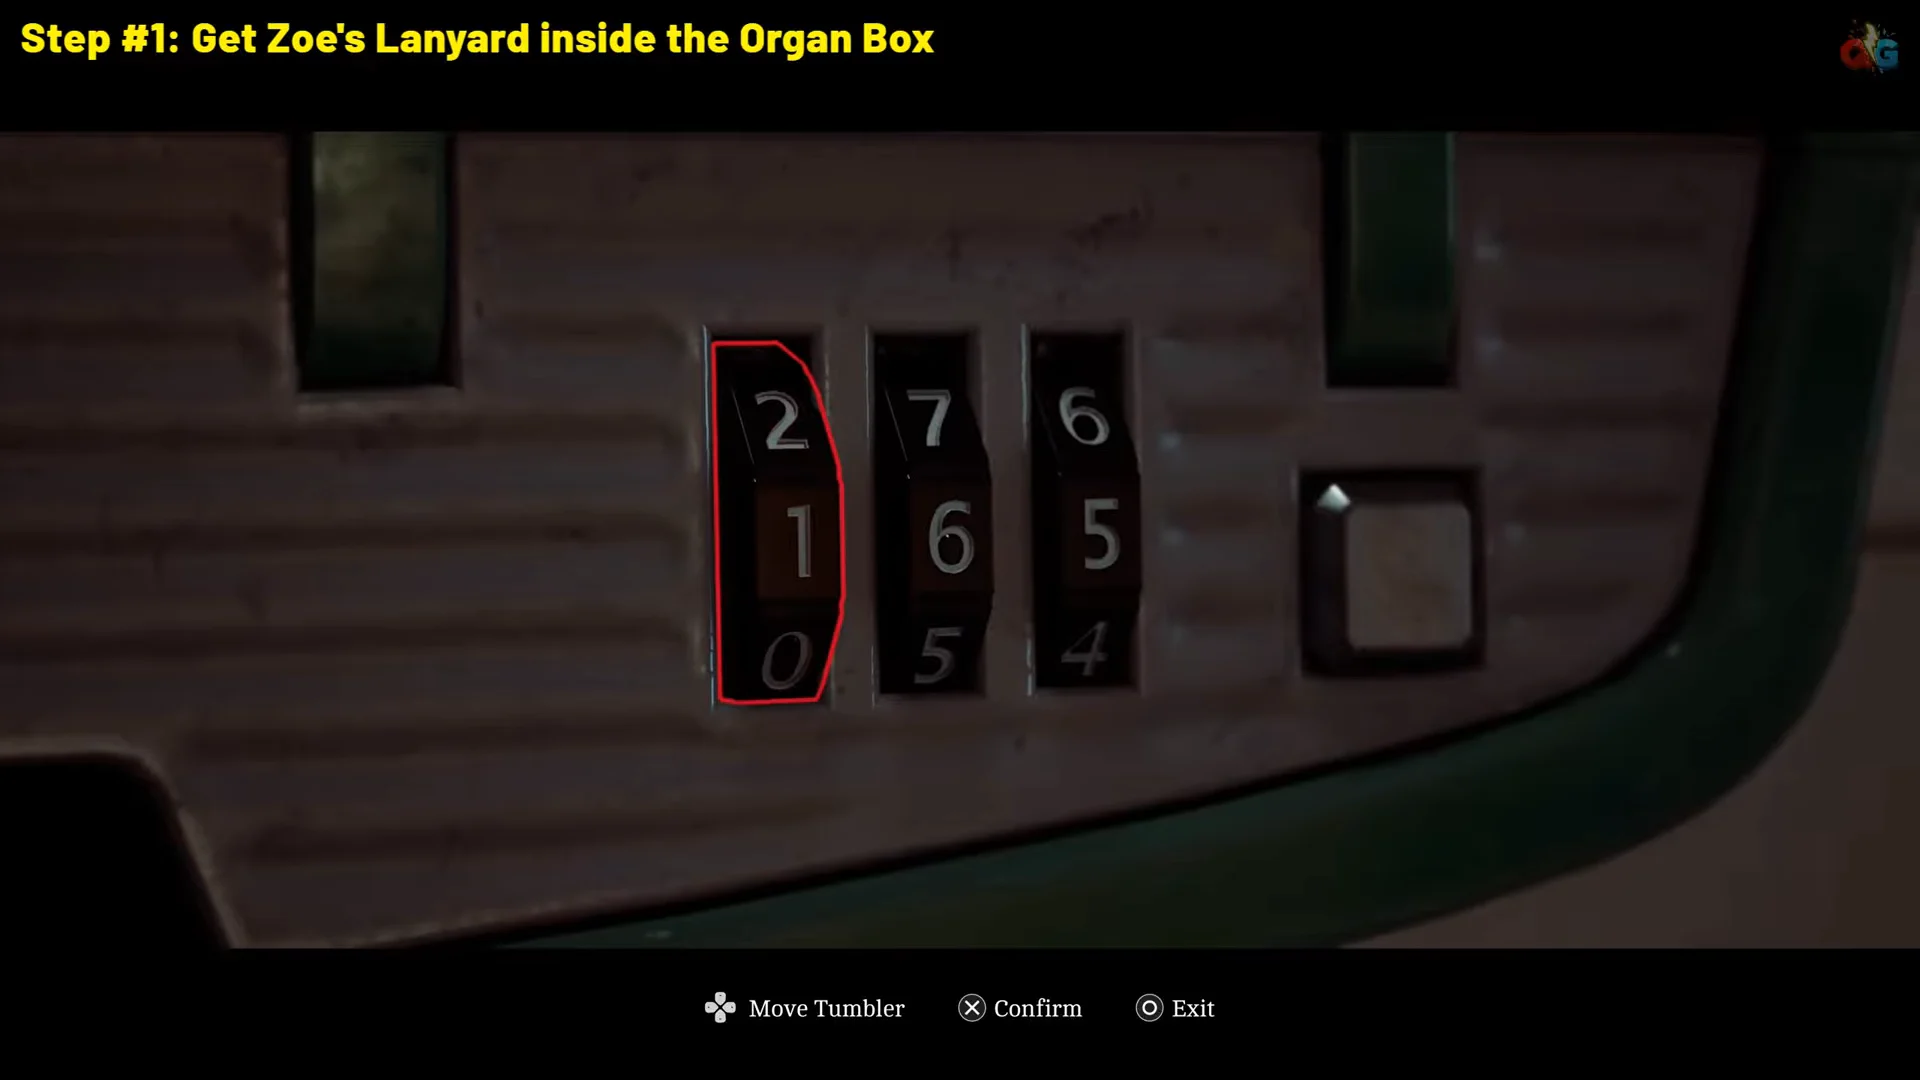
Zoe’s email and the Organ Transplant Card determine both dial codes, meaning your displayed numbers may differ from another player’s. This cooler has produced pairs including 956 / 133, 067 / 234, and 067 / 244; derive yours from the clues in your game.
Prescription Dosage Error Note location and the Pharmacy locker code
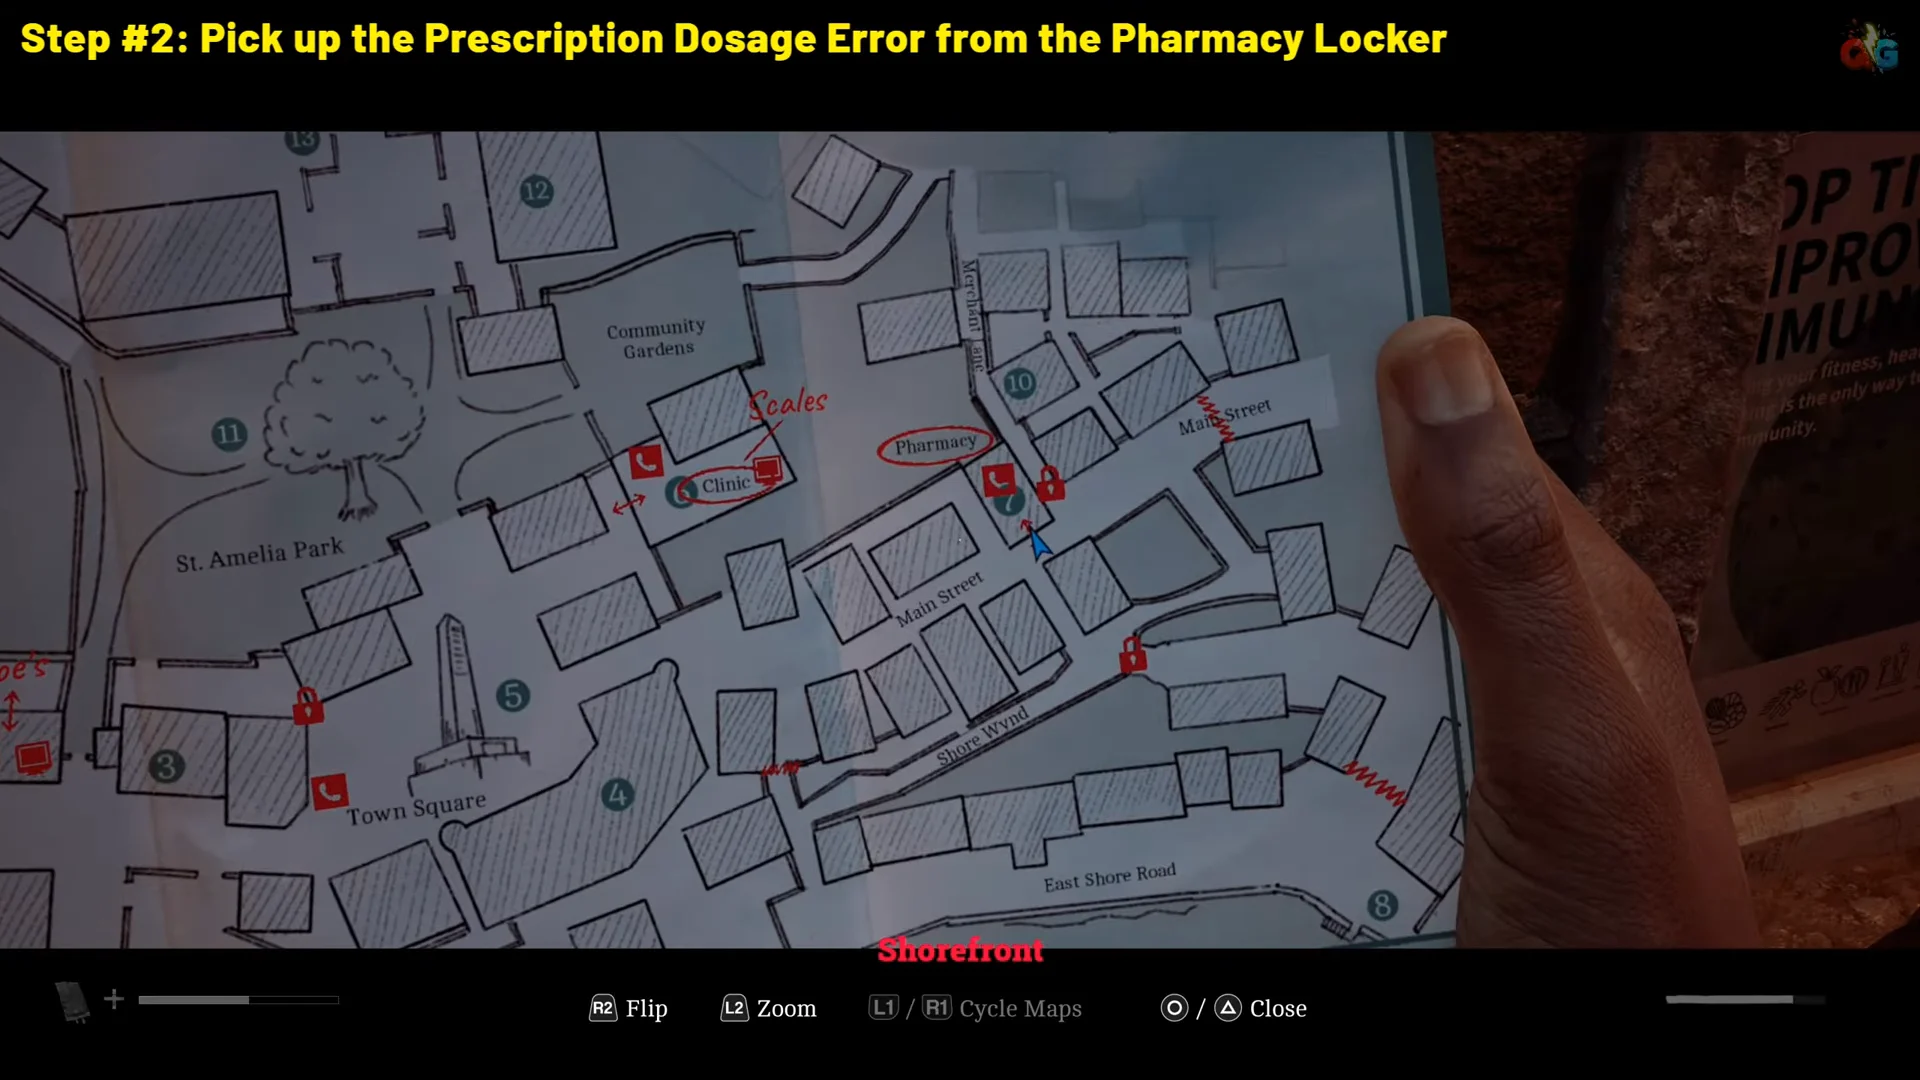
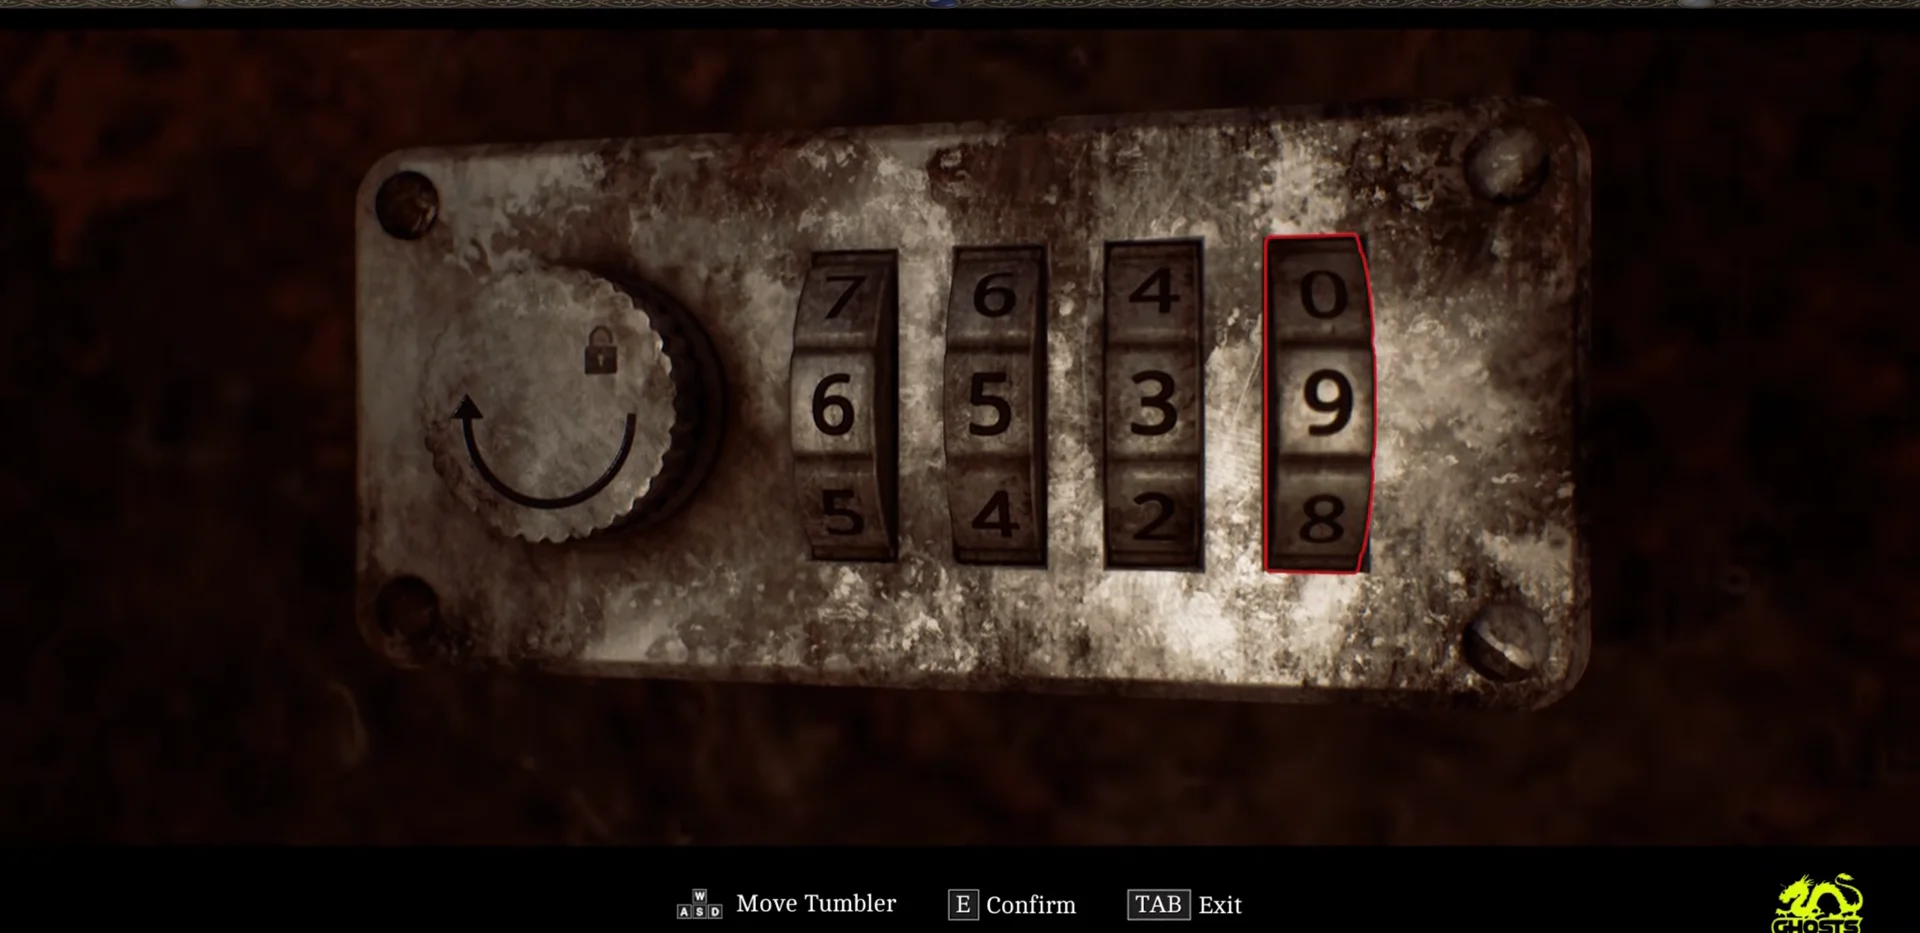
Read the posters in the sequence shown by the CRTV clip to get those digits: the hand-washing poster has six fingers, the prescription drugs poster shows 5, the nurse consultation poster places 3 on the scale, and the antibiotics pack contains nine pills. Should 6539 fail, use the posters in your own game; 7649, 7592, and 7654 are among the other combinations reported for this lock.
Broken Stethoscope location: Jess’s House on Farrow Street
Placing the items and confirming the puzzle is solved
After collecting all three objects as Key Items, return to the clinic and follow the corridor to the Z Ellis room. Examine the scales one by one: the left receives the stethoscope, the centre takes the dosage note, and the right takes the lanyard. No confirmation input is required.
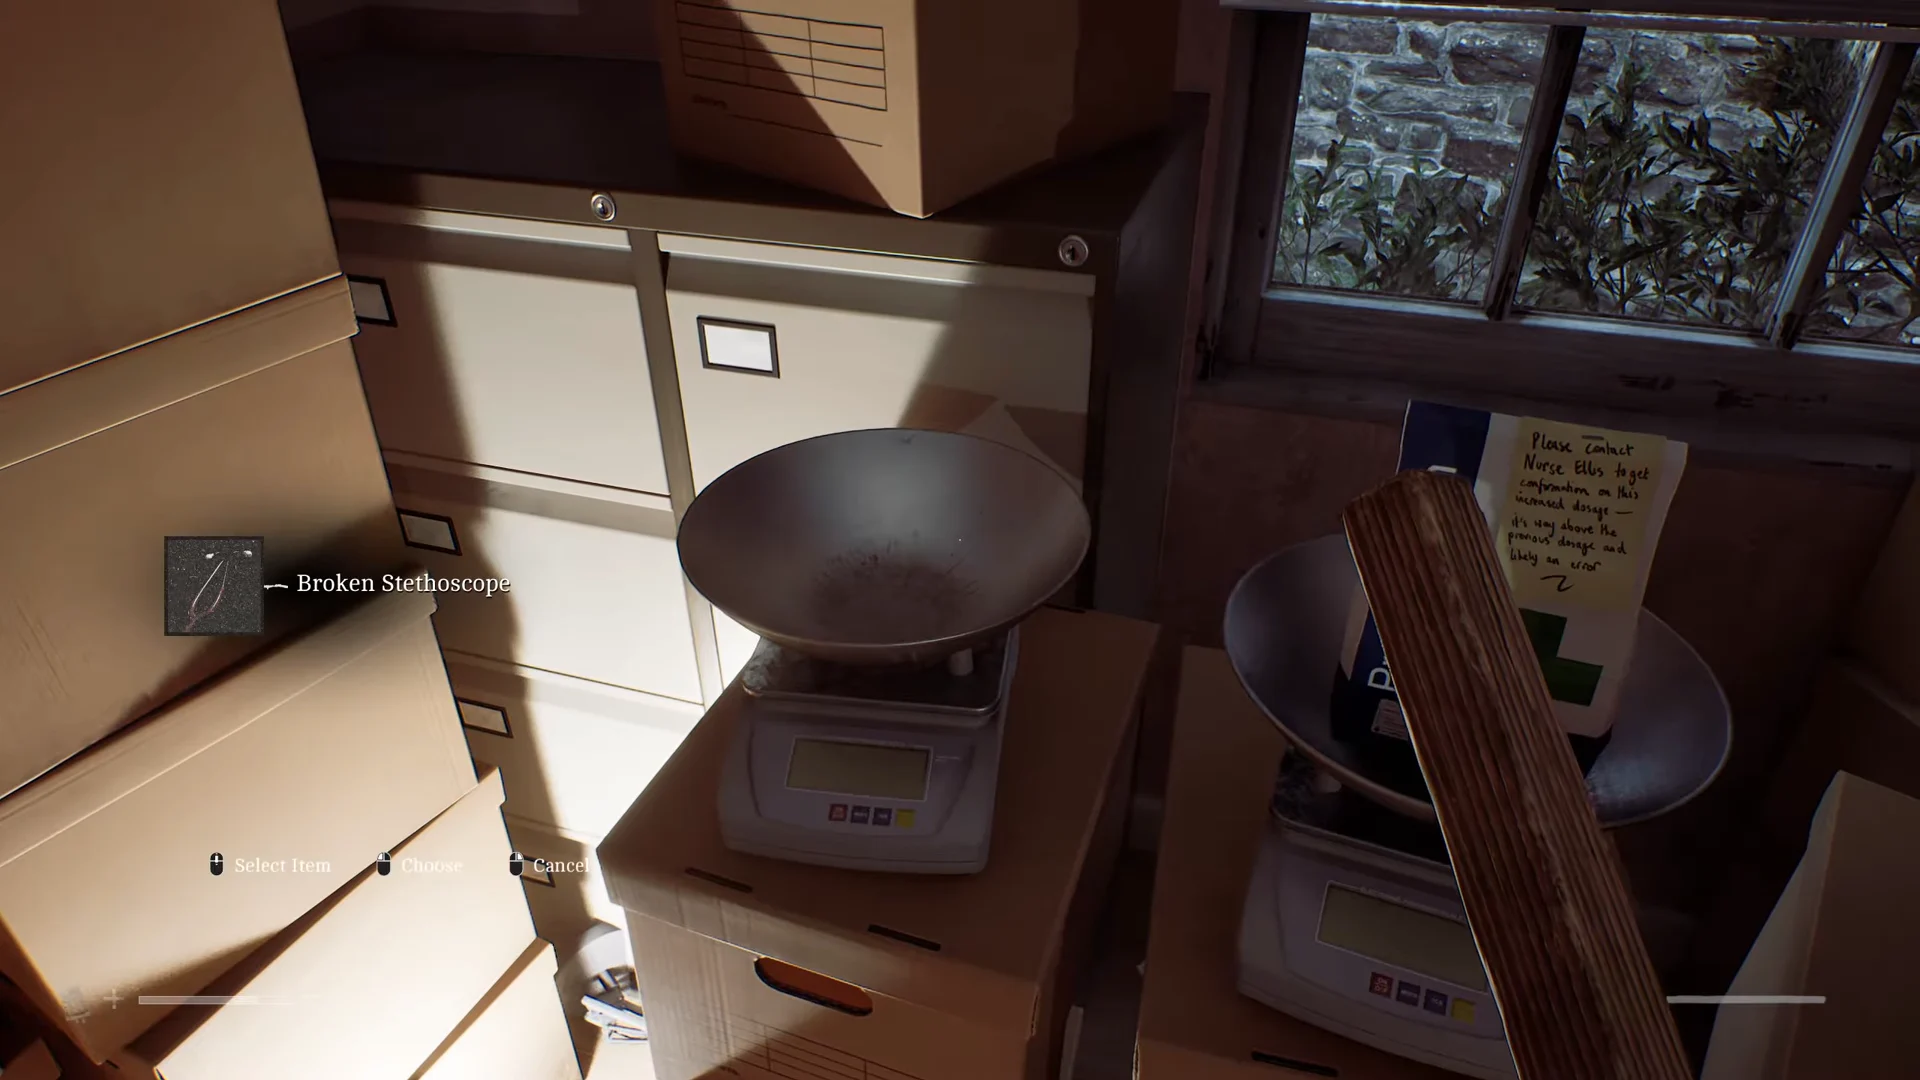
The game confirms the solution immediately: placing the last object correctly triggers a cutscene without further input. Zoe’s video tape plays, the Resignation trophy unlocks, and Part 2: Zoe begins.
If all three are down and nothing happens, swap the stethoscope and the dosage note first. Those two are the pair players mix up most often.
After the cutscene, you have finished everything required in that room. None of the three objects is useful again, so revisiting the scales serves no purpose.