In Slayers 2, advancement follows level gates in a set sequence. Becoming a Slayer has one firm requirement, and the endgame repeats boss contracts and Dungeons to earn Wen and damage titles. Use the route below to avoid the unproductive farming that holds many players back in the Level 150-225 bracket.
Quick answer: As a human, reach Level 45 and complete Final Selection near Butterfly Estate to become a Slayer. Afterward, earn Wen and Tier 3 gear by repeating Kasugai Crow boss quests and Dungeons.
Roll your clan before you spawn in
The Customize menu assigns your clan through spins; there is no list to select from, so use your rolls before locking in a character. Clans fall into six rarity groups, with Supreme at the peak and a 0.1% roll rate.
Judge a clan by more than its rarity. Check the abilities, passive effects, and stat distribution on each result. A Rare clan suited to your weapon or Breathing style may serve you better than a rarer one with bonuses for stats you ignore. Keep Supreme and Mythic results like Soyama; Koko and Susumaru are acceptable if you prefer to save your spins.
Slayers 2 level milestones to Level 45
Nearly all quests require a certain level before you can take them. Keep track of the next unlock so you know where to gain levels and when to leave an area.
| Level | What opens up | Where |
|---|---|---|
| 1 | Bandit quests from Krue | Starting town |
| 7 | Bandit Boss (Zuko) quest | Starting town |
| 10-13 | Bear Cub quest from Tom | Bear area |
| 18 | Mother Bear quest | Bear area |
| 25 | First Breathing technique | Trainer locations |
| 26 | Chaka’s subordinates quest | Near the large tower |
| 34 | Kaiden quest | Near the large tower |
| 45 | Final Selection | Near Butterfly Estate |
Find Krue in the starting area first. The opening quest asks you to kill three Bandits, and you should always accept it before you start swinging. Killing bandits with no active objective throws away the bonus experience and cash. You start with fists, a click attack, and a dash. Blocking is the mechanic that carries you through every later weapon and Breathing style, so slot blocks between your strings instead of spamming attacks.
Zuko appears on a short timer at Level 7 and rewards experience, cash, and a gear chest. Use the time between appearances to complete regular bandit quests. Put aside 500 cash for Raze’s standard Katana, then revisit him with 1,500 cash for the Fancy Katana. Its damage increase is big enough that some players pass on the cheaper blade and keep using their fists until they can pay for the upgrade.
Damage dealt does not reserve the Zuko chest for you. Any player may claim it, so reach the drop as soon as the boss falls.
Go to the bear area and take the Bear Cub quest from Tom. At Level 18, switch over to Mother Bear. These quests reward much more than bandit farming, and bringing a partner makes Mother Bear easier to handle. PvP is active in this second area, so stay alert and don’t farm while your health is low. Kazu offers another quest: find civilian infiltrators mixed in with regular NPCs. Attack a civilian to test them; infiltrators retaliate, whereas real civilians flee.
Near the large tower, Chaka offers the final two quests before Final Selection: subordinates at Level 26, followed by Kaiden at Level 34. Wait for Kaiden to dash, then use the recovery window for M1 strings instead of exchanging blows.
Unlocking your first Breathing technique at Level 25
At Level 25, you can learn Breathing, which substantially changes how your character fights. Serpent, Sound, and Thunder are the top options, with a separate trainer for each in a different map area.
Serpent Breathing (Obari)
Obari is the most straightforward trainer to reach and prepare for. You need Level 25, 20 Demon Horns dropped by snow demons, and 5 Beast Cores dropped by Beast Born Demons. Turn in the items, complete the training mini-games, and beat the Serpent Trainee to unlock him.
Sound Breathing
Find the Sound trainer in the snow biome. Travel across Iceveil Valley, then use the cliffs as your guide to reach them.
Thunder Breathing (Zentaro)
Zentaro takes the most effort to reach. His path rises along the cliffs past the bear village, and Wall Climb from the skill tree is needed to get there. Unlock it before leaving so you won’t need a second trip.
Final Selection at Level 45: every quest in order
Completing Final Selection earns the Slayer title. Entry requires a human character at Level 45 or higher, and each run starts at the top of the hour. Find the site in the map’s bottom-left, close to Butterfly Estate. Bring a party: the event includes item collection, demon battles, parkour, and a boss fight.
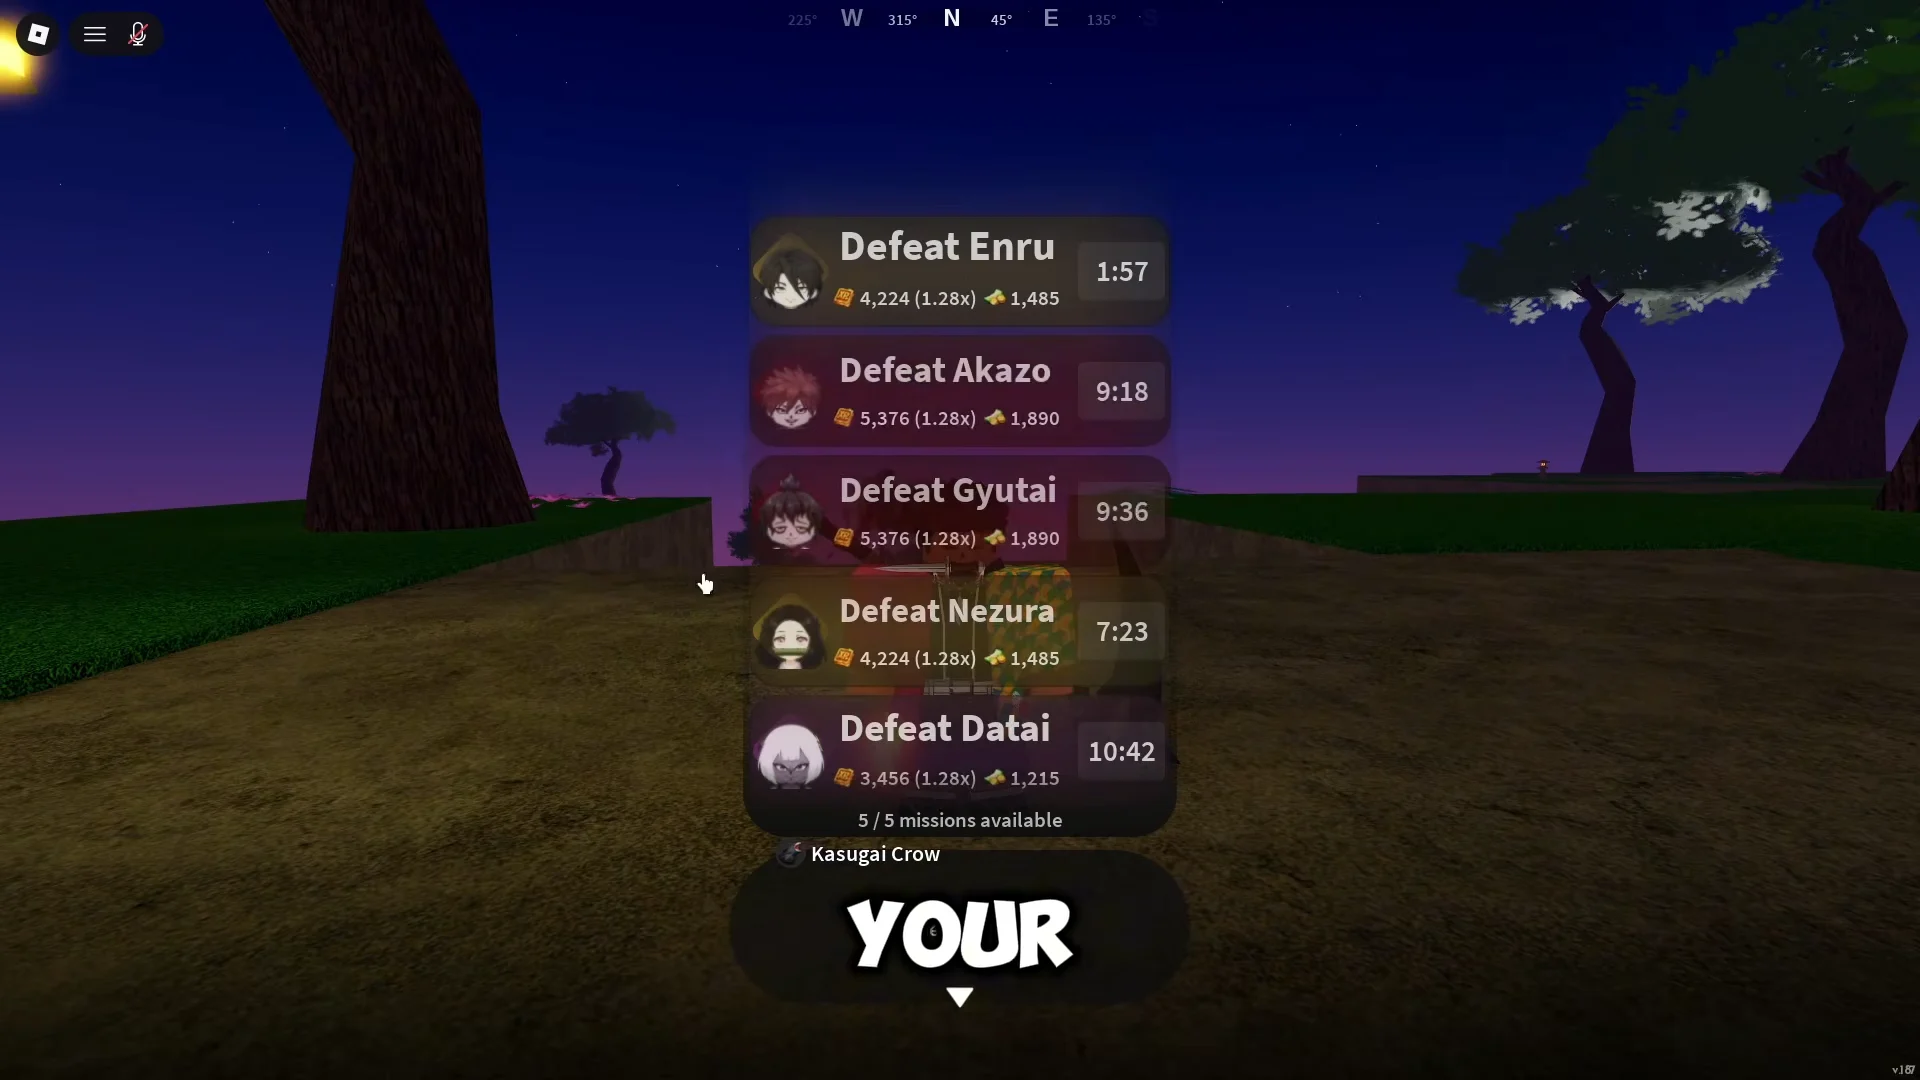
You know the run worked when the Sisters appear and grant three things: the Slayer title, the Uniform, and a Crude Iron Ingot. Take the Crude Iron Ingot to Tagane at Hidden Mist Village, who forges it into an Enryu, Shinkage, or Tengoku Katana, so decide before you hand it over. You also receive a Kasugai Crow, the more valuable long-term reward, which unlocks repeatable demon assassination contracts against targets such as Enru, Datai, and Nezura.
Endgame Wen, EXP, and mastery farming
After becoming a Slayer, keep taking boss hunting contracts from the Kasugai Crow, completing them, and accepting more; Muzan fills the equivalent role for Demons. These runs provide strong EXP and Wen while building mastery faster than any other method. Mastery is the main factor behind M1 damage, and around 200 sword mastery gives your basic attacks far more damage than players who avoid the grind.
| Crow target | EXP (1.28x) | Wen |
|---|---|---|
| Akazo | 5,376 | 1,890 |
| Gyutai | 5,376 | 1,890 |
| Datai | 4,456 | 1,315 |
| Sumari | 4,456 | 1,315 |
| Enru | 4,224 | 1,485 |
| Nezura | 4,224 | 1,315 |
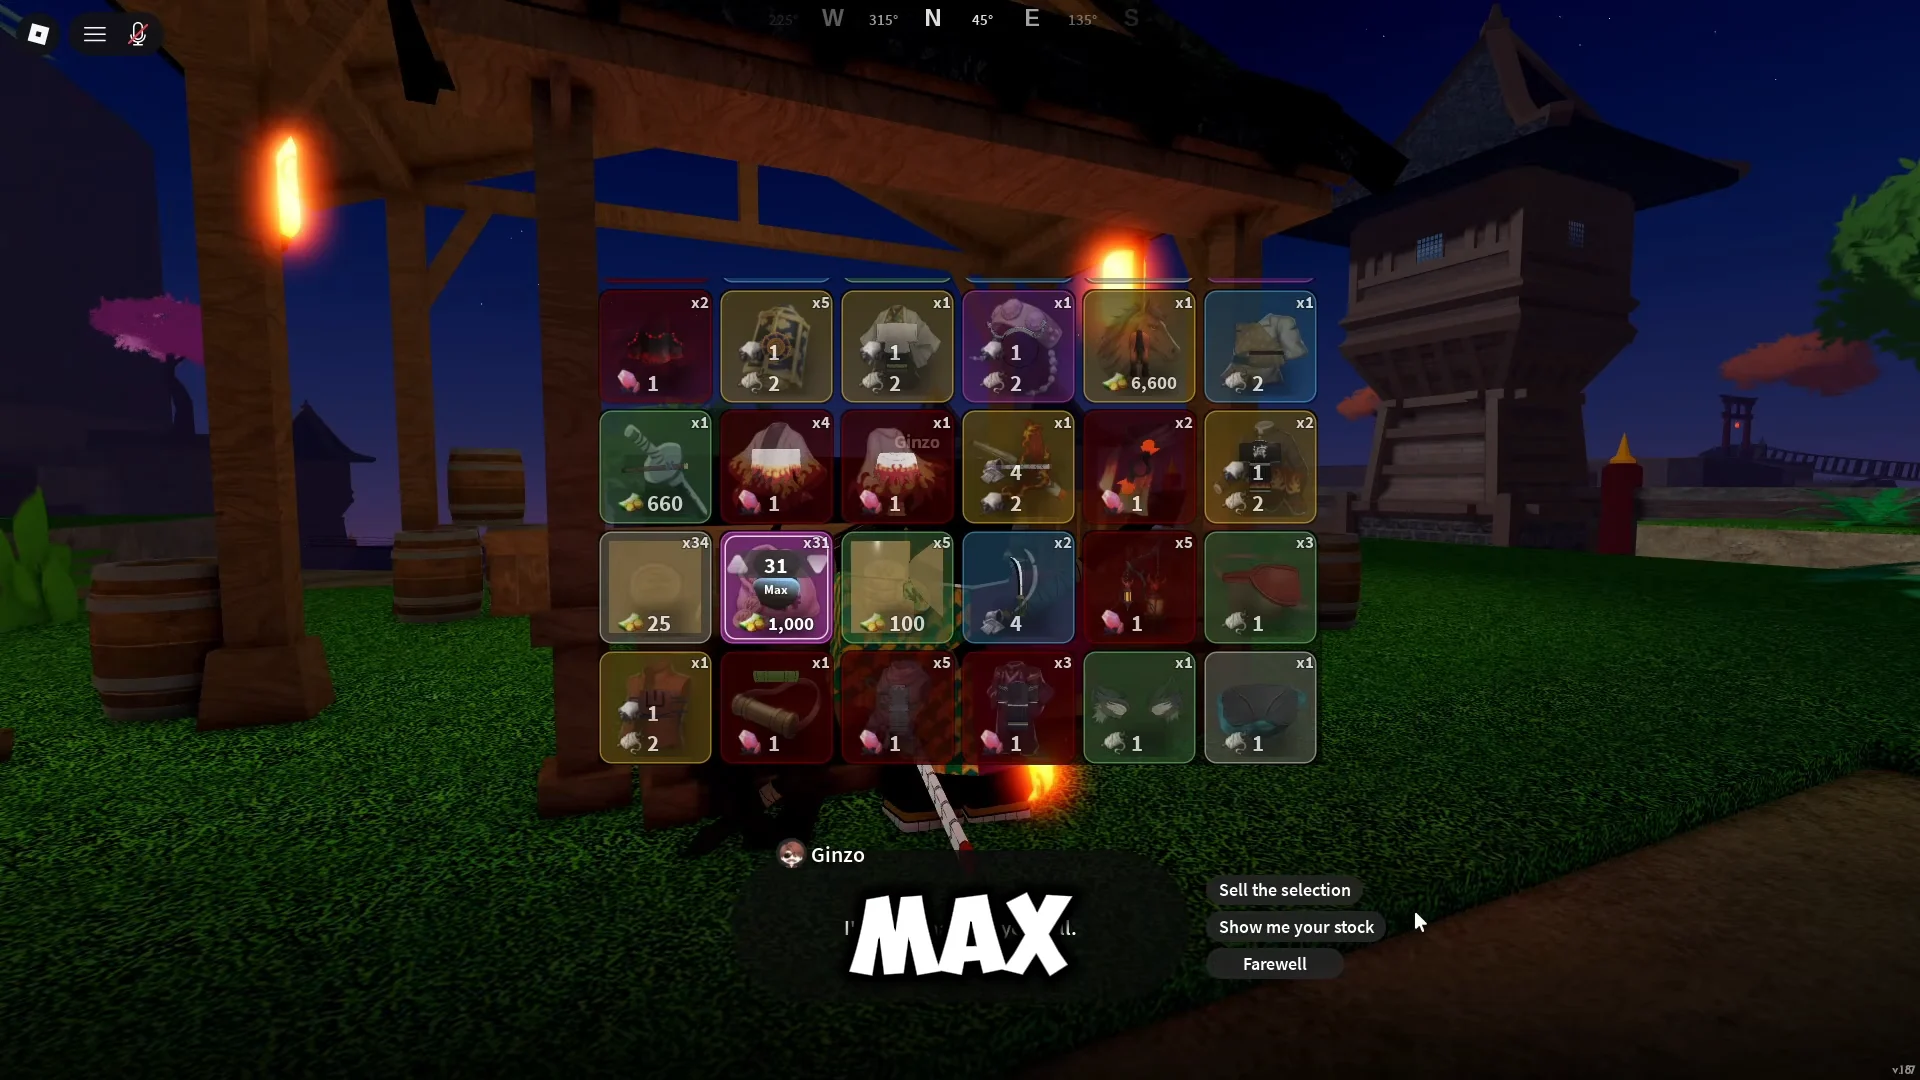
The real income sits in the drops. Each endgame boss drops two to four Coin Pouches alongside crafting materials such as Metal Scraps, Silk Thread, and Refinement Ore. Fast travel to Mistfall Harbor and sell the pouches to Ginzo for 1,000 Wen each. A stack of 31 pouches sells for 31,000 Wen, and each boss kill averages around 5,000 Wen in pouch value on top of the quest reward.
Advance your skill tree alongside your weapon mastery. Unspent skill points commonly hold players back, and the tree improves combat strength as well as the movement abilities required to enter gated areas.
AFK damage title farming at the Windy Peak statue
Damage titles are earned by hitting cumulative damage milestones, and you can equip up to three at once. The top damage title, Annihilator, requires 10,000,000 total damage, which is impractical through normal play alone.
| Title | Rarity | Requirement | Buff |
|---|---|---|---|
| Bonebreaker | Rare | 500,000 damage | +1 damage |
| Devastator | Epic | 2,500,000 damage | +1.5 damage |
| Annihilator | Legendary | 10,000,000 damage | +2 damage |
| Monster Hunter | Epic | 100 bosses | 1.012x damage |
| Nemesis | Legendary | 500 bosses | 1.03x attack speed |
| Relentless | Legendary | Die 1,000 times | 1.025x damage reduction |
For a safer Annihilator grind, go to Windy Peak Shrine and use a mount to descend past the Akaza cave path. At the cliff edge, look for the secluded stone training statue.
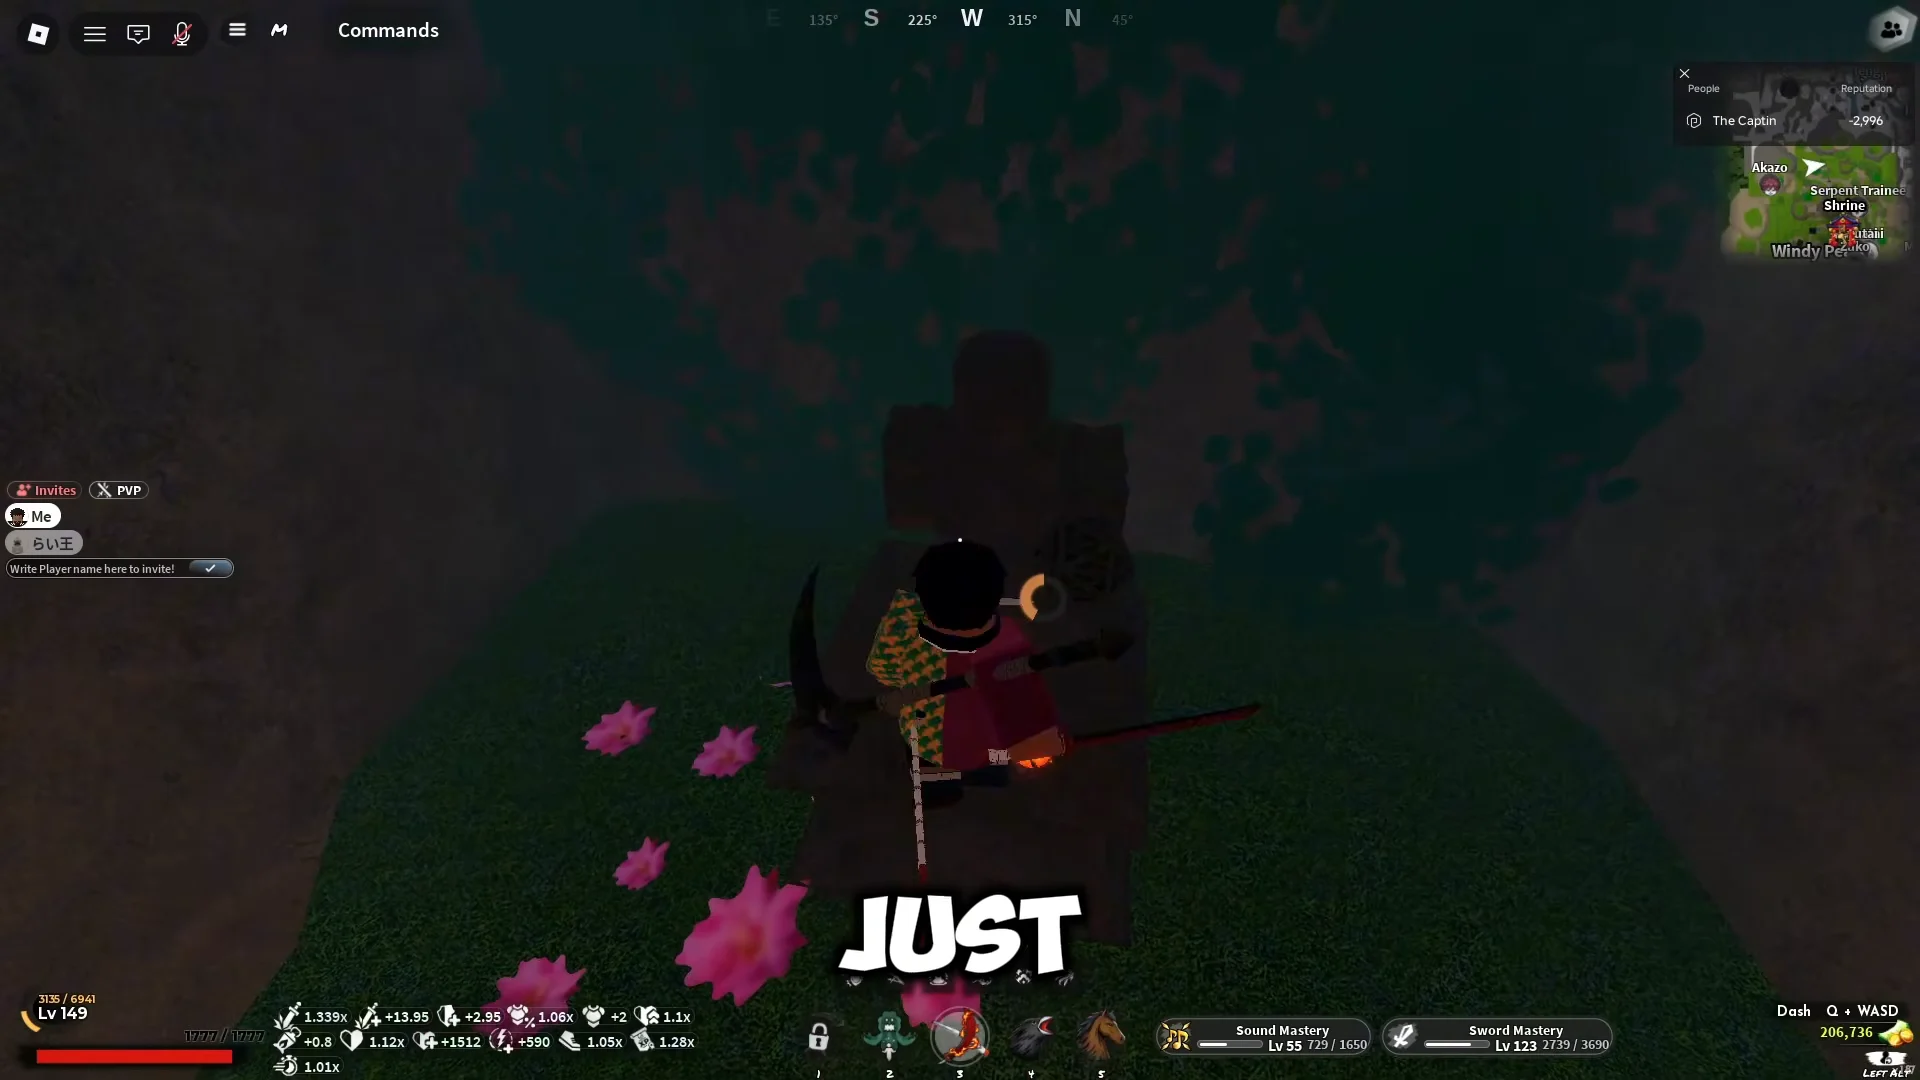
Attacks on the statue deal damage, but it neither dies nor retaliates. Put an auto-clicker on it to make each swing count toward title progress. An overnight session can bring you closer to the Annihilator threshold, which gives a +2 buff and +0.25 passive damage.

Endgame accessories and boss rotation
For a powerful setup, prioritize flat damage, health, and stamina over rarity. An item with a useful stat line can outperform one of higher rarity, so check the actual figures in the Archives menu before changing gear. In addition to the accessories below, a strong endgame kit includes the Bamboo Muzzle, Stone Haori (dropped by Gyorei), and Demonic Lantern.
| Accessory | Rarity | Key stats |
|---|---|---|
| Reaper’s Outfit | Mythic | +1 damage, 1.015x damage, +180 HP, +90 stamina |
| Red Oni Mask | Legendary | +2 damage, +85 HP, +45 stamina |
For material and drop farming, run a strict boss rotation instead of grinding standard overworld zones. A clean circuit runs Nezuko, then Reaper, then Stone Hashira, then Water Training Sabito. Reaper is essential for specific crafting materials, and rotating targets keeps your drop yields high within the shortest time. Private servers pay less XP due to lower player counts, but they are ideal for drop farming since you never compete for the last hit.
Unlocking Dungeons and the card drafting strategy
Dungeons are the primary source of rare crafting materials, refinement ores, and the schematics needed for Tier 2 and Tier 3 weapons. To open them, fast travel to Hidden Mist Village at Level 65, enter the blacksmith building, and speak to Blacksmith Togane.
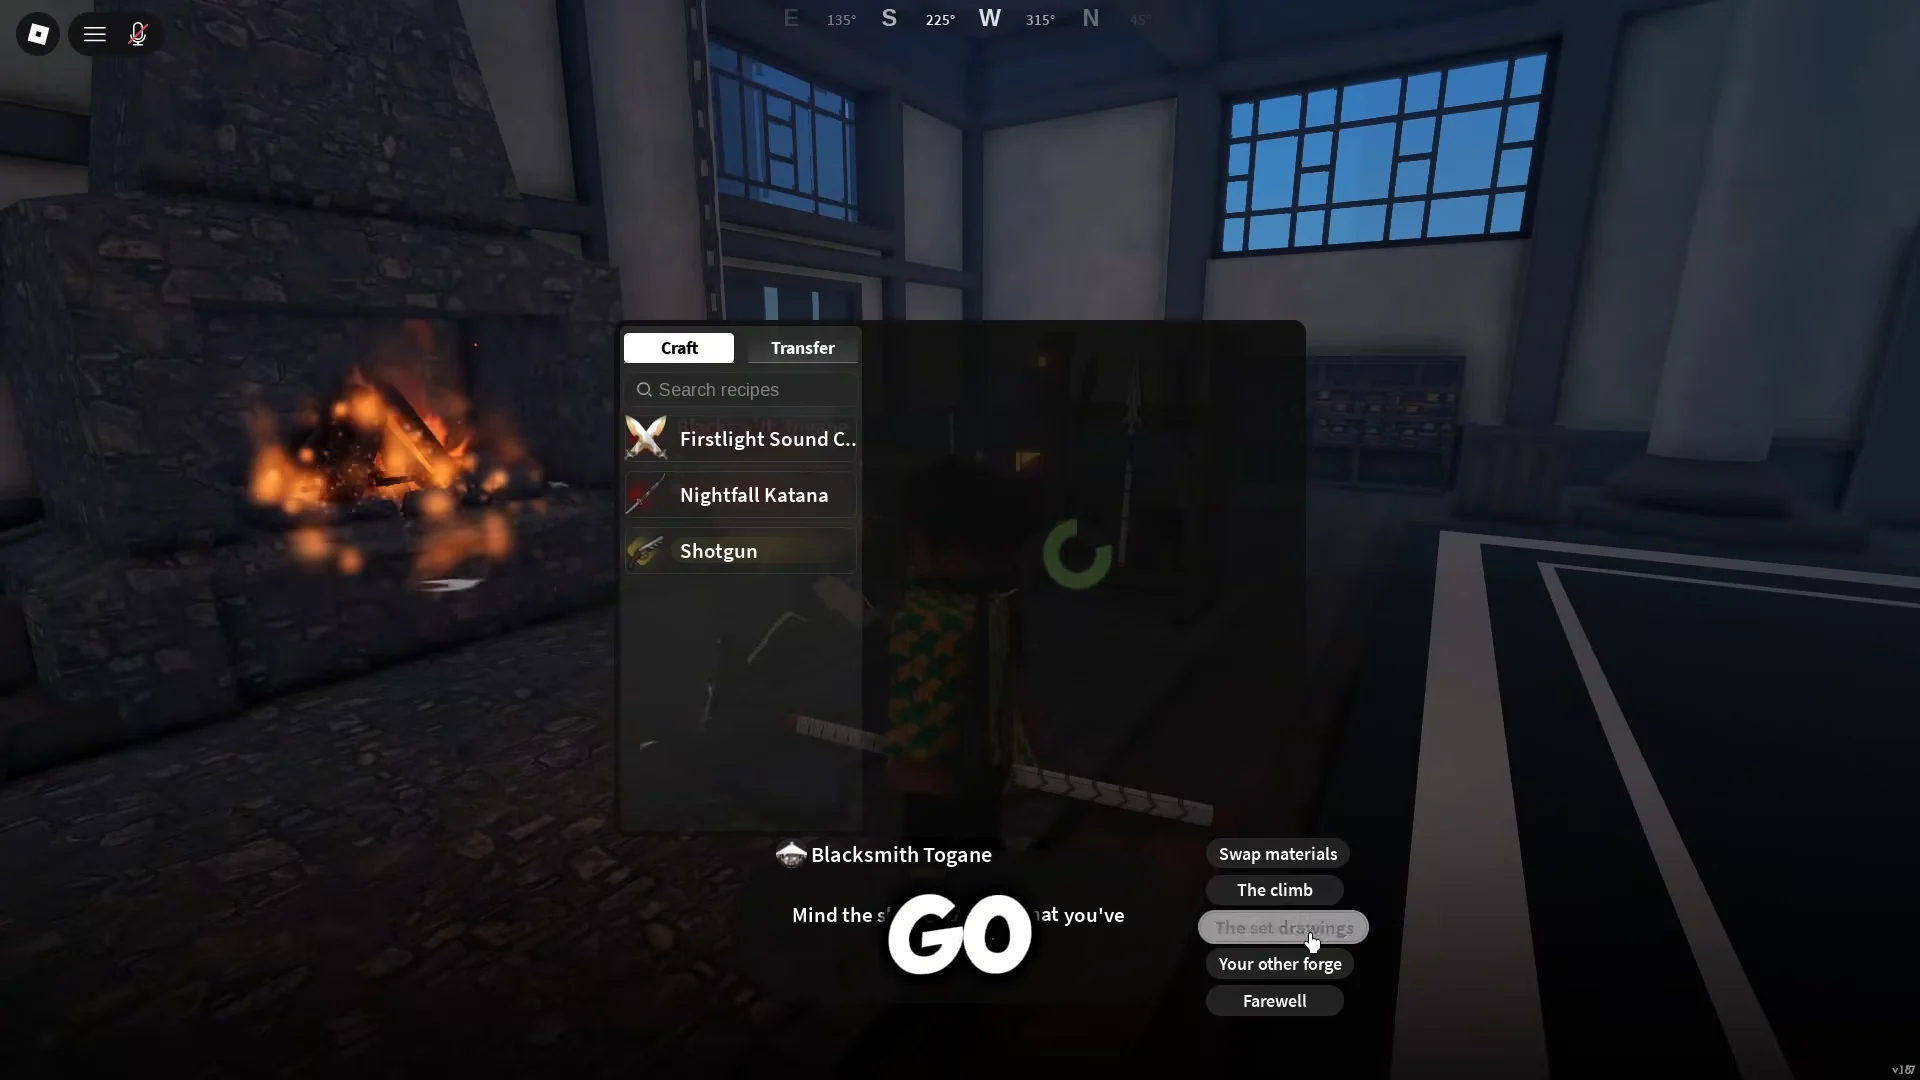
Select “Your other forge” to begin the quest for the Dungeon portal. At the far end of the long bridge in the Wilderness, you’ll find the portal; reach the Wilderness from Mistfall Harbor Shrine. Entry is available solo or with a party. If you play solo, wait until you have a complete Mythic-tier gear set before attempting serious Dungeon pushes.
Inside, the card drafts decide your run. On floors 1-25, prioritize flat Damage + cards and Damage Reduction over percentage buffs, and grab Vampirism early for sustain. Take a Lucky Draw card as soon as it appears to raise the rarity of every later offering.
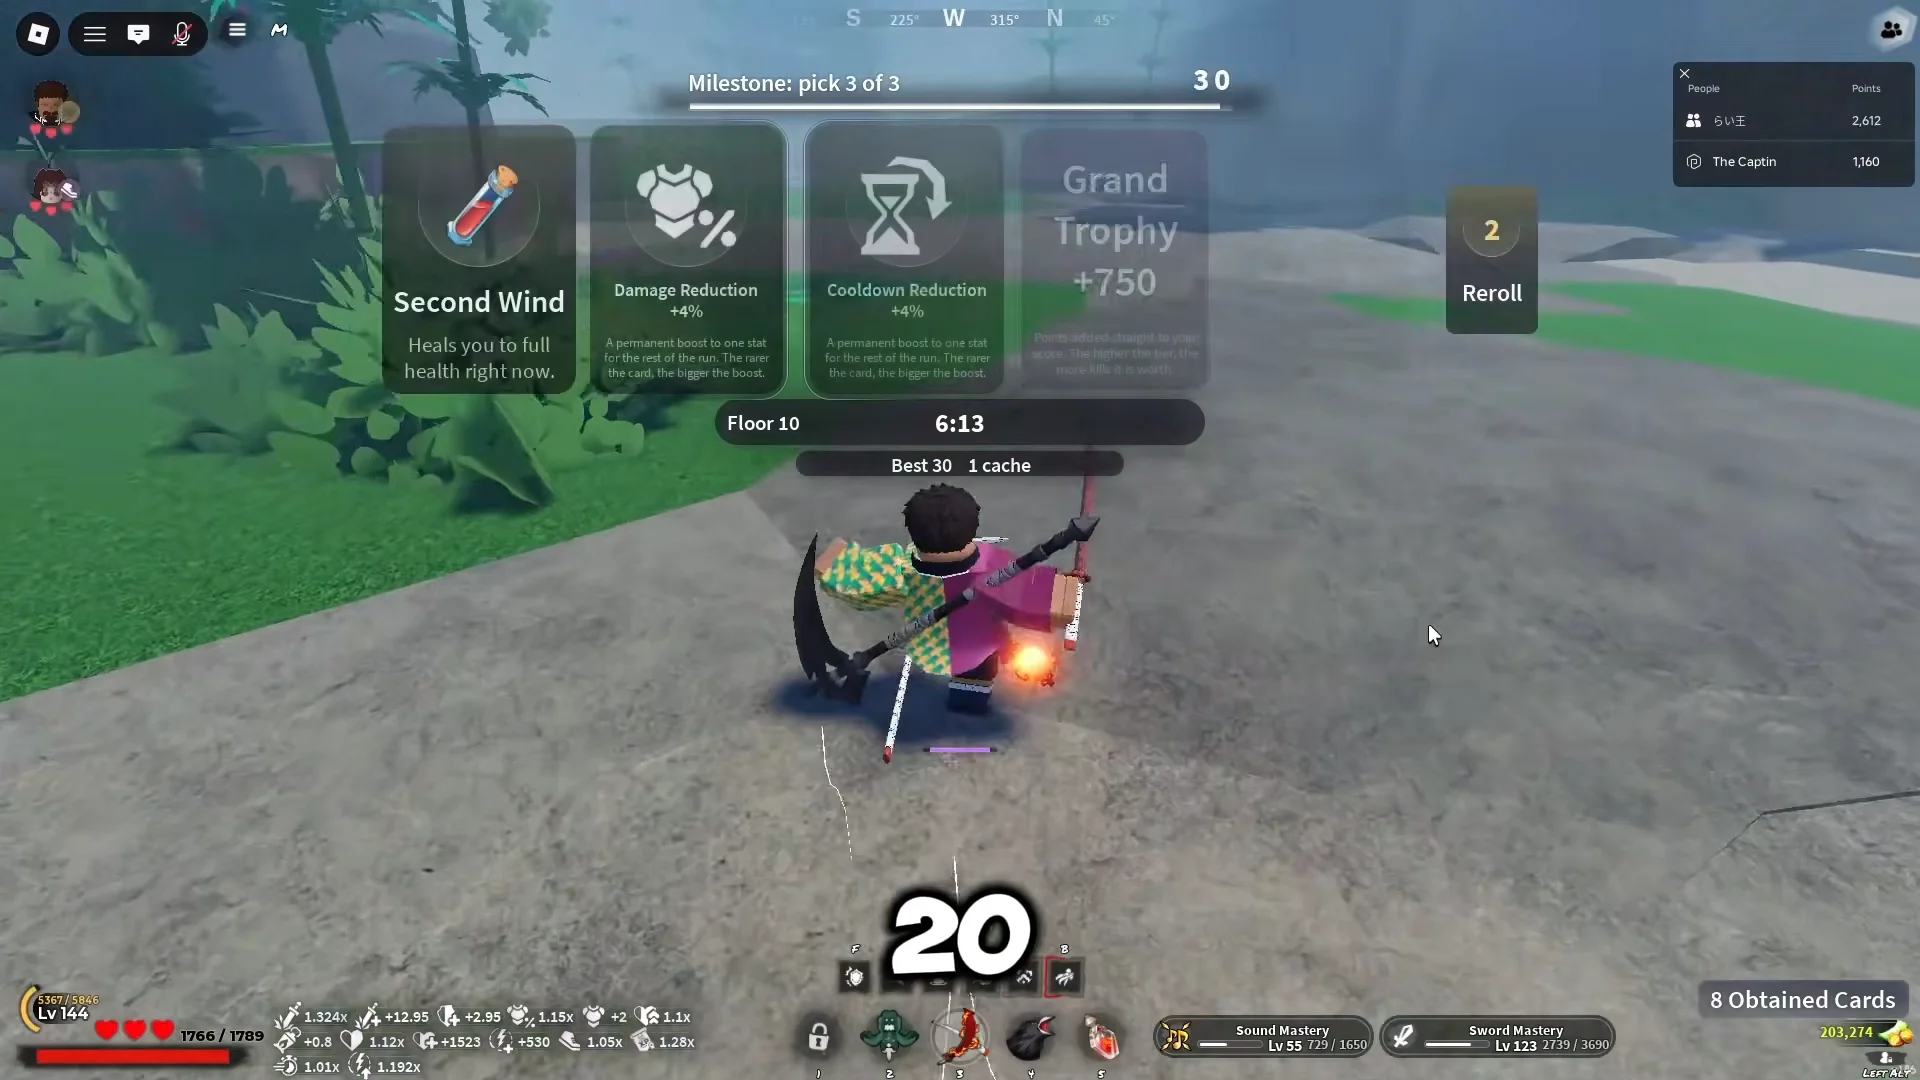
From Floor 30 onward, switch to point multipliers such as Double Time, Berserkers, and Blood Moon, plus Fortune cards, to push past 200,000 points per hour. Avoid negative traits like No Guard. Reward chests arrive every 10 floors, and reaching Floor 60 hands over six chests holding rare accessories (including the Red Oni Mask) and high-tier weapon blueprints.
Tower points do not persist once you leave a Dungeon match, so spend them at the post-run vendors before you exit. Changer Zeni sells Mythic Refinement Ore for 30,000 tower points.
Endgame weapons and refinement
Each weapon type has a Tier 2 version and, later, a Tier 3 version. Dungeon point farming and gathering resources take you from T1 to T2; T3 weapons, including the Nightfall series, can take weeks to earn. During Tower Mode, Blacksmith Togane in Ouwigahara handles Tier 2 upgrades. He requires Metal Scraps and Silk Thread from World Boss chests, along with Mythic Refinement Ore from Ginzo.
- Slayer class: Nightfall Katana and the Tier 3 Serpentine Katana, worth roughly a 50% damage boost.
- Demon class: the Tier 3 Damascus set, including the Damascus War Fans and Damascus Scythe.
Refining is where you squeeze out true damage, but high-level attempts can fail and drop your weapon’s level, setting you back days of farming. Match your mitigation to the risk before you commit.
| Refinement level | Risk | Mitigation |
|---|---|---|
| Levels 1-3 | Low | Base enhancement stones |
| Level 4 | Moderate | Refinement Guards for safety |
| Level 5+ | Very high | Refinement Guards mandatory |
Never attempt a Level 5 or higher refinement without a Refinement Guard. Refinement Guards drop from bosses and Dungeon chests, so free-to-play players can farm them rather than buying them. Keep your daily crow contracts and boss rotation running, and the Wen for a T3 weapon accumulates steadily even against its heavy cost.