Clearing a boss in Slayers 2 once is quick. Pulling the rare named piece from its chest is the slow part, because the themed drops sit behind low percentages and specific encounters. Knowing which bosses hold a genuine upgrade for your build keeps you from farming the whole roster at random.
Quick answer: The best returns come from the Scarred Warding Mask, Bamboo Muzzle, Stone Haori and Demonic Lantern for slayers, plus Blood Sickles, War Fans and the Bladed Wagasa for demon builds, each tied to one boss.
Slayer masks, haori and lanterns
These accessory and outfit drops stack flat damage with large health and stamina pools, which is why they hold up from early progression into endgame. Each one comes from a single boss at the drop rate below.
| Item | Boss | Drop rate | Rarity |
|---|---|---|---|
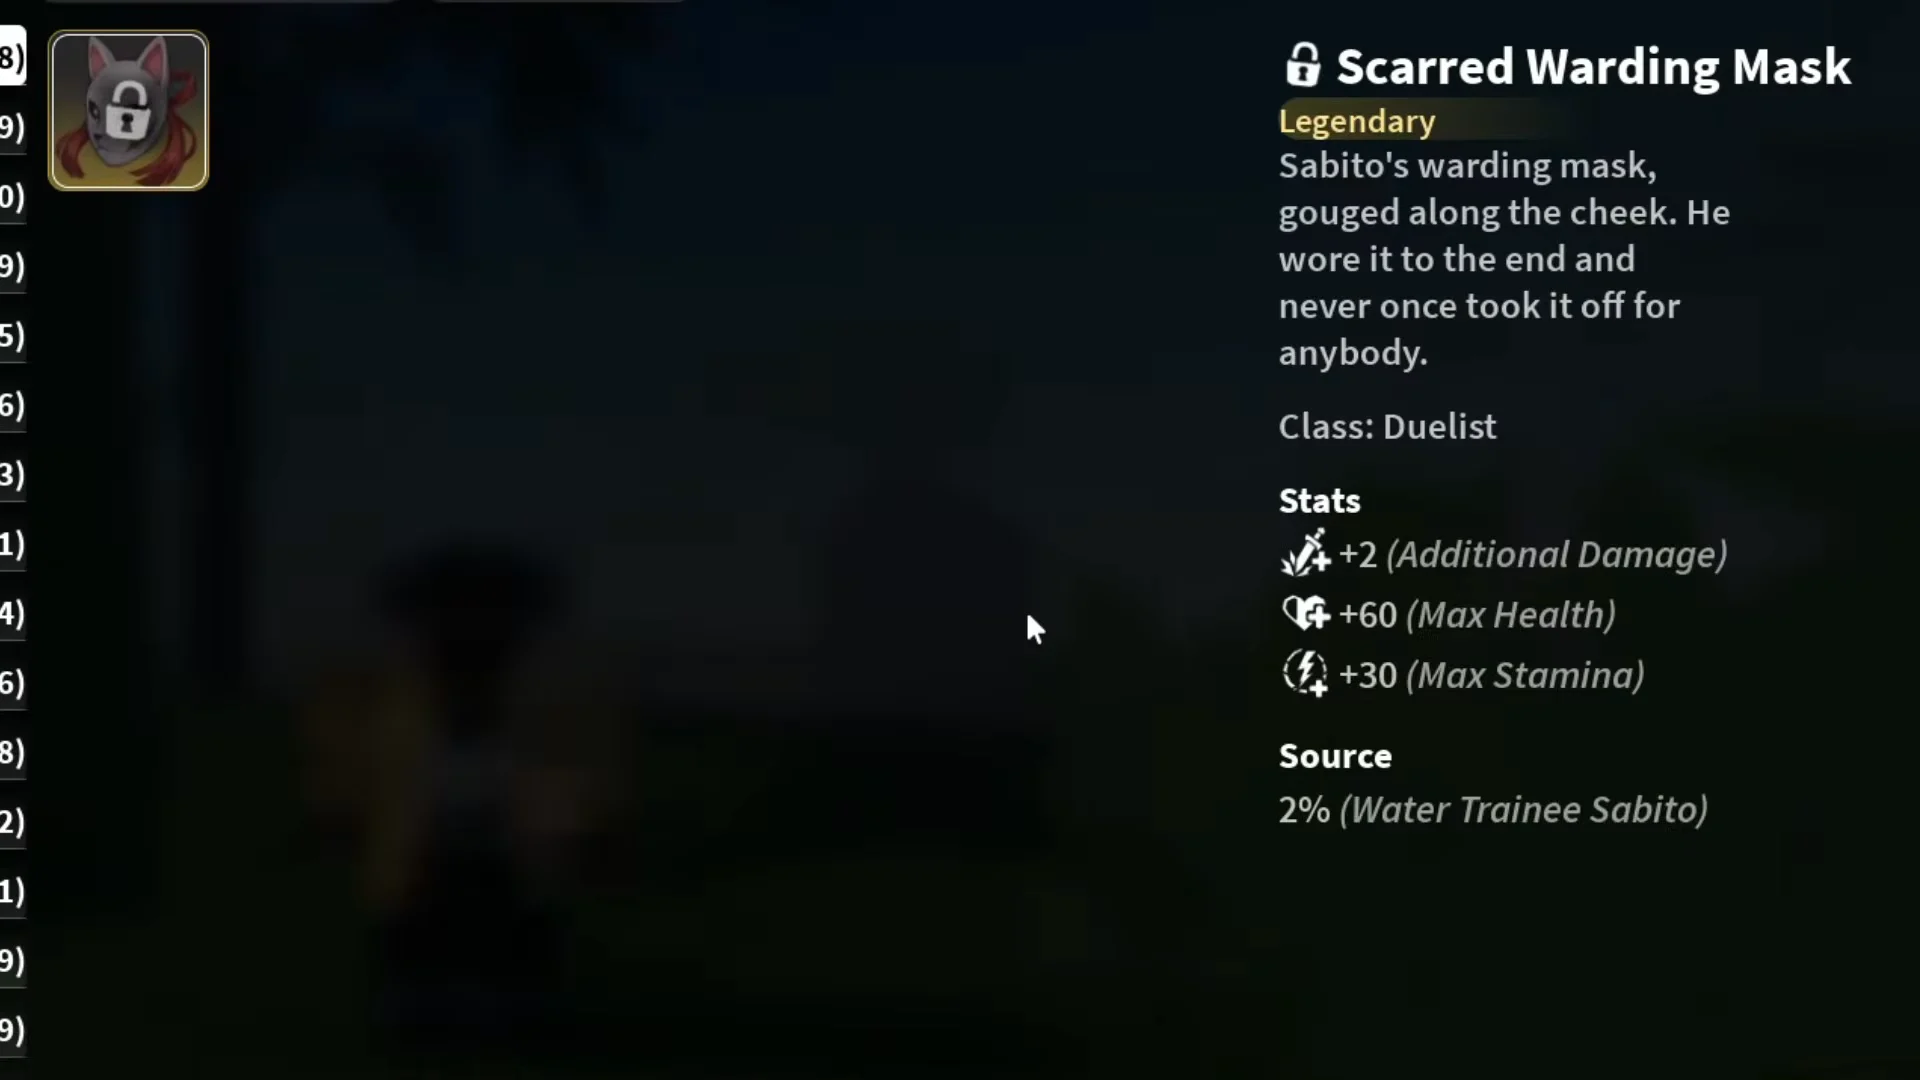
| Scarred Warding Mask | Water Trainee Sabito | 2% | Legendary |
| Bamboo Muzzle | Nezura | 3% | Mythic |
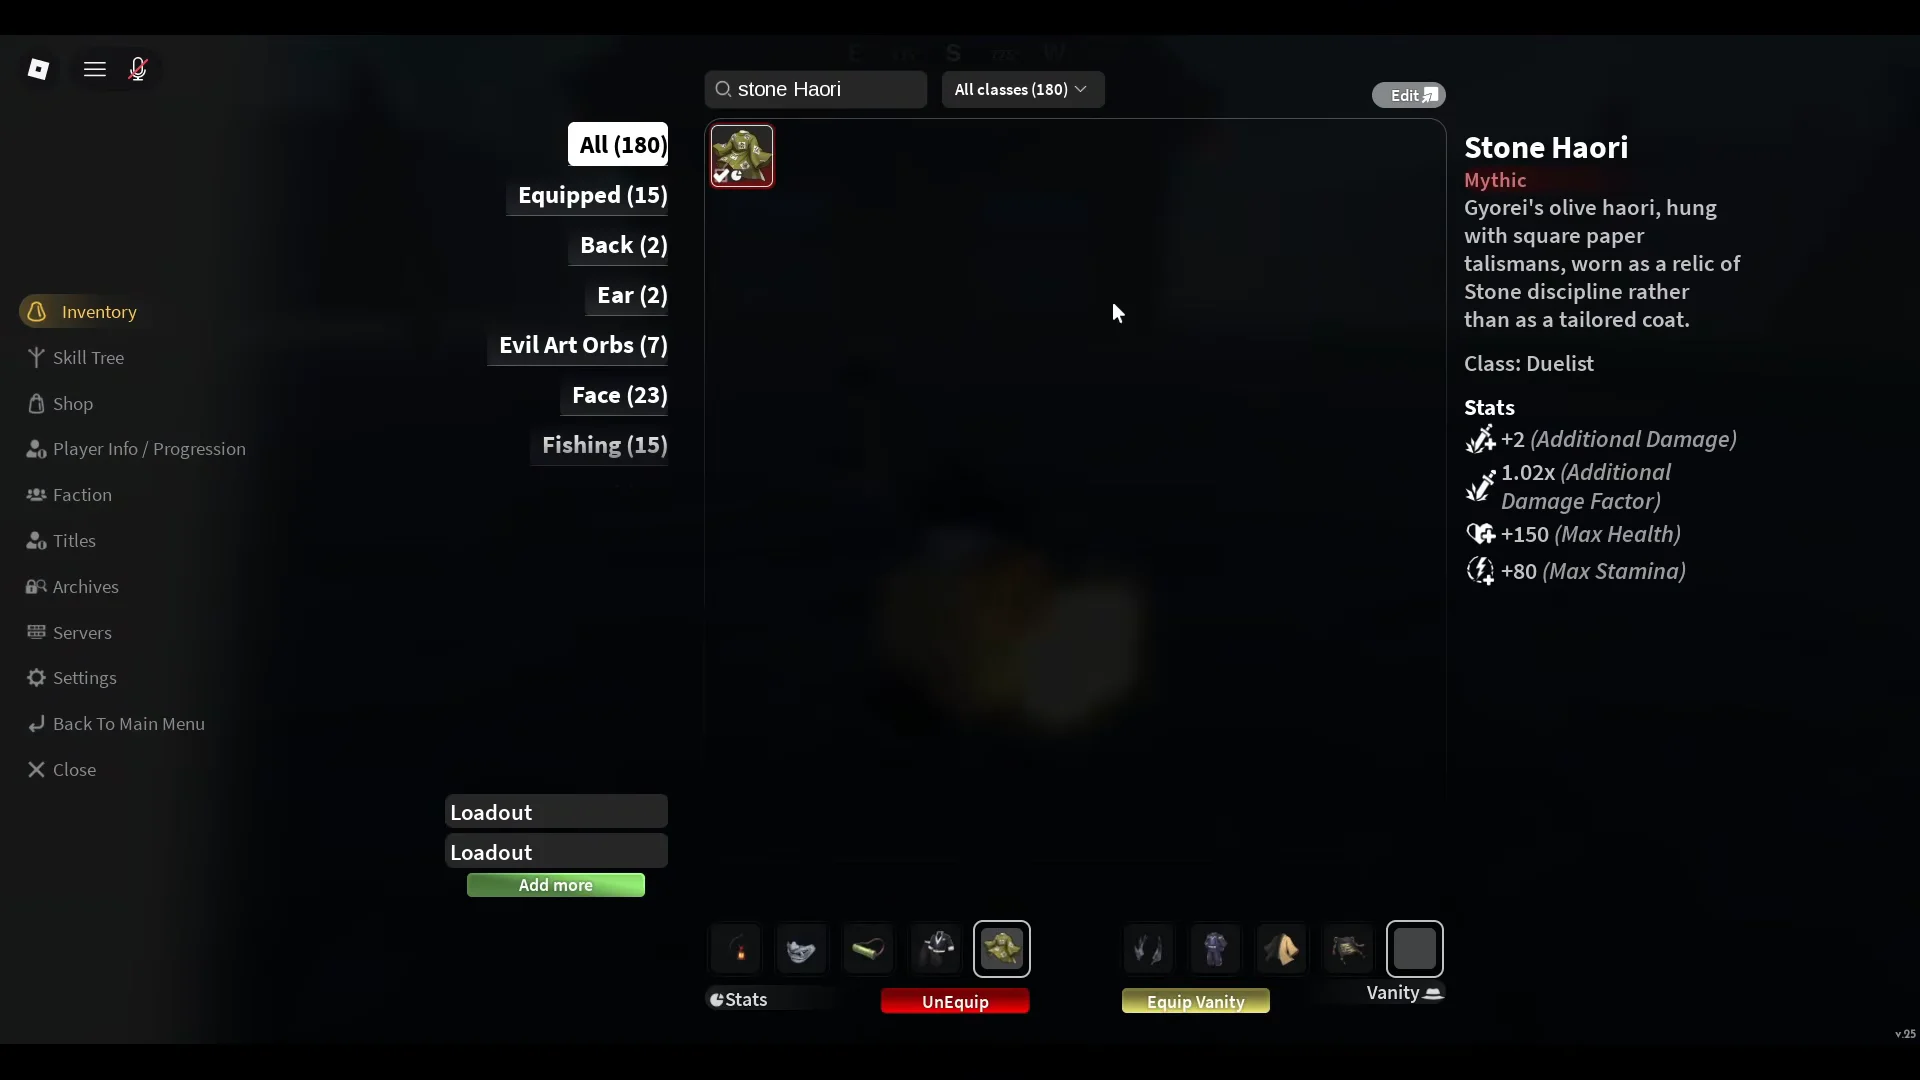
| Stone Haori | Gyorei | 2% | Mythic |
| Emberheart Lantern | Yeti | — | Legendary |
Scarred Warding Mask
Scarred Warding Mask gives +2 Additional Damage, +60 Max Health and +30 Max Stamina. It drops from the mini-boss Water Trainee Sabito, who sits at only 600 HP, so farming it is far faster than chasing a 2% drop off a full world boss. That low health pool is what makes it a reasonable target for new and veteran players alike.
Bamboo Muzzle
Bamboo Muzzle is the heavier upgrade of the group, adding +2 Additional Damage, a 1.015x Additional Damage Factor, +160 Max Health and +80 Max Stamina. It comes from Nezura, a world boss with 2,000 HP, and appears in the World Events Chest at a 3% chance.
Stone Haori
Stone Haori grants +2 Additional Damage, a 1.02x Additional Damage Factor, +150 Max Health and +80 Max Stamina. Gyorei drops it from a World Events Chest at 2%, with the boss also carrying 2,000 HP.
Emberheart Lantern
Emberheart Lantern is the one piece you take for utility rather than raw stats. It holds off the freeze that otherwise ticks on you in Iceveil while its ember burns, and the flame has to be rekindled at a campfire once it goes out. On top of that it gives +0.35 Illumination, +40 Max Health and +20 Max Stamina. It drops from the Yeti frozen inside the ice in Iceveil.

Weapons for breathing-style builds
Two weapon drops tie directly to specific breathing styles, so their value depends entirely on the route you already play.
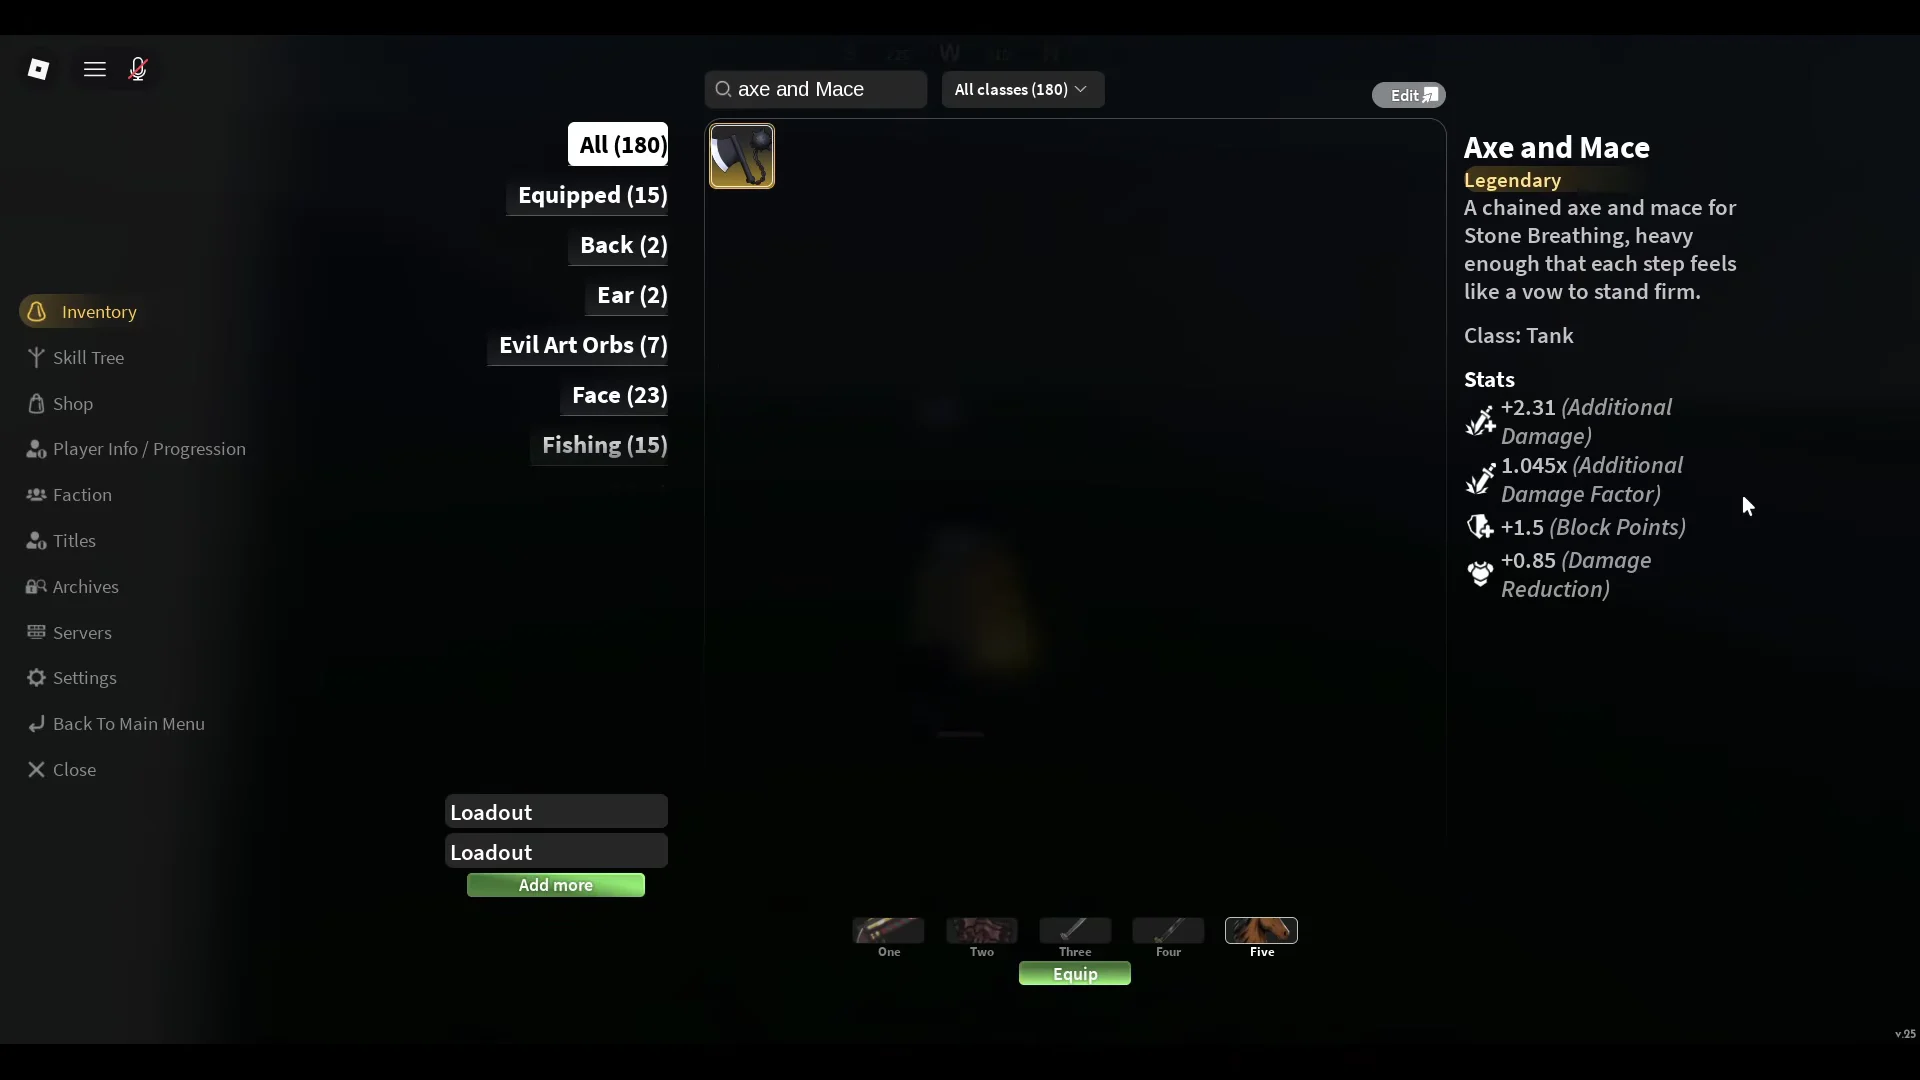
Axe and Mace is a Legendary tank weapon built for Stone Breathing users. It carries +2.31 Additional Damage, a 1.045x Additional Damage Factor, +1.5 Block Points and +0.85 Damage Reduction, which leans toward holding ground rather than burst output.
Flame Katana comes from Rengu and suits Flame Breathing play. It gives +2 Additional Damage, a 1.037x Additional Damage Factor and +1.95 Block Points, making it an accessible early blade for anyone leaning into that style.
Demon weapons and where they drop
Demon builds have their own set of targets. Match the weapon to your Blood Demon Art before committing to a long farm, since none of these carry across every art.
| Weapon | Boss | Chest | Drop rate |
|---|---|---|---|
| Sickles | Hoyuzo | Rare Chest | 3.25% |
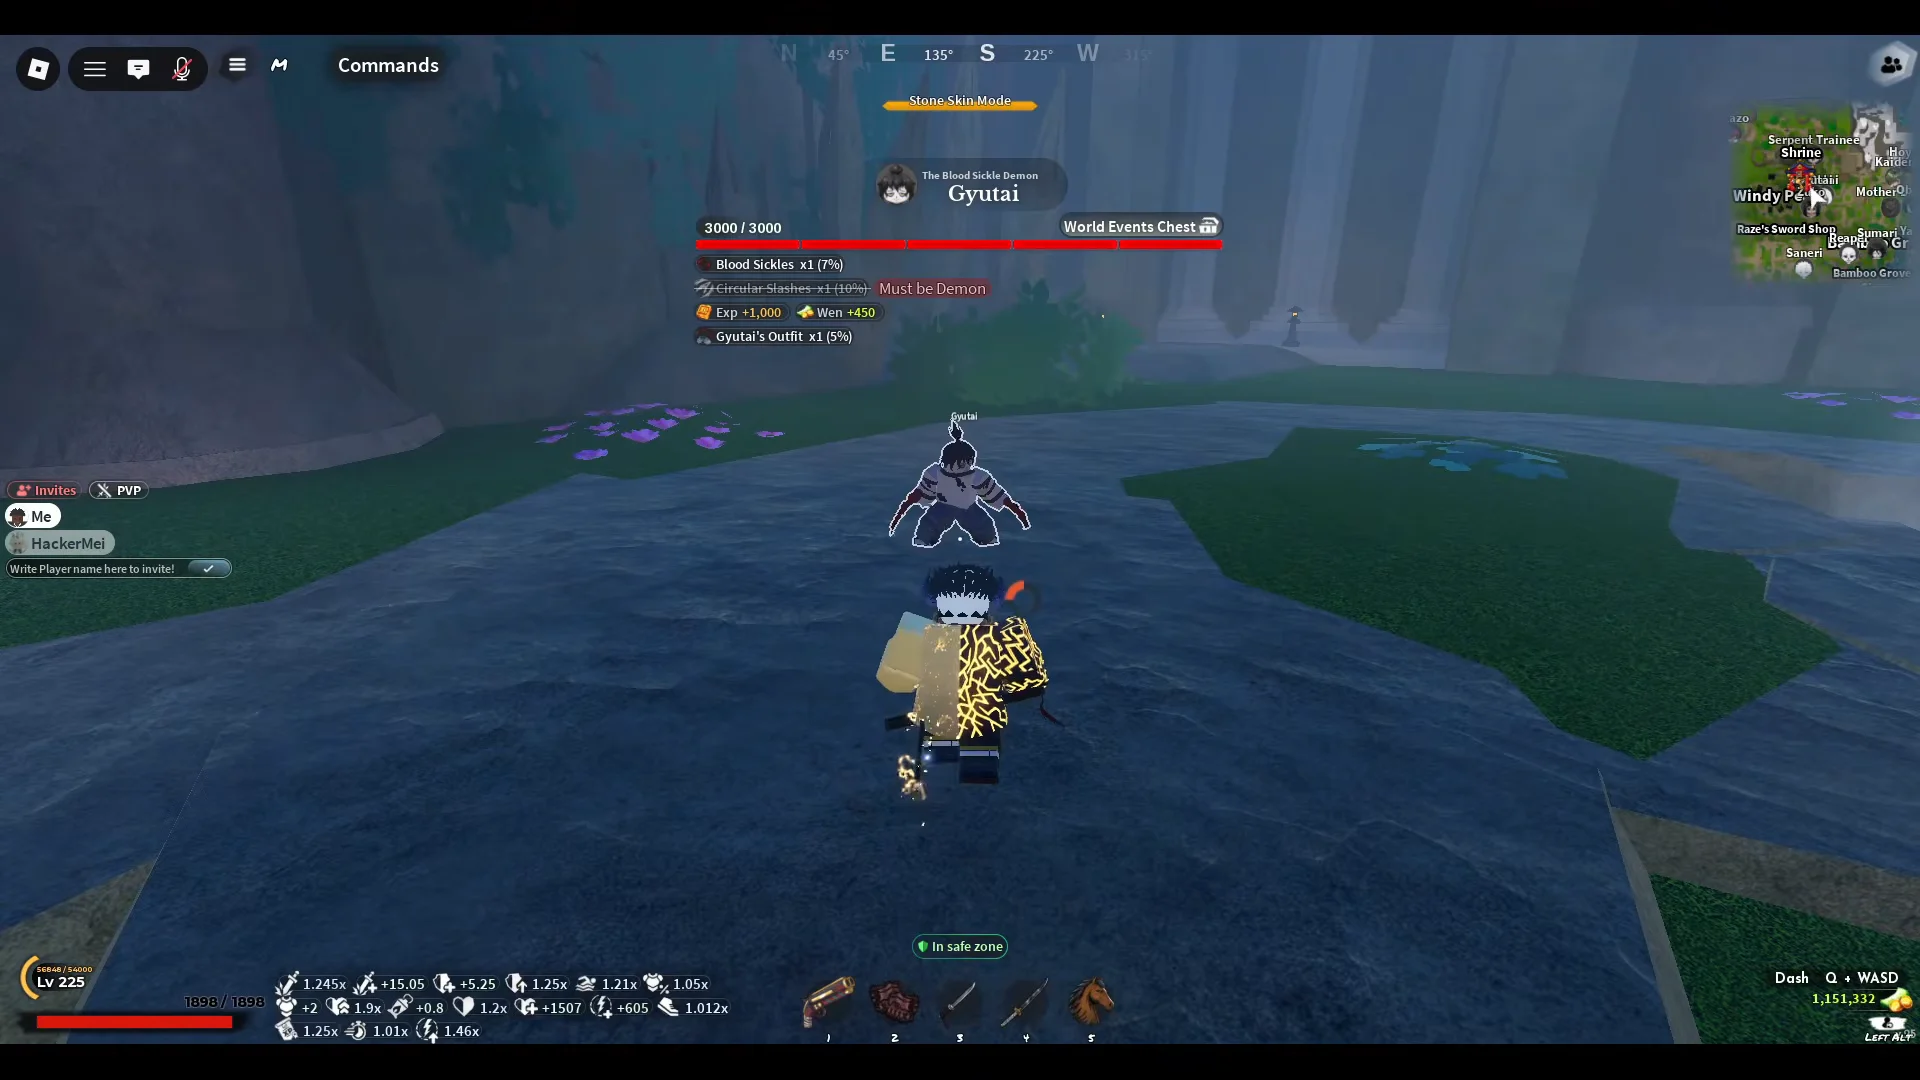
| Blood Sickles | Gyutai | World Events Chest | 3% |
| War Fans | Domae | World Events Chest | 2% |
| Bladed Wagasa | Fujiko | Ice Chest | 3% |
The basic Sickles come from the mini-boss Hoyuzo, the Sickle Reaper, who sits around 1,485 HP. The Legendary Blood Sickles are the step up, dropping from the world boss Gyutai, the Blood Sickle Demon, at 2,000 HP.
War Fans drop from Domae, also a 2,000 HP world boss. The Bladed Wagasa is the one hidden-route pickup here, coming from Fujiko at 3,200 HP through an Ice Chest, and it pairs strongly with Akaza’s Blood Demon Art.
Demonic Lantern from world event chests
Demonic Lantern is not locked to one boss. It can roll from any World Events Chest, which means beating any world boss, Akazo included, puts it in reach. The Legendary accessory gives +2 Additional Damage, a 1.015x Additional Damage Factor, +0.8 Illumination, +105 Max Health and +55 Max Stamina, so it works as both a light source and a straight stat stick.
Akazo, the Blood Horn Demon, runs 3,000 HP and is a clean example of the farm: clear the fight, open the World Events Chest, and the Demonic Lantern is one of the possible pulls.
How boss chests and drop rates work
Defeating a boss awards a chest, but its rare named item is a separate drop. You may clear the fight multiple times and receive regular loot before the boss-specific piece appears. Beating the right boss does not guarantee that rare reward.
A world boss has 3,000 HP with one attacker, and each additional player who attacks adds 1,000 HP. Two attackers mean 4,000 HP, while three mean 5,000, increasing the total damage the group must deal. Mini-bosses such as Water Trainee Sabito have a fixed amount of health.
Drop chances are rolled per player, so fighting a boss as part of a team does not cut your odds of the item you want.
You know a farm worked when the named piece lands in your inventory after opening the chest. Until it shows up there, an empty clear is normal behavior for these low percentages, not a sign the drop is missing.