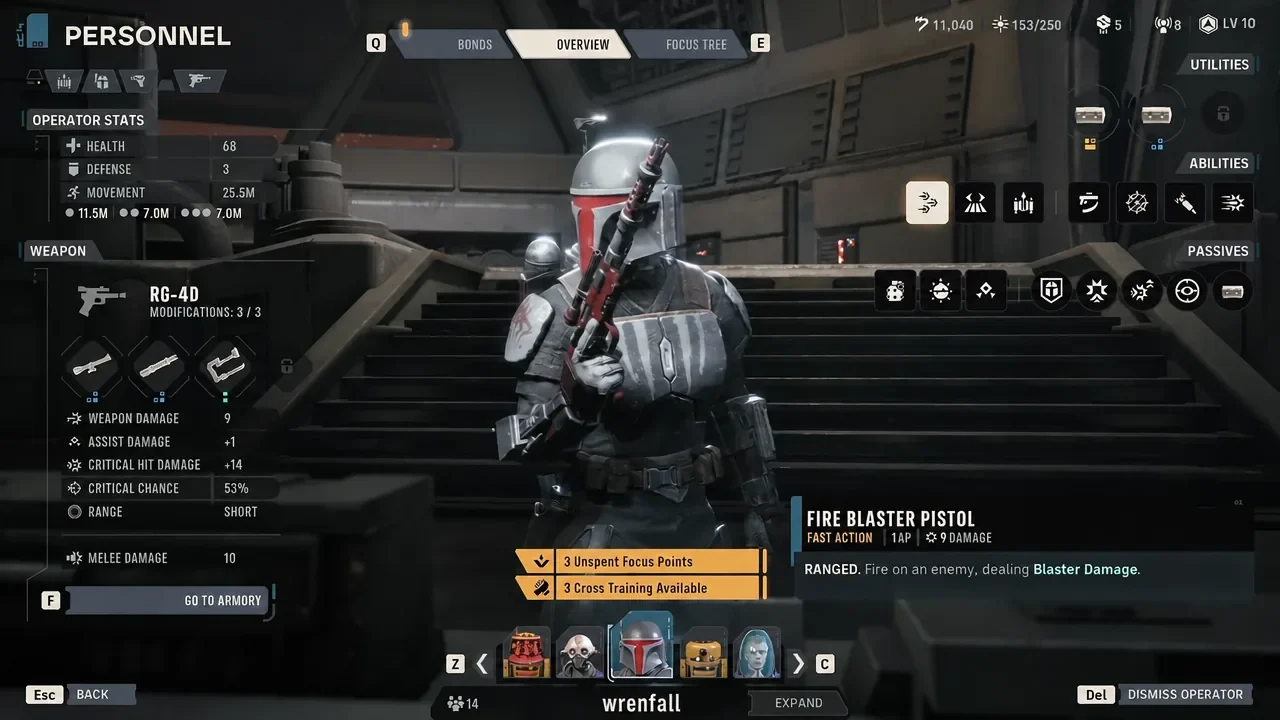
Tactical squad games usually cap how much one unit can do in a turn. In Star Wars Zero Company, a Mandalorian named Cly Kullervo can effectively ignore that cap. Pair her Mandalorian mobility with a Gunslinger damage passive, then park two Astromech droids behind her as portable action point supplies, and one operator can chain attacks until a whole enemy formation is gone.
Quick answer: Give Cly Kullervo the Gunslinger dual specialization for Onslaught, open each turn with Combat Jump (paid with Advantage, not AP), kill weak enemies using Quick Draw so it refunds its own AP, and top her back up with Built-in Comlink transfers from two Astromechs.
Squad composition and roles
The build runs four operators, and only one of them is meant to deal serious damage. Everyone else exists to keep her buffed, fed with action points, and protected when a turn ends badly.
| Operator | Role | Job in the loop |
|---|---|---|
| Cly Kullervo | Mandalorian / Gunslinger | Sole damage dealer; chains basic attacks to stack Onslaught |
| Dantics Hawks | Medic / Heavy | Buffs Cly with Combat Stim, taunts leftovers with Bulwark |
| F-8 | Astromech | AP battery via Built-in Comlink; grenade thrower |
| N4R-M8 | Astromech | Second AP battery; carries Coordinated Support |
The Gunslinger specialization is the piece that arrives late. It unlocks at Cycle 18, so the full version of this squad is a mid-to-late campaign setup rather than something you assemble on your first few missions.
The three mechanics that make the turn loop
Nothing here is a hidden interaction. Three talents simply line up so that attacking costs less and hits harder the longer you keep going.
| Talent | Effect |
|---|---|
| Combat Jump | Moves Cly up to 23 meters for 2 Advantage instead of AP, pushing enemies and applying Burning |
| Onslaught | Adds +1 primary blaster damage for every basic attack she makes in a single turn |
| Quick Draw | Costs 1 AP and refunds 1 AP when it kills the target |
Because Combat Jump is paid for with Advantage, repositioning never eats into her attack budget. Onslaught then rewards volume rather than single big hits, and Quick Draw makes that volume nearly free as long as each shot finishes something off. Every kill both refunds the AP and pushes her damage one point higher for the rest of the turn.
Note: Onslaught stacks are per turn. The damage bonus resets when the turn ends, which is why the whole build is designed around extending a single turn instead of spreading damage across several.
Astromech action point economy
Quick Draw only pays for itself when it kills. Against tougher targets it does not refund, and Cly runs dry. That is what the droids solve.
Built-in Comlink lets an Astromech hand its own action points over to another operator. Both droids can pour their AP into Cly, but there is a hard ceiling: she can hold a maximum of 3 AP at any one time. Transfers only work when there is room under that cap, so you feed her in small amounts as she spends, not in one big dump at the start.
Coordinated Support is the reset button. It costs 10 Advantage, grants every operator +2 AP, and can be used once per combat. Since it refills the droids as well as Cly, it effectively doubles how many Comlink transfers are available in a fight. Save it for the turn where the enemy formation is dense enough to be worth clearing entirely.
Focus tree priorities
Cly’s focus tree leans entirely into mobility and attack repetition. The droids invest in transfer efficiency and carrying capacity rather than combat stats.
| Unit | Focus picks |
|---|---|
| Cly Kullervo | Combat Jump IV, Quick Draw V, Keen Eye IV, Ruthless V |
| Astromechs | Built-in Comlink III, Coordinated Support VI, Extended Storage |
| Dantics Hawks | Combat Stim VI, Bulwark |
Combat Stim VI gives Cly +3 damage and +12 maximum HP, which matters because the extra health keeps her alive after she jumps into the middle of a group. Bulwark taunts enemies in an area, pulling attention away from her when the turn ends before the field is clear.
Loadout and cross-training bonds
The Blaster Pistol is the weapon to build around, since Onslaught scales primary blaster damage. Three mods carry it: Lightning Cycler for its chance to refund AP, Assassin’s Scope for critical chance, and Custom Ergonomic for stacking blaster damage.
The Astromechs should carry high-damage explosives rather than utility gear. Thermal Imploders, Prototype Imploders, and Concussion Grenades let them soften or finish clusters that Cly cannot one-shot, which turns those enemies back into free Quick Draw kills.
Two cross-training bonds add more AP on top of everything else. Behind the Lines restores 1 AP when you kill an exposed target with a blaster or sidearm, and Pinpoint Parade restores 1 AP on the first critical hit of a turn. Both stack neatly with the pistol mods.
Turn order: How to pilot the squad
Why the chain stops early
When a turn ends sooner than expected, it is almost always one of a few specific things.
- A Quick Draw shot did not kill, so no AP came back and the chain broke.
- Cly was already at the 3 AP ceiling, so a Comlink transfer had nothing to add.
- Coordinated Support was already spent, since it is limited to once per combat.
- Advantage was too low for Combat Jump or for the 10 Advantage Coordinated Support cost.
You can tell the loop is working the moment Onslaught’s damage number keeps climbing while Cly’s AP total stays roughly flat. That is the whole point of the setup: fights that would normally take several rounds of careful positioning collapse into a single, very long Mandalorian turn.