Buy Cheap, Never Sleep is an optional mission tied to Kabb Uppercut, and it hides in plain sight on the Holotable aboard the Den. Players who scan only the Critical missions tend to sail past it, because it sits under a region you may not have checked yet.
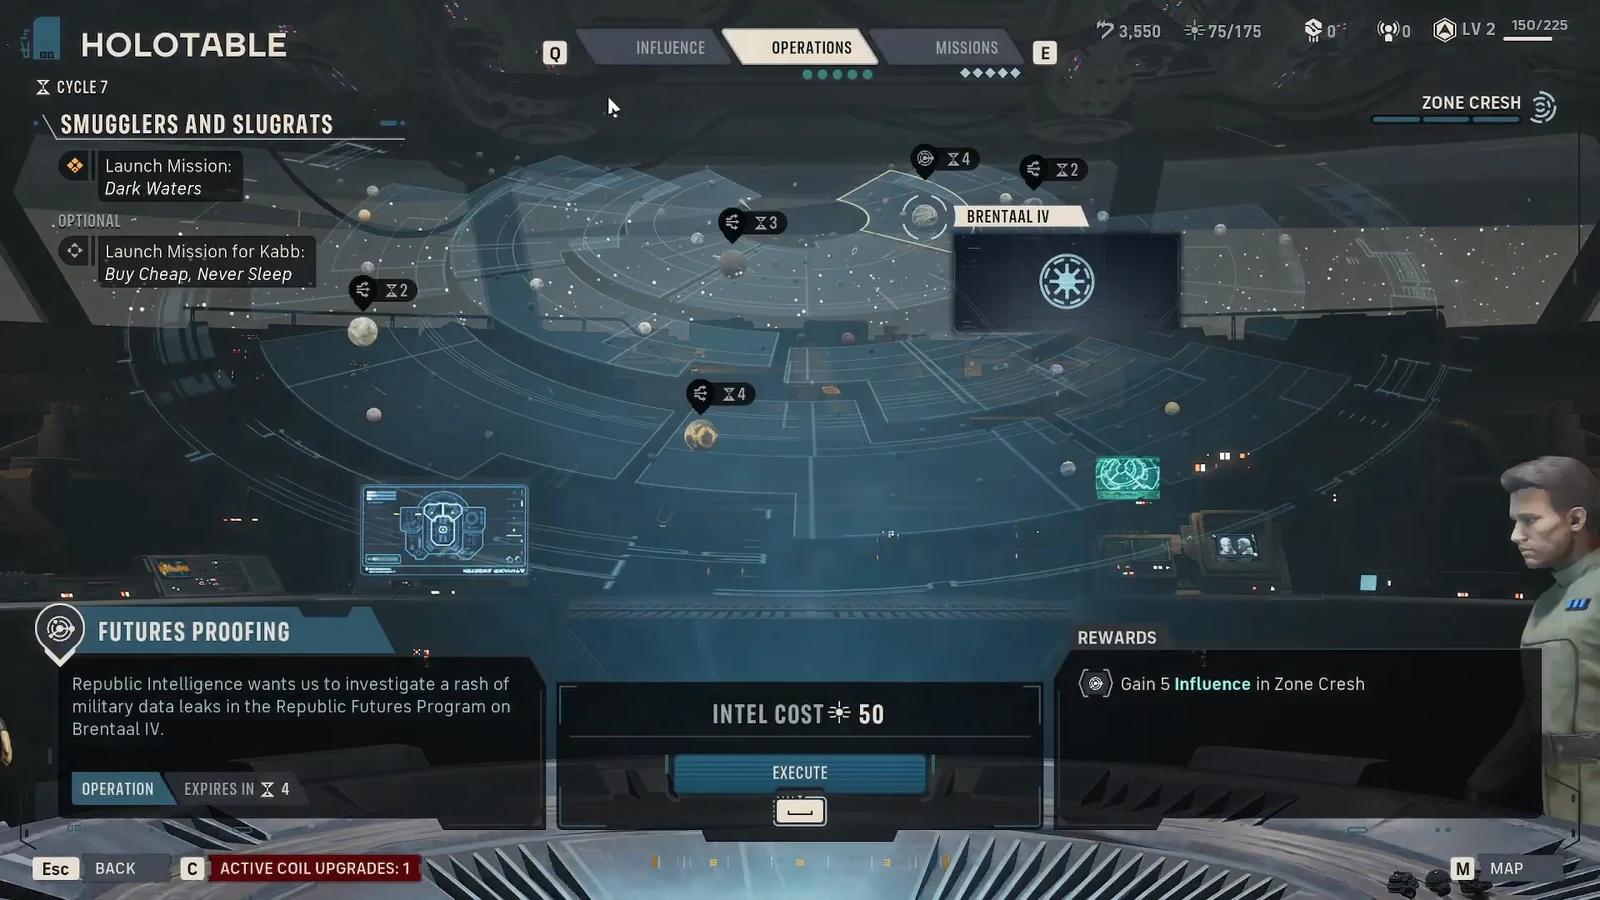
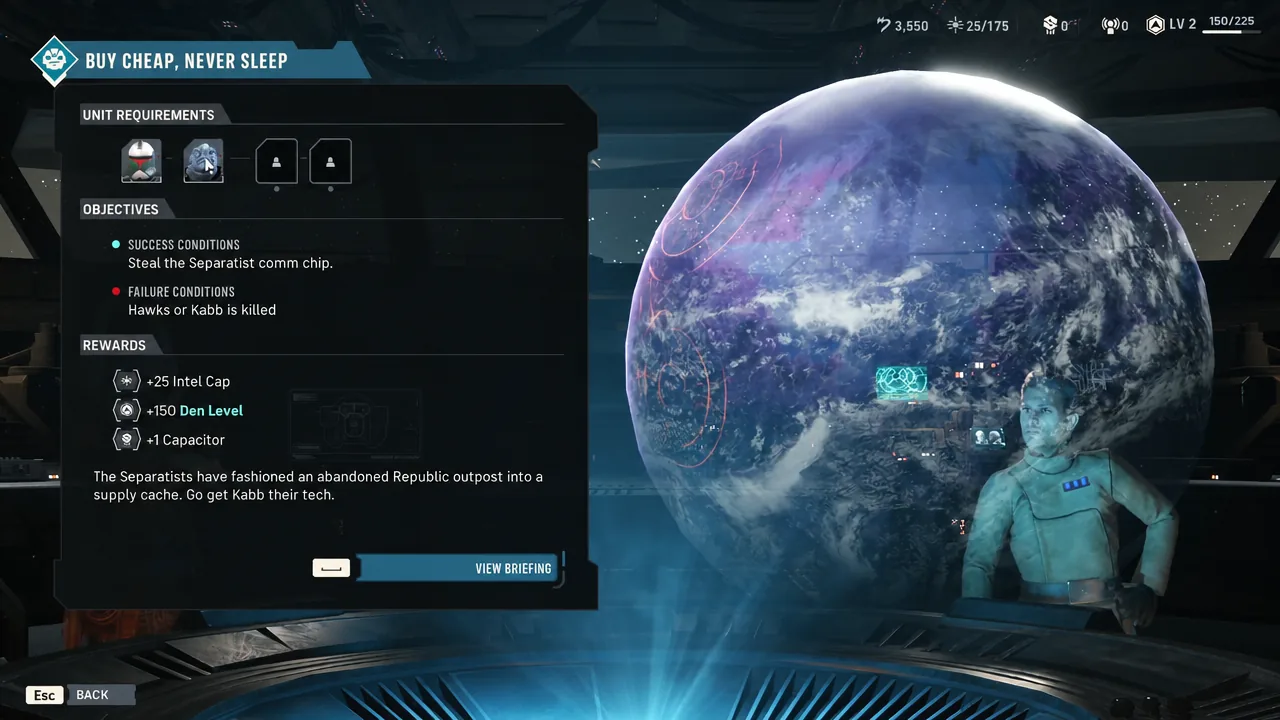
Quick answer: Open the Holotable on the command deck, switch to the Missions tab, select the Anaxes region, click the Buy Cheap, Never Sleep mission icon, then confirm a squad that includes Kabb and press Launch Mission.
Buy Cheap, Never Sleep requirements and rewards
The setup is simple. The Separatists have converted an abandoned Republic outpost into a supply cache, and Kabb wants the tech inside. Because it is his personal job, he is a locked squad slot rather than an optional pick, and the mission fails outright if he goes down for good.
| Detail | Value |
|---|---|
| Region | Anaxes |
| Mandatory unit | Kabb Uppercut |
| Success condition | Steal the Separatist comm chip |
| Failure conditions | Hawks or Kabb is killed |
| Rewards | +25 Intel Cap, +150 Den Level, +1 Capacitor |
Note: launching any tactical mission pushes you into the next cycle, so finish everything you want to do inside the Den first. Conversations, medbay assignments, upgrades, and recruitment all happen before the drop, not after.
Spend leftover Intel before you deploy
Intel does not travel well. Operations and missions on the Holotable expire when the cycle rolls over, so any Intel sitting in your pool when you launch is Intel that bought you nothing. Clear it out first.
Open the Operations tab on the Holotable and look for anything you can afford. Futures Proofing, for example, costs 50 Intel and returns +5 Influence in Zone Crash. Influence accumulates toward zone rewards such as upgrades, utilities, and contacts, which makes a non-combat operation a reasonable dumping ground for a stray 50 Intel.
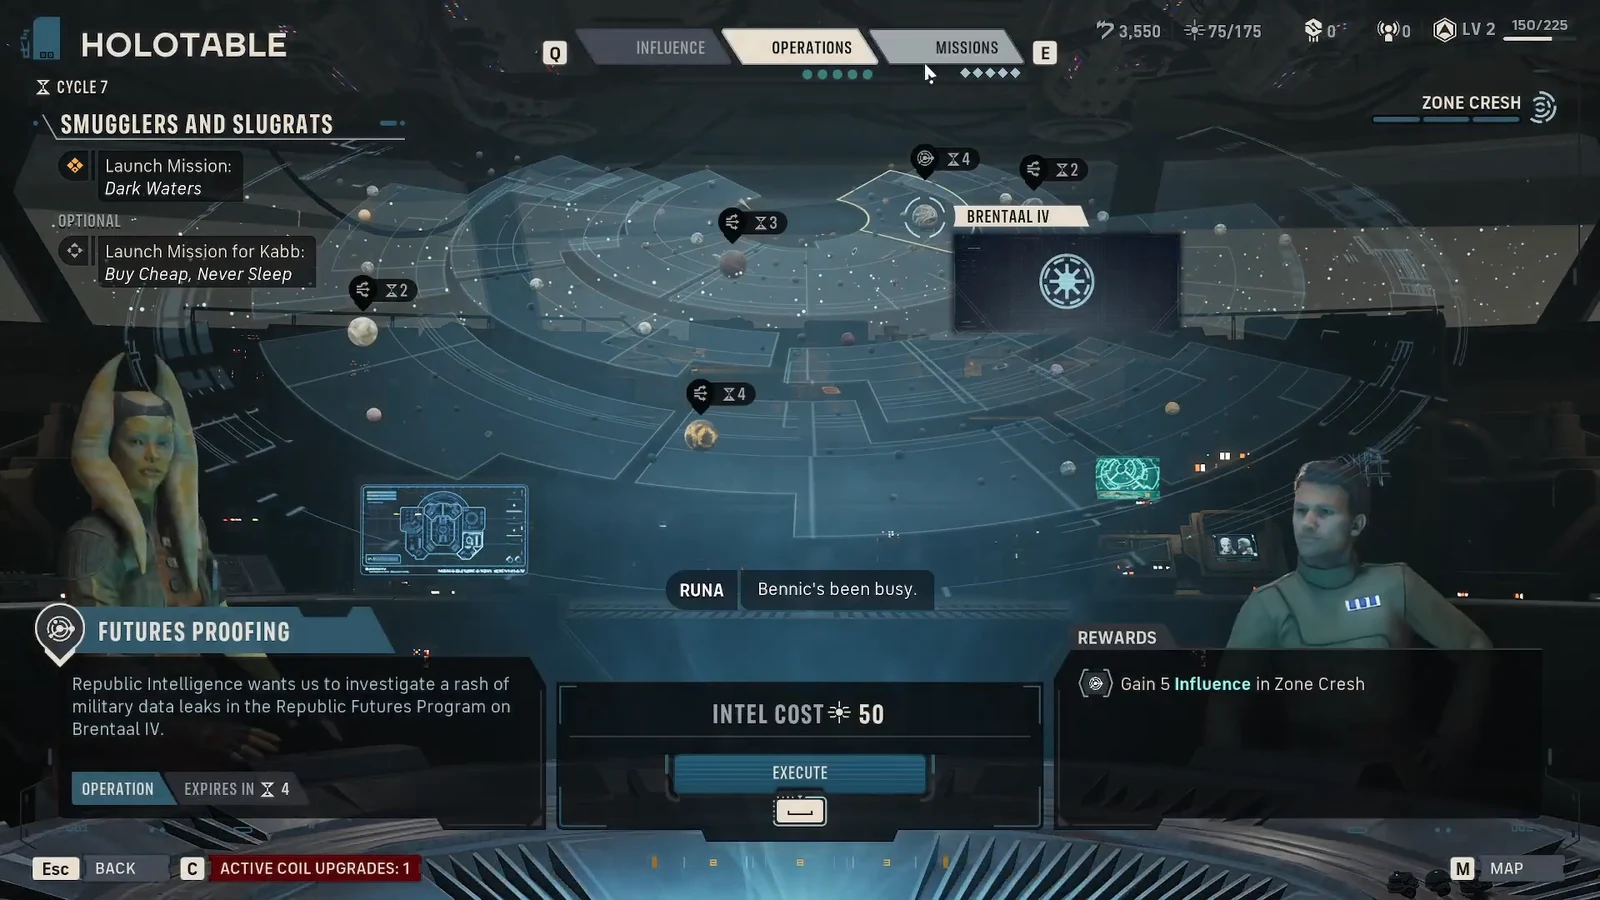
One caveat worth remembering. The mission itself raises your Intel Cap by 25, but that is a ceiling increase, not a payout. Spending down before launch costs you nothing on that front.
How to find and start the mission on the Holotable
What the objectives look like on the ground
The battlefield objective list is more granular than the Holotable summary. It opens with securing the Separatist tech, using Safecracker on the security chest, and keeping Kabb alive.
Once an operator starts cracking the chest, the objective flips to defending the safecracker across three stages while reinforcements arrive. B1 Battle Droids, BX Droid Commandos, BX Droid Snipers, and eventually B2 Super Battle Droids feed in from the depot and the upper catwalks. After the chest opens, the final objective is evacuating all four operators to the elevated landing pad.
Tip: the evacuation stage is where Hawks is most exposed, since the route to the pad runs up open stairs. A downed operator can be Rallied back up, but a second failure state is not something you want to test with the mission’s only two protected characters.
How to confirm the mission completed
Success is unambiguous. An extraction cutscene plays as the gunship lifts the squad out of the canyon, then a results screen lists “Steal the Separatist comm chip” as completed alongside totals for tactical rounds, enemies defeated, and damage dealt.
The ship returns to the hangar at the Ring of Kafrene and the post-mission breakdown shows resource gains, bond bonuses, and any injuries picked up in the fight. Back on the command deck, Kabb talks about his new comm relay chip, which is the narrative confirmation that the job landed. The cycle counter has advanced by then, and the Holotable will be populated with a fresh set of missions and operations.
Common reasons the mission does not appear or cannot launch
- You are looking at the wrong tab. Operations and Missions are separate lists on the Holotable, and the mission only shows under Missions.
- You are on a different planet entry. The mission is filed under Anaxes, not the other regions offered that cycle.
- Kabb is unavailable. He is a required unit, so an incomplete or unhealthy roster blocks a clean launch.
- The cycle moved on. Missions and operations sit on a limited window and disappear permanently once that window closes.
If a run goes badly, you can restart the mission from the game menu and try a different approach with the same operators. That resets the tactical layer without costing you the roster, which matters most on a job where two specific deaths end the whole thing. Star Wars Zero Company is out now on PC, PlayStation 5, and Xbox Series X|S, with more detail on the game’s systems on the official Zero Company page.