Dire is the sixth and final tier of Stygian Onslaught, and in version 7.0 it stacks three bosses back to back: the Chimeric Winged Lion, the Veteran Wind Operative, and Knuckle Duckle. Each one hides behind a shield or ward that has to come down before your damage counts, and each fight runs on a two-minute clock. Raw numbers matter less than how fast you strip that protection.
Quick answer: Break the gate before you burst. Use Stellar reactions on the Chimeric Winged Lion, a shield or a clean dodge against the Operative’s Hunt Down, and kill every Duckling to drop Knuckle Duckle’s ward.
Dire difficulty rules, unlock conditions, and timers
Stygian Onslaught itself opens at Adventure Rank 20 once you finish Archon Quest Prologue: Act III, “Song of the Dragon and Freedom.” Dire sits behind one extra condition — you have to clear Fearless in single-player mode before the tier appears. The 7.0 lineup runs until 2026/09/22 03:59 server time, and the Disturbance Outbreak window that allowed Resin spending and artifact farming closed back on 2026/08/29.
The timers split the mode in half. The bottom three tiers hand you ten minutes per boss, which is enough to ignore mechanics entirely. The top three cut that to two minutes.
| Difficulty | Enemy level | Time per boss |
|---|---|---|
| Normal I | 40 | 10 minutes |
| Advancing II | 70 | 10 minutes |
| Hard III | 90 | 10 minutes |
| Menacing IV | 100 | 2 minutes |
| Fearless V | 105 | 2 minutes |
| Dire VI | 110 | 2 minutes |
From Menacing upward, a character can only be used on one boss, so Dire needs twelve units, not four. Dire also strips away the crutch the lower tiers give you. Exalted Ones — the roster of highly used characters that grants ATK, DEF, and HP buffs to units you already own — have their Eminent Boons switched off at this tier. Clearing Dire in single-player instead grants Eminence to your party, and Enduring Eminence if you also handle the Perilous Objectives.
Boss HP pools and shield gates on Dire
The HP jump from Fearless to Dire is the reason most runs fail. Every boss roughly doubles, and all three convert absorbed damage into a payback hit once their protection breaks — which is exactly why the break phase, not the burst phase, decides the clear.
| Boss | Fearless HP | Dire HP | Gate |
|---|---|---|---|
| Chimeric Winged Lion | 10.75M | 23.35M | 40-Unit Electro Shield |
| Veteran Wind Operative | 8M | 17.5M | White Damage Shield |
| Knuckle Duckle | 13.1M | 25.9M | Ward plus Ducklings |
How to break each boss in Battle of the Starburst
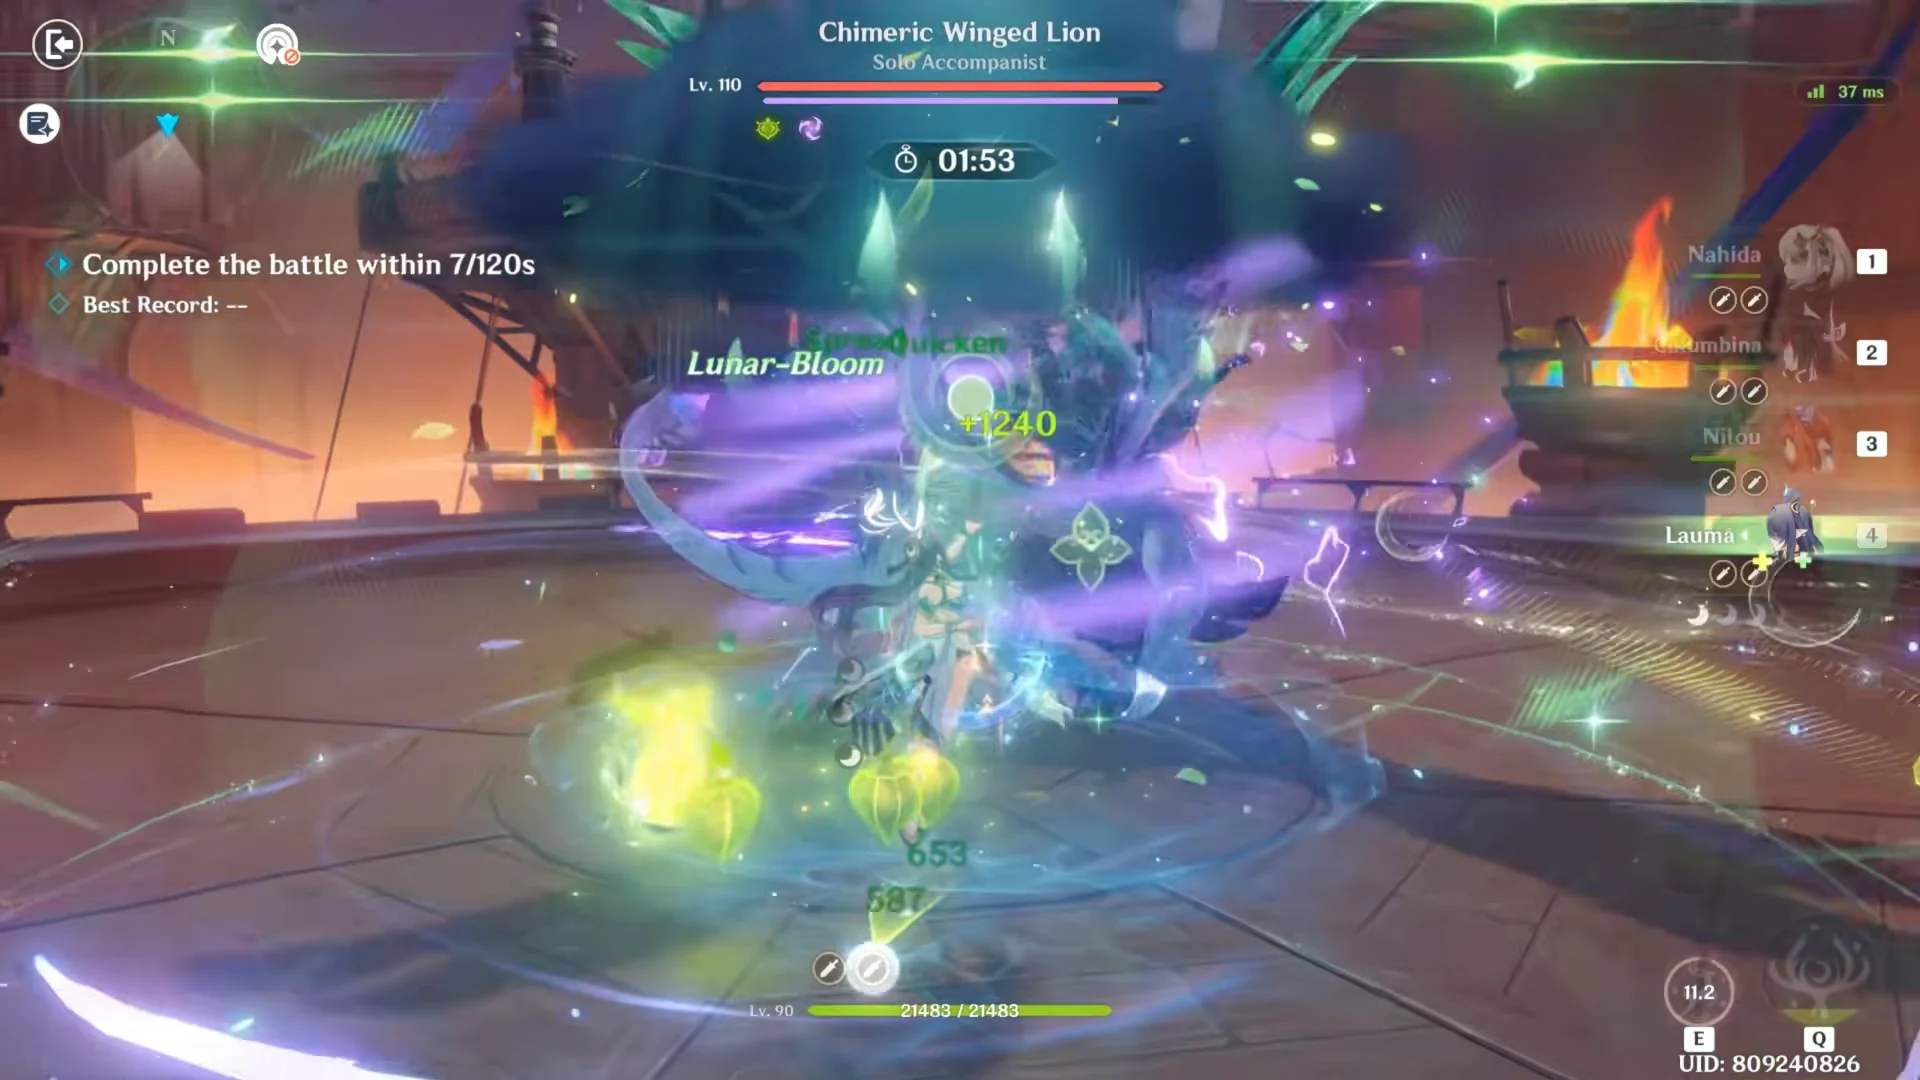
Chimeric Winged Lion: Power Overwhelming
The Lion is new in 7.0 and it is built around Stellar teams. A few seconds in, it wraps itself in an Electro Shield worth 40 Gauge Units. Any Elemental Reaction shaves off a slice, but a single Stellar Reaction removes 16 Units, so a Stellar-Conduct team can clear the shield in three well-timed hits.
Breaking the shield makes the Lion take damage equal to its stored absorption and briefly lowers its Cryo and Anemo resistance. Use that opening for your burst. It rises afterward, takes to the air, attacks, and creates Anemo Orbs. On contact, each orb absorbs Pyro, Hydro, Electro, or Cryo before exploding. Destroy every orb, or deal damage with Stellar Glimmer, to force another knockdown and gain a second free-damage phase.
Veteran Wind Operative: Treacherous Blade
This Fatui Operative plays almost identically to the Cryo version from 6.1, only with an Anemo coat and a bigger health bar. The element swap works in your favor — teams without Bennett no longer get a Cryo aura pasted on them mid-rotation.
She casts Hunt Down almost at once, sacrificing some of her HP to create a large White Damage Shield before swinging. Vaporize and Melt lose their damage bonus against this shield, although it otherwise works as an extra health bar. An unshielded character struck by Hunt Down lets her recover HP and receives a powerful damage-over-time debuff on the active unit. As long as the shield remains, the whole team receives a very large Bond of Life that healing cannot remove.
Fast shield breaks let her raise the shield roughly three times per fight, and each break returns damage equal to what she absorbed — so speed here compounds instead of resetting.
Knuckle Duckle: Armored Arsenal
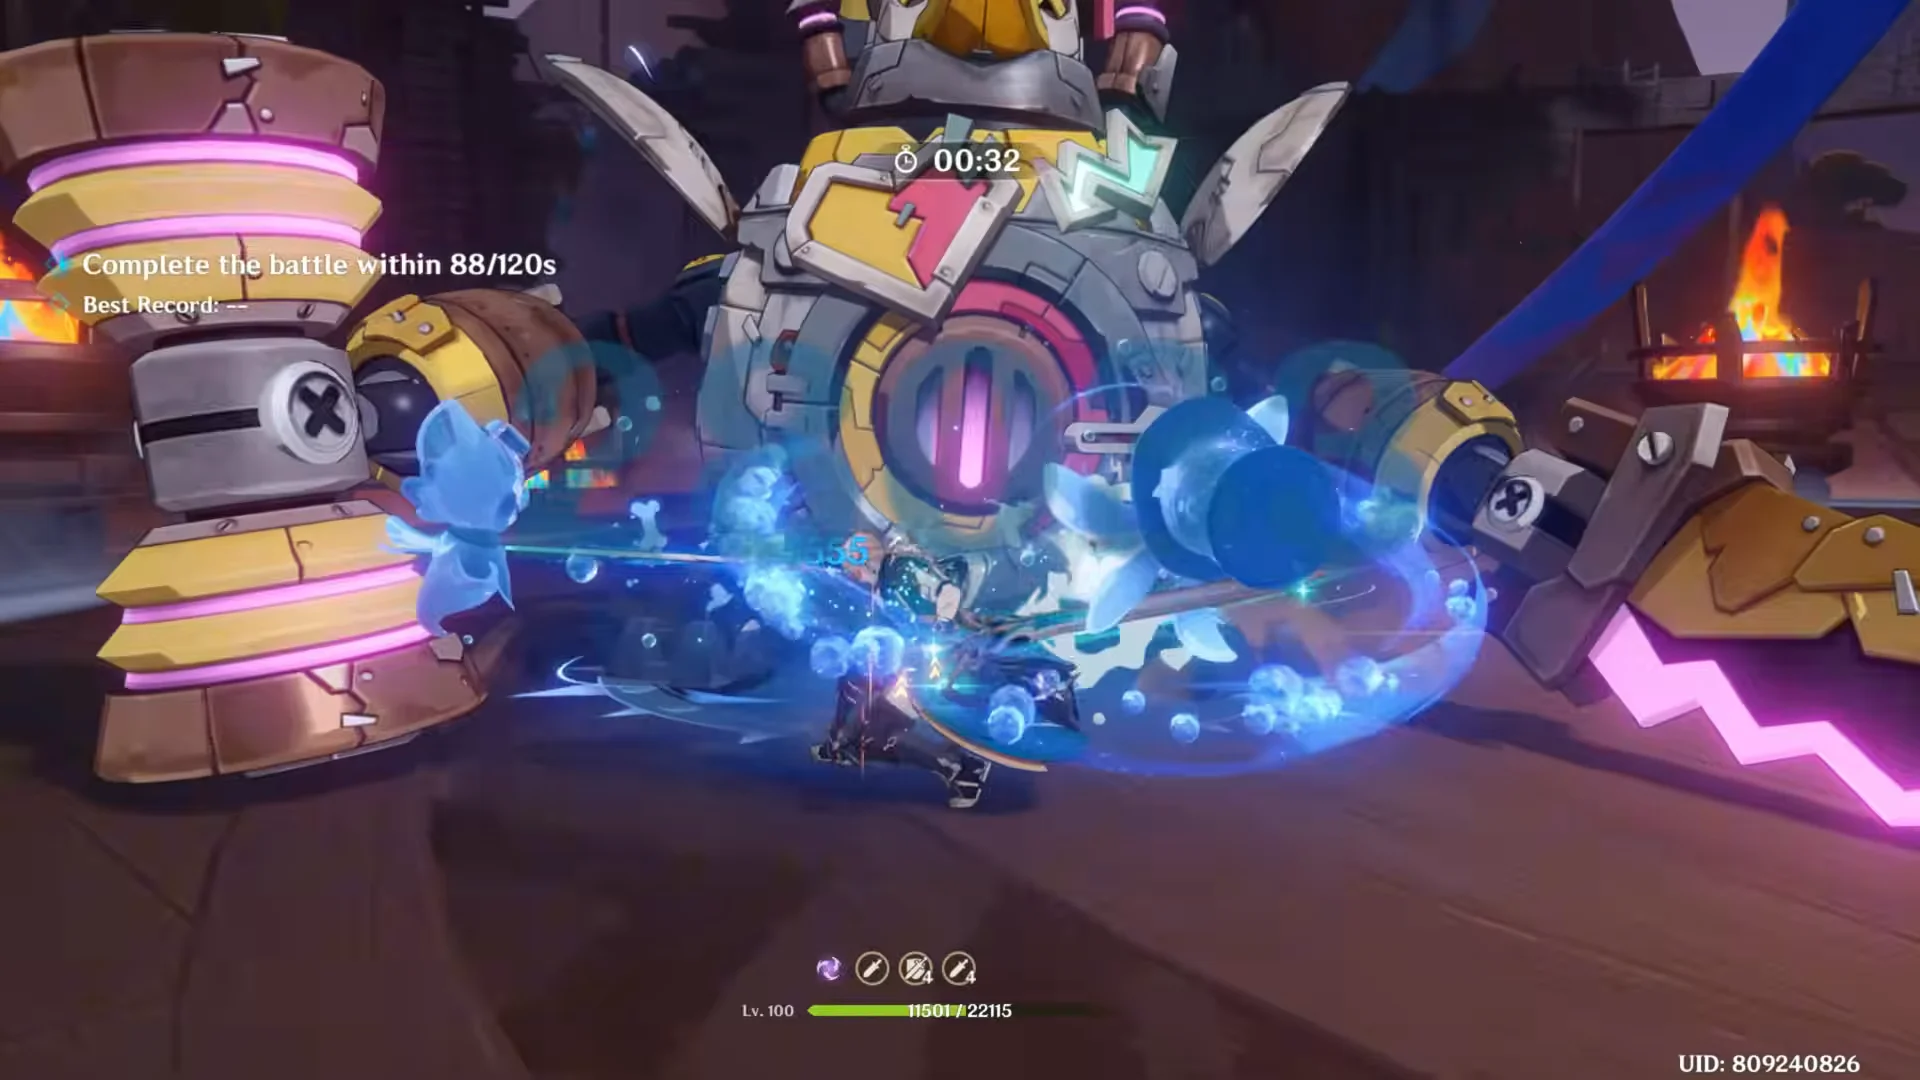
Knuckle Duckle is still the same and continues to favor Lunar-Charged teams. Early in the battle, it surrounds itself with a White Damage Shield and gains enough resistance that attacking the barrier directly wastes time. It instead summons small Stomping Devices called Ducklings, and every Duckling you kill carves a chunk out of the boss’s Ward.
Electro-Charged and Lunar-Charged hits build counters on the Ducklings; after taking enough of that damage, they dismantle themselves, and both damage types are especially effective against them. Removing the final Duckling breaks the Ward, removes the added resistance, and lowers Electro resistance even further. The barrier stays down for a while before returning. You can force the fight without Lunar-Charged, but doing so requires heavy vertical investment.
Best teams for each Dire boss
Because nobody can be reused across the three fights, plan the full twelve-slot roster before you queue. Match each boss to the element or reaction that eats its gate fastest and fill the rest with whatever keeps your rotation clean.
| Boss | Core picks | Why it works |
|---|---|---|
| Chimeric Winged Lion | Sandrone, Wriothesley or Cryo Traveler, Odette, Yae Miko, C6 Alyosha | Stellar Reactions strip 16 Units per hit |
| Chimeric Winged Lion (alt) | Mavuika, Arlecchino, Varka, Skirk, Lohen, Nefer | Raw Pyro, Cryo, or Dendro damage |
| Veteran Wind Operative | Arlecchino, Nicole, Chevreuse, Fischl | Bond of Life scaling on her biggest hit |
| Veteran Wind Operative (alt) | Clorinde, Furina, Fischl, Mona | Same Bond of Life conversion |
| Knuckle Duckle | Flins, Sucrose, Ineffa, Columbina | Lunar-Charged clears Ducklings fast |
Arlecchino is the standout against the Operative for one specific reason. She feeds your whole team a Bond of Life you cannot remove, and his largest hit lands while that Bond is at full value. Clorinde converts it the same way. Everyone else is just trying to survive a mechanic those two get paid for.
For Knuckle Duckle, two Electro DPS units backed by supports built around Lunar-Charged or Electro-Charged is the shape that works. The goal is not boss damage at first — it is deleting Ducklings quickly enough that the Ward opens with most of your two minutes still on the clock.
Sample Dire clear times and the 180-second split
The total time is what gates the better reward, so it helps to see how a full run distributes across three fights. Two high-investment clears show the spread clearly — one finished the whole lineup in 178 seconds, the other in 205.
| Boss | 178s run | 205s run |
|---|---|---|
| Chimeric Winged Lion | 63s | 78s |
| Veteran Wind Operative | 88s | 39s |
| Knuckle Duckle | 27s | 88s |
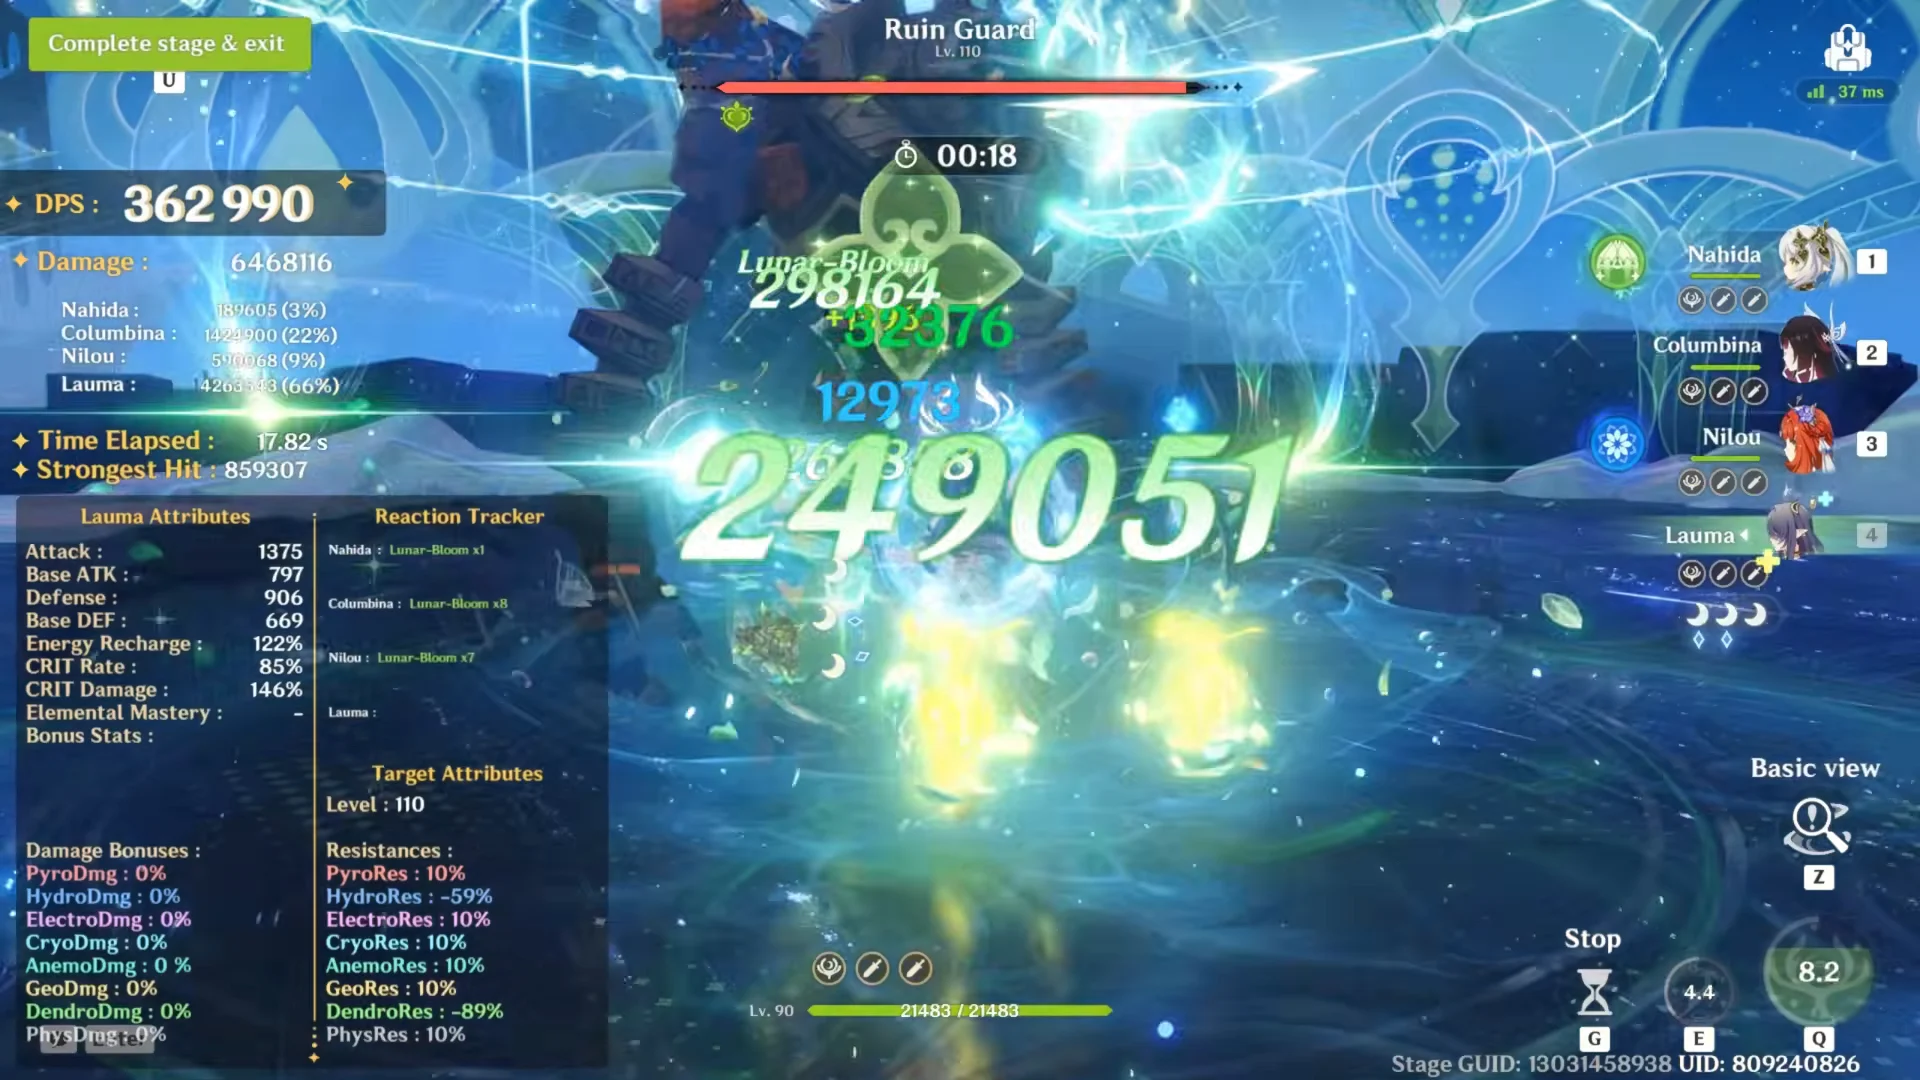
In the 178-second run, a Dendro and Hydro core of Nahida, Columbina, Nilou, and Lauma handled the Lion, an Electro and Swirl group of Alyosha, Fischl, Prune, and Varka took the Operative, and a Melt and Crystallize team of Nicole, Xilonen, Citlali, and Durin flattened Knuckle Duckle in 27 seconds. The 205-second run leaned on Sigewinne, Furina, Prune, and Varka for Knuckle Duckle, Odette, Nicole, Venti, and Lohen for the Lion, and Yae Miko, Escoffier, Traveler, and Wriothesley to drop the Operative in 39 seconds.
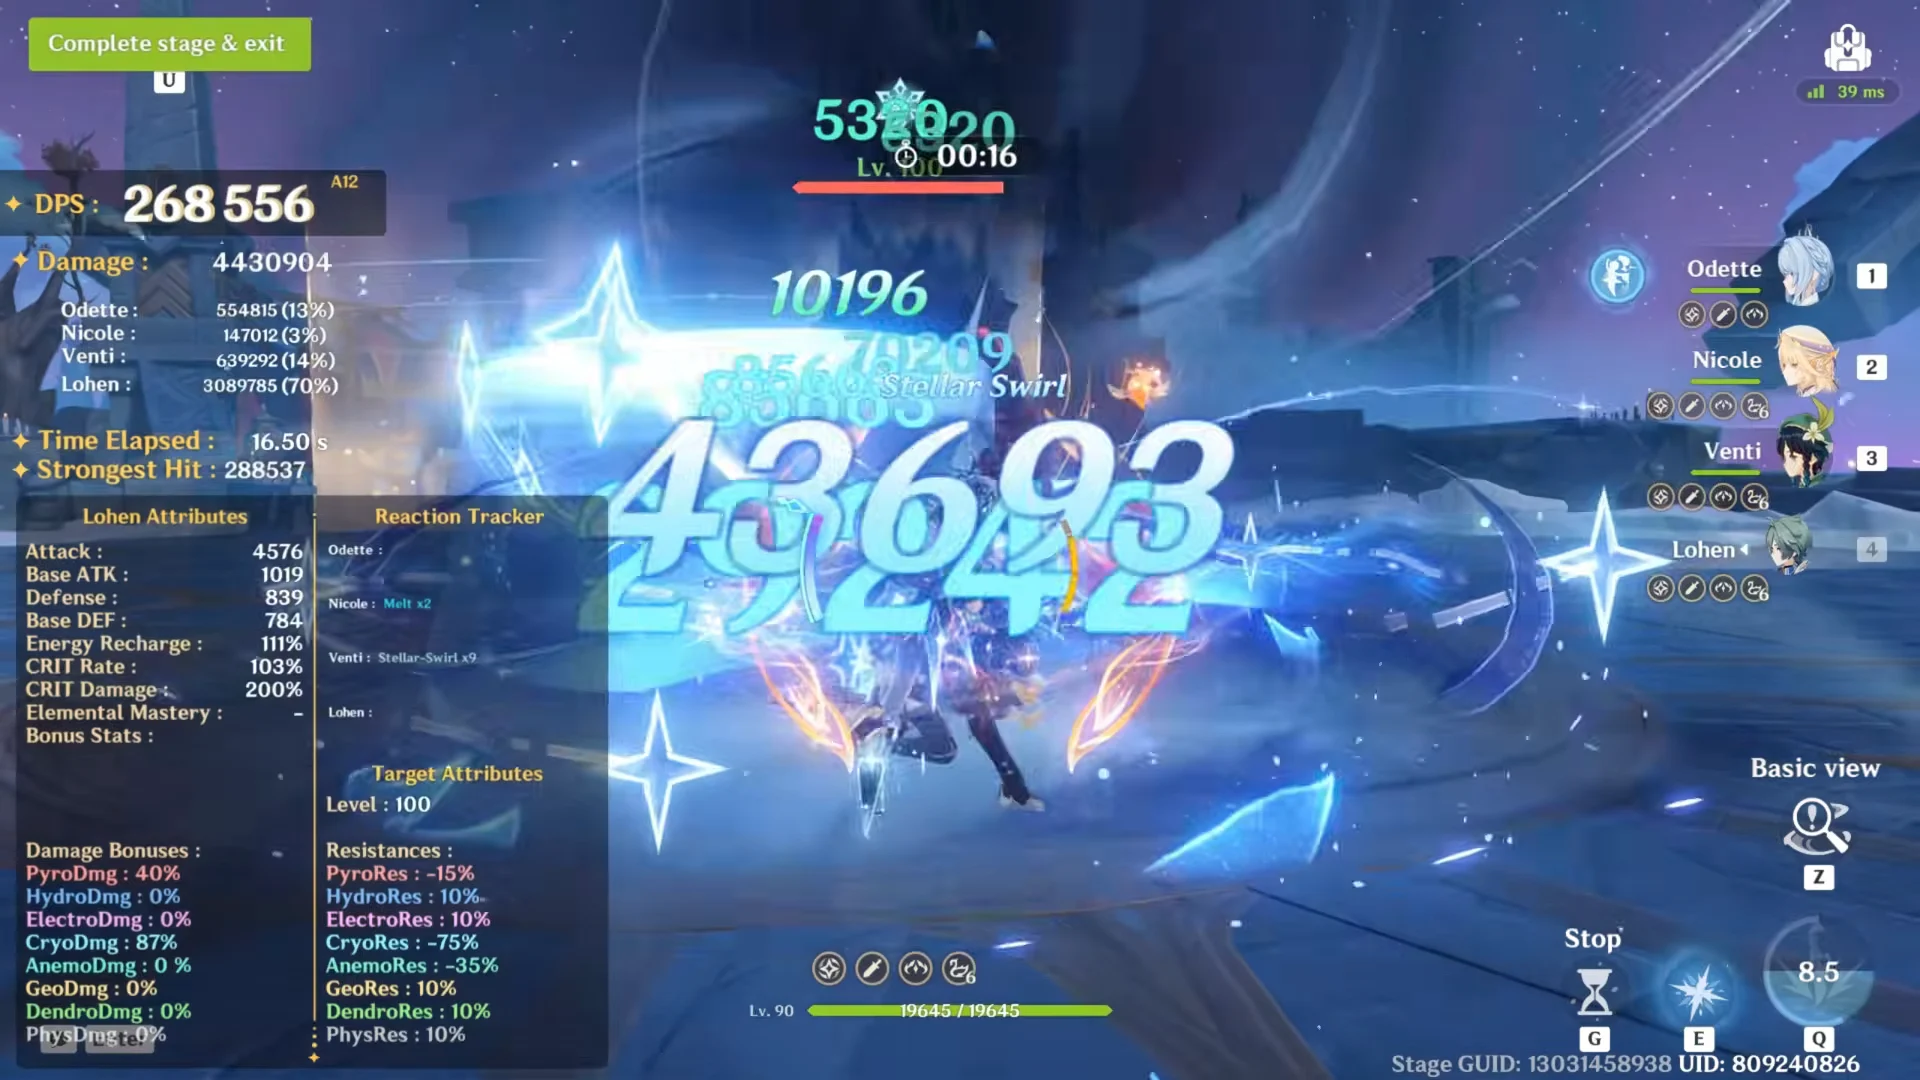
Those same numbers make the point about investment. Both runs are showcase setups with Lv. 100 characters and refined signature weapons, so treat the per-boss times as a ceiling rather than a benchmark. If you want to know whether your own rotation is fast enough, test it against a Level 110 target and compare how long it takes you to produce the damage those runs land inside a single break window.
Confirming the clear and claiming the weapon skins
At the end of each fight, a Battle Complete banner reports that boss’s elapsed time. The run then ends on a Challenge Completed screen, which shows your current total before dismissing itself. Your account receives the Dire clear only after all three bosses are defeated within their individual timers.
Completing Dire in single-player mode awards the Radiant Phantasm: Incursion Repeller weapon skin. Finishing all three bosses in under 180 seconds total upgrades that to the Sublimation variant, a 5-star version with an extra glow. Both come with a skin for every weapon type plus color variants for each of the seven elements.
These skins are tied to the patch and expire when it ends, so claim and equip them before the lineup closes. Past skins have returned in later versions alongside the newer designs.
Every boss in Battle of the Starburst runs on the same loop. Bring the element or reaction its gate is weakest to, remove the shield or ward, then spend everything during the short exposed window. Once that rhythm is consistent, the two-minute timers stop being the constraint — and the 178-second clear shows there is room under the 180-second threshold even with time left on the table.