

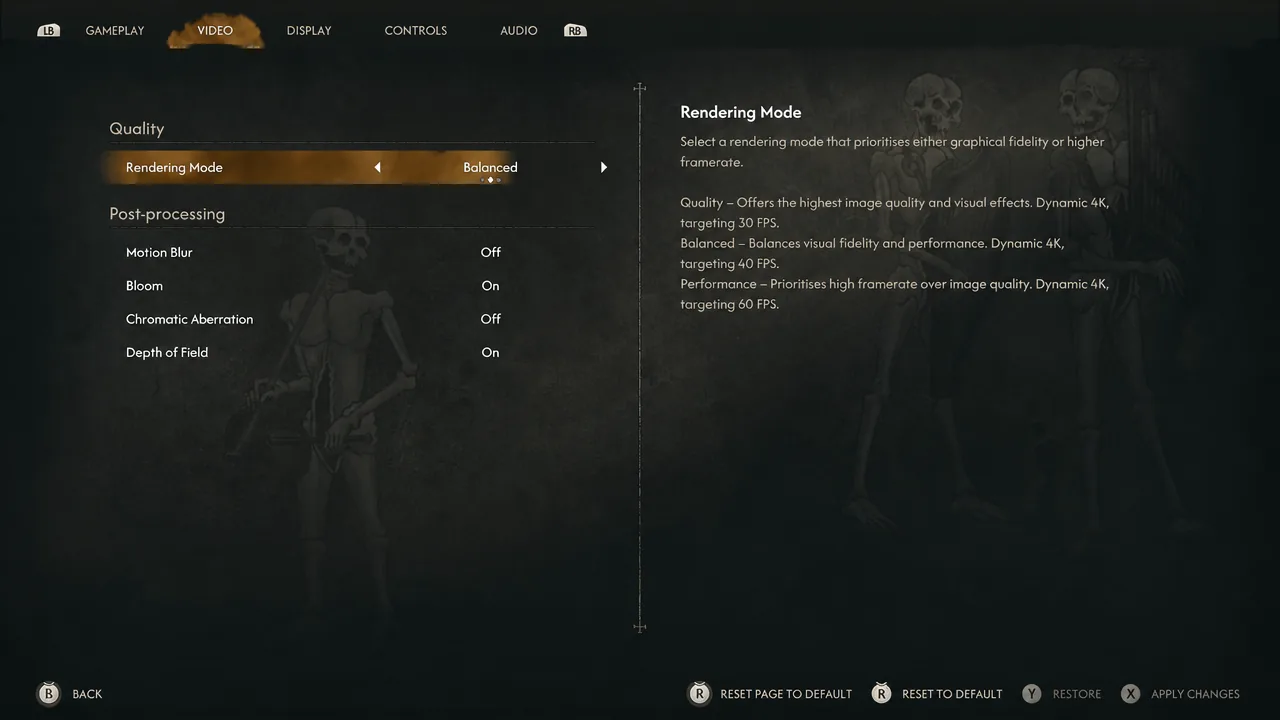
The Blood of Dawnwalker gives console players three rendering modes on PS5, PS5 Pro, and Xbox Series X, and a single locked mode on Xbox Series S. All three selectable options render at a dynamic 4K resolution, so the only thing you are really choosing between is a 30fps, 40fps, or 60fps target — and how stable that target actually feels on your hardware and display.
Quick answer: Pick Performance (60fps) if you have a 120Hz display with VRR, and pick Balanced (40fps) if you do not. On PS5 Pro, Performance is the strongest option overall. On Xbox Series X, Balanced is the safer choice if you have run into freezes or crashes in Performance mode.
Rendering Mode targets on PS5, PS5 Pro, Xbox Series X and Series S
The Rendering Mode option sits under the Video menu. Quality targets 30fps, Balanced targets 40fps, and Performance targets 60fps, all at dynamic 4K. Balanced is a 120Hz-exclusive mode, so it only appears as a useful option on a display that can actually run at 120Hz. On a 120Hz panel the game outputs at 120Hz and leans on VRR and low frame rate compensation to smooth out dips.
| Mode | Target | Resolution |
|---|---|---|
| Quality | 30fps | Dynamic 4K |
| Balanced | 40fps (needs 120Hz) | Dynamic 4K |
| Performance | 60fps | Dynamic 4K |
The 60fps option was not part of the original console plan. Rebel Wolves initially showed only the 30fps and 40fps modes, then confirmed Performance Mode for PS5, PS5 Pro, and Xbox Series X through the day one patch after player feedback. Xbox Series S was never included in that change.
Which mode to pick on your console
The right mode depends far more on your TV than on your console. Every mode on base hardware has some instability, so the question is whether you would rather absorb dips with VRR or accept a lower, flatter target.
| Console | Best pick | Why |
|---|---|---|
| PS5 | Performance with VRR, otherwise Balanced | Performance rarely holds a locked 60fps. Balanced stays close to 40fps but has uneven frame pacing, as does the 30fps mode. |
| PS5 Pro | Performance | All three modes generally hit their targets, and the sharp image in Performance points to the Pro’s own upscaling doing the work. Minor hitches still appear. |
| Xbox Series X | Performance on a 120Hz VRR display, otherwise Balanced or Quality | Behaves much like the base PS5. Xbox consoles include low frame rate compensation, which smooths dips on VRR panels. |
| Xbox Series S | No choice | Locked to 30fps at 1080p, with drops in cutscenes and busier fights. |
There is one stability caveat worth knowing on Xbox Series X. Extended play in Performance mode has produced freezes and hard crashes for some players, and dropping to Balanced clears them up while still giving you 40fps. If your session becomes unstable, switch to Balanced before you start blaming your console or your save file.
Note: if your display is capped at 60Hz, Balanced will not behave the way it does on a 120Hz panel. On that kind of TV, the practical choice is Quality at 30fps or Performance at 60fps.
Video and post-processing settings worth changing
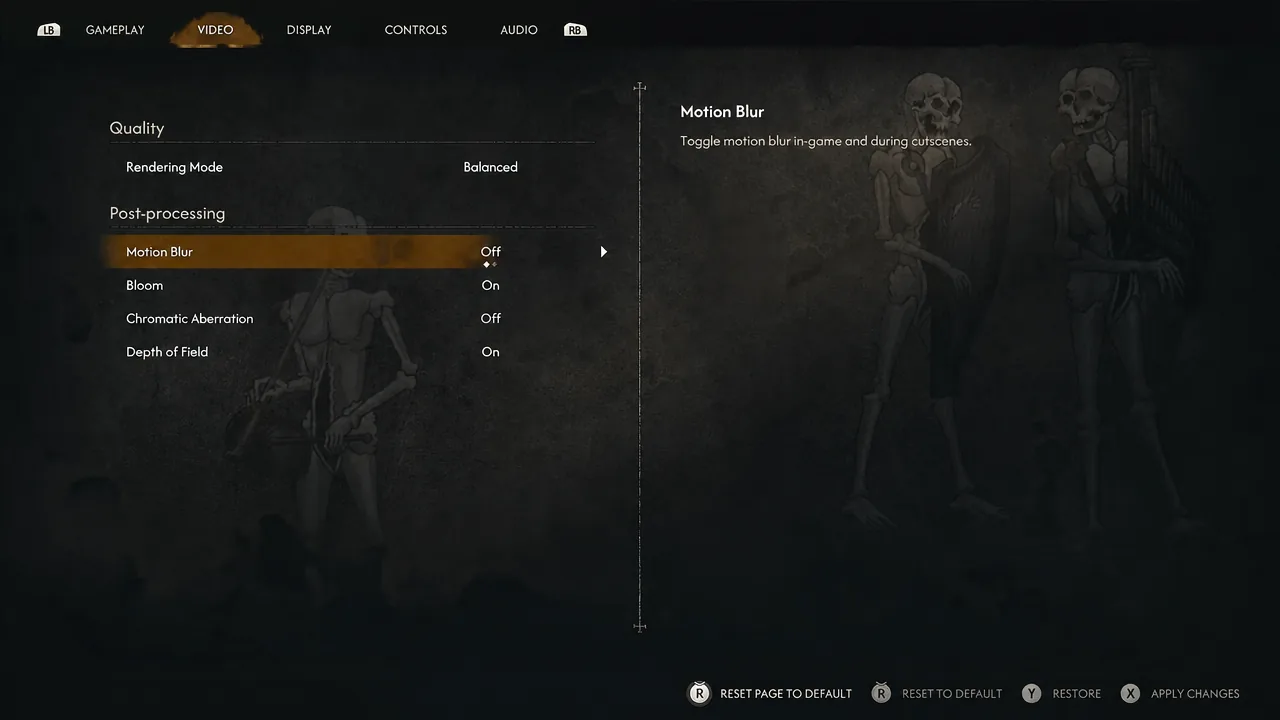
Below Rendering Mode sit four post-processing toggles. Motion Blur is the one to turn off first, since it smears fast camera swings during combat and makes the directional block prompts harder to read at lower frame rates. Chromatic Aberration is also worth switching off, as it adds colour fringing around high-contrast edges with no gameplay benefit.
Bloom and Depth of Field are safer to leave on. Both feed into the game’s lighting and dark fantasy look rather than obscuring anything you need to see, and neither has the readability cost that motion blur does.
One more entry lives under Display rather than Video. Turning off Play Intro Cinematic On Startup skips the logo sequence every time you boot the game, which is a small but permanent time saving.
Combat settings for directional blocking
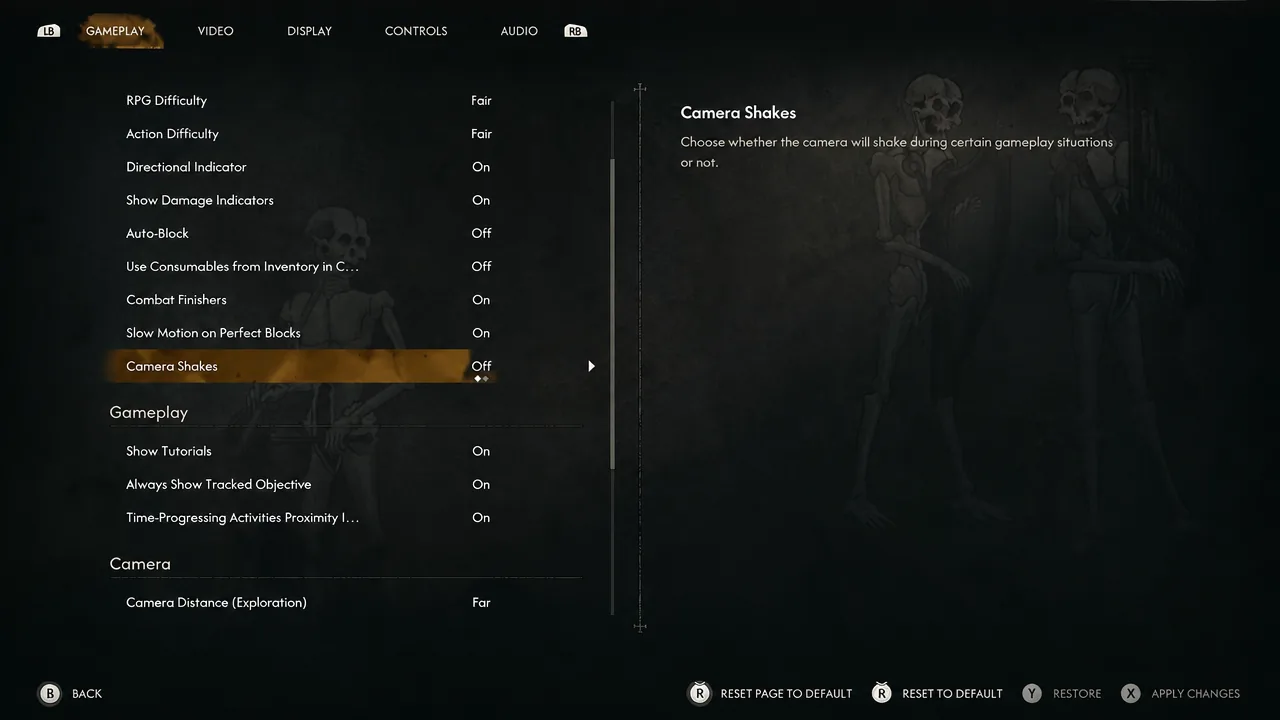
Combat is built around directional blocking, so the Gameplay menu matters more here than it does in most action RPGs. Difficulty is split into separate RPG Difficulty and Action Difficulty values under the Difficulty Preset, letting you keep encounters mechanically demanding without inflating enemy health bars, or the reverse.
Leave Directional Indicator on. It is the on-screen cue that tells you which side an incoming attack is coming from, and without it you are guessing at which direction to block. Turning it off is a challenge option, not an optimisation.
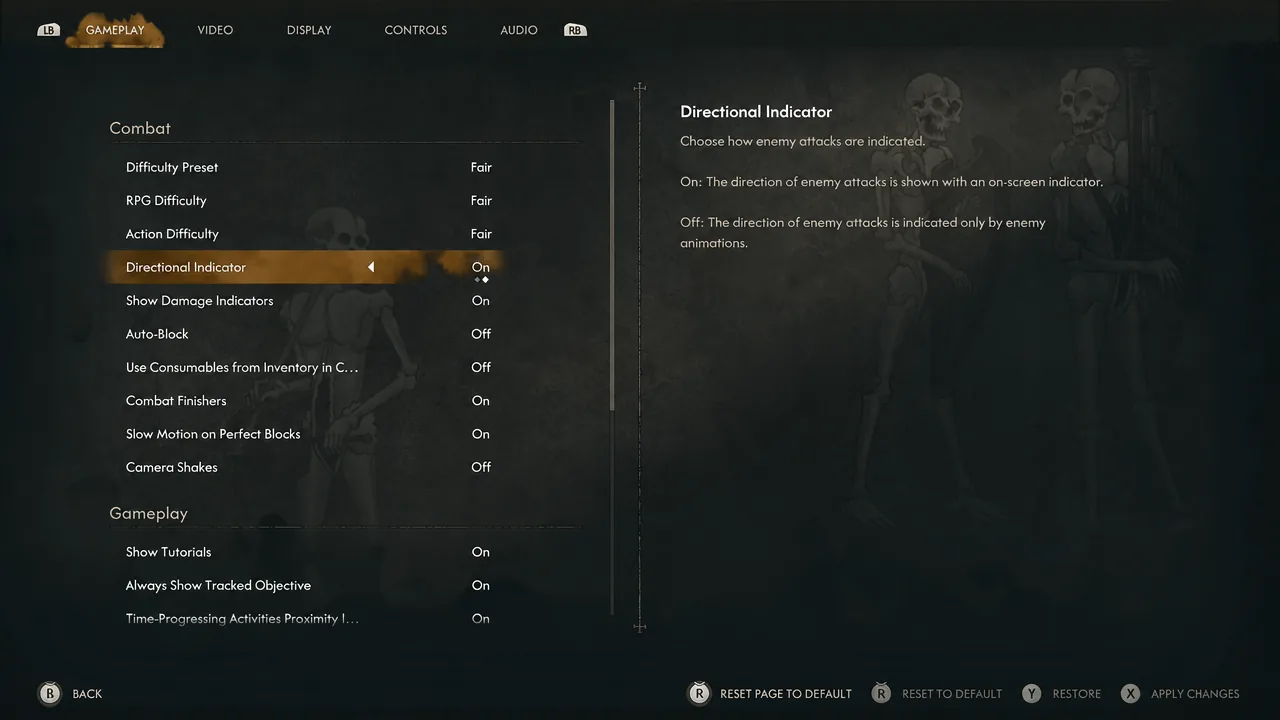
Auto-Block sits directly beneath it and changes how forgiving that system is. With it on, a block in the wrong direction still succeeds, but it drains stamina to do it. Switching it off keeps directional reads meaningful and stops stamina disappearing on mistakes you did not notice you were making. Show Damage Indicators is down to preference; keep it on if you want confirmation that hits are landing.
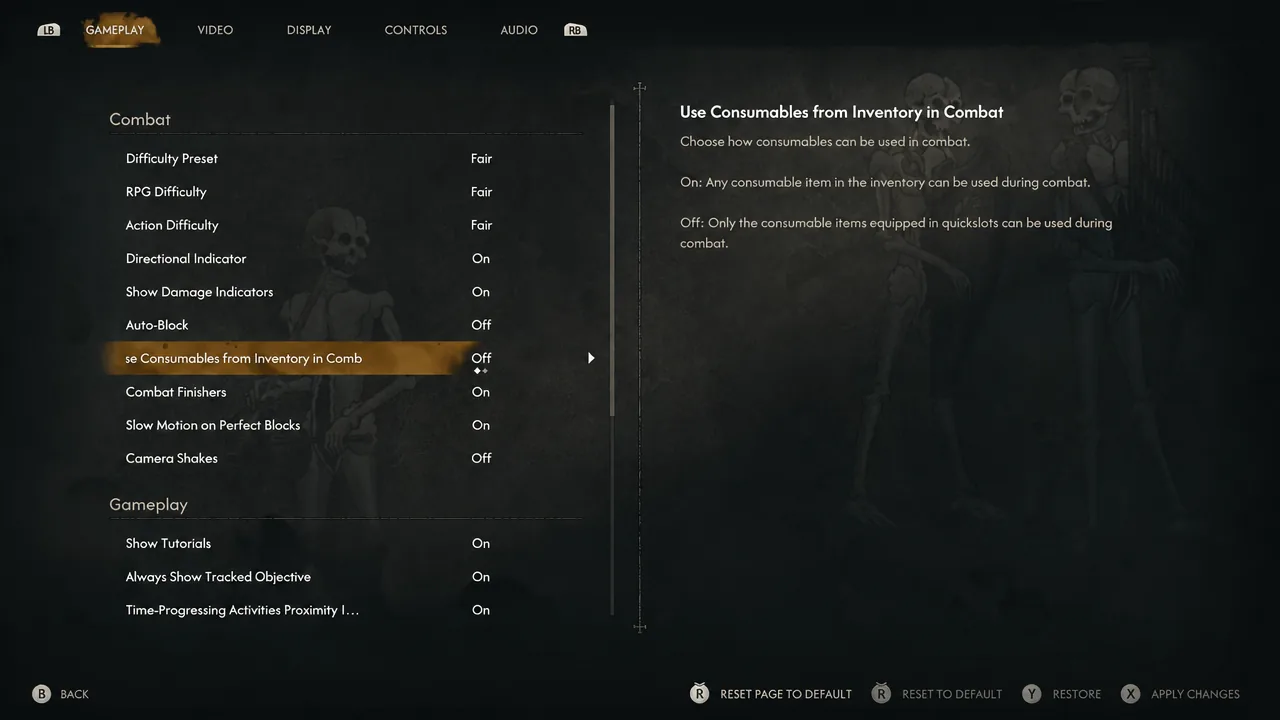
Use Consumables from Inventory in Combat is the setting most likely to trip you up. Left on, it opens your full inventory mid-fight. Turned off, consumable use is restricted to your quickslots, which keeps the pace of a fight intact and forces you to prepare loadouts before an encounter instead of pausing through one.
Combat Finishers and Slow Motion on Perfect Blocks are presentation options and can stay on. Camera Shakes is the exception. Screen shake stacks badly with a 40fps target and makes it harder to track enemies during multi-opponent fights, so turning it off gives you a cleaner picture during the moments that matter.
Camera, map, and time limit settings
Camera Distance is split into two entries, one for exploration and one for combat. Setting both to Far widens your view of the surrounding area and, more importantly, keeps more enemies inside the frame when a fight opens up. A close camera in a directional-block system means attacks arriving from off-screen.
The map has five separate visibility toggles, and turning all of them on gives you the fullest picture of the world without hunting through submenus later.
- Show Undiscovered Locations
- Show Non-Interactable Map Markers
- Show Merchant Locations
- Show Activities
- Show Quest Start Locations on the Map
The Time-Progressing Activities Proximity Indicator deserves special attention because it interacts with the in-game time limit. With it enabled, an icon appears on the map warning you that a given quest will push the clock forward. Since your available time is finite, that warning is the difference between spending a day deliberately and spending one by accident.
Show Tutorials and Always Show Tracked Objective round out the HUD options. Keep tutorials on for a first playthrough, and enable the persistent objective marker if you would rather not open the journal every time you get sidetracked.
Controls and audio options
The Controls menu covers Controller Preset, Controller Sensitivity, and the Invert Horizontal Axis and Invert Vertical Axis toggles. Most players can leave the preset and axis settings alone, then nudge sensitivity to taste once they have fought a few encounters and know how quickly they need to turn.
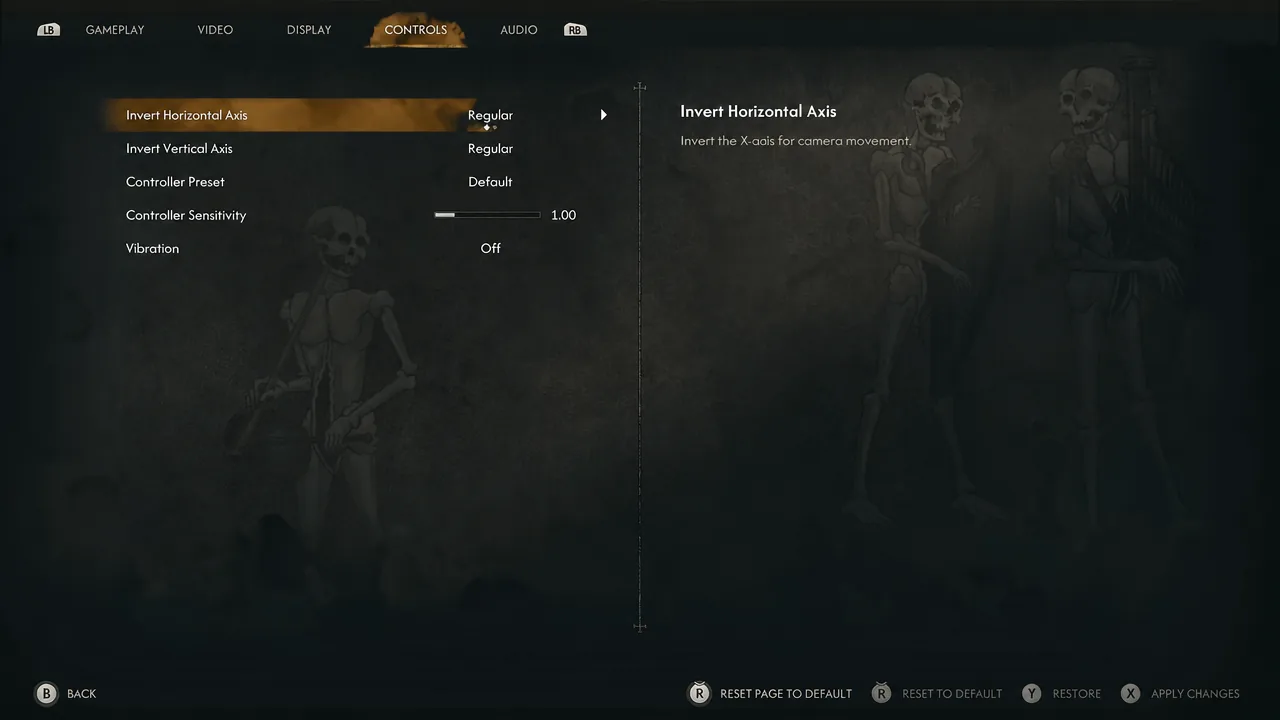
Vibration is worth turning off if constant rumble during traversal and combat becomes distracting, and it removes one small draw on controller battery. The Audio menu is straightforward, covering audio language, subtitles, and individual volume sliders, so set subtitles on if you want dialogue readable over combat noise.
Full recommended console settings
Open the pause menu, select Settings, and work through the menus in this order. Every change applies immediately, so you can back out and test a fight straight away.
| Menu | Setting | Value |
|---|---|---|
| Video | Rendering Mode | Balanced, or Performance on 120Hz VRR / PS5 Pro |
| Video | Motion Blur | Off |
| Video | Bloom | On |
| Video | Chromatic Aberration | Off |
| Video | Depth of Field | On |
| Display | Play Intro Cinematic On Startup | Off |
| Gameplay | Directional Indicator | On |
| Gameplay | Auto-Block | Off |
| Gameplay | Use Consumables from Inventory in Combat | Off |
| Gameplay | Camera Shakes | Off |
| Gameplay | Camera Distance (Exploration and Combat) | Far |
| Gameplay | Time-Progressing Activities Proximity Indicator | On |
| Map | All visibility options | On |
| Controls | Vibration | Off |
Give the mode you land on a real test before committing, ideally a busy outdoor fight rather than a quiet interior, since that is where frame rates on base hardware fall furthest from their target. If Performance dips or stutters more than you can tolerate, Balanced costs you 20 frames and buys back a noticeably steadier picture.





