
Moving Windows 11 to a new solid-state drive (SSD) significantly speeds up boot times and overall system responsiveness by replacing slower storage with faster technology. Transferring your existing Windows installation allows you to keep all your files, applications, and settings intact, avoiding the hassle of reinstalling everything from scratch.
Method 1: Clone Windows 11 to a New SSD Using Cloning Software
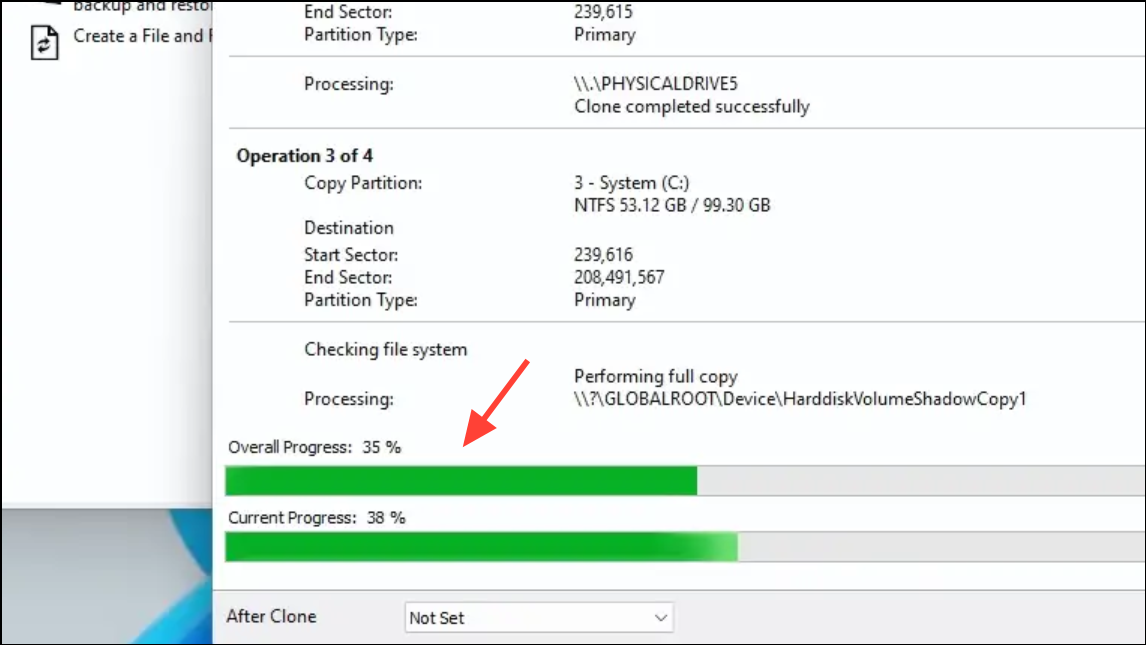
Cloning is the most direct and reliable way to transfer your Windows 11 installation to a new SSD. This process creates an exact copy of your current system drive, including the operating system, applications, and personal data.
F2, Delete, or Esc).Important Notes:
- Ensure the new SSD has enough free space to accommodate all data from your current Windows drive.
- Back up important files before starting to prevent data loss in case of unexpected issues.
- Use the SSD alignment feature if available in your cloning software to optimize SSD performance.
Method 2: Transfer Windows 11 Using Windows Backup and Restore
If you prefer using built-in Windows tools, the Backup and Restore method allows you to create a system image and restore it to the new SSD.
System and Security, then select Backup and Restore (Windows 7).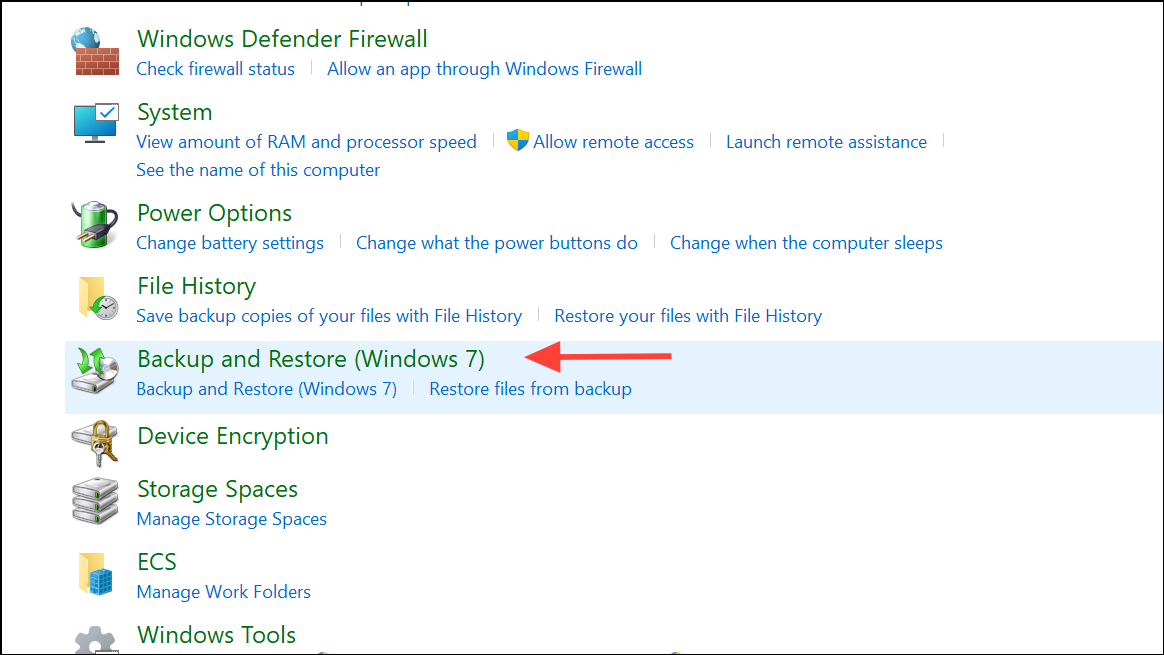
Create a system image and choose the external drive as the destination. Follow the prompts to complete the backup.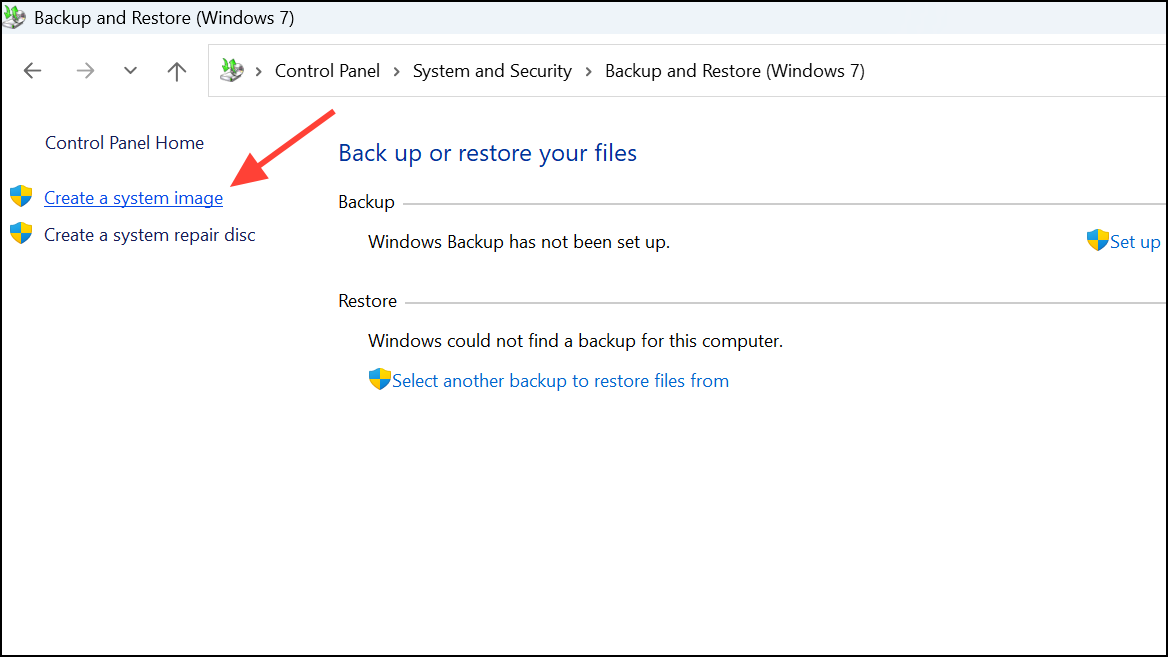
Recovery Drive in the Start menu and following the instructions to include system files.Troubleshoot > Advanced options> System Image Recovery, then choose the system image you created earlier.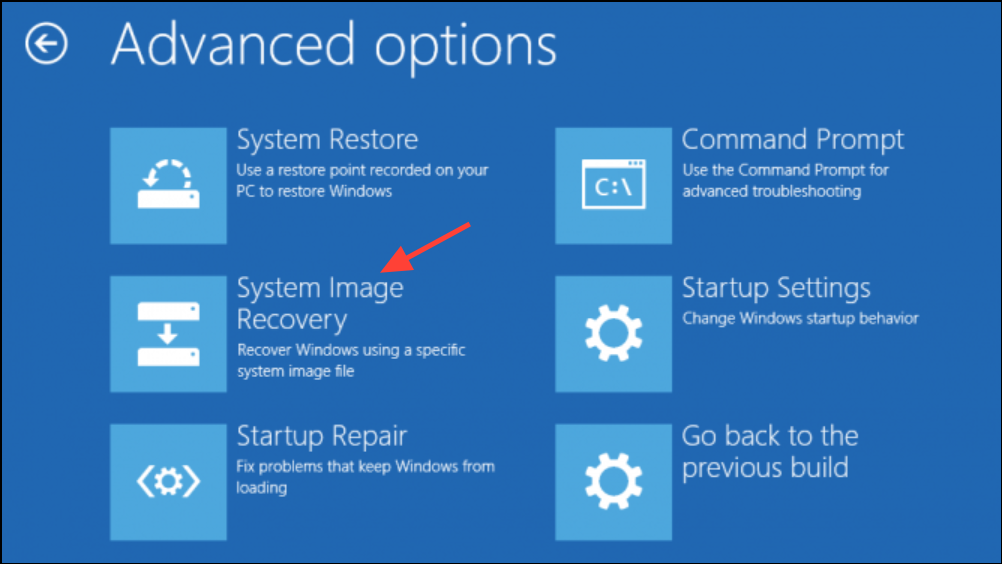
Important Notes:
- This method is slower and requires more steps than cloning but uses only built-in Windows features.
- It is best suited when migrating to a larger SSD.
- Backing up critical data before starting remains essential.
Additional Tips for a Successful Transfer
- Back up your data: Regardless of the method, always back up your important files to avoid data loss.
- Check SSD compatibility: Confirm your new SSD supports your computer’s interface (SATA, NVMe, M.2).
- Initialize the SSD: If the SSD is new, initialize it in Windows Disk Management using the GPT partition style for compatibility with Windows 11.
- Verify Windows activation: After transfer, Windows 11 activation should remain intact if the motherboard hasn’t changed. If not, reactivate using your Microsoft account.
- Format old drive for storage: Once you confirm Windows boots successfully from the new SSD, format your old drive to use it as additional storage.
Transferring Windows 11 to a new SSD optimizes your system by drastically reducing boot times and application load speeds, providing a smoother and more responsive computing experience without reinstalling the operating system or software.


