
There are many reasons you may need to turn your PC into a WiFi router. Maybe the signal of your WiFi doesn’t reach all parts of your house, or a hotel or café only allows you to connect a limited number of devices, or you don’t want to share the details of your home WiFi with someone, or maybe you don’t have WiFi at all. All you need is a PC with an internet connection and a wireless card in it to turn your PC into a WiFi router.
Since now you know that being able to share an internet connection can come in handy, let’s go about the different ways this can be made possible.
Use Windows 10 WiFi Hotspot Feature
Microsoft introduced the Mobile Hotspot feature in Windows 10 with the “Anniversary Update” rolled out in 2017. If you’ve recently installed Windows 10 on your PC, or if you keep your Windows 10 installation updated (even once a year), you should already have the Windows 10 Mobile Hotspot feature in the PC settings. To access it, go to Settings » Network & Internet and select Mobile hotspot from the left panel.
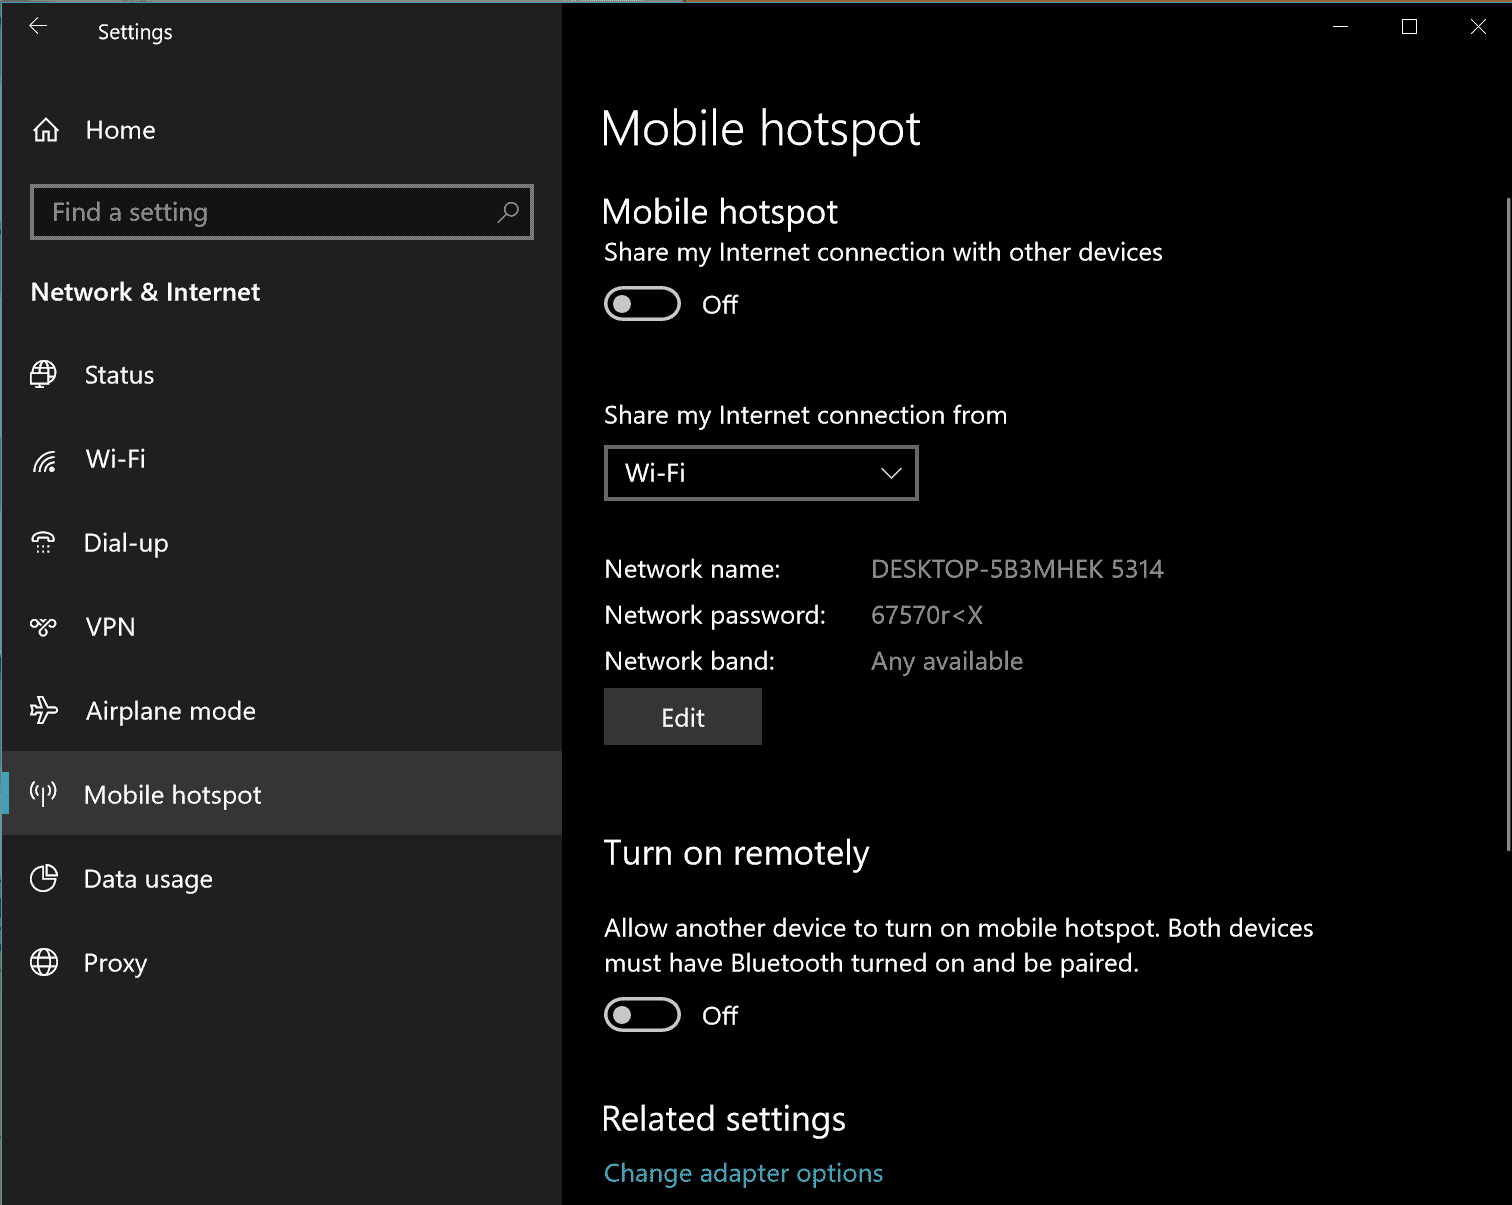
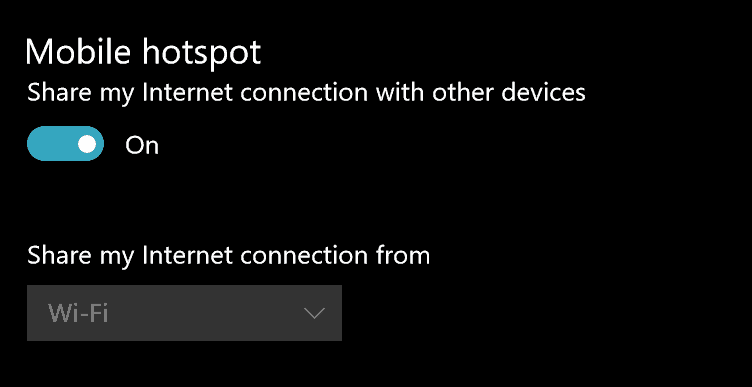
To enable the Hotspot, turn on the toggle switch for ‘Share my Internet connection with other devices‘. If you are connected to a WiFi and want to share it, the drop-down menu should read Wi-Fi. If you are connected to an Ethernet cable, the ‘Share my Internet connection from’ box should say Ethernet.
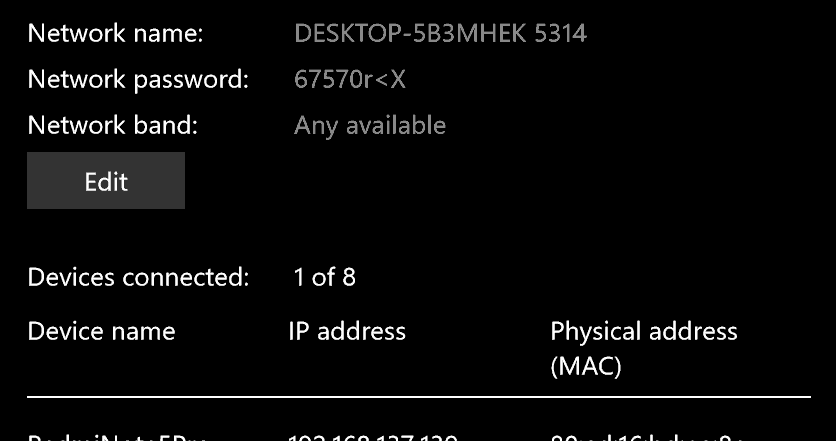
Windows 10 automatically creates a network name (based on your PC name) and a random secure password. If you wish to personalize hotspot settings, you can click the Edit button to change the network name and password settings. Once a device is connected to your hotspot, you will be able to see its name, IP address and physical/MAC address on the same page.
Once you have set up Mobile Hotspot on your PC, you can simply toggle it on or off using the Mobile hotspot button in the Action Center.
Use Third-Party Software to create a WiFi Hotspot
If you are using an earlier version of Windows or need advanced features that Windows 10’s Hotspot feature doesn’t provide, you may have to install third-party software like mHotspot to use your PC as a WiFi router.
mHotspot is a free software that acts as a virtual router and lets you share your PC’s internet connection with other devices. It is one of the easiest software to use and provides a lot more features than some of its paid counterparts. You can download mHotspot from the link below.
- Download and install mHotspot on your PC from the link above.
- Restart your PC.
- Go to Control Panel » Network & Internet » Network and sharing center. Click Change adapter settings, then right-click on the network you’re connected to and select Properties.
- Under the Sharing tab in Network properties, enable Allow other network users to connect through this computer’s Internet connection and hit the Apply button. This will allow the network to be shared.
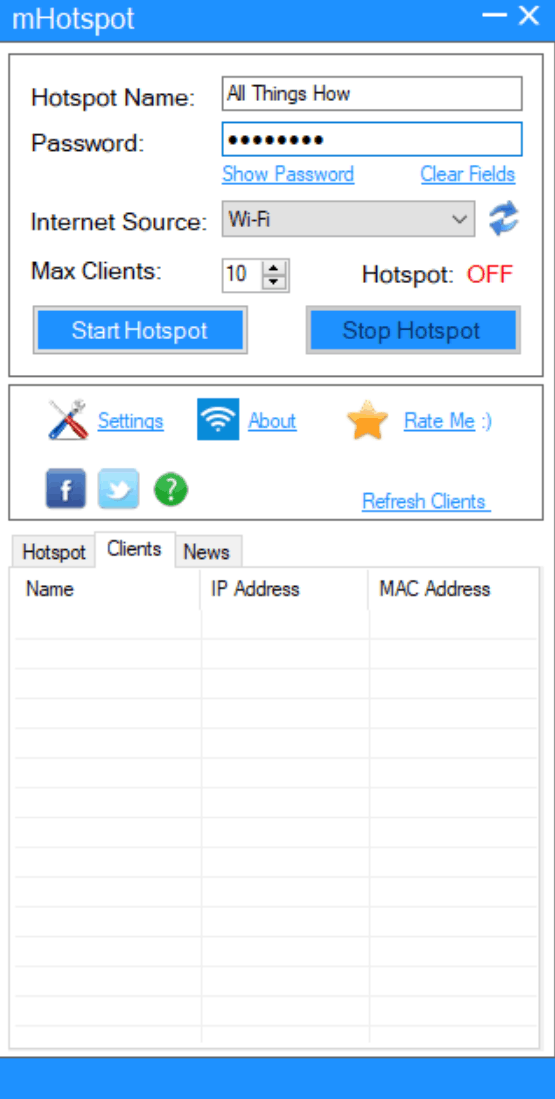
- Launch mHotspot on your PC. Enter Hotspot name and password, then select the network we enabled sharing for in the step above as the Internet source. You can also configure the maximum number of devices that can connect to your Hotspot from the Max Clients option in the software.
- Hit the Start Hotspot button.
That’s it. Try connecting your devices to the WiFi network you just created on your PC using mHotspot, it should work flawlessly.
Use Command Prompt to enable WiFi Hotspot on Windows PCs
On Windows 7, Windows 8 and earlier versions of Windows 10, you can share your PC’s internet connection without any software via the command prompt as well if the wireless adapter installed on your PC supports Hosted Network feature. To check if your PC’s WiFi adapter supports Hosted Network, follow the instructions below:
- Open a command prompt window with administrator privileges. Press “Win + R” » type cmd and hit Ctrl + Shift + Enter to open a Command Prompt window with Administrator privileges.
- Now paste the following the command into the CMD window and hit enter to find out if your PC’s wireless adapter supports Hosted Networks.
netsh wlan show drivers
- If you see Hosted network supported: Yes in the output from the command, it means you can enable WiFi Hostpot on your PC directly from the command line as well.
- Go to Control Panel » Network & Internet » Network and sharing center. Click Change adapter settings, then right-click on the network you’re connected to and select Properties.
- Under the Sharing tab in Network properties, enable Allow other network users to connect through this computer’s Internet connection and hit the Apply button. This will allow the network to be shared.
- Open the command prompt window (with admin privileges) again and issue the following command:
netsh wlan set hostednetwork mode=allow ssid=name key=password
└ Change the SSID name and password key (in bold) as per your preference.
- Finally, issue the following command to start sharing your PCs internet connection as a WiFi hotspot.
netsh wlan start hostednetwork
That’s it. You can now connect your wireless devices to the internet using your PC as a WiFi router.
If you have to disable the WiFi hotspot created via command line, issue the following command netsh wlan stop hostednetwork in a command prompt window with admin privileges.


