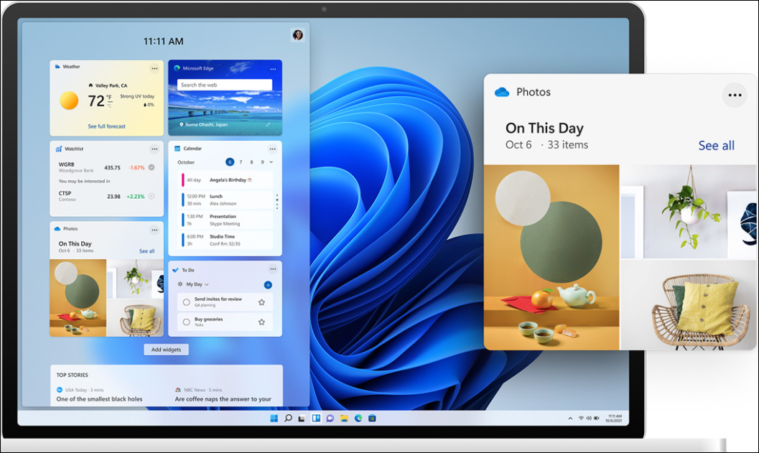
With Microsoft’s recent unveiling of Windows 11, users are eager to see what the new operating system has to offer. However, along with the excitement comes a set of minimum system requirements that have raised questions, particularly concerning the Trusted Platform Module (TPM) 2.0. This security feature is a key component in determining whether a system can upgrade to Windows 11. Many older PCs might not be compatible due to this TPM requirement.
Minimum system requirements
To install Windows 11, your system must meet the following basic requirements:
- Processor: 1 gigahertz (GHz) or faster with 2 or more cores on a compatible 64-bit processor or System on a Chip (SoC).
- RAM: 4 gigabytes (GB).
- Storage: 64 GB or larger storage device.
- System firmware: UEFI, Secure Boot capable.
- TPM: Trusted Platform Module (TPM) version 2.0.
- Graphics card: Compatible with DirectX 12 or later with WDDM 2.0 driver.
- Display: High definition (720p) display that is greater than 9″ diagonally, 8 bits per color channel.
- Internet connection and Microsoft account: Internet connectivity and a Microsoft account are required for setup for Windows 11 Home.
What is TPM 2.0
The Trusted Platform Module (TPM) 2.0 is a specialized security chip embedded in your computer’s motherboard. It provides hardware-based, security-related functions by storing cryptographic keys that are essential for protecting sensitive data. TPM 2.0 enhances the integrity of your system by ensuring a secure environment, which is why Microsoft has made it a mandatory requirement for Windows 11.
However, many users are uncertain whether their systems include a TPM 2.0 chip. It’s crucial to verify the presence and version of TPM on your computer to determine compatibility with Windows 11.
Checking system compatibility
The easiest method to determine if your system is eligible for Windows 11 is by using Microsoft’s PC Health Check app. Download the app here.
To check your system’s compatibility using the PC Health Check app, follow these steps:
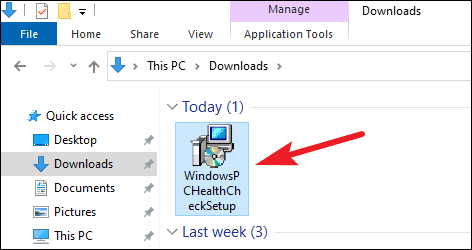
- Download the PC Health Check app from Microsoft’s website. Click here to download.
- Navigate to your Downloads folder and double-click the downloaded file to run the installation wizard.
- Follow the prompts in the installation wizard to install the app.
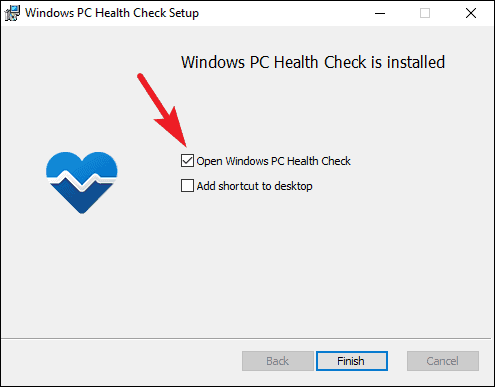
- Once the installation is complete, ensure the box labeled ‘Open Windows PC Health Check‘ is checked, then click the Finish button.
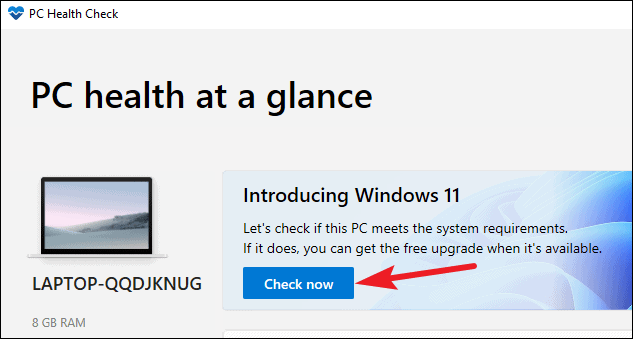
- When the app opens, click the ‘Check now‘ button to assess your system’s compatibility with Windows 11.
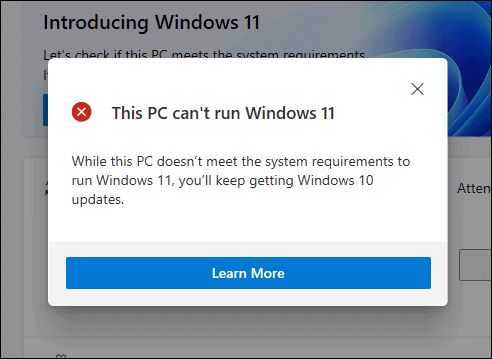
You will receive one of two messages: ‘This PC can run Windows 11‘ or ‘This PC can’t run Windows 11‘. If your system is compatible, no further action is needed. If not, the issue is often related to the TPM configuration.
The PC Health Check app does not provide detailed information about why your system is incompatible, but you can manually check your TPM status.
Checking TPM status
To verify if your system has a TPM chip and whether it is enabled, follow these steps:
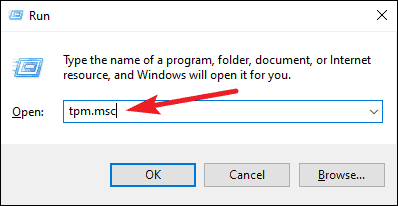
- Press Windows + R on your keyboard to open the Run dialog.
- Type
tpm.mscand press Enter.
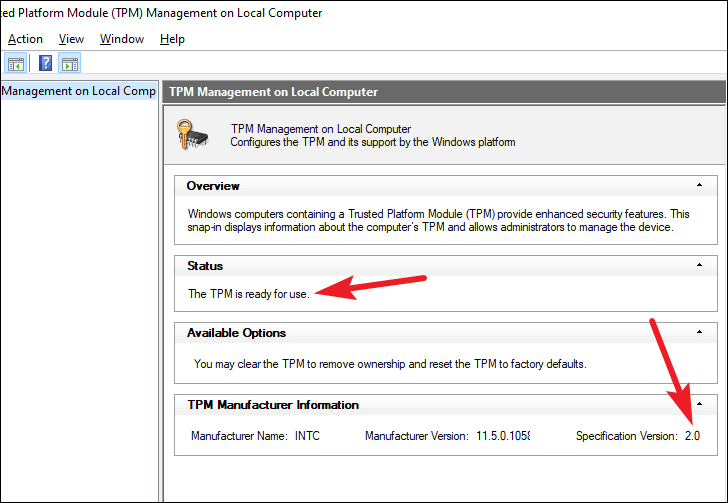
The TPM Management on Local Computer window will appear. Under ‘Status‘, you can see if TPM is ready for use. Under ‘TPM Manufacturer Information‘, check the ‘Specification Version‘ to determine your TPM version.
If TPM is disabled, you may need to enable it in your system’s BIOS settings. The process to enable TPM varies by manufacturer, so consult your motherboard or system manual for specific instructions.
If your system has TPM 2.0 but still doesn’t meet the requirements for Windows 11, the issue might be your processor. Microsoft has set specific minimum processor requirements for Intel, AMD, and Qualcomm CPUs.
For Intel processors, Windows 11 supports 8th generation and newer chips. Systems running 7th generation or older Intel Core processors may not be compatible with Windows 11. You can view the complete list of supported processors provided by Microsoft.
Ensuring your system meets the Windows 11 requirements is essential for a smooth upgrade. By checking your TPM version and processor compatibility, you can determine if your device is ready for the new operating system.


