
Many users have reported experiencing high CPU usage attributed to the "WinGet COM Server" process after updating Windows, installing new software, or sometimes even without any apparent trigger. This issue can significantly slow down your system and disrupt your workflow.
What is WinGet COM Server Process?
The WinGet COM Server process is an essential component of the Windows Package Manager, commonly known as winget. This command-line tool allows users to discover, install, upgrade, remove, and configure applications on Windows 10 and Windows 11 devices. The winget tool simplifies software management by providing a centralized system to handle applications.
The WinGet COM Server facilitates communication between the winget client and other applications or services. It manages tasks like downloading, installing, updating, and uninstalling software, as well as handling application dependencies. While it's a legitimate and important process, it can sometimes consume excessive CPU resources due to various reasons such as software conflicts, large application downloads, or issues with the winget installation itself.
Fixing WinGet COM Server High CPU Usage Issue
Here are some methods you can try to resolve the high CPU usage caused by the WinGet COM Server process:
1. Update the App Installer
Since winget is managed through the App Installer program on your computer, keeping it up to date is crucial. An outdated App Installer can cause conflicts and lead to high CPU usage.
Method 1:
Step 1: Open the Microsoft Store on your computer and navigate to the Library section.

Step 2: Look for any available updates for the App Installer. If an update is available, click on the Update button to install it.
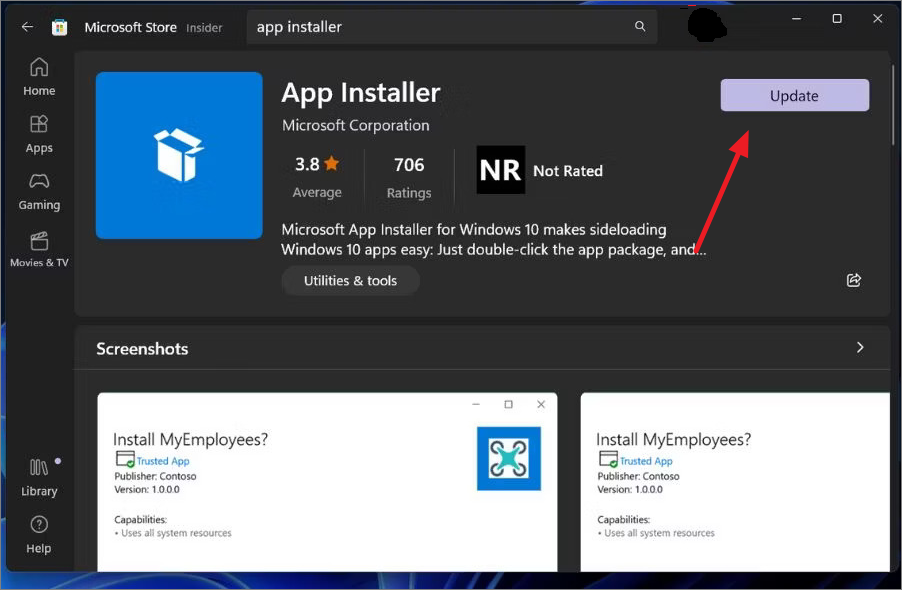
After updating, check if the high CPU usage issue persists.
Method 2:
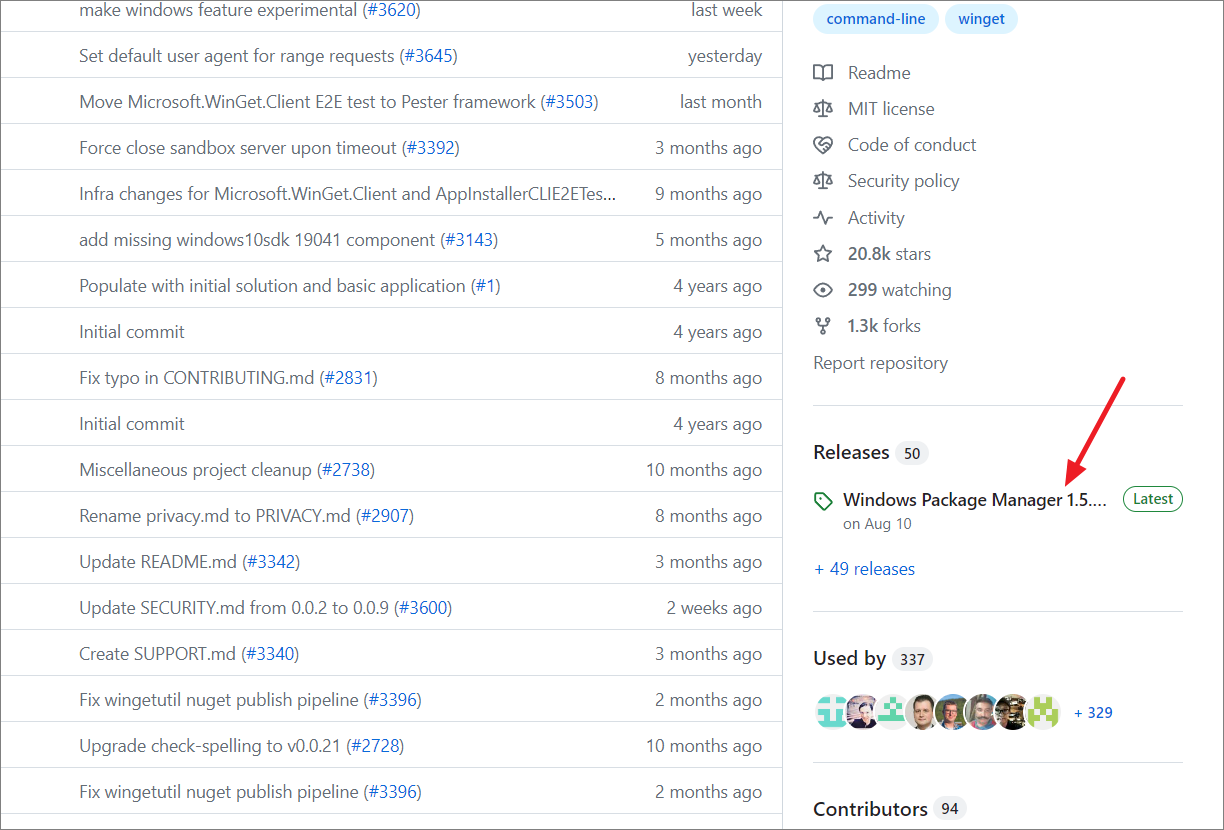
Step 1: Visit the official winget GitHub page.
Step 2: On the left side of the page, click on the latest release under the Releases section.
Step 3: Scroll down to the Assets section and download the .msixbundle file.
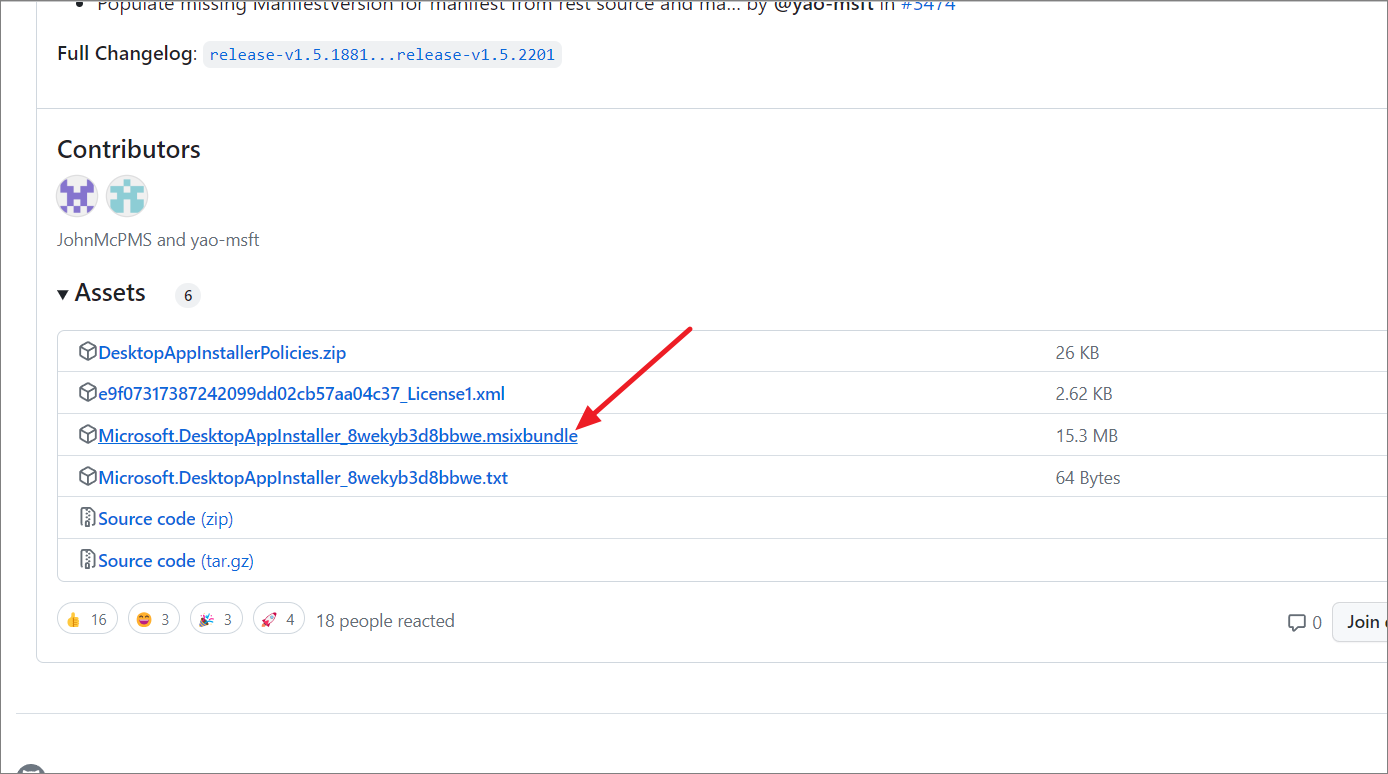
Step 4: Run the downloaded file and choose to Update or Reinstall when prompted.
Wait for the installation to complete. This process may install additional dependencies required for winget to function correctly.
2. Re-register Winget
If there are issues with the winget installation, re-registering it can restore default settings and potentially fix the high CPU usage problem.
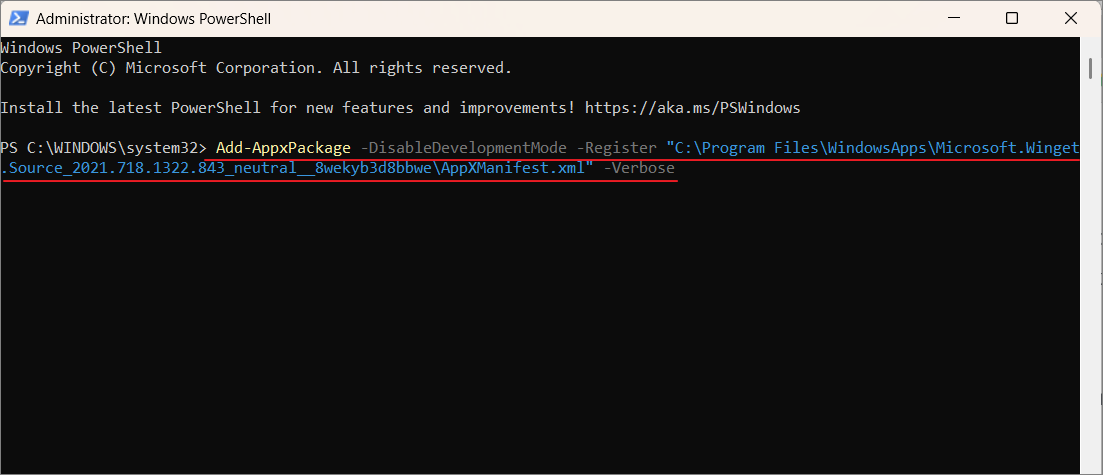
Step 1: Open Windows PowerShell as an administrator. You can do this by right-clicking on the Start menu and selecting Windows PowerShell (Admin).
Step 2: Paste the following command and press Enter:
Add-AppxPackage -DisableDevelopmentMode -Register "C:\Program Files\WindowsApps\Microsoft.Winget.Source_2021.718.1322.843_neutral__8wekyb3d8bbwe\AppXManifest.xml" -VerboseStep 3: After the command executes successfully, restart your computer.
3. Perform a Full System Shutdown
A complete shutdown can reset system processes and drivers, potentially resolving issues causing high CPU usage.
Step 1: Press Win + R to open the Run dialog box. Type cmd and press Ctrl + Shift + Enter to open the Command Prompt with administrative privileges.
Step 2: In the Command Prompt window, enter the following command and press Enter:
shutdown /s /f /t 0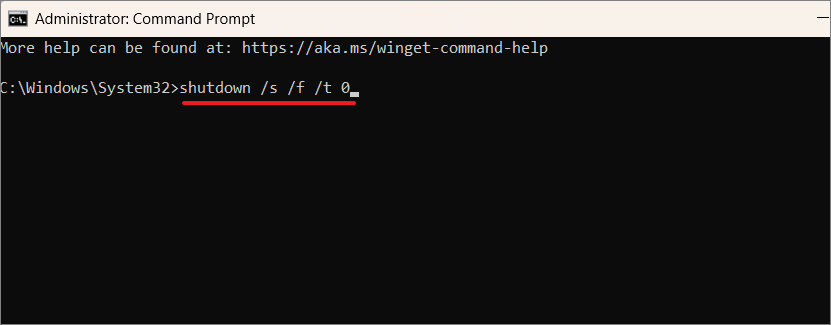
This command will initiate a full shutdown of your PC. Once the system has powered down, turn it back on and check if the issue is resolved.
4. Disable Non-Essential Winget Sources
Having unnecessary winget sources enabled can increase the workload of the WinGet COM Server. Disabling sources that you don't use can alleviate CPU usage.
Step 1: Open Command Prompt and run the following command to list all winget sources:
winget sources list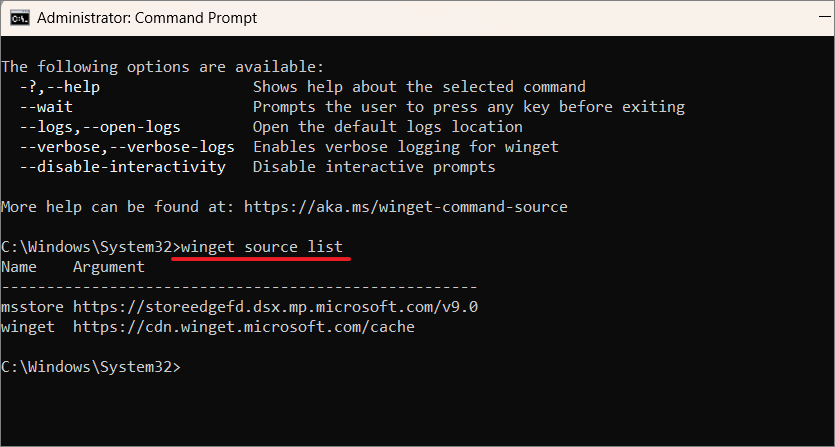
Step 2: Identify the sources you don't need. To disable a source, run the following command:
winget source disable <source name>Replace <source name> with the name of the source you wish to disable.
5. Perform a Clean Boot
A clean boot starts Windows with a minimal set of drivers and startup programs, which can help identify if background programs are causing the issue.
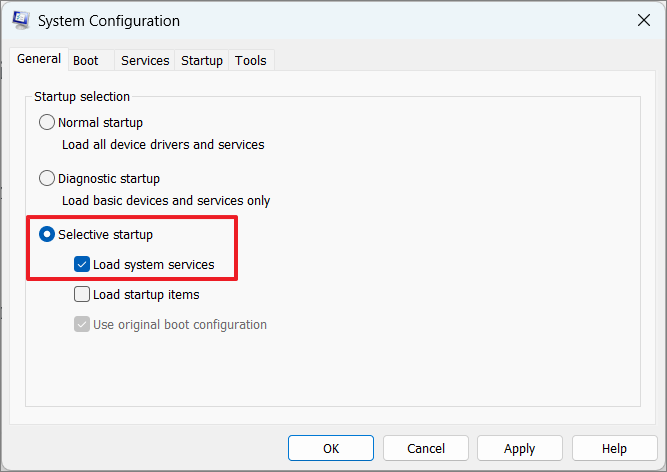
Step 1: Press Win + R, type msconfig, and press Enter to open the System Configuration window.
Step 2: In the General tab, select Selective startup and uncheck Load startup items.
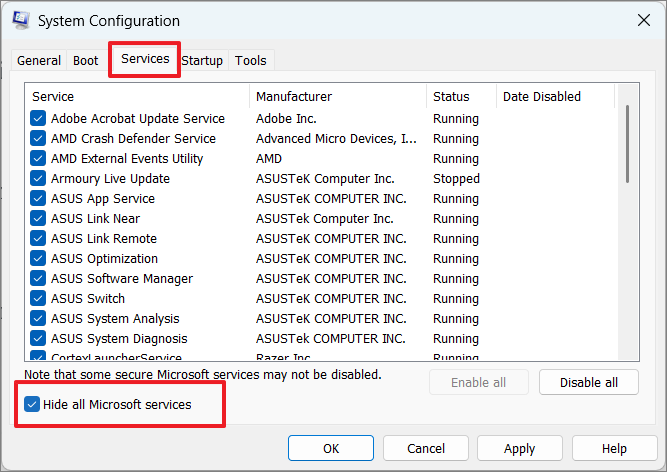
Step 3: Go to the Services tab, check Hide all Microsoft services, and then click Disable all.
Step 4: Click on the Startup tab and select Open Task Manager.

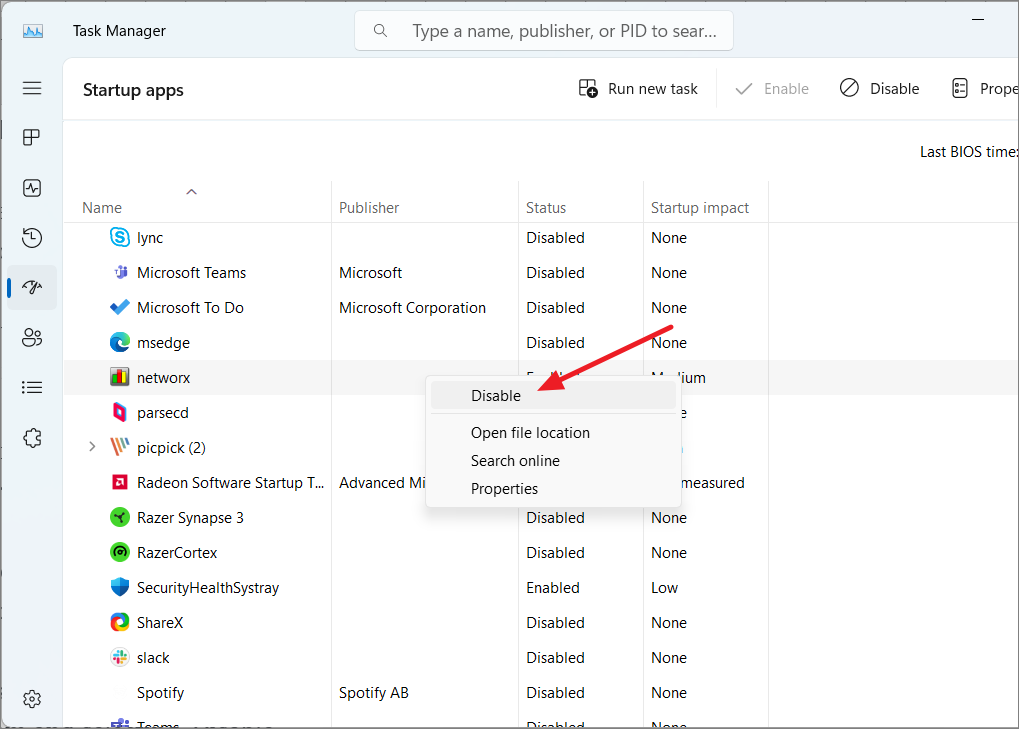
Step 5: In Task Manager, disable all startup items by right-clicking each one and selecting Disable.
Step 6: Close Task Manager, click Apply and then OK in the System Configuration window, and restart your computer.
After restarting, check if the high CPU usage persists. If the issue is resolved, you can re-enable services and startup items one at a time to identify the problematic software.
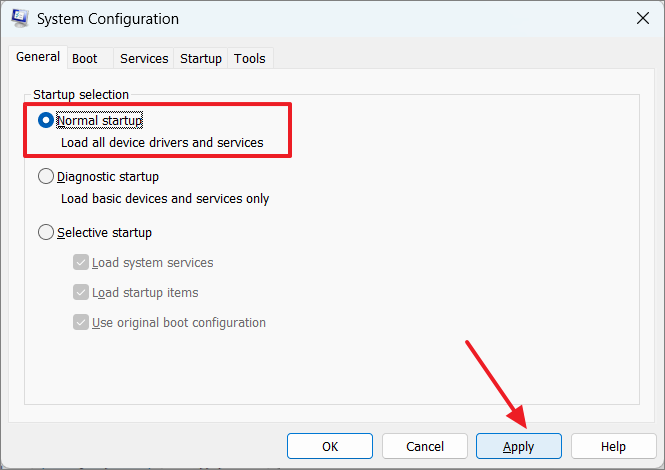
To return to normal startup mode:
Step 7: Open System Configuration again, select Normal startup in the General tab, click Apply, then OK, and restart your computer.
6. Repair Corrupted System Files
Corrupted system files can cause various issues, including high CPU usage by system processes. Running System File Checker (SFC) and Deployment Image Servicing and Management (DISM) tools can repair these files.
Step 1: Open Command Prompt as an administrator.
Step 2: Run the SFC scan by typing the following command and pressing Enter:
sfc /scannow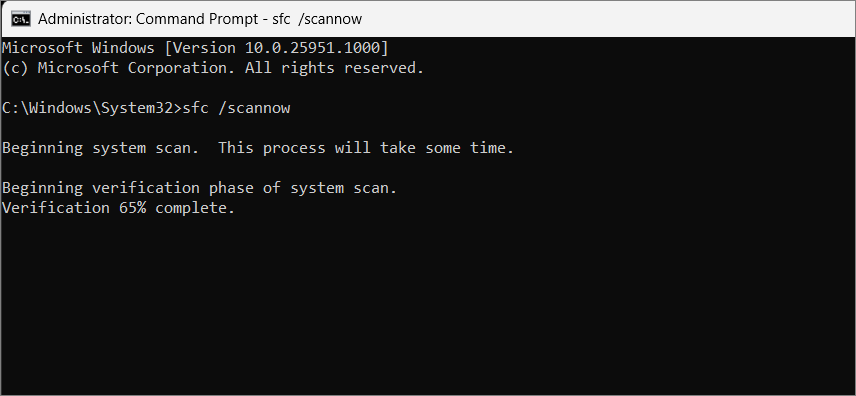
Step 3: After the SFC scan completes, run the DISM tool by entering the following commands one after another:
Dism /Online /Cleanup-Image /CheckHealthDism /Online /Cleanup-Image /ScanHealthDism /Online /Cleanup-Image /RestoreHealth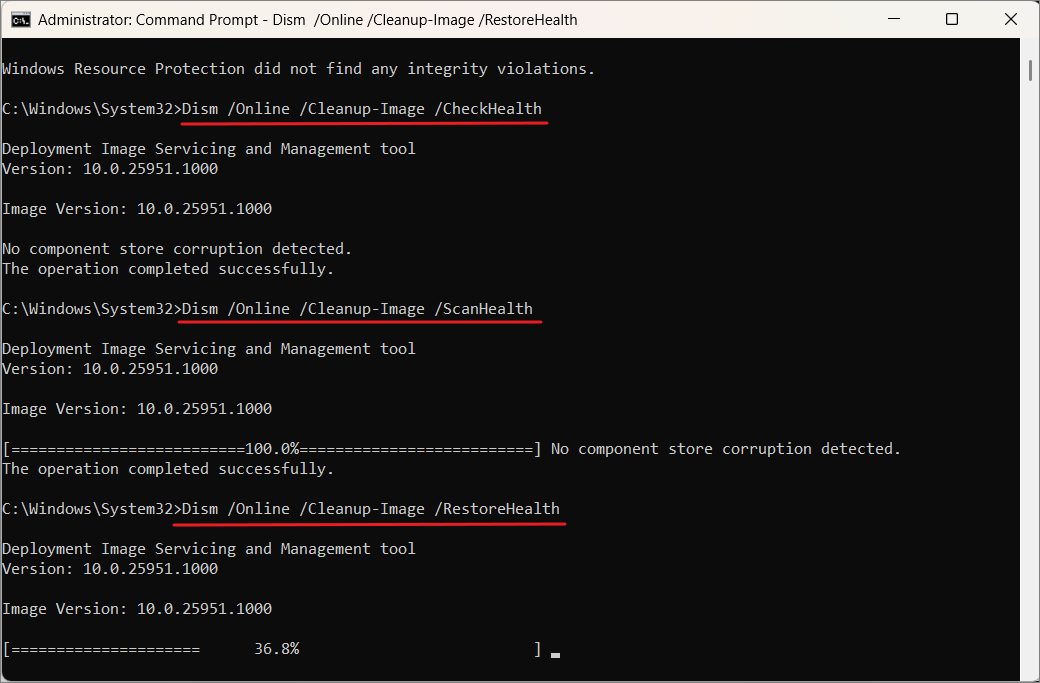
Once the scans are complete, restart your computer and check if the issue has been resolved.
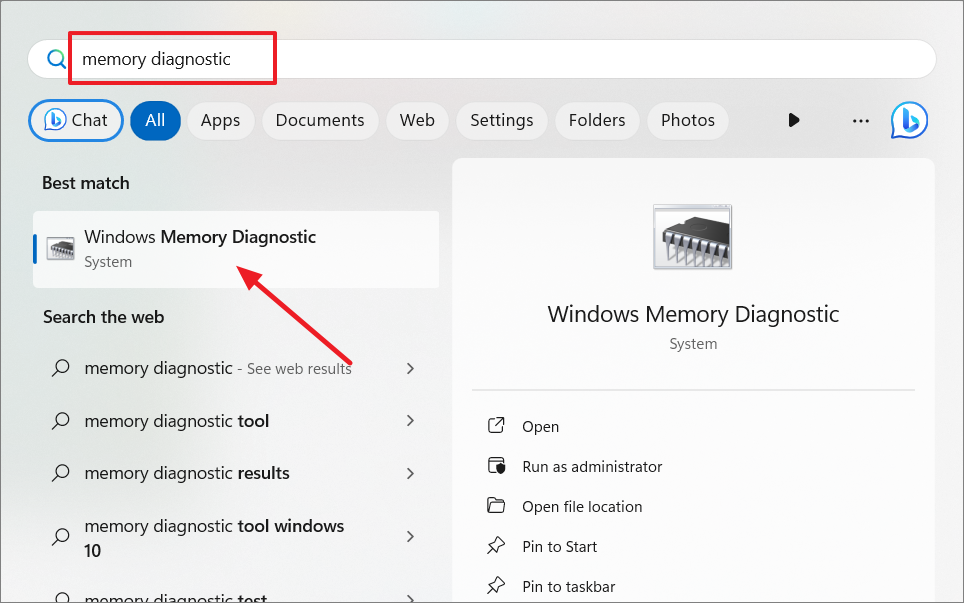
7. Run the Windows Memory Diagnostic Tool
Memory issues can also lead to high CPU usage. The Windows Memory Diagnostic tool can help identify problems with your RAM.
Step 1: Click on the Windows Search bar, type Windows Memory Diagnostic, and select the tool from the results.
Step 2: In the diagnostic window, select Restart now and check for problems (recommended). Your computer will restart and run the memory test.

After the test completes, your system will restart again. Any detected memory issues will be displayed after logging in.
Additional tips to reduce high CPU usage:
- Close unnecessary programs running in the background.
- Disable startup programs that you do not need.
- Update all your device drivers to the latest versions.
- Run a comprehensive virus and malware scan.
- Check for and install any available Windows updates.
If none of the above solutions resolve the high CPU usage caused by the WinGet COM Server process, you may need to consider upgrading your hardware or performing a system reset.