
Thumbnails offer a preview of the picture or video without opening it. This comes in handy when viewing multiple files are once. For instance, you are trying to pick a particular picture or video from a bunch and don’t have the time to open each of them individually to verify if it’s the one you were looking for. This is where thumbnails come to your aid, as they offer a preview and help you identify an image or video without opening them.
However, sometimes due to an error, Windows 10 does not show the thumbnail for a particular set of files or folders. This can be irksome to many who rely on thumbnails.
Why Image and Video Thumbnails are Not Visible?
Before we move to the fixes, it imperative that you know the various issues that lead to the error.
- Corrupt Drive
- Corrupt Cache
- Disabled settings to show thumbnails
- Malware infection
- Windows OS bugs
The fixes for the various issues that prevent the image and video thumbnails from displaying are very simple and can be executed in no time to resolve the issue. Execute the fixes in the order that they are mentioned until the error is fixed.
Fix 1: Verify File Explorer Settings
The first thing you should look for when the thumbnails are not visible is whether the settings are set alright. Many a time, the settings may have been changed inadvertently, thus showing the file icon and not the thumbnails.
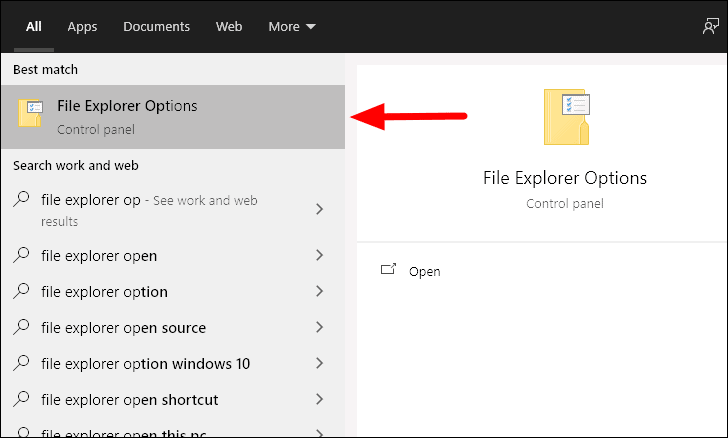
To check the File Explorer settings, search for ‘File Explorer Options’ in the ‘Start Menu’ and then click on the relevant section.
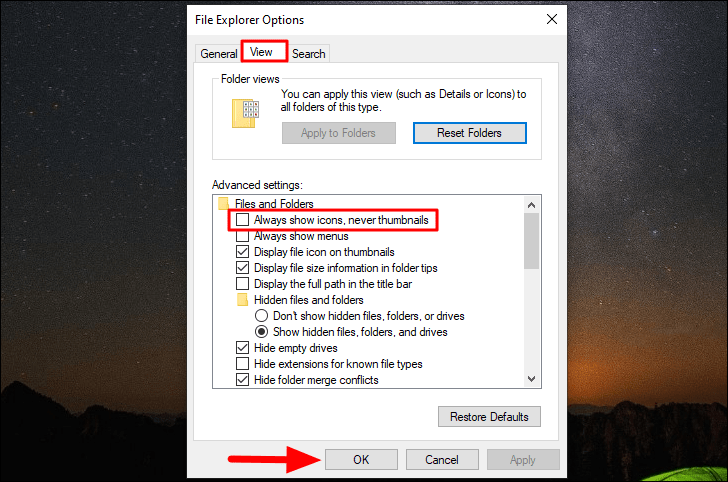
In the ‘File Explorer Options’ window, navigate to the ‘View’ tab from the top and then verify whether the ‘Always show icon, never thumbnails’ option is unchecked. In case it is selected, uncheck the option. After you have made the changes, click on ‘OK’ at the bottom.
The thumbnails should be visible now. In case, you are still facing the error, move to the next fix.
Fix 2: Restore File Explorer Settings to Default
The other fix to resolve the thumbnail error is to restore the default settings for File Explorer. If you have made changes to the settings, there is a chance that they might be causing the error, hence restoring the default settings might fix it.
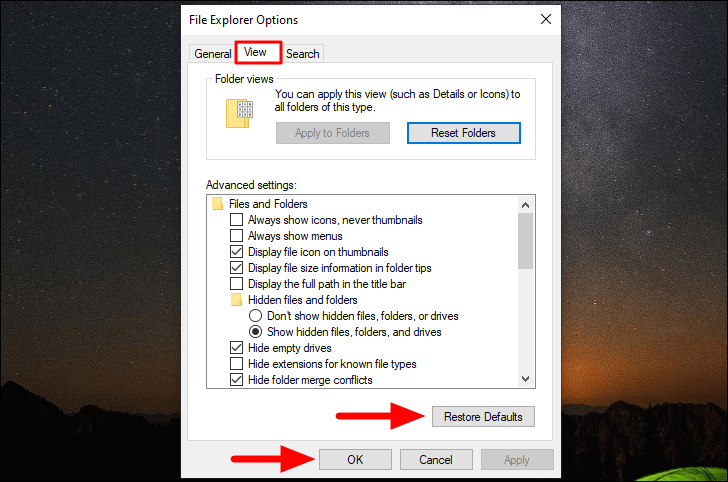
To restore the default settings, click on ‘Restore Defaults’ in the ‘View’ tab of ‘File Explorer Options’ and then click on ‘OK’ to save the changes and close the window.
Fix 3: Restore Default Settings for Particular Folder
If you are facing the error with the images and videos in a particular while the others seem to work fine, you should restore default settings for that particular folder.
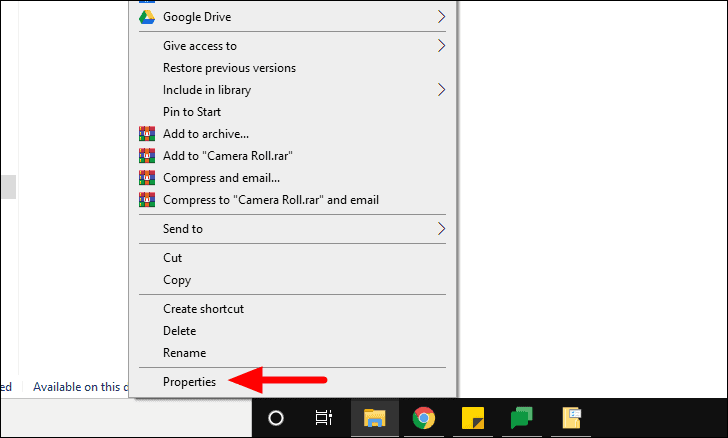
To restore default settings for a particular folder, locate the folder and right-click on it.
Next, select ‘Properties’ from the context menu.
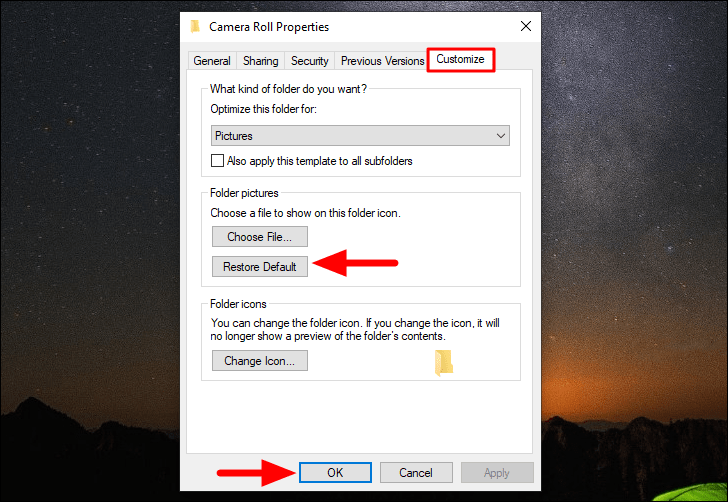
Now, navigate to the ‘Customize’ tab in the folder ‘Properties’ window, click on ‘Restore Default’ under ‘Folder pictures’ and then click on ‘OK’ at the bottom to apply the changes and close the window.
Fix 4: Change the Default Application for the File Type
In case, you are facing an error for a particular image or video type, try changing the default application.
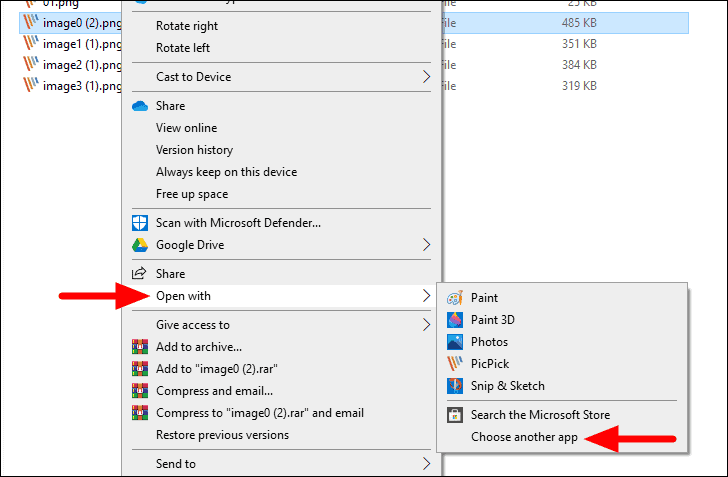
To change the default application, right-click on the problematic file type, hover the cursor over ‘Open with’ and click on ‘Choose another app’ from the menu.
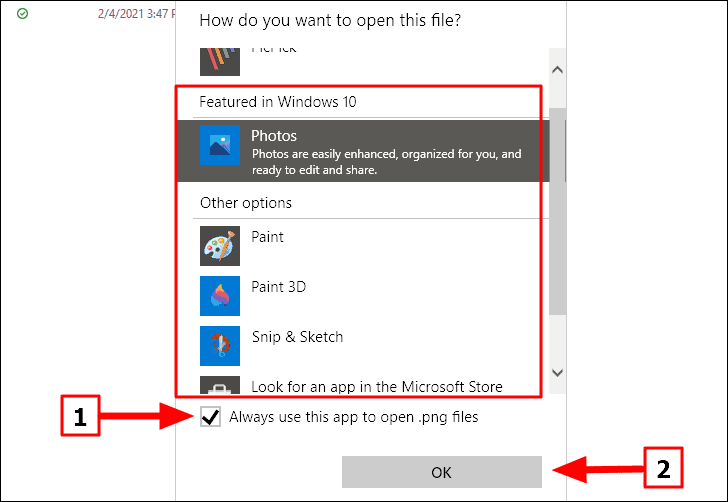
Now, select another app from the list, tick the checkbox for ‘Always use this app to open .png file’, and then click on ‘OK’ at the bottom. In the case of another file type, the extension (.png in the case) will be different.
Now, open the folder and check whether the image and video thumbnails are visible. Similarly, try other apps as well if the one selected earlier doesn’t work. If changing the default app doesn’t work altogether, try the other fix.
Fix 5: Run SFC Scan
Corrupted system files can also sometimes lead to errors in showing the thumbnails. SFC (System File Checker) scan will check all the system files and either repair or replace the corrupted ones with a cached copy. If you are facing the thumbnail error due to corrupted system files, running an SFC scan will fix it for you.
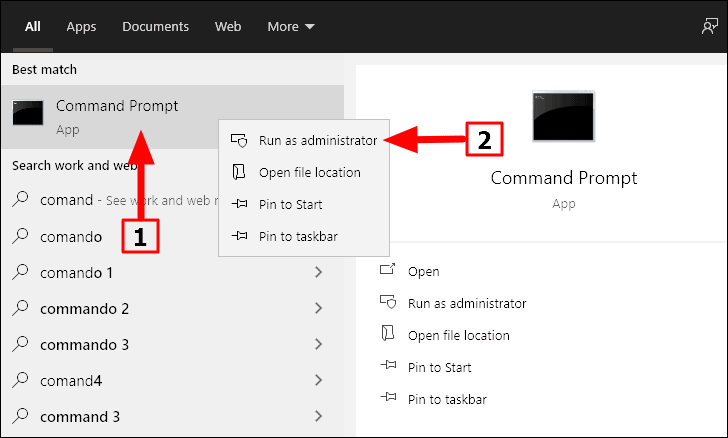
To run an SFC scan, first, search for ‘Command Prompt’ in the ‘Start Menu’, right-click on the search result, and then select ‘Run as administrator’ from the menu. Click ‘Yes’ on the confirmation box that pops us.
Now, enter the following command in the ‘Command Prompt’ and then press ENTER.
sfc /scannow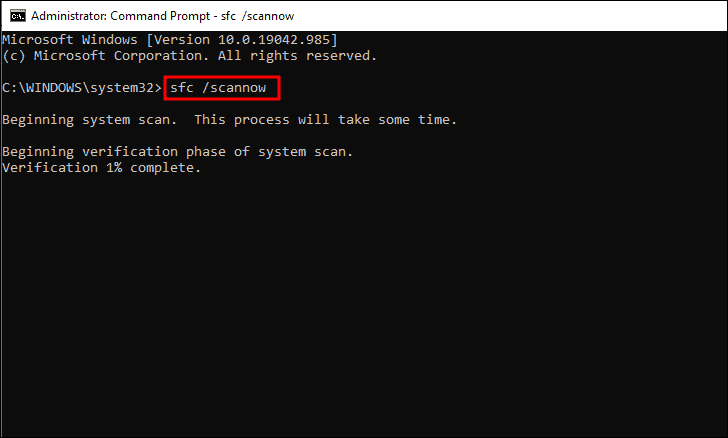
The scan will now start and will take a couple of minutes to complete. Sometimes, the scan may appear to be stuck to you but never interfere or close the command prompt window. Also, any issues found during the scan will be fixed right away.
Once the scan is complete, check whether the error is fixed. In case it persists, move to the next fix.
Fix 6: Clear Thumbnail Cache with Disk Cleanup
The thumbnails for every file are stored in the thumbnail cache, which might get corrupted due to multiple reasons. When the cache is corrupted, the thumbnails will either not be displayed correctly or not shown altogether. To fix the error, you should go for Disk cleanup to clear the thumbnail cache. After the cache is cleared, Windows will create another one for the thumbnails, thus fixing the error.
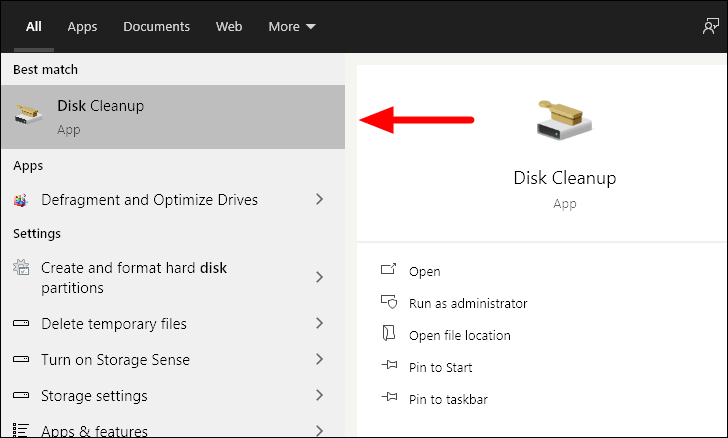
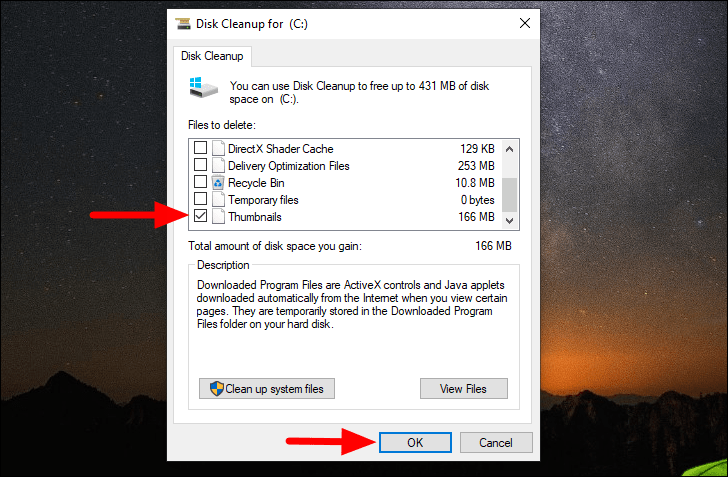
To clear the thumbnail cache, search for ‘Disk Cleanup’ in the ‘Start Menu’ and then click on the search result to launch the app.
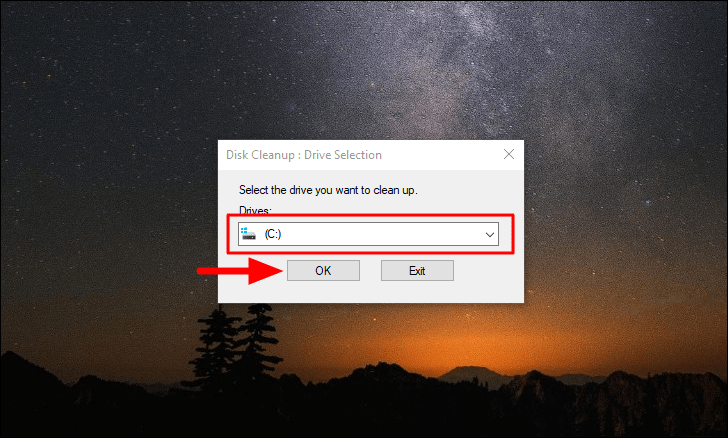
You will now be asked to select the drive to clean up. Select the ‘C’ drive, which is where the system files are stored, and then click on ‘OK’. In case, you have chosen another drive as the system drive, select that one from the drop-down menu.
The Disk Cleanup will now scan the drive to check how much space will be cleared. It will take some time depending on the files to be scanned.
After the scan is completed, check the ‘Thumbnails’ option and uncheck any other option that might be checked by default. Next, click on ‘OK’ to start the cleanup.
After the thumbnail cache is cleared, Windows will automatically generate another one. Now, check whether the thumbnail error is fixed.
Fix 7: Modify Advanced System Settings
Many a time, the ‘Advanced System Settings’ may be preventing the thumbnails from showing. If the error has not been fixed yet, it’s time you modify whether the advanced system settings.
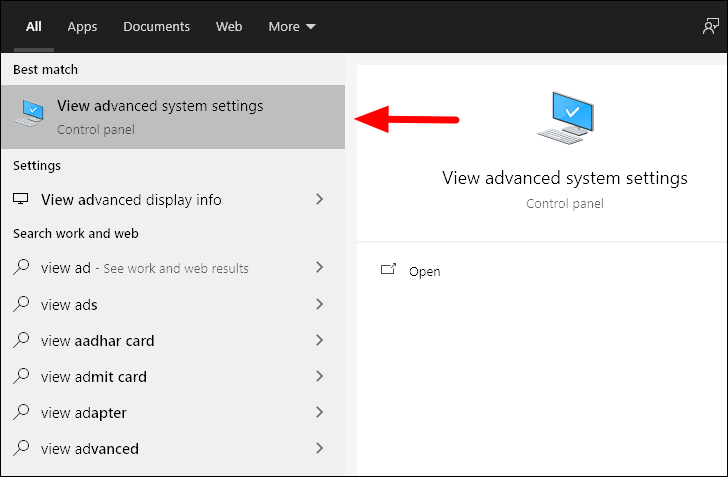
To modify, search for ‘View advanced system settings’ in the ‘Start Menu’ and then click on the relevant search result.
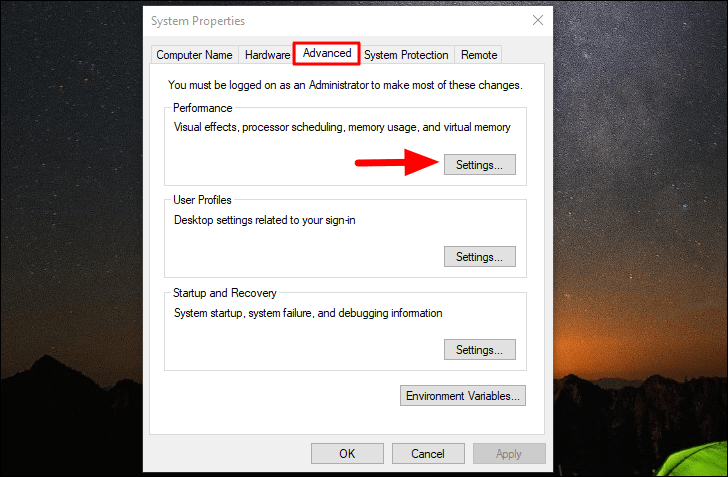
Navigate to the ‘Advanced’ tab in the ‘System Properties’ window and then click on ‘Settings’ under the ‘Performance’ section.
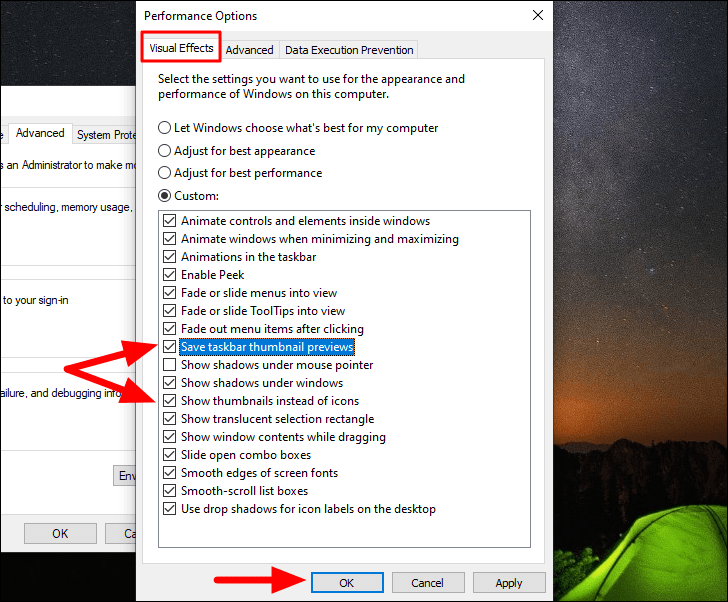
Next, navigate to the ‘Visual Effects’ tab and then check the boxes for ‘Save taskbar thumbnail previews’ and ‘Show thumbnails instead of icons’ under the ‘Custom’ section, if not already checked. Finally, click on ‘OK’ to apply the changes and close the window.
Now open the folder where you were encountering the thumbnail issue and check whether it’s resolved or not. If not, move to the next fix.
Fix 8: Scan the System for Malware
If the thumbnail error has not been fixed yet, it’s probably because of malware. To fix the error, run a scan with Windows Security or use a third-party antivirus.
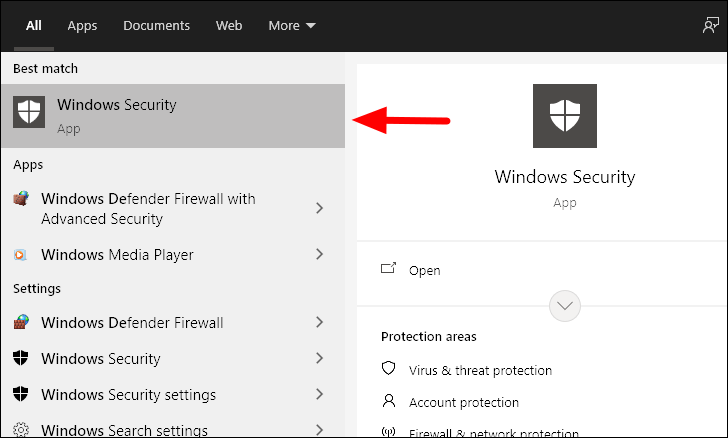
To run a scan, search for ‘Windows Security’ and then launch the app from the search results.
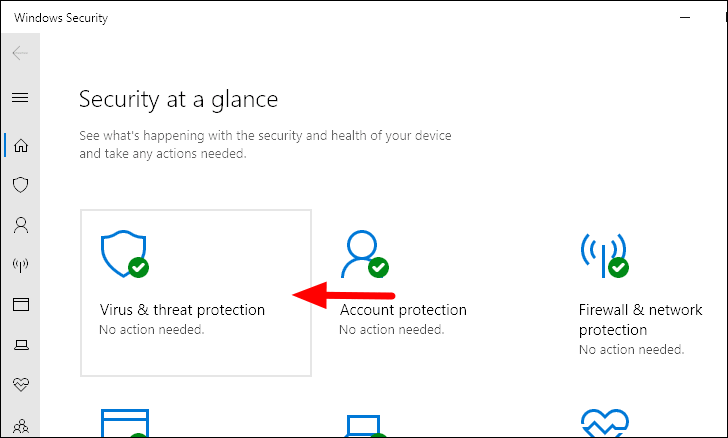
In the Windows Security window, select ‘Virus and threat protection’ from the list of options.
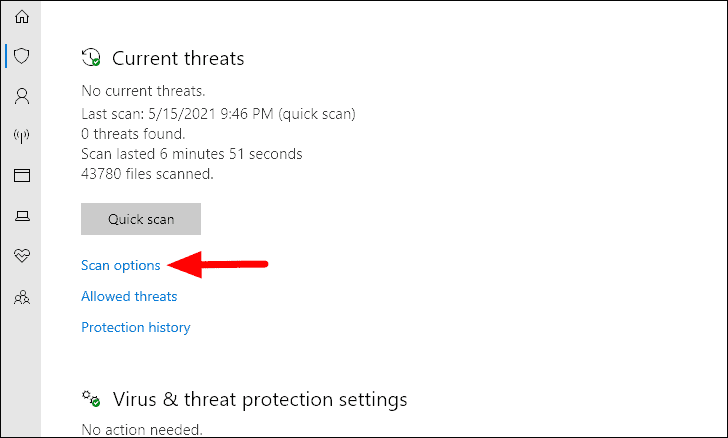
Next, click on ‘Scan options’ to view the other options for scan, since only the ‘Quick scan’ option will be available on the screen.
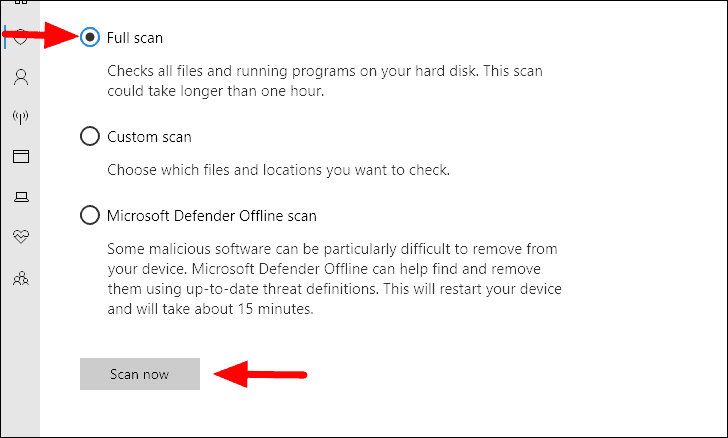
Next, select the checkbox for ‘Full scan’ and click on the ‘Scan now’ options at the bottom.
The scan will begin soon after. You can work continue working on the system while the scan goes on. Any malware or threats found will be dealt with.
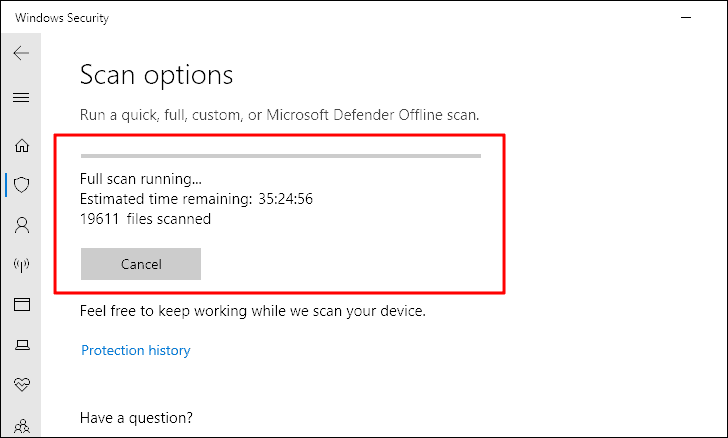
Once the scan is complete, check whether the thumbnails are now visible.
Fix 9: Uninstall Recent Programs
If you started encountering the error after you installed a program, they might be causing the error. If you can identify the erring program, uninstall it or uninstall every program you have recently installed and then download them back one by one until you find the one behind the error.
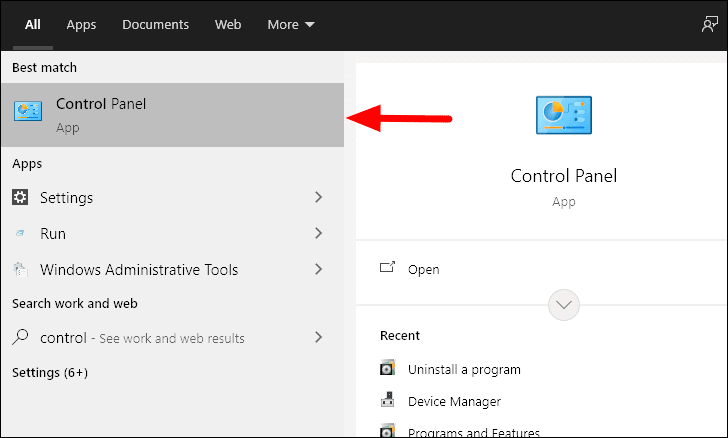
To uninstall a program, search for ‘Control Panel’ in the ‘Start Menu’ and then launch the app from the search results.
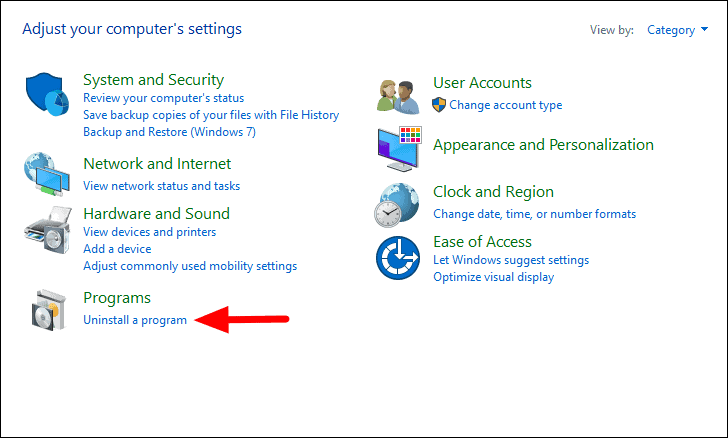
Next, click on ‘Uninstall a program’ under ‘Program’ heading.
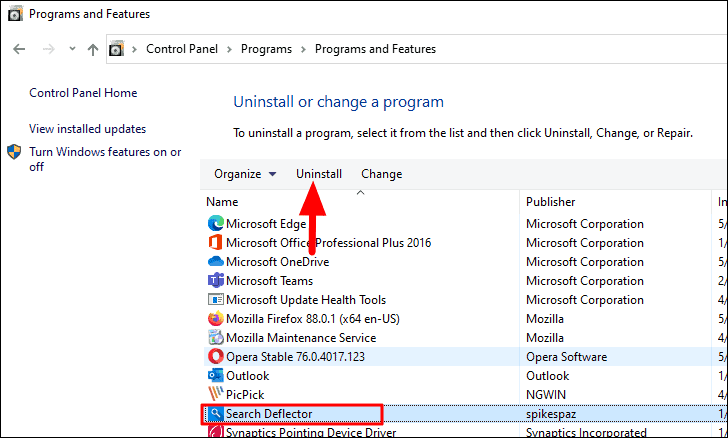
Now, select the app that you feel might be causing the error and click on ‘Uninstall’ at the top. If you receive a prompt, follow the on-screen instructions to complete the process.
After the uninstall process is complete, check whether the issue is fixed. If not, try uninstalling more apps that you feel might be leading to the error. In case the error is not fixed after uninstalling the apps, move to the next fix.
Fix 10: Make Changes to the Registry
If none of the above fixes have resolved the thumbnail error for images and videos on the system, your last option is to make changes to the registry. Making changes to the registry is an intricate process and demands extra caution from your end as any lapse or mistake could lead to major issues. Hence, follow the steps as is and not make any other changes during the process.
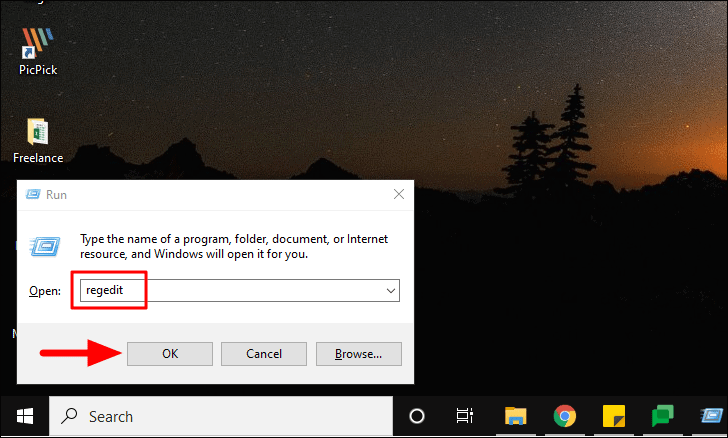
To launch the Registry, press WINDOWS + R to open ‘Run’, enter ‘regedit’ in the text box, and then either press ENTER or click on ‘OK’ at the bottom. Next, click on ‘Yes’ in the box that pops up.
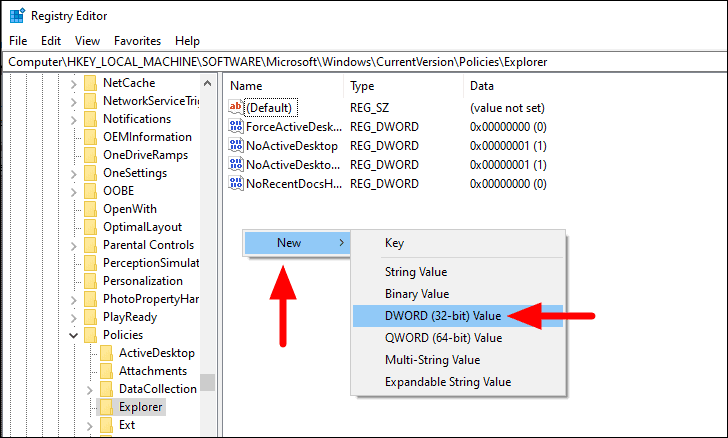
In the ‘Registry Editor’, navigate to the following address or paste it in the address bar at the top and press ENTER.
Computer\HKEY_LOCAL_MACHINE\SOFTWARE\Microsoft\Windows\CurrentVersion\Policies\ExplorerNow, search for ‘DisableThumnails’ DWORD on the right. If you do not find it, create one. To create, right-click on the screen, hover the cursor over ‘New’, and then select DWORD (32-bit) Value’ from the list of options. Name the DWORD as ‘DisableThumnails’.
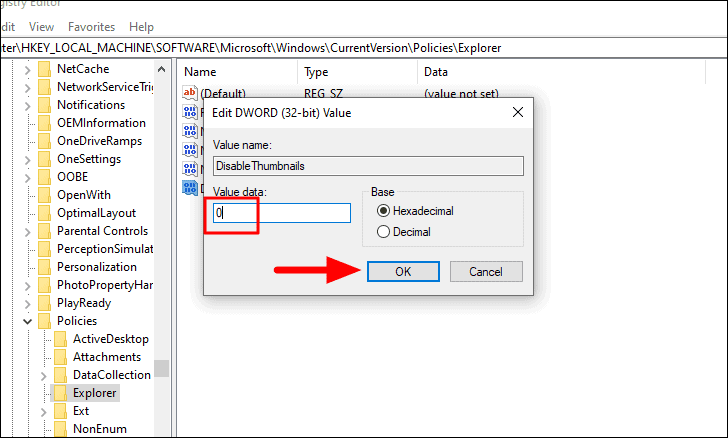
Next, double-click on the DWORD, enter the value ‘0’ under ‘Value data’, and then click on ‘OK’ at the bottom.
After you have made changes to the registry, reboot the system and the issue will be resolved.
The thumbnails for images and videos will now be shown on the computer after you employ the above fixes. Sorting and identifying files would now be much easier.


