
USB drives are really handy for moving data around – just plug them in, transfer your files, and you’re good to go. However, sometimes the drive may not appear on your Windows PC after plugging in, which stops you from transferring anything. This can happen for many reasons, and figuring out why can be tricky. But don’t worry, there are some easy solutions to try and fix the issue.
Why isn’t your USB drive appearing on your computer? Let’s first look at the possible reasons for this issue. Knowing why this happens can make fixing it much simpler.
- Hardware Compatibility
- Corrupted Driver
- Absence of partitions on the USB drive
- The USB drive has no assigned drive letter
Now that you understand the underlying causes, let’s move to the fixes.
1. Do Basic Checks
Before you start troubleshooting software issues, it’s wise to check if the problem isn’t actually with the hardware. Here’s how you can do some basic checks:
- If your USB drive has an external power button, make sure it’s turned on. This could be why it’s not appearing in Windows.
- Try plugging the USB drive into a different USB port on your computer. Sometimes, the issue could be with the port itself.
- Restarting your computer can also solve the problem. Occasionally, a simple reboot can make the USB drive appear if it was previously not showing up due to a minor glitch.
- Test the USB drive on another computer. If it shows up there, the issue might be with your computer’s drivers. If it doesn’t, the USB drive could be damaged or have unallocated space.
- Inspect the USB drive for any physical damage, like bends or cracks. Physical damage could be why it’s not being recognized by Windows. If you find any damage, it’s best to consult a professional.
After trying these steps, you’ll have a clearer idea of what the problem might be and can then proceed with more specific fixes.
2. Device Does Not Show Up in Disk Management
If the drive does not show up in disk management on your PC but shows up on other PCs, it could be an issue with the driver. But before we move to the driver aspect, let’s first see how to view the USB drive in Disk Management.
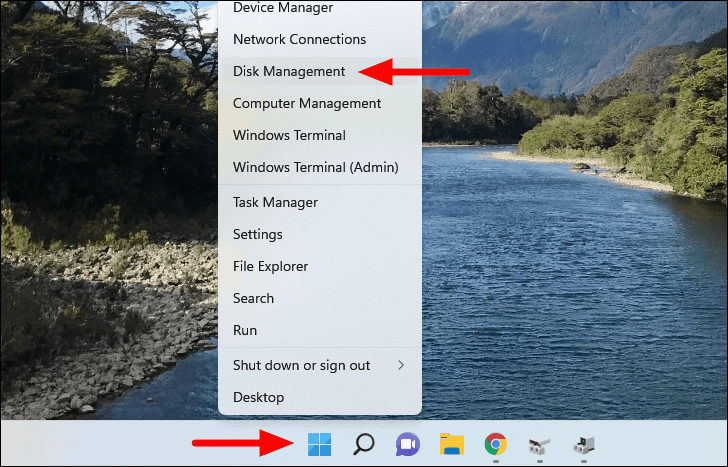
To view the USB drive in Disk Management, either right-click on the ‘Start’ icon in the Taskbar or press WINDOWS + X to launch the Quick Access Menu, and select ‘Disk Management’ from the list of options.
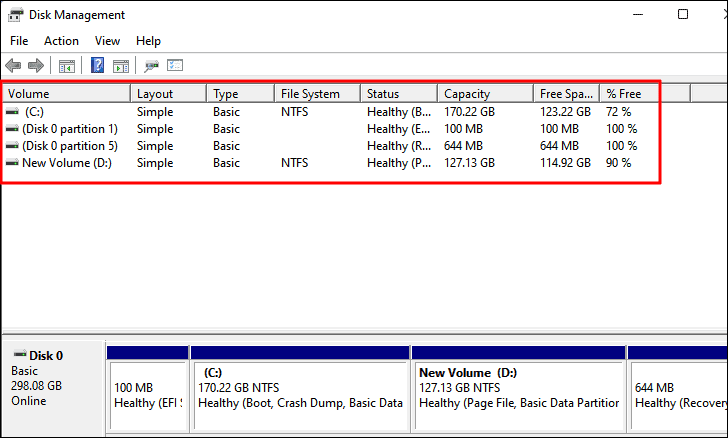
In the Disk Management panel, all the drives and partitions on the system will be listed. This includes both the internal and external drives. If you are unable to find the drive listed here, let’s head to the Device Manager.
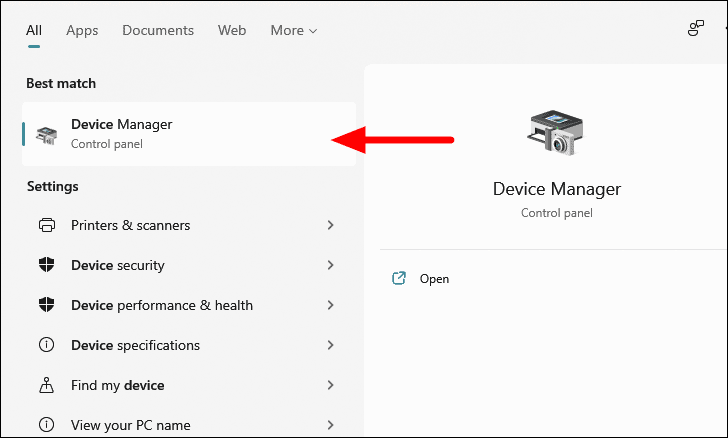
To launch the Device Manager, search for in the Start Menu and click on the relevant search result to launch the app.
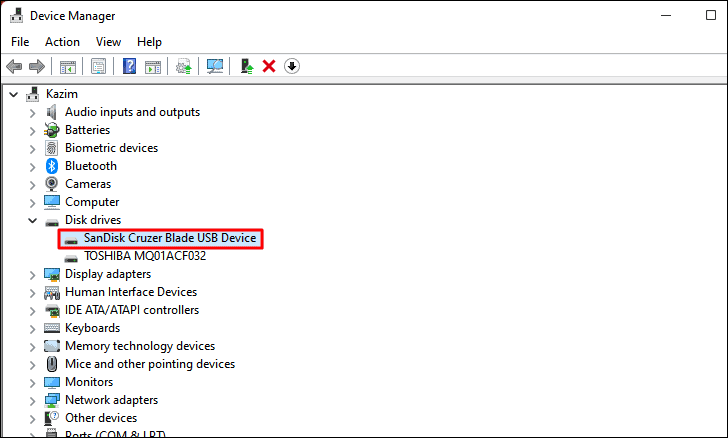
In the Device Manager, double-click on the ‘Disk drives’ option to expand and view the devices under it.
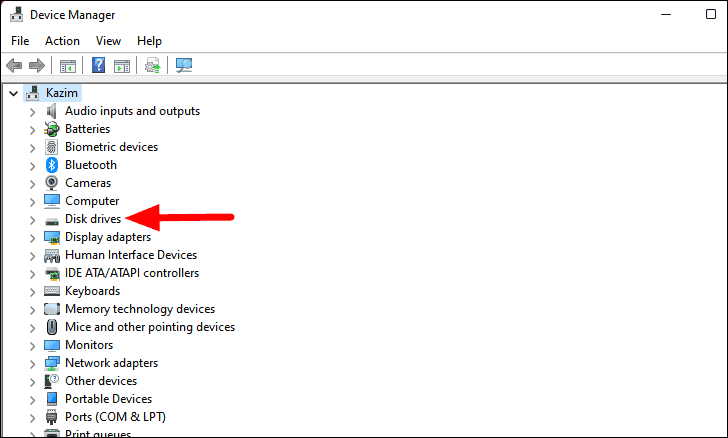
If you find the USB drive listed here, it’s probably an issue with the driver that can be easily fixed.
Re-enable the USB Drive
The first fix here is to re-enable the USB drive. Here’s how you do it.
Right-click on the ‘USB drive’ listed under ‘Disk drives’ and select ‘Disable device’ from the context menu.
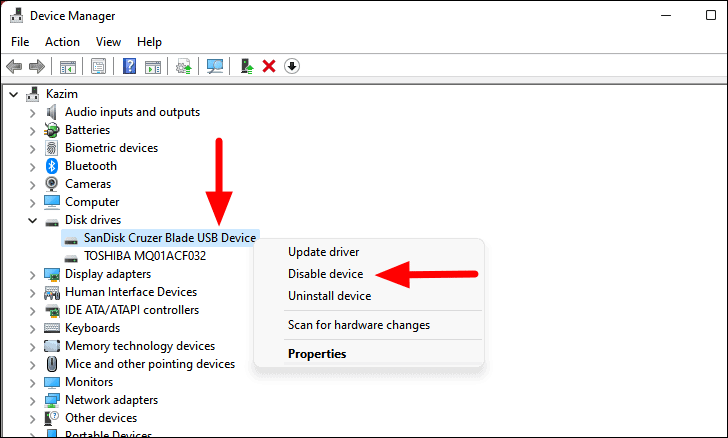
Next, click on ‘Yes’ in the confirmation box that appears.

Now, wait for a few minutes and then again right-click on the USB drive and select ‘Enable’ device from the context menu.
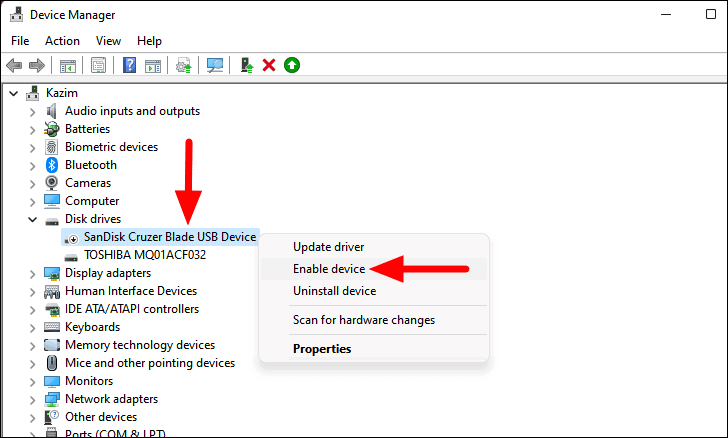
Now, check if the device shows up in the Disk Management and File Explorer.
Reinstall Device
If a bug in the driver is printing the drive from showing up in Windows, reinstalling the device will work as an effective fix.
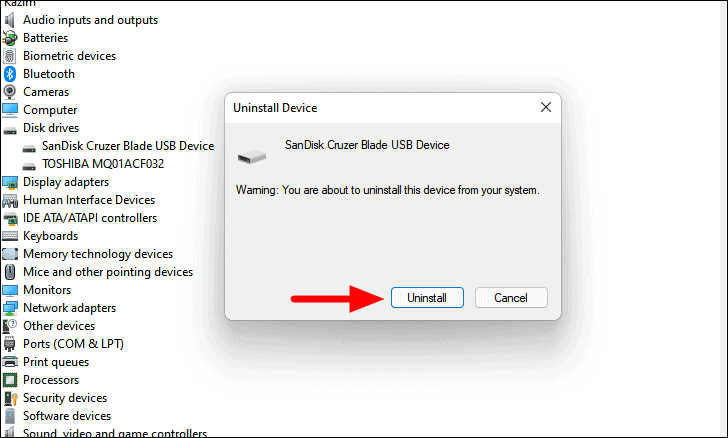
To reinstall a device, right-click on it and select ‘Uninstall device’ from the context menu.
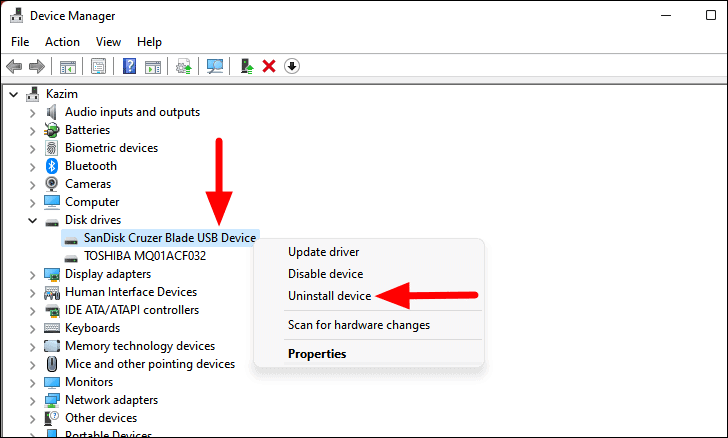
Click ‘Uninstall’ on the confirmation box that pops up.
After you have uninstalled the device, restart the PC and Windows will automatically install a fresh driver for the drive. Check if this fixes the error.
Update Driver
If the above two fixes have not worked, it could be that you are on an outdated driver, and updating it should fix the error.
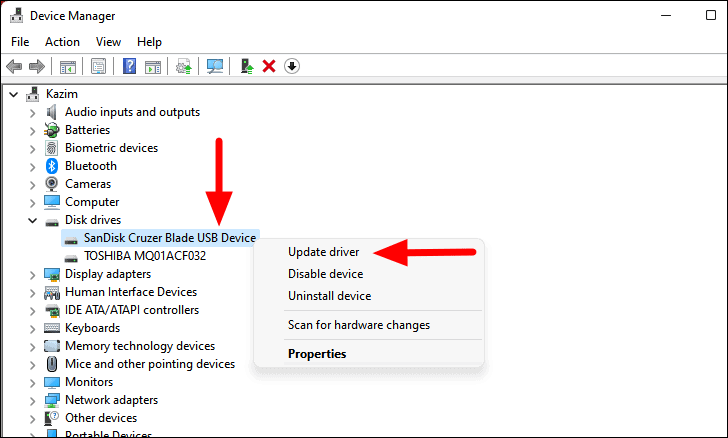
To update the driver, right-click on the USB drive and select ‘Update Driver’ from the context menu.
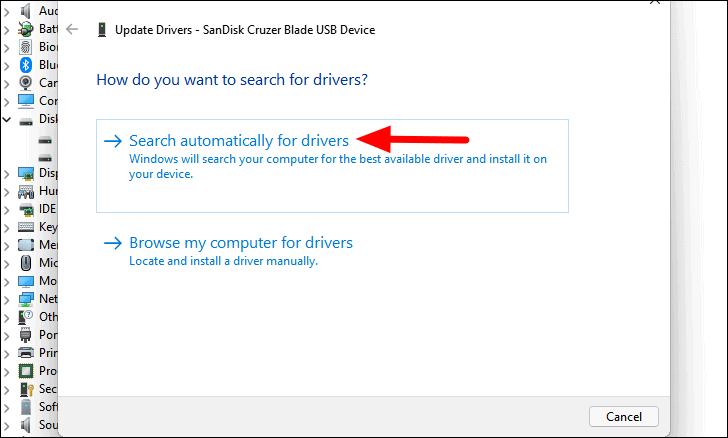
You will now be offered two options, either to let Windows automatically search for the best available driver on your system or you could locate and install one manually. It’s recommended that you choose the first option and let Windows take care of the update.
After the driver is updated, restart the computer and check if the driver shows up. If there was no update available, you are probably on the latest version.
Roll Back Driver Update
If you started encountering a problem after updating the driver, roll back to the previous version. Also, Windows may have updated the driver without you even realizing it, so you should give it a try.
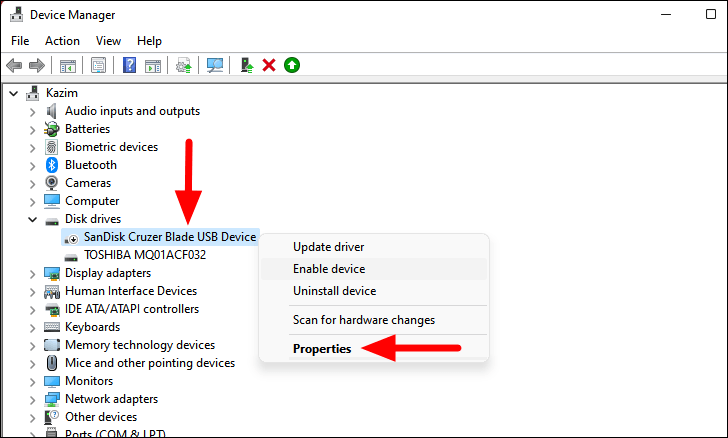
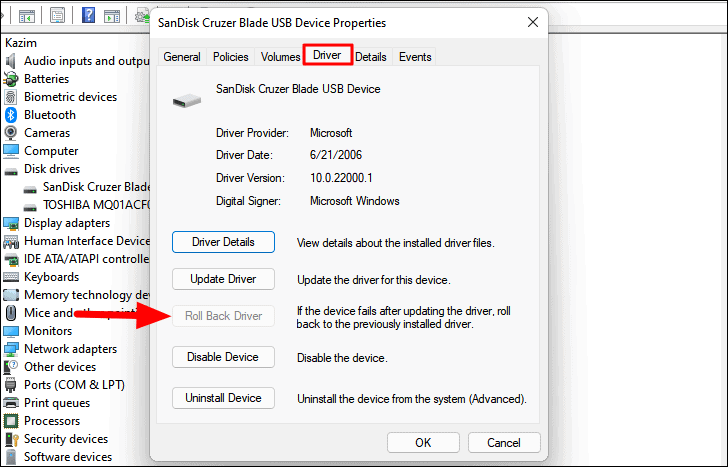
To roll back driver update, right-click on the ‘USB drive’ and select ‘Properties’ from the context menu.
In the Properties window, navigate to the ‘Driver’ tab and click on the ‘Roll Back Driver’ update option. Choose the relevant response if a confirmation box appears.
Note: The ‘Roll Back Driver’ option will be greyed out if the driver hasn’t been updated or the file for the previous version is not stored on your computer.
The device should now be working and you should be able to access it from File Explorer.
2. Windows Asking You to Format the Drive
When you plug in a USB drive and get a message saying it needs to be formatted before use, go ahead and format it. But first, make sure there’s no important data on the drive. This error usually happens because the drive is formatted in a way that Windows can’t read. If there’s important data on it, connect the USB to the computer where it was originally formatted, move your data off, then plug it back into the Windows computer. You can format the drive by selecting the ‘Format disk’ option in the message that appears.
3. Assign Drive Letter
If the drive appears in Disk Management but not in the File Explorer, it could be because the drive has not been assigned a drive letter yet. But, before we assign a drive letter, check if the drive has a blue bar at the top. In case it has, it’s most likely the drive letter that’s causing the issue and can easily be fixed.

When the bar at the top of the drive is black, it indicates that the space on it has not been allocated, which is also a possible reason for the issue. We have taken it up in the next fix.
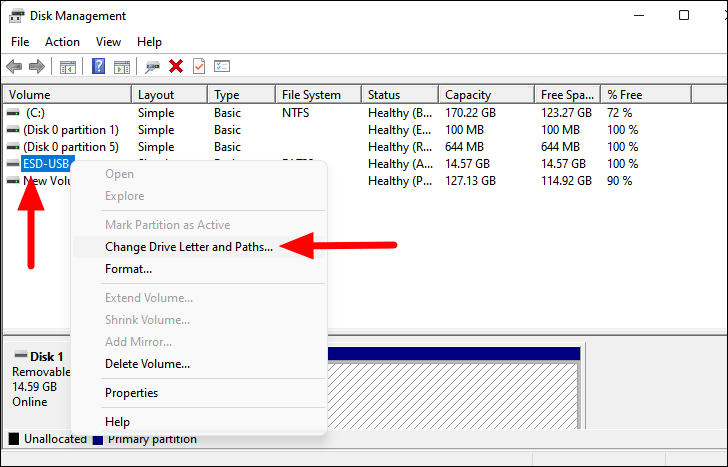
To assign a drive letter to the USB drive, right-click on the USB drive, and select ‘Change Drive Letter and Paths’ from the context menu.
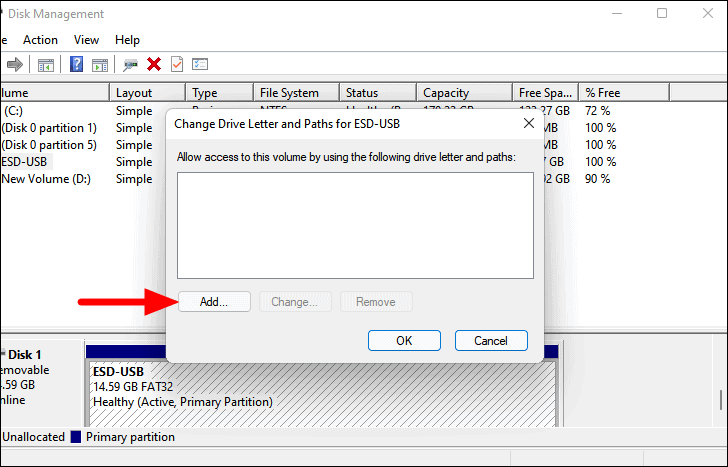
Next, click on ‘Add’ in the ‘Change Drive Letter and Paths’ panel that appears.
The next available drive letter will be selected by default and you click on ‘OK’ to assign it. In case you want to choose a different drive letter, click on the drop-down menu, select the one of choice, and then click on ‘OK’.
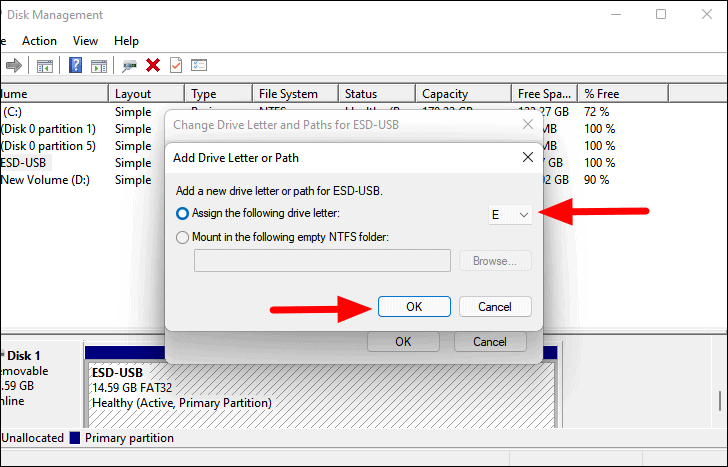
This should fix the issue in case it was due to a drive letter not being assigned to the USB drive.
4. Format the USB Drive
As discussed in the last fix, if there is a black bar at the top of the drive, its space hasn’t been allocated, likely the reason for the USB drive not showing up issue. To fix it, you will just have to allocate the space or create a simple volume by following the steps below.
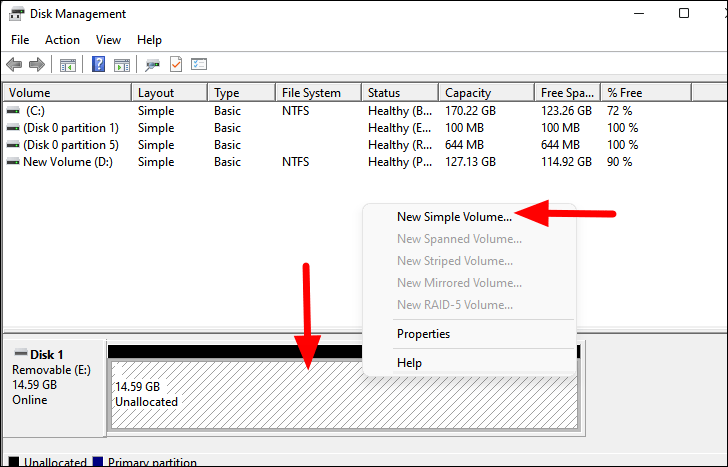
To create a simple volume, right-click on the unallocated space where the drive is listed at the bottom and select ‘New Simple Volume’ from the context menu.
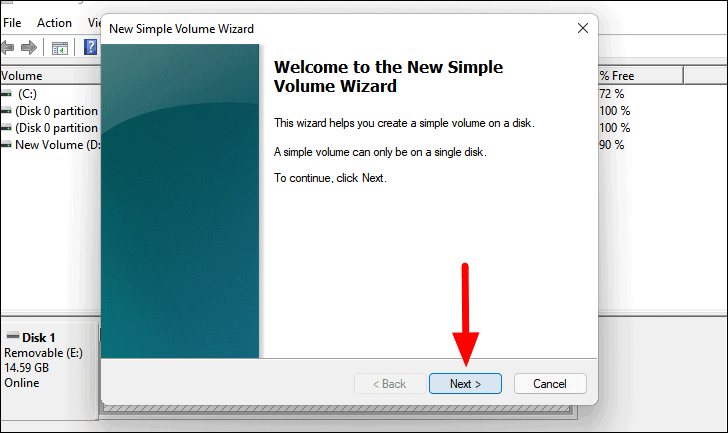
The ‘New Simple Volume Wizard’ window will launch. Click on ‘Next’ to proceed.
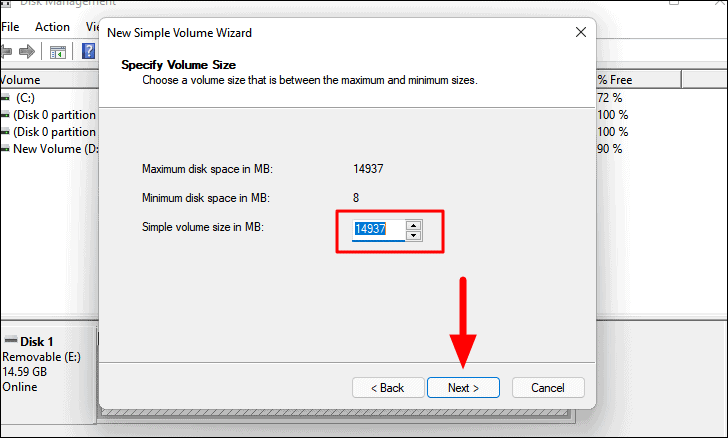
Next, choose the maximum size for the simple volume and click on ‘Next’ at the bottom.
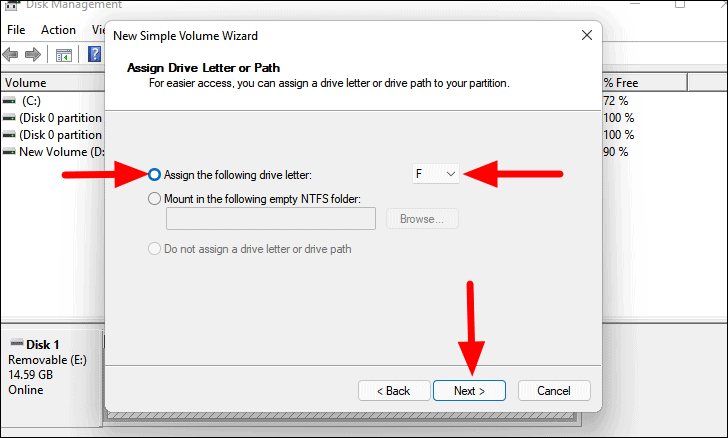
Now, make sure you have the ‘Assign the following drive letter’ option selected, choose the desired drive letter from the drop-down menu on the left and then click on ‘Next’ at the bottom.
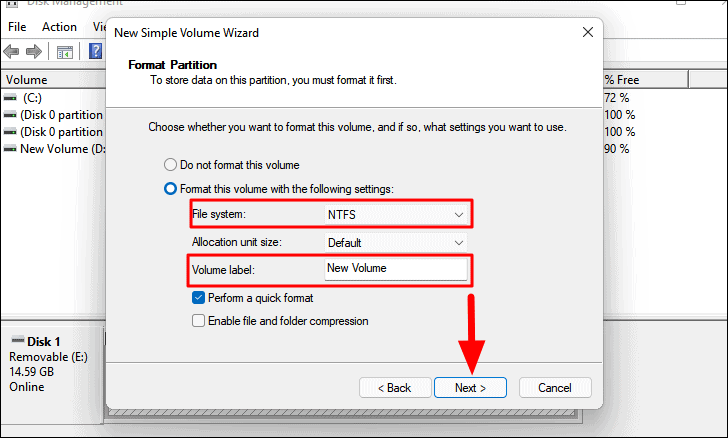
Now choose a file system for the drive and enter a ‘Volume label for it. If you are using a USB drive with more than 4 GB of storage space on Windows, the ‘NTFS’ file system is recommended. For drives smaller than that, use the ‘FAT32’ file system. Click on ‘Next’ to proceed.
Finally, verify the settings that you have selected for the format, and click on ‘Finish’ to apply them.
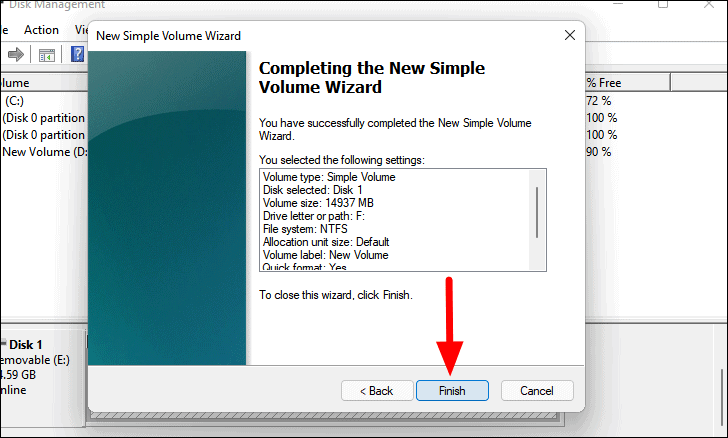
Once you have created a new simple volume, the drive should appear in the File Explorer.
5. Format the Drive With Command Prompt
If you were unable to format the drive with Disk Management, you can always use the ‘DiskPart’ command in Command Prompt. Many a time, the partitions on the USB drive are such that they cannot be formatted with Disk Management. The DiskPart command requires administrator access, so you will have to launch an elevated Command Prompt. Let’s see how you can format the drive with Command Prompt.
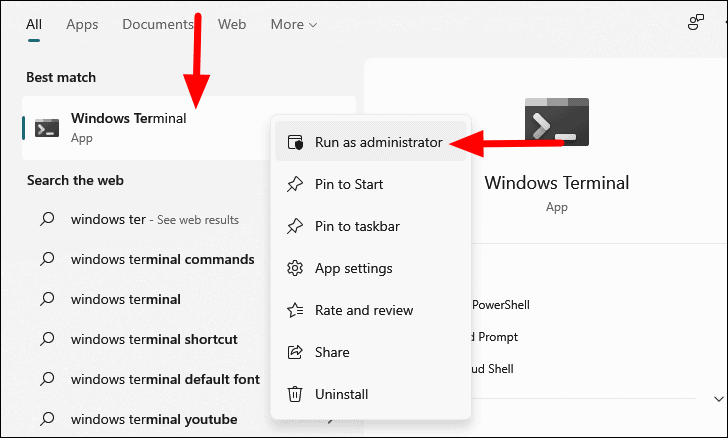
To format the drive with Command Prompt, search for ‘Windows Terminal’ in the Start Menu, right-click on the relevant search result, and select ‘Run as administrator’. Click ‘Yes’ on the UAC box that appears.
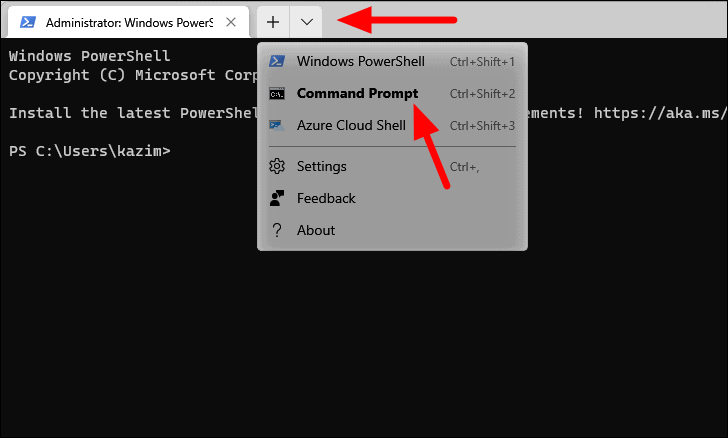
If you haven’t set ‘Command Prompt’ as the default profile on Terminal, click on the carrot arrow icon on the top and select ‘Command Prompt’ from the menu. Alternatively, you can press the CTRL + SHIFT + 2 to launch the Command Prompt tab.
In Command Prompt, type the following command and press ENTER.
diskpart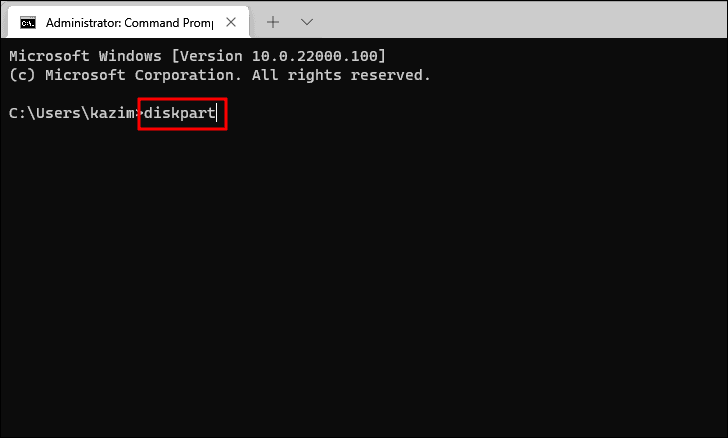
Next, type the following command and press ENTER.
list disk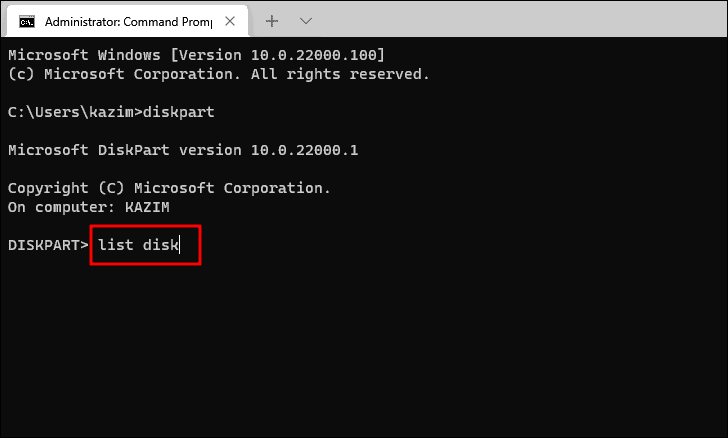
You will now find the various disks on your computer listed in the Command Prompt with each allotted a specific number under the ‘Disk ###’ column. Next enter the following command while replacing the ‘Disk ###’ with the number for the specific disk.
select Disk ###Since we want to format Disk 1 from the list, we have replaced ‘Disk ###’ in the above command with ‘Disk 1’, and the final command for this case becomes as follows. Type or paste it and press ENTER.
select Disk 1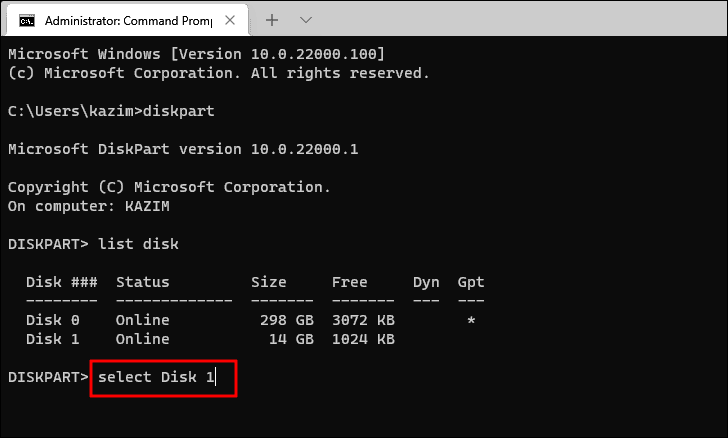
The disk you entered earlier will be now selected. Now, type the following command and press ENTER.
clean
The disk has now been cleaned and any existing partitions have been removed, but you are yet to format it.
To format the disk, type the following command and press ENTER.
create part pri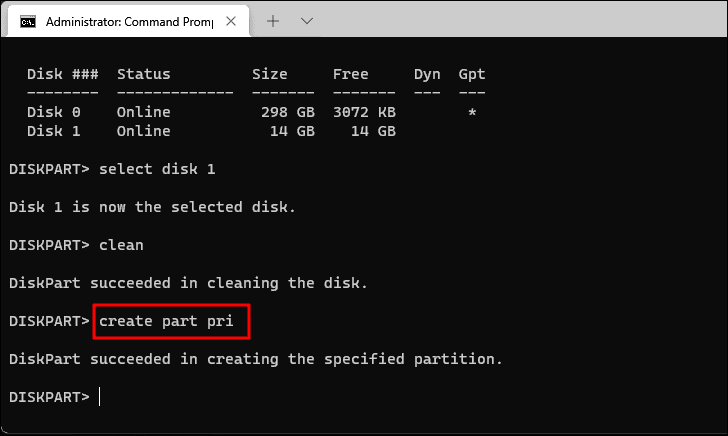
Once you have created the partition, the penultimate step is to mark the drive as active. To do that, type the following command and press ENTER.
active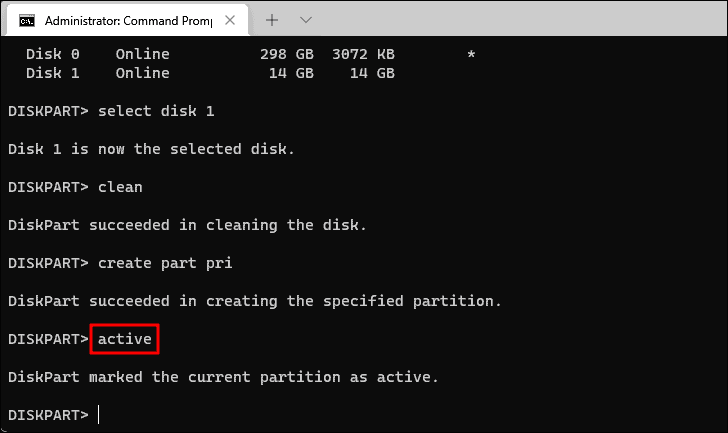
The last step is to set a file system. As discussed earlier, set ‘NTFS’ for drives up to 4 GB of storage space and ‘FAT32’ for the ones above that. Since the drive we are formatting has 16 GB storage, we will use the ‘NTFS’ file system. Type the following command and press ENTER to set a file system.
format fs=fat32To set ‘NTFS’ as the file system, replace ‘fat32’ in the command with ‘NTFS’.
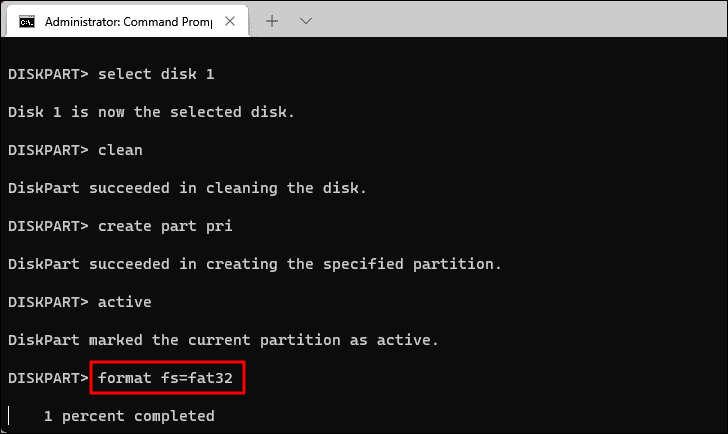
Wait for the process to complete. It may take up to a few minutes for the drive to be formatted as the selected settings. Once the drive is formatted, it should appear in the File Explorer.
6. Disable USB Selective Suspend Setting
If none of the above fixes have worked, check if the power setting on your system is preventing the USB drive from showing up. There is a setting in the ‘Power Options’ that cuts power to the USB drive when it’s plugged in, as a result, it might not be showing up. This is a power-saving feature and if disabling it doesn’t work, revert to the original settings.
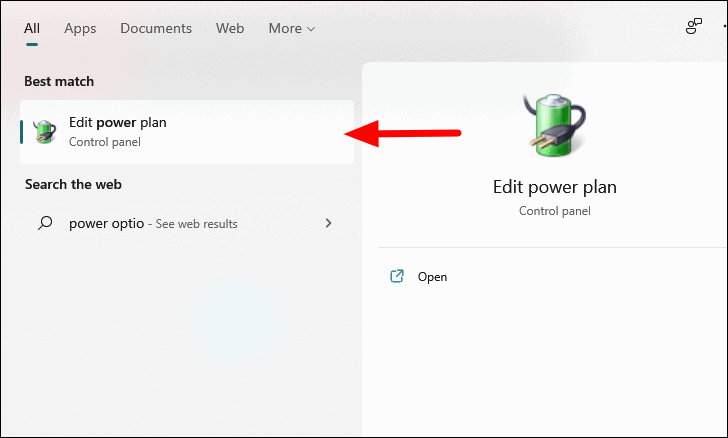
To check if the USB drive is disabled from the power settings, search for ‘Edit power plan’ in the Start menu and click on the relevant search result to launch it.
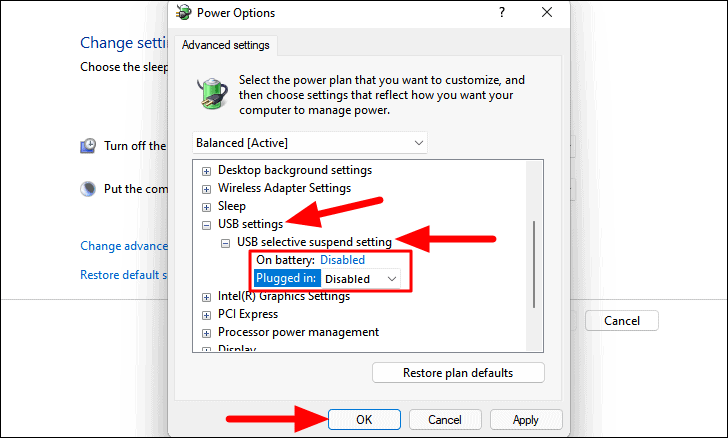
Your current power plan settings will now be displayed on the screen, click on ‘Change advanced power settings’.
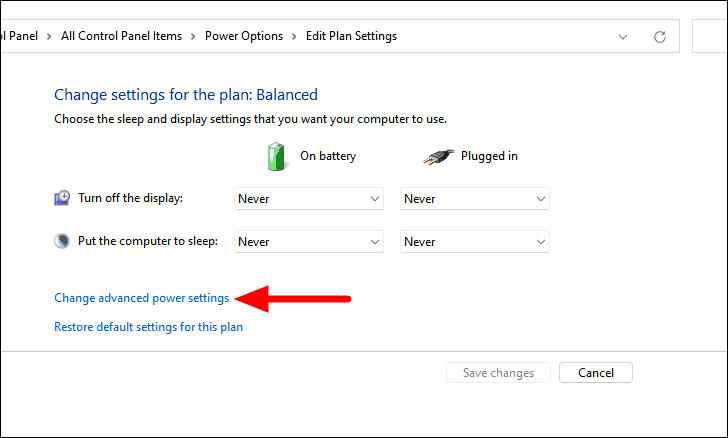
In the ‘Power Options’ panel that launches, double-click on ‘USB settings to expand it and then double-click on ‘USB selective suspend setting’. Now change both the ‘On battery’ and ‘Plugged in’ setting to ‘Disabled’, by clicking on the drop-down menu and selecting ‘Disable’ from the list of options. Finally, click on ‘OK’ at the bottom to save the changes.
With the above fixes, your USB drive will now show up in Windows. However, do remember to transfer any critical data stored on it to another system where the drive was formatted and then format it on your Windows PC to avoid data loss.


