Mortal Shell 2 hands you a steady drip of pickups, and almost none of them explain themselves properly. Some are permanent build pieces. Some exist purely to be sold. A few quietly gate mechanics like fast travel. Knowing which bucket an item belongs to before you dump it on a vendor saves a lot of regret.
Quick answer: Items split into four groups. Equipables attach to your Harbinger for an active or passive effect, treasures exist only to be sold for Coins, resources are spent at Beacons or on upgrades, and mechanic items unlock systems like fast travel and locked containers. Never sell an equipable, because duplicates raise its tier.
The four item types in Mortal Shell 2
Every pickup in the game slots into one of four categories, and the category tells you exactly what to do with it.
| Type | What to do with it |
|---|---|
| Equipable | Attach it for an active or passive effect. It stays in your inventory permanently. Collect duplicates to raise its tier. |
| Treasure | Sell it. Treasures have no other function beyond converting into Coins. |
| Resource | Spend it on upgrades, or consume it at a Beacon to raise a stat. |
| Mechanic | Pick it up to unlock a system or open something. Not consumed. |
Equipable items: full list and effects
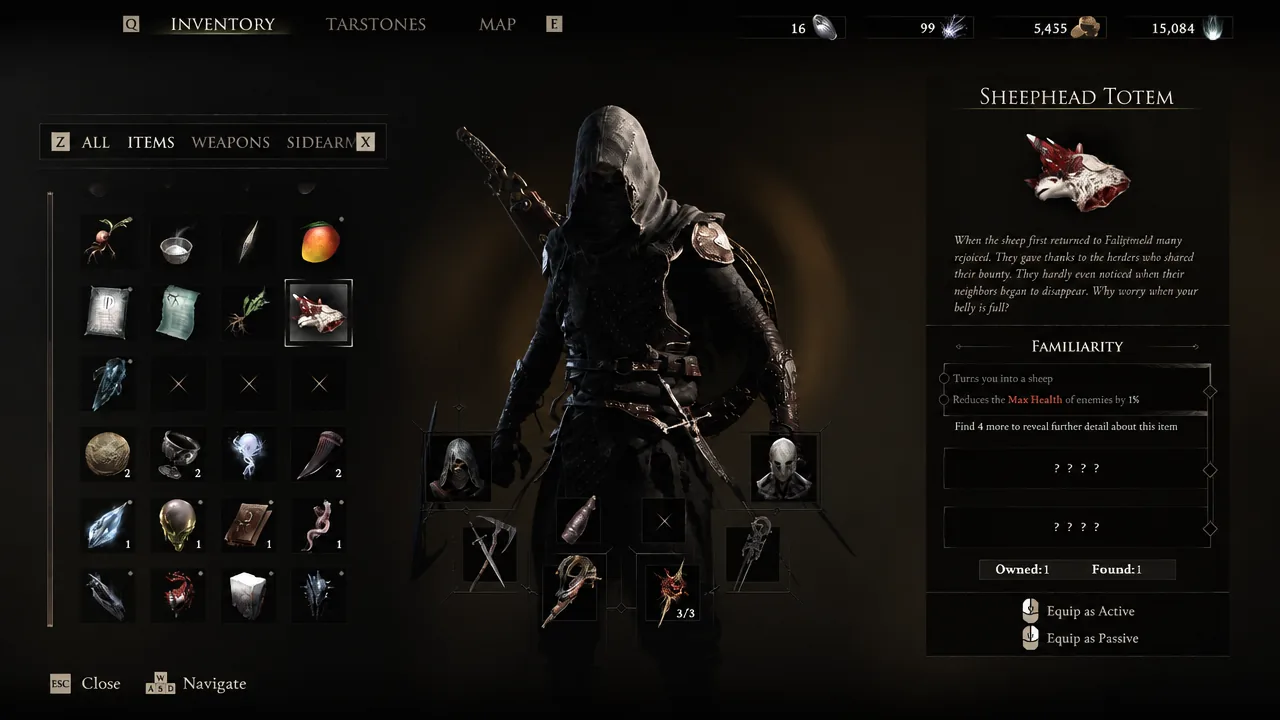
Equipables are the closest thing the game has to a build system outside of Shells and weapons. Each one can be slotted as either an active or a passive effect, and they never leave your inventory once collected. Most of the roster is dedicated to curing a specific status effect and softening the damage it deals, but a handful do something more interesting.
| Item | Effect |
|---|---|
| Bloodseed | Cures Bloodcurse and reduces incoming Bloodcurse damage. |
| Burnt Effigy | Cures Burn and reduces incoming Burn damage. |
| Galvanic Shard | Cures Lightning and reduces incoming Lightning damage. |
| Martyr’s Ash | Cures Frost and reduces incoming Frost damage. |
| Paradoxical Scripture | Cures Stasis and reduces incoming Stasis damage. |
| Tarspore | Cures Poison and reduces incoming Poison damage. |
| Common Moonshine | Restores a small amount of Health and grants slight damage reduction. |
| Weltcap | Restores a small amount of Health and grants slight health regeneration. |
| Grisha Remnant | Summons a Grisha to fight alongside you. |
| Sheephead Totem | Turns you into a sheep and cuts the maximum Health of enemies. |
| Trollweed | A rare plant of dubious use, frequently mistaken for a far more potent variety. No confirmed combat effect. |
The Sheephead Totem is the standout of the group. Shaving maximum Health off enemies applies broadly rather than to one damage type, which makes it useful in nearly every encounter instead of situationally strong. Grisha Remnant is the other one worth slotting early, since a summoned ally pulls aggro during boss openings.
Equipable tiers: 1, 10, and 50 copies
Duplicate equipables are not wasted. Picking up more copies of the same item unlocks stronger versions of its skill, on a fixed schedule.
| Copies collected | Unlocks |
|---|---|
| 1 | Tier I |
| 10 total | Tier II |
| 50 total | Tier III |
Because Tier III sits at 50 copies of a single item, it pays to pick a favorite early and hoover up every instance of it you find rather than spreading collection thin across the whole list.
Treasure items and their Coin values
Treasures do nothing in combat and nothing in your build. They exist to be traded for Coins, so carrying them around has no upside. Sell them the next time you are somewhere safe.
| Treasure | Sell value |
|---|---|
| Devout’s Chalice | 100 Coins |
| Coin of Mammon | 500 Coins |
| Winterglass Gem | 1,000 Coins |
| Muradean Tome | 1,500 Coins |
| Marsh Pearl | 2,000 Coins |
| Tooth of Nochte | 2,000 Coins |
Tip: if an item’s description reads like a curiosity and gives you no effect text, it is almost certainly a treasure. That is the fastest in-game tell before you check its category.
Currencies and Beacon consumables
These are the items that move your character forward. Coins buy upgrades, Gloom and Glimpse level the Harbinger, and two consumables are spent at Beacons to improve how you use Mether’s Pulse.
| Item | Use |
|---|---|
| Coin | The standard currency for purchasing upgrades. |
| Gloom | The white upgrade currency. Spent at Beacons to level the Harbinger. |
| Glimpse | Also spent on Harbinger upgrades. |
| Mether’s Breath | Powers fast travel between Beacons, cleanses corruption walls, and returns you to Marrow Keep. |
| Revered Gland | Consume at a Beacon to increase your capacity to use Mether’s Pulse. |
| Synaptic Vessel | Consume at a Beacon to increase the efficiency of Mether’s Pulse. |
Gloom is dropped on death, so spend it first
Gloom behaves the way souls-like currencies usually do. When you die it drops where you fell and can be recovered by returning to that spot. The practical rule is simple: bank it at a Beacon before you commit to a boss attempt or a long push into unfamiliar territory.
There is a second, easier-to-miss cost attached to Mether’s Breath. Using it to return to Marrow Keep costs you all the Gloom you are currently holding. Fast travel between Beacons and cleansing corruption do not carry that penalty, so check your Gloom total before you trigger the trip home.
Blackmarrow Key and locked treasure in Marrow Keep
The Blackmarrow Key is a mechanic item, which means it is not consumed and cannot be sold. It opens a locked treasure inside Marrow Keep. Once the key is in your inventory it stays there, so there is no risk of losing access if you leave and come back later.
You will know an item is a mechanic type rather than a resource because it does not display a stack count and it never appears in a vendor’s sell list. That distinction matters most with keys, since selling one by accident would be unrecoverable if the game allowed it.
The short version: of item management in Fallgrim: sell every treasure on sight, never sell an equipable, and treat duplicate equipables as progress toward a tier rather than clutter. Everything else is a currency or a key, and the game will not let you get rid of those by mistake.