Gaming Guide

Prodigy (Manga) Skin in Anime Expeditions: How to Get It From M.A.S.T.R.R.: Beyond Pain

Complete the limited East Town expedition event and claim the Gohan cosmetic before the reward window closes.

Complete the limited East Town expedition event and claim the Gohan cosmetic before the reward window closes.

The Prodigy (Manga) skin is a limited cosmetic for the Secret unit Prodigy, based on Gohan from Dragon Ball. You earn it by clearing the M.A.S.T.R.R.: Beyond Pain event on the East Town expedition map, then claiming the reward from the Events menu. The skin can be equipped once Prodigy is evolved to Prodigy (Rage).

Quick answer: Queue into East Town – Expedition, complete the M.A.S.T.R.R.: Beyond Pain run by defeating the BioInsect (Perfect) boss, extract successfully, then open Events, select M.A.S.T.R.R.: Beyond Pain, and press Claim All to receive Prodigy (Manga), 200 Expedition Coins, and 100 Event Coins.


What the Prodigy (Manga) skin is and the event window

Prodigy (Manga) is a unit skin, a cosmetic item that changes the appearance of the Prodigy model. Skins in Anime Expeditions attach to evolved units only, so this one applies to Prodigy (Rage) rather than the base form. You can freely equip and unequip it from the Skins menu in your inventory.

The skin comes from M.A.S.T.R.R.: Beyond Pain, one of the events added in Update 1.0 (Warriors Saga). This event runs on a longer timer than most of the update’s rotation. Because it is a limited event, complete the run and claim the reward while it remains active rather than leaving it for later.


Event rewards from M.A.S.T.R.R.: Beyond Pain

RewardAmount
Prodigy (Manga) skin1
Expedition Coins200
Event Coins100

All three rewards are granted together when you press Claim All after a successful run. The completion notification you are looking for on screen reads M.A.S.T.R.R: Beyond Pain completed!


Prepare before you queue

The expedition applies heavy modifiers that shut off much of your usual toolkit. Expect Cards Disabled, No Farms, No Anvils, No Repair, No Research Tree, No Tomes, and Traitless. Because farms are off, your Yen income depends on the run’s own economy, so early upgrade picks that boost Yen matter.

Bring strong DPS units with high stat tiers. Reliable choices for a solo clear include 8th Sword (Berserk) Kenpachi for physical AoE and Shadow (Divine) Megumi, whose Winged Spirit summon adds pressure. Prodigy (Rage) and Dark Mage (Sovereign) also work well as early placements on the payload cart.

Tip: On the Expedition Map, look for Defense nodes over Assault nodes for a smoother path to the boss. If the generated route is poor, you can restart the match to reroll the node layout before committing.


Completing the East Town expedition run
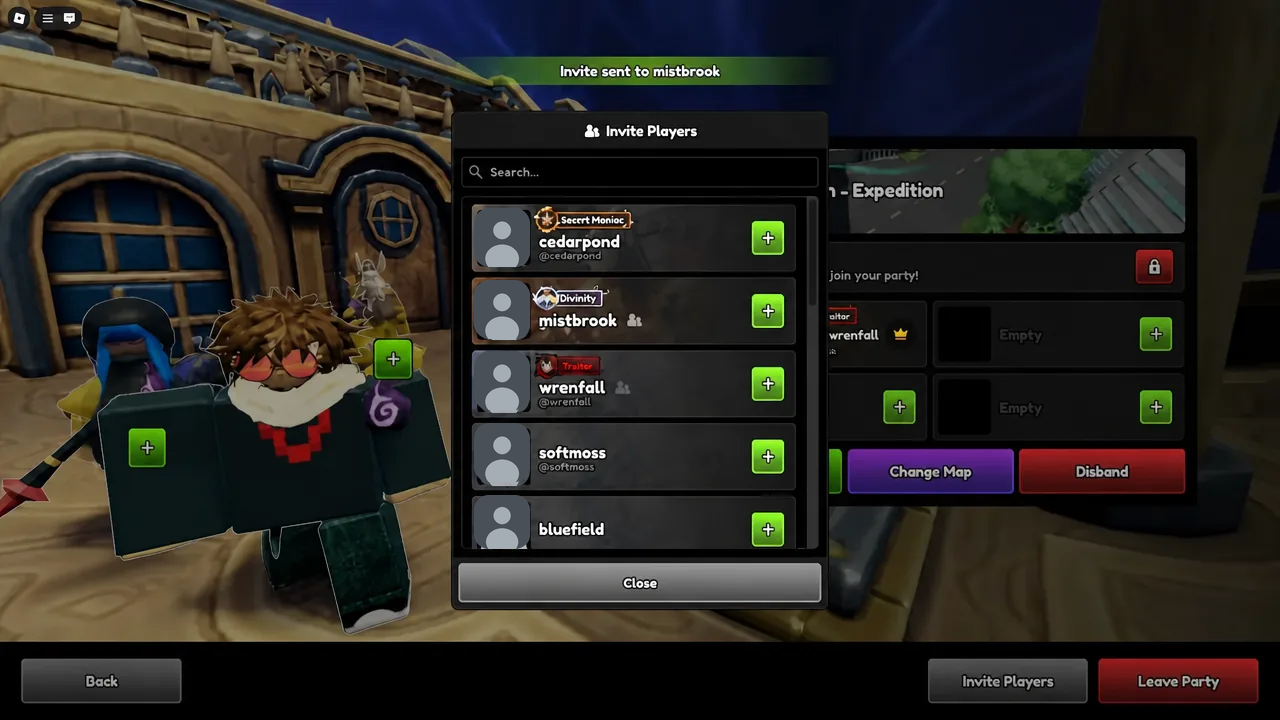
Queue into East Town – Expedition. You can run it solo or invite a friend into a private party. If you are playing with a partner, add them through the Invite Players dialog before pressing Start.
Invite Players dialog with the plus button used to send a party invite for the expedition
The Invite Players dialog, where you send a party invitation before starting the run.
When the stage loads, place your starter units onto the payload vehicle. Early options like Elf Mage and Puppet (Telekinetic) work as filler while your main carries come online. Keep the disabled modifiers in mind so you don’t waste time looking for farms or repairs.
On the Level 2 Reward screen, pick an economy buff. Yen Hunger increases your base Yen gain, which helps offset the missing farm income. Fortified Cargo is a strong defensive pick when offered, adding payload health and Yen.
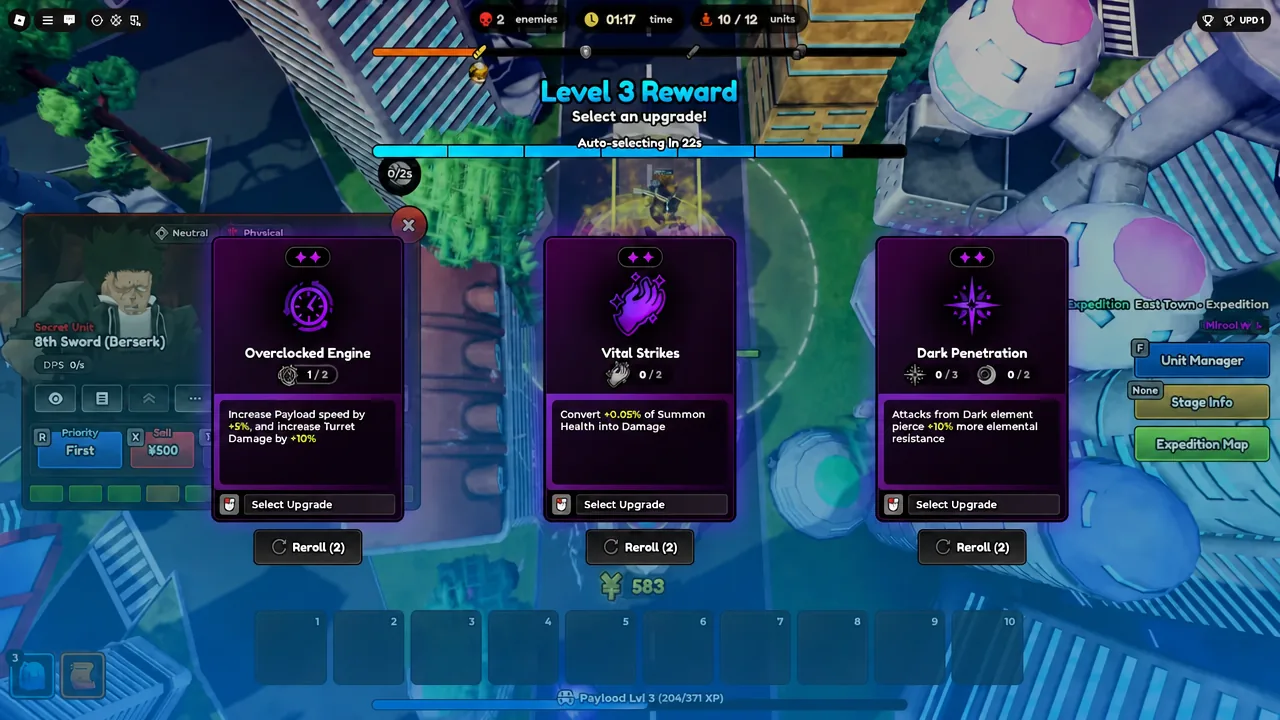
At Level 3, choose an upgrade that supports your run. Overclocked Engine speeds the payload; Fortified Cargo adds +100 payload health and +2,000 Yen where available. Make the pick before the screen auto-selects for you.
Level 3 Reward screen showing Overclocked Engine, Vital Strikes, and Dark Penetration cards
The Level 3 Reward screen, where you pick one upgrade card before auto-selection.
Keep upgrading your damage units as waves progress. Push Shadow (Divine) Megumi until his Winged Spirit dog summon unlocks, and prioritize 8th Sword (Berserk) Kenpachi toward Unrestrained Rampage for a wide AoE clear.
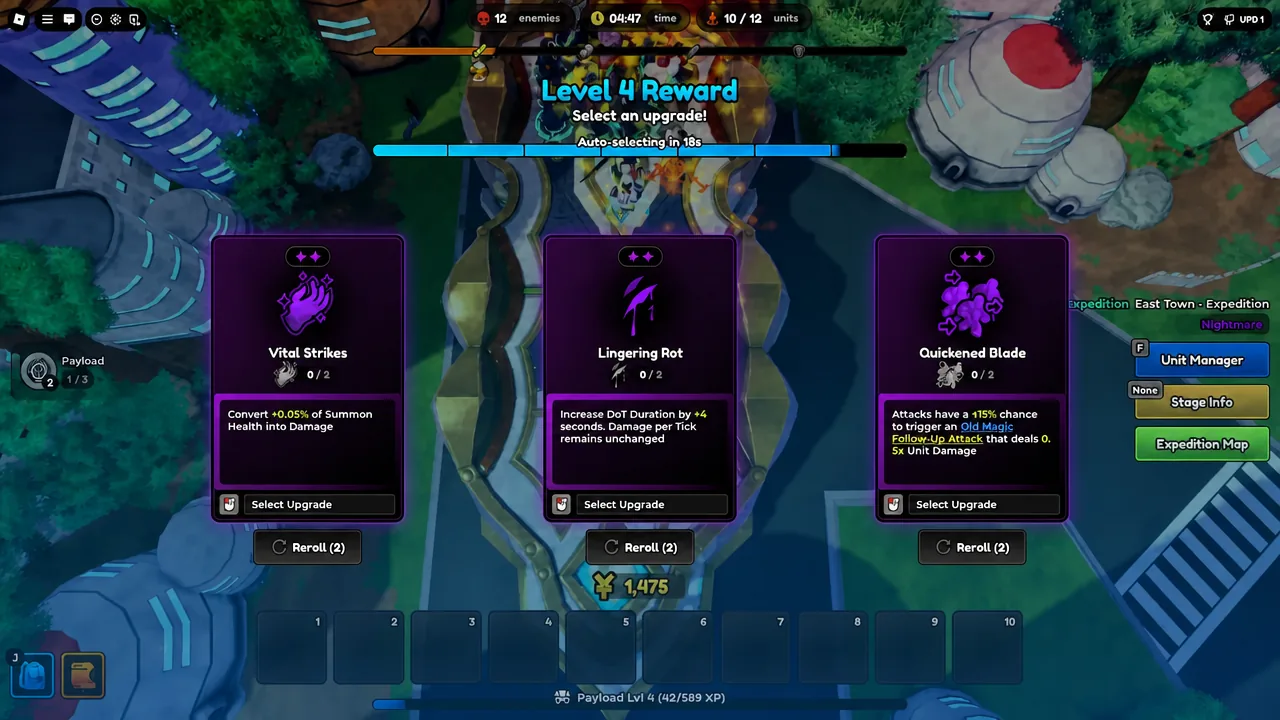
On the Level 4 Reward screen, Lingering Rot boosts damage-over-time effects, which pairs well with status-heavy units. Choose it if your team applies DOTs, otherwise take the stronger direct-damage option.
Level 4 Reward screen offering Vital Strikes, Lingering Rot, and Quickened Blade
The Level 4 Reward screen, with Lingering Rot selected to strengthen damage-over-time effects.
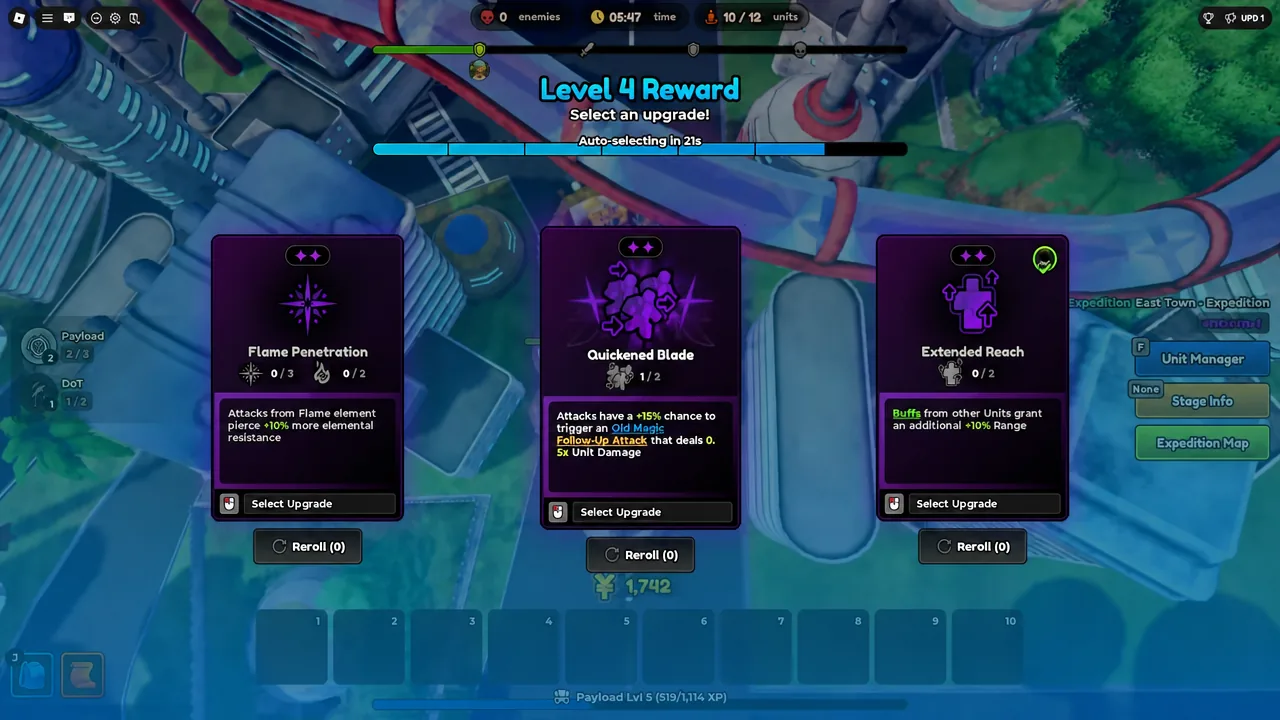
At the Level 5 Reward screen, pick from Flame Penetration, Quickened Blade, or Extended Reach based on your unit types. Reposition and upgrade your placements as you advance between checkpoints.
Level 5 Reward screen showing Flame Penetration, Quickened Blade, and Extended Reach options
The Level 5 Reward screen, where you choose one upgrade before it auto-selects.
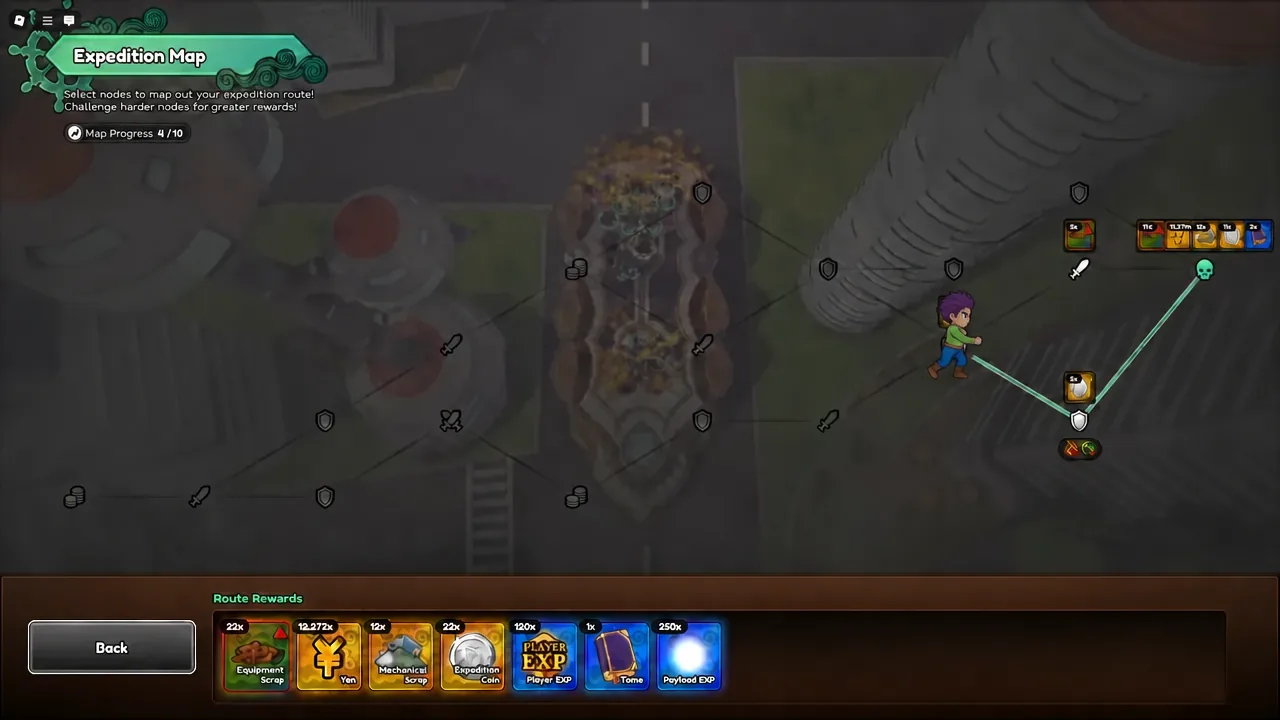
Use checkpoints to review your route. Open the Expedition Map to confirm the path to the final boss, then close it with the Back button and continue the run.
Expedition Map screen with the Back button highlighted after reviewing route rewards
The Expedition Map, showing route nodes and rewards before you exit with the Back button.

Beating the BioInsect (Perfect) boss

The final boss is BioInsect (Perfect), and it arrives with an immunity shield backed by surrounding minions. You cannot burn the boss down while the shield is active, so your targeting order matters more than raw damage here.

Open the Unit Manager and set all unit priorities to Weakest. This directs your damage at the minions that keep the boss’s immunity up, stripping the shield while you chip the payload’s attackers.
Watch for the phase transition as the boss drops below 50% HP. Once the shield is gone, reopen the Unit Manager and switch all priorities to Strongest so every unit focuses the boss directly.
Hold your payload through the final burn. Payload HP can fall dangerously low near the end, so reposition key units with Relocate if the boss shifts its attacks. When the boss dies, the M.A.S.T.R.R: Beyond Pain completed! notification appears.

Claim the skin and confirm it worked

After the boss falls, go to the checkpoint interface and confirm extraction. The Victory screen appears with your clear stats and collected drops.
Return to the main lobby and open the Events menu. Select M.A.S.T.R.R.: Beyond Pain from the list.
Press Claim All. You receive the Prodigy (Manga) skin along with 200 Expedition Coins and 100 Event Coins. The skin then lives in your inventory under the Skins menu.

You know the process worked when the reward pop-up lists Prodigy (Manga) and the two currency amounts. To equip it, open the Skins menu and assign it to Prodigy (Rage). Remember that skins attach only to evolved units, so it will not show up as an option on an unevolved Prodigy.


If the claim does not appear

The most common reason the reward fails to unlock is not finishing the run. You must both defeat BioInsect (Perfect) and confirm extraction at the checkpoint; leaving before the Victory screen means no completion credit. If Claim All is greyed out, the completion did not register, so re-run the expedition.

Since Prodigy (Manga) is a limited event reward, treat the run as time-sensitive and claim it while M.A.S.T.R.R.: Beyond Pain is still listed in your Events menu. Once claimed, the cosmetic stays in your inventory permanently, ready to equip on Prodigy (Rage) whenever you want the Gohan manga look on the field.