Credits come in slowly in Star Wars Zero Company, and the Den will happily take every one of them. Facilities, Crew perks, and weapon upgrades all compete for the same pool, while the Holotable asks you to commit influence to zones that pay out on a completely separate track. Getting the order right early means more equipment, more Operator slots, and more income for the rest of the campaign.
Quick answer: Unlock the Black Market first, then push Networking, then take Utility Items to Level 5 for an extra utility slot on every Operator. On the Holotable, bank influence into Zone Cresh, Zone Grek, and Zone Leth before anything else.
Den upgrade priority order (Facilities, Crew, Weapons)
Den Level gates what you can buy, so the sequence below assumes you take each entry as soon as it becomes available rather than saving up for something further down the tree.
| Priority | Upgrade | Why it comes first |
|---|---|---|
| 1 | Black Market (Facilities) | Opens the shop for Operator equipment; available at Den Level 1 |
| 2 | Black Market Quality I (Facilities) | Raises the tier of items that appear in stock |
| 3 | Networking (Facilities) | Increases influence earned, including from placed Contacts |
| 4 | Teamwork III (Crew) | Unlocks the Lounge, which gives Bond XP to benched Operators |
| 5 | Utility Items V (Crew) | Grants an additional utility slot to every Operator |
| 6 | Weapon Mods (Crew) | Adds a weapon mod slot across the roster |
| 7 | Crew Focus (Crew) | Adds focus points for ability use |
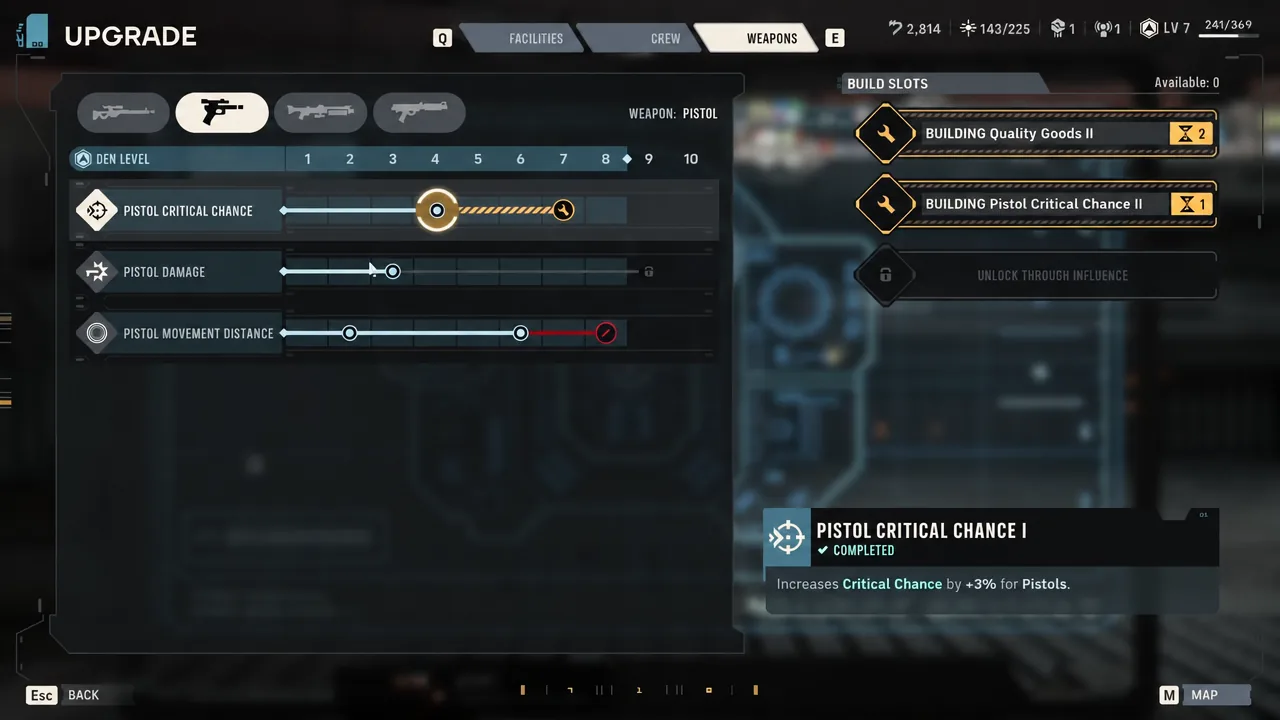
| 8 | Pistol / Rifle Movement Distance (Weapons) | Available at Level 2; more repositioning per turn |
| 9 | Pistol / Rifle Damage (Weapons) | Available at Level 3; flat damage beats situational crit |
Droid Repair Bay and the first Medbay level arrive at Den Level 2 and are worth picking up. Deeper Medbay tiers can wait if your squad is finishing missions without stacking Injuries, and Crew Quarters is safe to skip for a long time, since a small, well-equipped core team performs better than a wide bench.
Black Market and Networking: The two Facilities that compound
The Black Market is the only reliable way to buy specialized gear on your own schedule instead of waiting for mission drops. Unlock it immediately, then take the first level of Black Market Quality so the stock rotates in higher-tier items. Further Quality levels are a lower priority unless you are sitting on spare Credits, because you still have to pay for whatever appears.
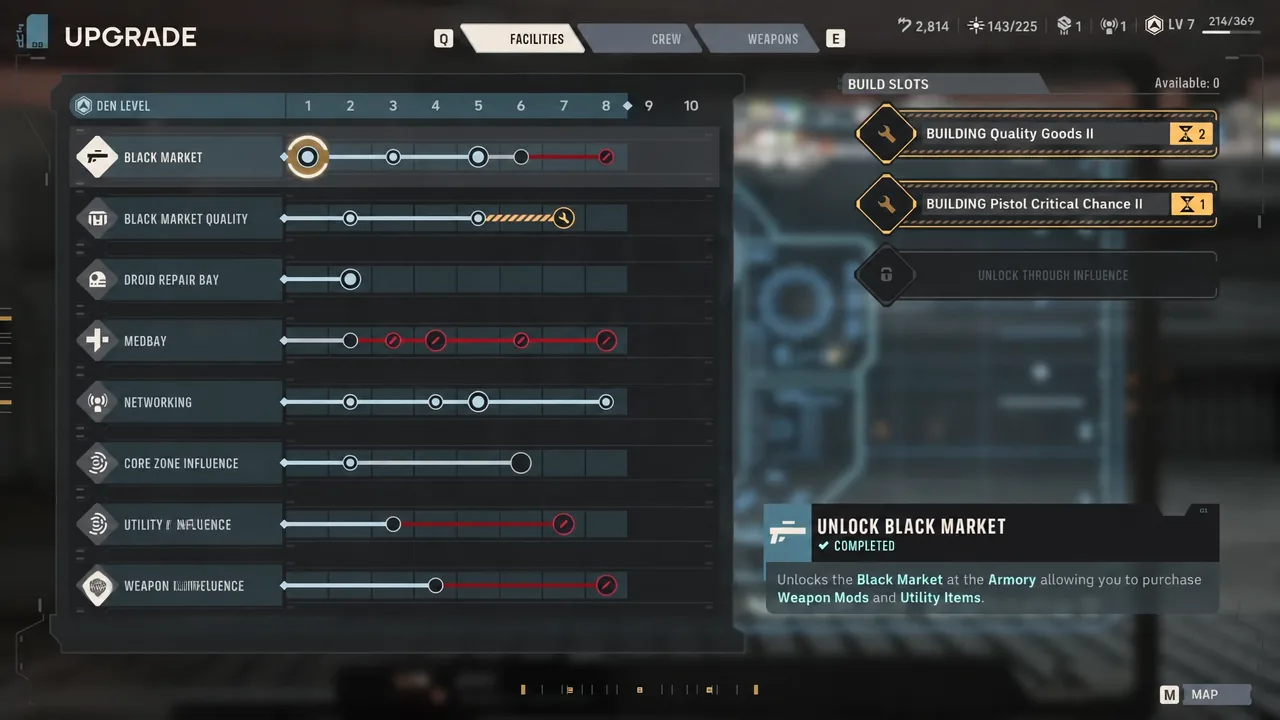
Networking is the quiet one. It raises how much influence you generate, which matters because influence is what unlocks zone rewards, and zone rewards are where the permanent squad-wide buffs live. Maxing Networking early makes every Contact you place and every Operation you run worth more. Core Zone Influence and Zone Influence upgrades are worth taking selectively, when a specific zone holds a reward you want.
Crew upgrades that add slots to every Operator
Once the basic Facilities are in place, shift spending to Crew. Teamwork Level 3 opens the Lounge, where Operators who sit out a mission still earn Bond XP. Because it applies to everyone you are not fielding, it quietly speeds up progression across the whole roster.
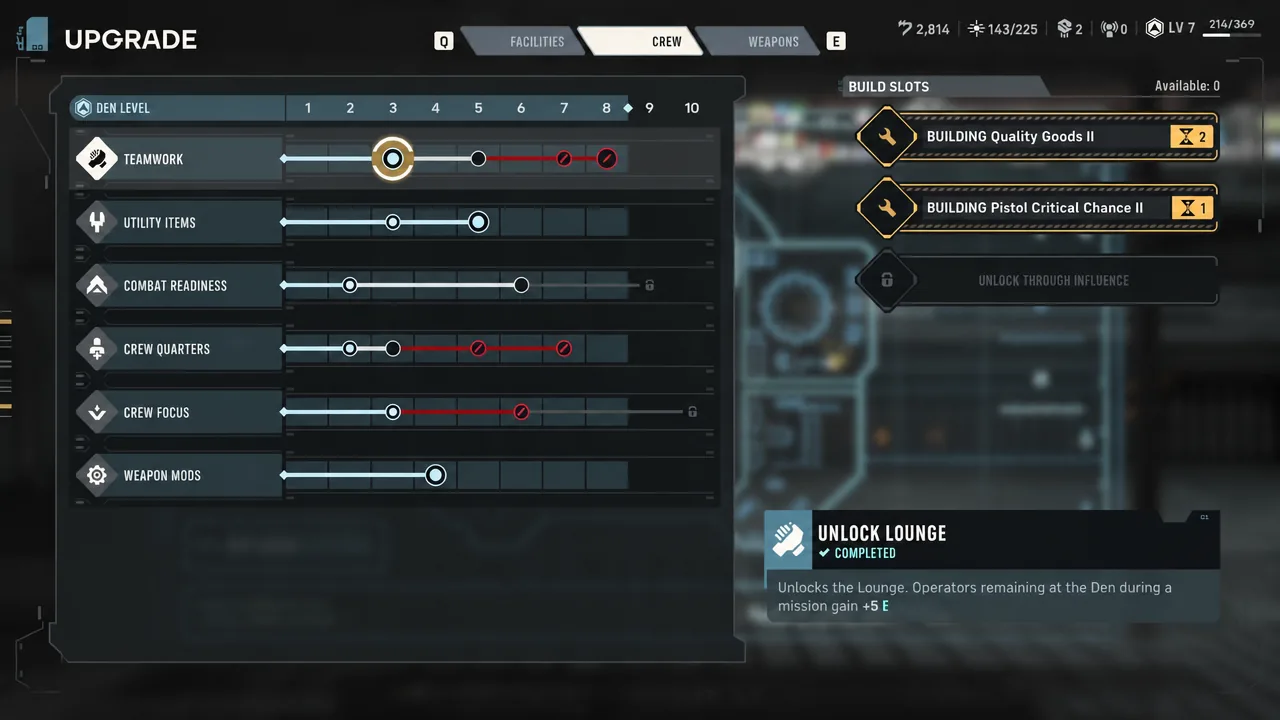
Utility Items is the standout. At Level 5 it grants an additional utility slot to all Operators, which means a second grenade, medpac, or modulator on every mission for the rest of the campaign. Weapon Mods works the same way for mod slots, and Crew Focus adds focus points so abilities fire more often. Combat Readiness is worth a look too, since it starts fights with Advantage banked.
You can confirm the slot upgrades landed by opening any Operator’s loadout after the purchase completes. The extra utility or mod slot appears empty and immediately accepts an item.
Weapon upgrades: Damage and movement over critical chance
Weapon upgrades apply per weapon category, so they only pay off if multiple squad members carry that type. Pistols and rifles are the safest investments for most rosters. Movement Distance unlocks at Level 2 and is unusually strong, because extra reach affects every move an Operator makes, which translates into better flanks and better cover.
Damage upgrades open at Level 3 for every category except the Longarm and should come next. Critical Chance is the weakest of the three unless you are deliberately building around crit with skills, gear, and Bond upgrades. Range and Overwatch is situational, and how much it matters depends on the difficulty you picked, so field-test your hit chances before committing Credits to it.
How to earn Zone Influence
Influence mostly comes from Operations run at the mission table. Many Operations force a choice between outcomes or between which zone gains reputation, so read the options rather than clicking through. The other lever is Contacts. Placing a Contact in a zone grants a meaningful chunk of influence, starting at +7, and Networking increases what you get.
Each zone holds three reward tiers tied to your reputation level there. Rewards apply as soon as the tier unlocks, so a squad-wide health or focus bonus takes effect on the next mission without any further action.
Best zones to invest influence in first
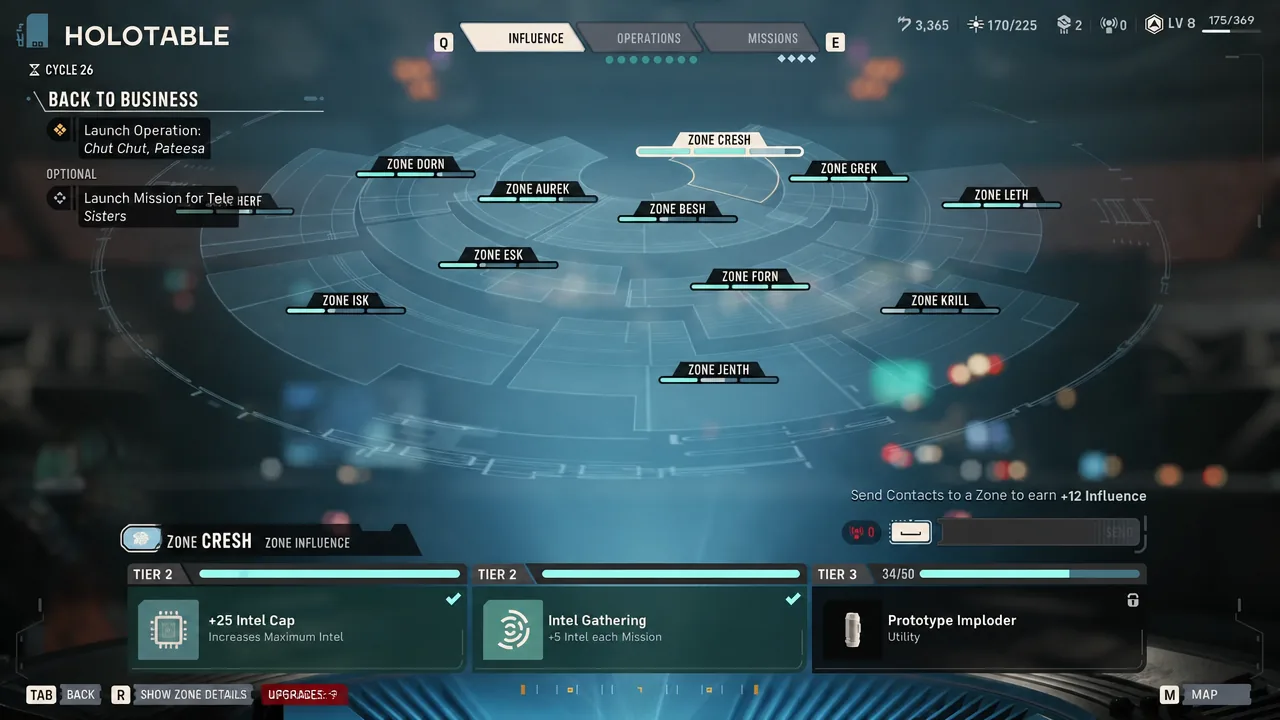
The right-hand side of the Holotable is the strongest opening play. Zone Cresh feeds you intel, which is the currency Operations consume, so it keeps the whole influence engine running. Zone Grek adds focus points and then boosts influence gains from Operations and Missions, effectively paying for itself. Zone Leth increases Credit income per mission and ends with better Black Market stock, which ties straight back into your Den spending.
After that, the picture depends on what you need. Zone Dorn is the only route to an extra Upgrade Facility Slot. Zone Forn ends with a weapon mod slot for every Operator. Zone Besh has one of the strongest mods in the game at Tier 3, and Zone Aurek and Zone Esk both stack maximum health across the roster.
Tier 1 zone hopping
You do not have to commit to a single zone. Tier 1 rewards cost the least reputation, and several are strong enough to justify spreading influence around instead of pushing one zone to Tier 3. Zone Aurek, Zone Dorn, Zone Herf, Zone Jenth, and Zone Krill all have Tier 1 payouts worth grabbing on the way past.
All Zone Influence rewards by tier
| Zone | Tier | Reward |
|---|---|---|
| Aurek | 1 | +1 Roster Capacity |
| Aurek | 2 | +4 Max Health for all Operators |
| Aurek | 3 | Medpac Mk. IV (heals 30% of an ally’s Health; not usable on Droids) |
| Besh | 1 | Repulsor Units Mk. II (+1.0m Movement on all moves) |
| Besh | 2 | +2 Focus Points for all Operators |
| Besh | 3 | Weightless Stabilizer mod (33% chance to gain Evasion when firing) |
| Cresh | 1 | +25 maximum intel |
| Cresh | 2 | +5 intel each mission |
| Cresh | 3 | Prototype Imploder (high-damage grenade) |
| Dorn | 1 | +100 Den Level XP |
| Dorn | 2 | +2 Capacitor |
| Dorn | 3 | +1 Upgrade Facility Slot |
| Esk | 1 | Trauma Kit Mk. II (Rallied allies return fully healed; 20% chance no Injury) |
| Esk | 2 | +4 Max Health for all Operators |
| Esk | 3 | Gas Dispenser Mk. IV (Dazes all units in the target area) |
| Forn | 1 | Advanced Range Scope (-10% range hit penalty) |
| Forn | 2 | Assassin’s Scope (+12% Critical Chance with that blaster) |
| Forn | 3 | +1 Weapon Mod Slot for all Operators |
| Grek | 1 | +1 Focus Point for all Operators |
| Grek | 2 | Additional influence from Operations and Missions |
| Grek | 3 | Custom RSKF-44 (short-range armor-piercing pistol shot) |
| Herf | 1 | +1 Capacity |
| Herf | 2 | +30 Bond XP for everyone |
| Herf | 3 | Lightning Modulator (100% chance to Shock on hit) |
| Isk | 1 | Advanced Tracking Scope (+2 Assist Damage) |
| Isk | 2 | +175 Den Level XP |
| Isk | 3 | Ion Blaster Mk IV (weakens Ray Shields; strong against Droids) |
| Jenth | 1 | +2,500 Credits |
| Jenth | 2 | +1 item at the Black Market |
| Jenth | 3 | Exotic item |
| Krill | 1 | +1 Roster Capacity |
| Krill | 2 | Reinforced Underlay Mk. III (+3 Defense) |
| Krill | 3 | Wildfire Modulator (4 stacks of Burning on hit) |
| Leth | 1 | +20 Bond XP for everyone |
| Leth | 2 | +250 Credits each mission |
| Leth | 3 | Higher quality Black Market items |
Note: the two economy zones are the ones people underrate. Cresh keeps intel flowing so you can actually run Operations, and Leth keeps Credits coming in so the Den upgrades above stay affordable. Combat rewards like the Lightning Modulator and the Weightless Stabilizer are excellent, but they are much easier to reach once your income is stable.