Contacts are the fastest way to push a zone over an Influence threshold in Star Wars Zero Company, and they are also the easiest resource to miss. They do not drop from routine work, they are not something you can farm on demand, and the game only tells you where they are if you stop and read a mission’s reward panel before committing to it.
Quick answer: Open the Holotable in The Den, go to the Missions tab, and check the rewards listed in the bottom-right corner of each mission. Complete the ones that show +1 Contact or +2 Contacts, then switch to the Influence tab and send those Contacts to a zone of your choice for seven Influence each.
What a Contact is worth
A Contact is a spendable resource, not a passive bonus. Sending one to a zone grants seven Influence there, and the zone is entirely your choice — nothing locks a Contact to the planet or region it came from. There is no cap on how many you can stockpile and no cap on how many you can dump into a single zone, so saving three or four and spending them all at once is a legitimate way to jump a tier in one go.
Influence itself is an experience track tied to twelve zones spread across the Core, Mid, and Outer rings of the galaxy map. Each zone has three tiers, each tier pays out a reward, and the thresholds are identical everywhere. Influence also cannot be lost once earned, so there is no penalty for spreading Contacts thin other than slower payouts.
| Tier | Influence required | Contacts needed if used alone |
|---|---|---|
| Tier 1 | 20 | 3 |
| Tier 2 | 30 | 5 |
| Tier 3 | 50 | 8 |
Tier rewards range from utility items and weapon mods to structural upgrades, including improving the quality of gear available in the black market. That makes concentrating Contacts on one or two zones far more useful than sprinkling them across the map.
Finding missions that pay out Contacts
Contacts come from story progression and from missions that specifically list them. Operations are the workhorse for ordinary Influence gains, but they are not a dependable Contact source, so the Missions tab is where you should be looking.
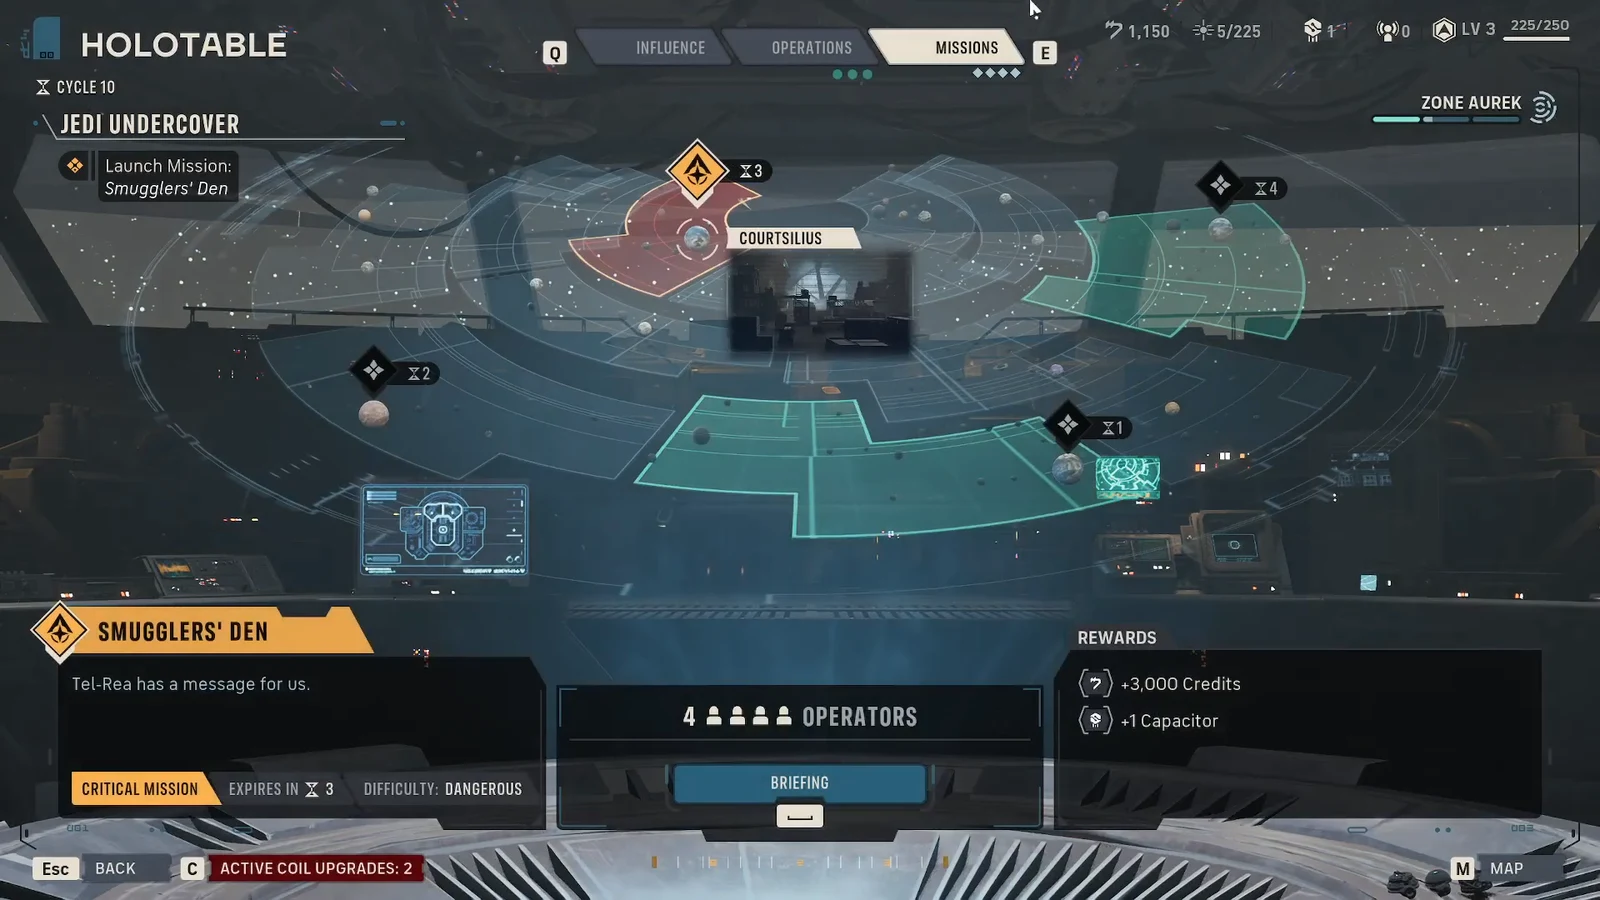
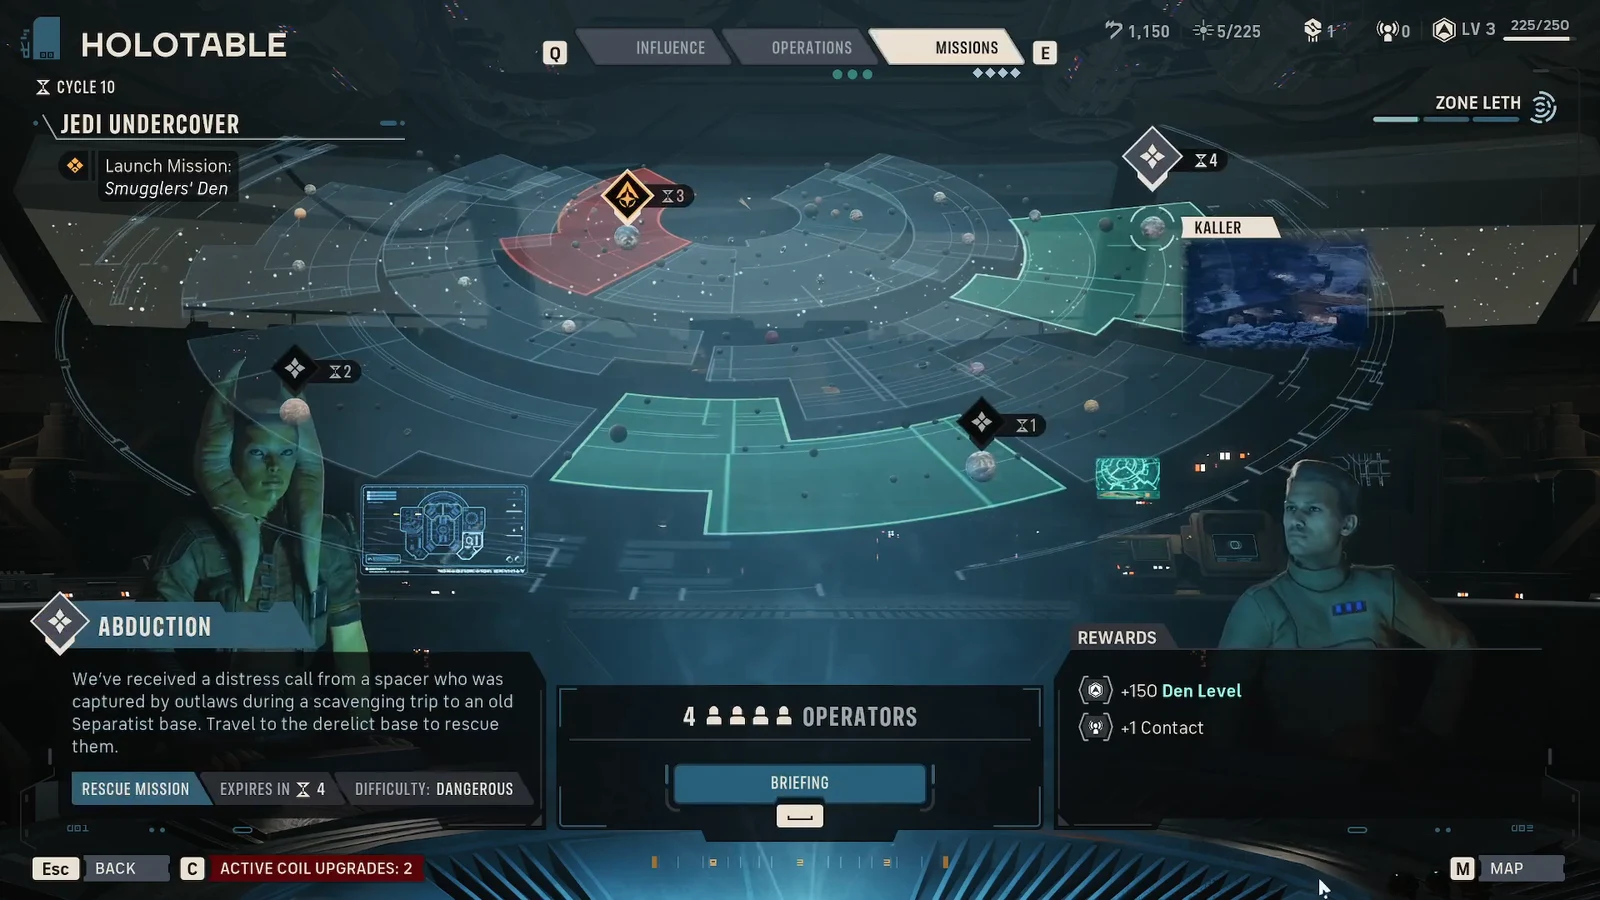
Payouts are not uniform. Two examples from the mission board illustrate the spread:
| Mission | Contact reward | Influence value |
|---|---|---|
| Hostage Situation | +1 Contact | 7 |
| Silent Running | +2 Contacts | 14 |
Note: missions and Operations both expire from the board after a while, so a mission offering two Contacts is worth prioritizing over one offering a single Contact if you cannot fit both into the same cycle.
Spending Contacts in the Influence tab
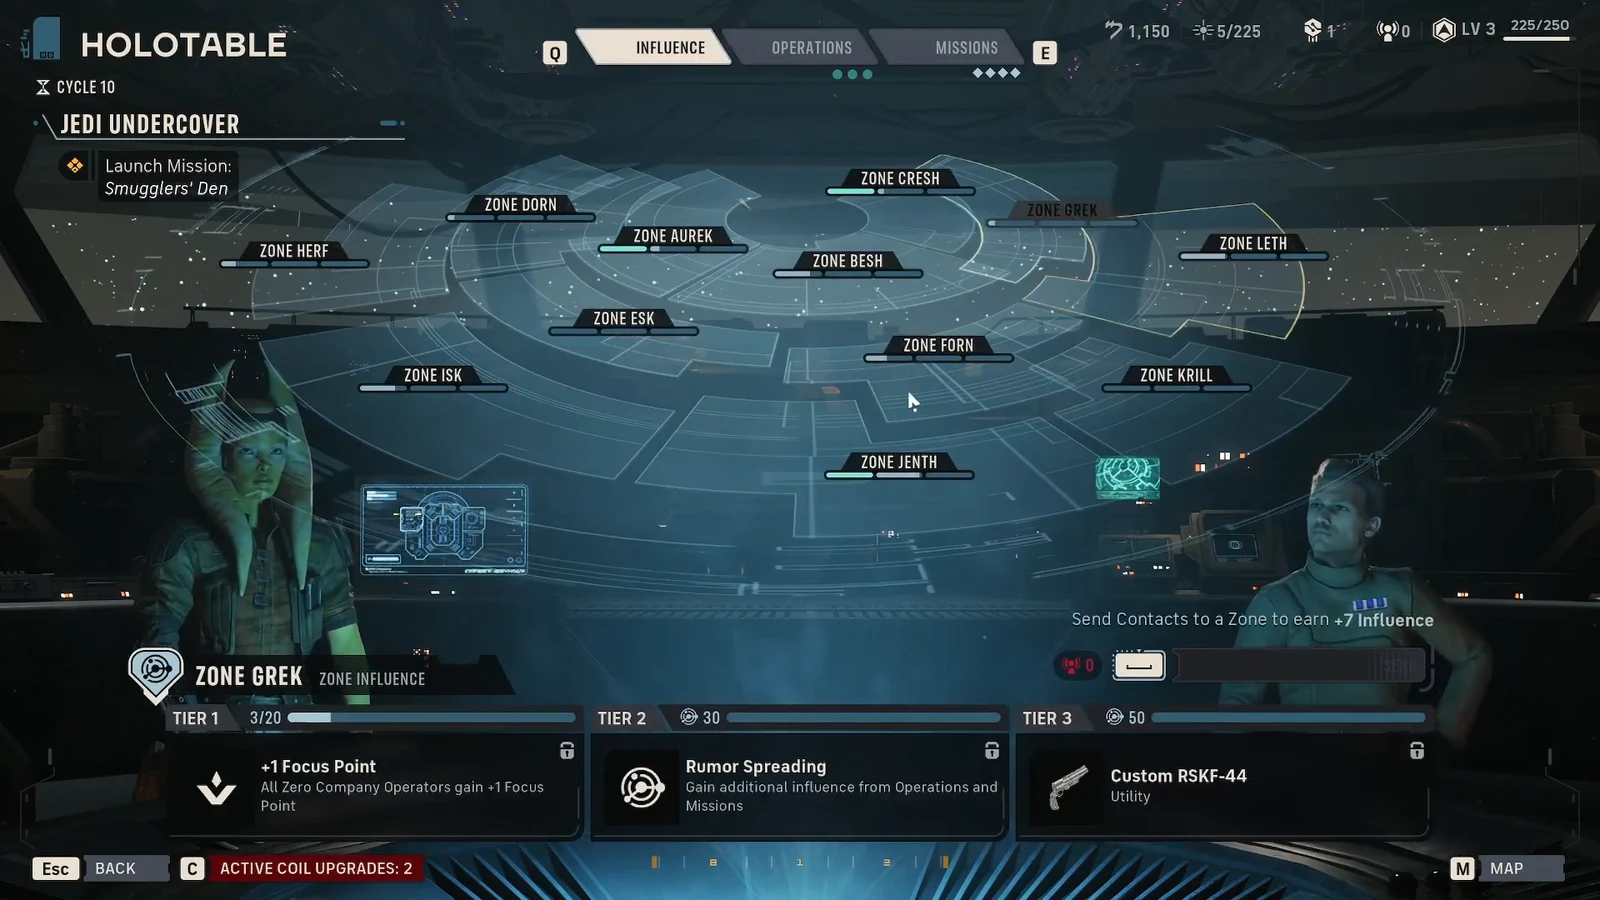
You know it worked when the zone’s Influence bar jumps by seven per Contact and your Contact count drops accordingly. Cross a threshold and the tier reward unlocks immediately — items and mods go straight into your inventory, while upgrades like better black market stock apply the next time you check.
Getting more out of each Contact
The Den’s upgrade menu has a Facility tab, and inside it is a node called Networking. Buying it with credits raises what you get back from each Contact, which is why it is worth grabbing early rather than after you have already burned through a stockpile. Fully upgrading the node is the better long-term investment.
The same Facility menu contains planet-specific nodes tied to the Core, Mid, and Outer zones. Those give you a quick burst of progress across the map, but they are a secondary priority behind Networking.
Other ways Influence comes in
Contacts are the burst option. Steady Influence mostly arrives from Operations, which award it in the zone where the Operation is located on the map. If you are trying to finish a specific zone, take every Operation that appears in that part of the galaxy. The amounts are small individually, but you can run several per cycle if you have the Intel to spend.
| Source | How it behaves |
|---|---|
| Operations | Frequent but small; applied to the zone the Operation sits in |
| Contacts | Rare and finite; seven Influence, any zone you choose |
| Mission rewards | Listed in the reward panel before launch |
| Den Facility upgrades | One-time boosts bought with credits |
| Zone Grek Tier 2 reward | Unlocks as a tier payout in that zone |
Operations do not always show their rewards before you commit, which makes them a partial gamble. Missions do, which is the whole reason the reward panel is the only screen that matters when you are hunting Contacts. Read it every time, bank what you get, and spend the pile in one shot on the zone whose tier 3 reward you actually want.