Supply Caches are the COG resupply crates you lean on all through the E-Day campaign. Each one is a squat grey armoured box with blue lights and a round hatch on the front, usually planted at a COG position just before a big fight. Walk up, open it, and you get a full loadout menu where you can re-arm, re-mod, and refill before the Locust come at you again.
Quick answer: Walk up to a cache, press X on the “Use Supply Cache” prompt, then swap your weapons, grenade, Tactical Gear and Armor Mods, fit mods, and refill ammo. There is no confirm step — changes apply as you make them, and B backs you out to the world.
What a Supply Cache does and where you first use one
Opening a cache brings up a full-screen menu titled SUPPLY CACHE. From there you change which weapons you carry, your grenade or deployable, your Tactical Gear and your Armor Mods, and you fit mods to all of them. The game’s own tutorial card also notes that caches refill your ammo. Every weapon you pick up in the field gets added to the cache’s inventory, so a gun you dropped hours ago can be taken back at any later cache.
Your first one is in Act 2, Chapter 2, Hold the Line. Outside the stadium, your “Get your orders” objective gains a sub-objective to “Open the Supply Cache”, and a “SUPPLY CACHE NEARBY” alert appears on the left of the screen. The cache sits under the yellow elevated rail structure, inside the ring of sandbags and barbed wire where your squad is waiting. Press X on the “Use Supply Cache” prompt to open it.
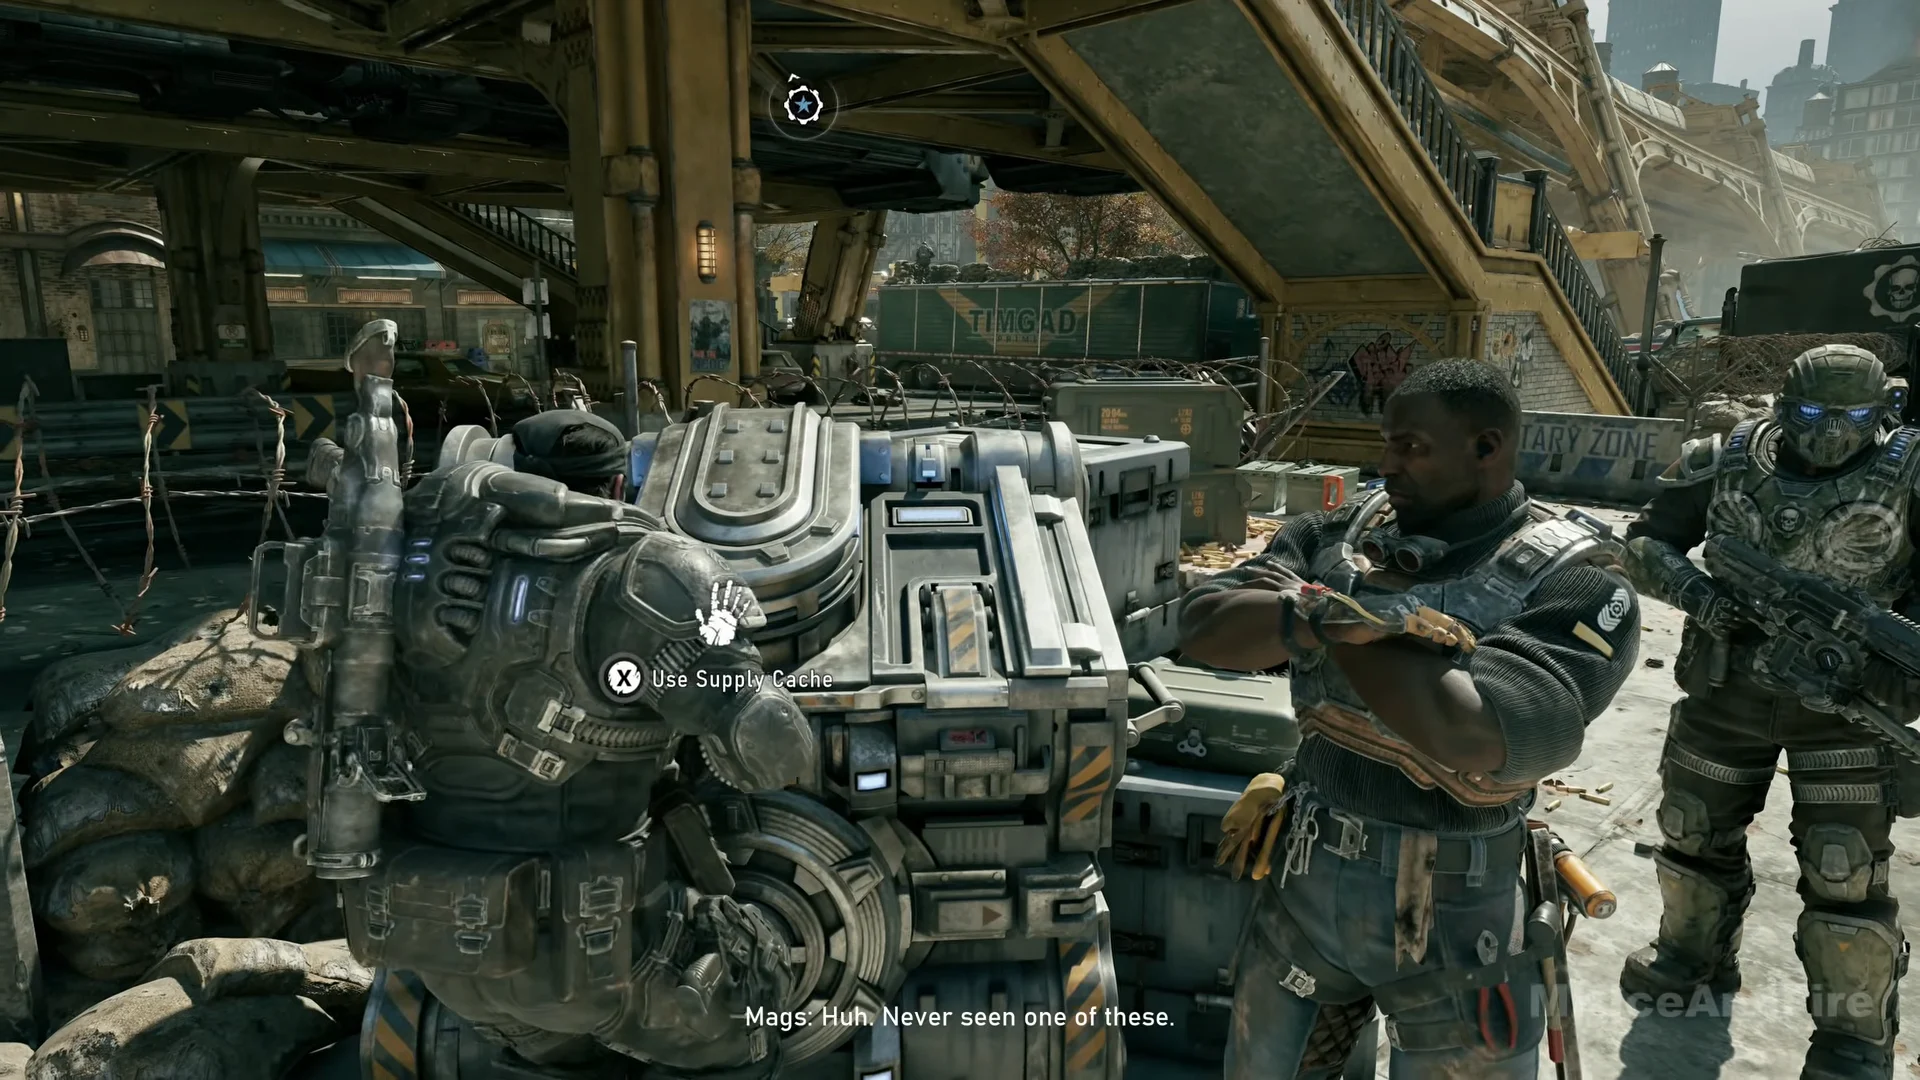
Opening it the first time shows two tutorial cards one after the other. Press LB or RB to flip between them, B to close. After that the sub-objective completes and the game saves a checkpoint — the only reason a save follows this cache is because an objective finishes here, not because caches save on their own.
The loadout screen and its slots
The left column holds four slots, each with its item name, a picture and an ammo count. At the first cache they read like this:
| Slot | Item | Ammo |
|---|---|---|
| Primary | Prototype Lancer | 600/600 |
| Secondary | Gut-Puncher | 12/12 |
| Sidearm | Snub | 132/132 |
| Equipment 1 | Frag Grenade | 2/2 |
Two more tiles appear next to these as the chapter goes on. Tactical Gear shows up from the Octus Way Station cache, and it carries a counter like “MODS: 0/12”. Armor Mods appears from the police precinct cache as “COG ARMOR” with a counter like “MODS: 2/20”. The right side of the screen shows the highlighted item’s mod panel — for example “COG ASSAULT RIFLE / PROTOTYPE LANCER MODS” — with a Perfect Reload mod row and numbered mod slots 1, 2 and 3. Each slot reads EMPTY, SLOT LOCKED, or the name of the mod fitted in it.
Primary and Secondary draw from the same weapon list, and clicking the right stick swaps the two. That means you can carry two rifles if you want to.
Weapons you can equip
At the first cache the weapon grid holds Lancer Mk1, Prototype Lancer, Hammerburst, Gnasher, Breechshot and Gut-Puncher. The list grows as you find more guns. The Longshot sniper rifle is in it by the cache before the Seeder, and the Incinerator joins at the Fairlight Outpost hangar cache in Act 3. At that point the grid shows eight weapons.
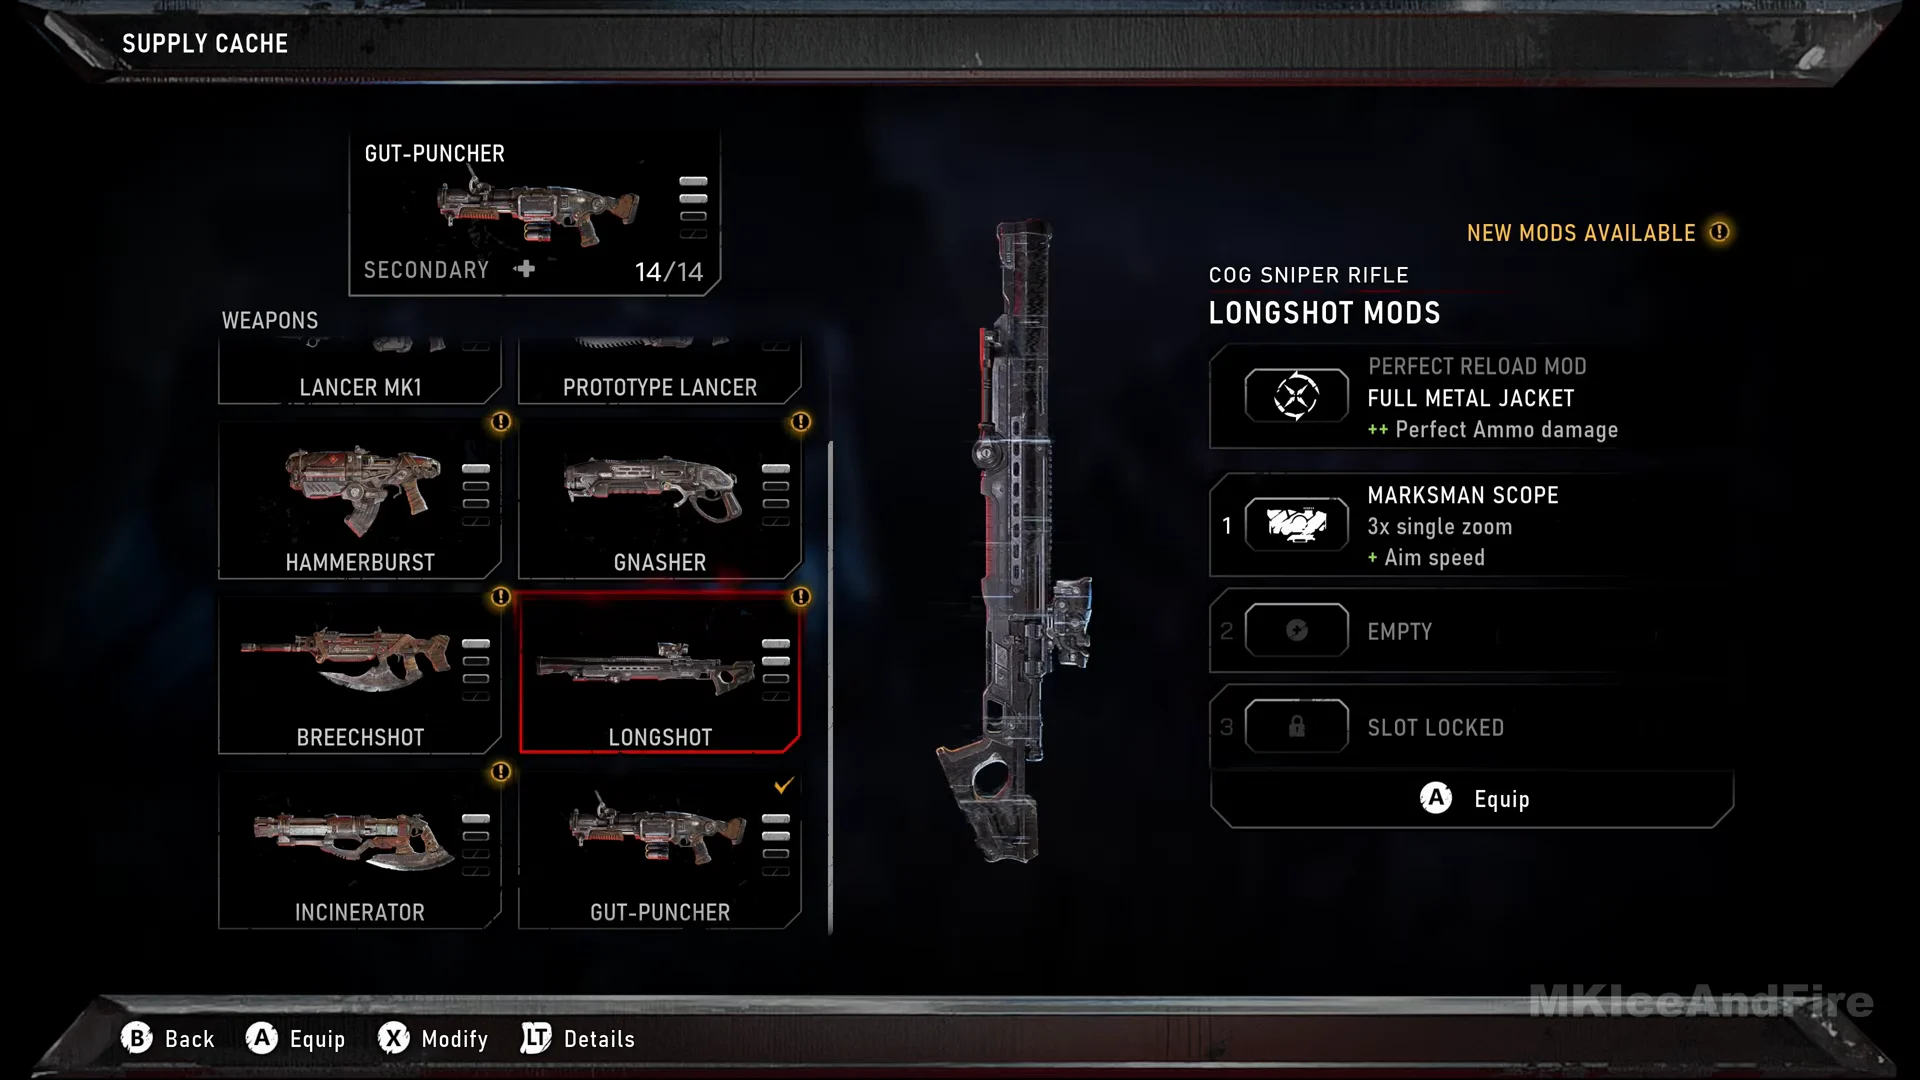
The eight at that cache are Lancer Mk1, Prototype Lancer, Hammerburst, Gnasher, Breechshot, Longshot, Incinerator and Gut-Puncher. Each entry lists its class, such as “LOCUST PRECISION RIFLE / BREECHSHOT” or “COG SHOTGUN / GNASHER”. The weapon already sitting in a slot carries a tick in the grid.
Equipment 1 is the grenade-or-deployable slot. Choices seen at the Act 3 Chapter 2 cache are Frag Grenade, Smoke Grenade, Razor Mine and Stim Grenade. The slot also shows whatever you are carrying when you open the cache, so a Machine Gun Sentry or an Incendiary Grenade can appear there too, always at 2/2.
Tactical Gear and Armor Mods
Tactical Gear is a rechargeable item you deploy by clicking both sticks together, used to hit enemies or hand your squad a combat advantage. You start with two choices, with more added as you go:
- Adrenaline Injector — refills health and grants a large amount of Adrenaline, reducing damage taken and raising damage dealt while active.
- Sonic Disruptor — stuns Drones and disrupts other enemies in a forward cone, interrupting their attacks.
- Pulse Drone (added in Act 3) — marks enemies across a large area, making them easier to see.
- Stim Vaporizer (by Act 3 Chapter 3) — creates a large area that heals and revives Gears.
Armor Mods upgrade your COG Armor and tune your Gear’s abilities to how you play. The COG Armor tile has three numbered slots, with one open and two locked when it first appears. The first two mods in the inventory are Hardened Cover (improved defense in cover) and Rock Steady (improved weapon recoil). Armor Mods are found in Hardcases around the city or earned by completing Secondary Objectives.
Fitting mods at a cache
Mods you pick up in the field are not usable until you reach a cache. Open a Hardcase and the game reminds you: “Get back to a Supply Cache to register and equip your mods.” Until you do, that mod or slot is not on the weapon.
Some mods change your ammo totals on the spot. Fitting Extended Magazine takes the Snub from 132/132 to 136/136, and Extended Belt takes the Gut-Puncher from 12/12 to 14/14. You unlock new Weapon Mods and Mod Slots by finding Hardcases and finishing Secondary Objectives.
How to find caches around Kalona
There are three ways the game points you to a cache:
- A “SUPPLY CACHE NEARBY” pop-up appears in the top-left of the screen when one is close.
- Tac-Com points the way — hold LB to see your objective and to find Collectibles, Supply Caches and Hardcases.
- The map marks them with round dark icons carrying a wrench-in-cog symbol; put the cursor on one and it reads “Supply Cache”.
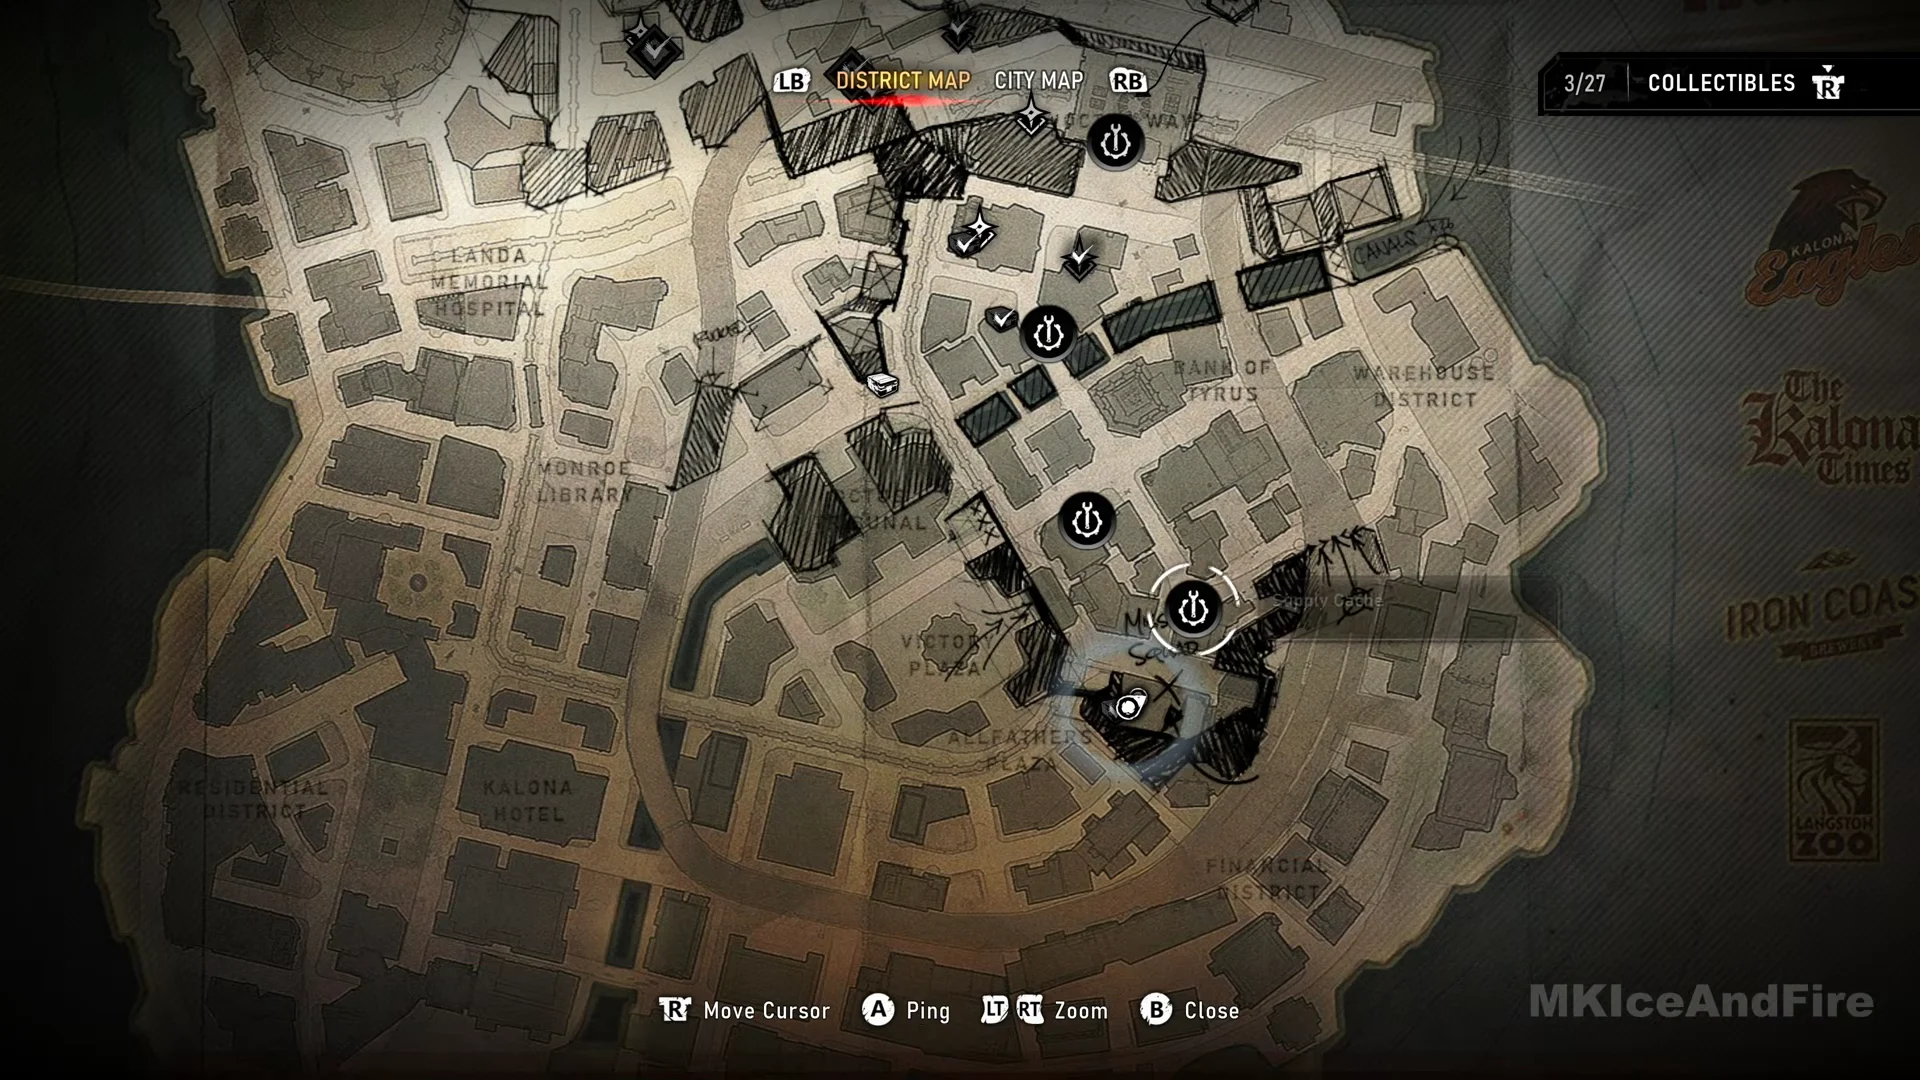
Caches sit at COG positions and tend to show up right before heavy fighting. Spots you pass through in and after Hold the Line include under the rail by the stadium, a corner of the Octus Way Station concourse, a corner diner across from the Beast Arcade sign, the police precinct lobby, beside a COG truck in the street, by the iron fence at a COG barricade, the hotel lobby, the scaffold walkway before the Seeder, the Centaur depot, the Fairlight Outpost hangar and sub-station, and the command post later on.
Cache screen controls (Xbox)
Close and Back are always B, Select and Equip are A, Modify is X, the Primary/Secondary swap is a right-stick click, and Details is LT. The exact prompts change with the slot you are on:
| Where you are | Buttons |
|---|---|
| Primary or Secondary | B Close, A Select, X Modify, right-stick click Swap, LT Details |
| Sidearm | B Close, A Select, X Modify, LT Details |
| Equipment 1 | B Close, A Select, LT Details |
| Tactical Gear | B Close, A Select, X Modify |
| Armor Mods | B Close, X Modify |
| Weapons grid | B Back, A Equip, X Modify, LT Details |
| Mod slots | B Back, A Change Mod, X Remove Mod (when filled) |
| Mod list | B Back, A Equip Mod |
How you know your changes stuck
There is no confirm button on the cache screen. Everything applies the moment you make it. Ammo counts in the menu read full for what you carry — 600/600, 12/12, 132/132, 2/2 — and capacity mods bump those totals immediately. A picked-up rifle carrying partial ammo swaps back to a full stored one: choose the Prototype Lancer from the grid and it returns at 600/600 in place of a 300/300 field gun. When you are done, press B to drop straight back into the world with your new loadout live.