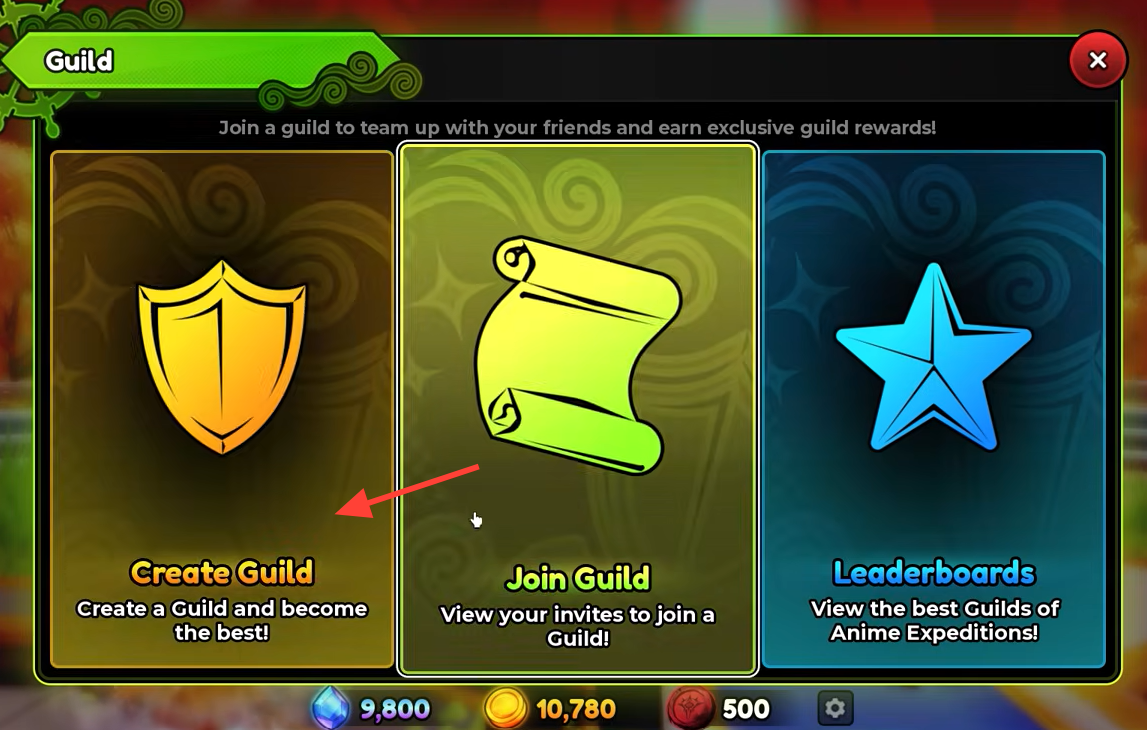
Guilds in Anime Expeditions run through a single menu that handles three things at once. You can start your own group, accept an invite to join someone else’s, and check the leaderboards for the top guilds. The catch is that founding a guild is locked until you hit a specific level, and setting a custom icon depends on a Roblox value that is easy to grab from the wrong place.
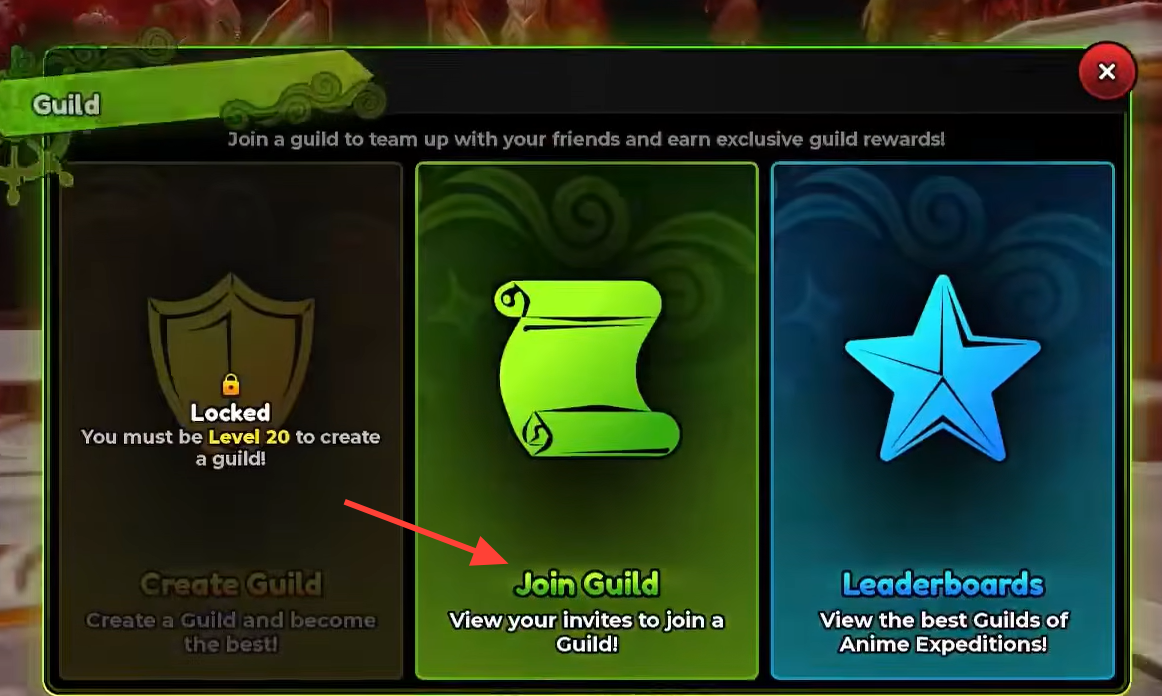
Quick answer: Reach Level 20 to unlock guild creation, then paste a numeric Roblox decal asset ID into the Image ID field to set your guild icon. Below Level 20, join through an invite using the Join Guild option.
Guild requirements in Anime Expeditions
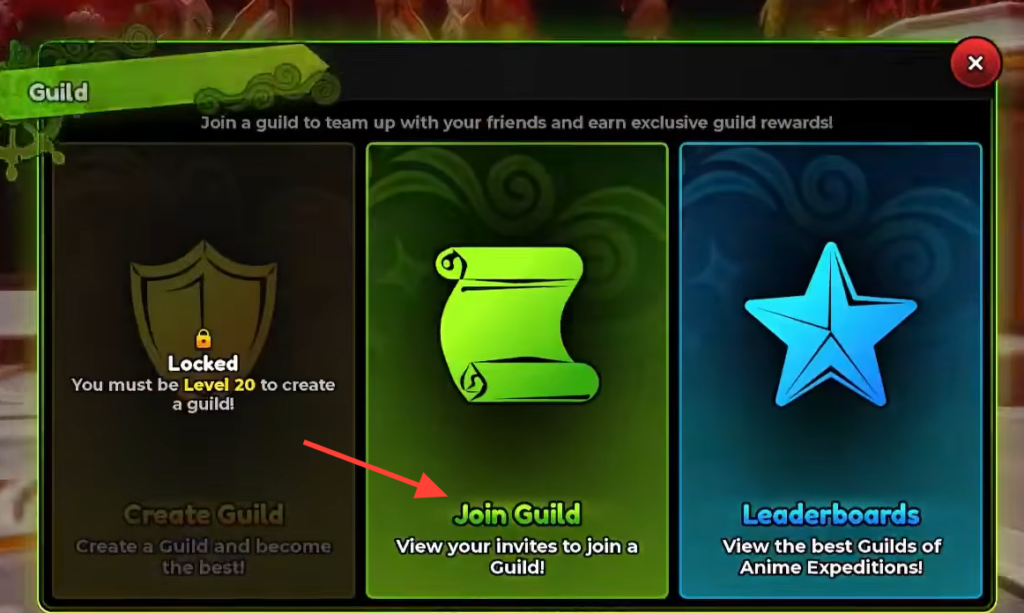
Each guild action has its own gate. Creating a guild is the only one tied to your account level, while joining depends on another player and the icon depends on a Roblox asset.
| Action | Requirement |
|---|---|
| Create a guild | Reach Level 20 |
| Join a guild | Receive an invite from another player |
| Set a guild image | Use a numeric Roblox decal asset ID |
The Guild menu also carries a Join Guild option for handling invites and a Leaderboards view that ranks the strongest guilds. If an update shifts the interface, the level lock is shown directly on the creation screen, so you can confirm it there.
Create a guild after reaching Level 20
Set the guild image with a Roblox decal asset ID
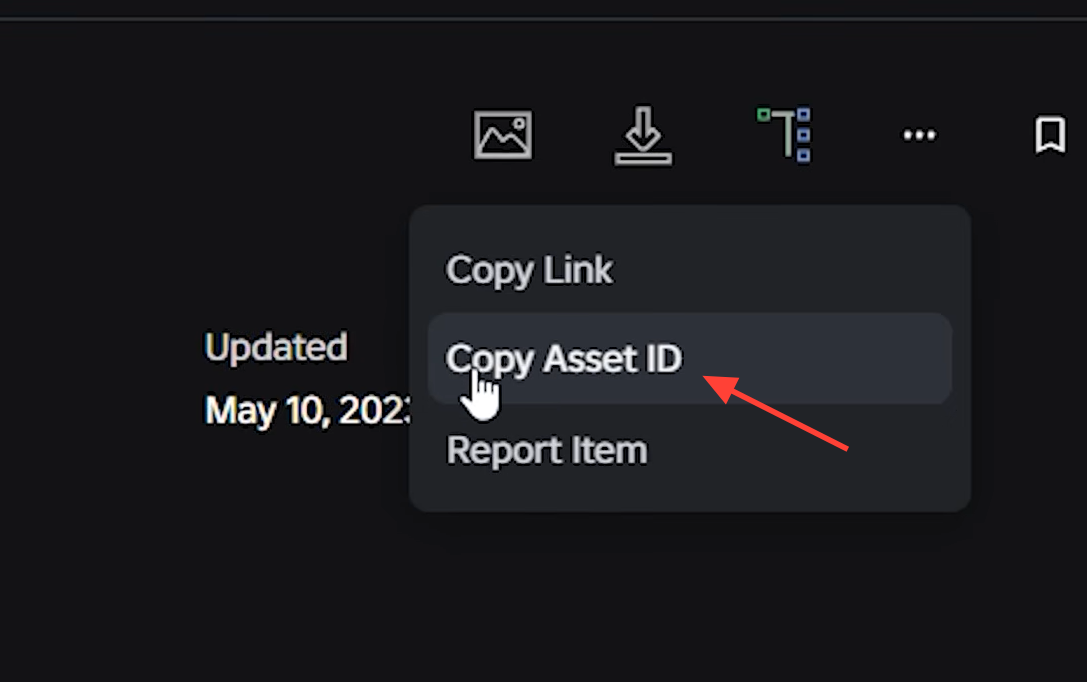
The Image ID field wants a plain number, not a link. That number comes from a decal inside Roblox, and copying it from the right spot is what makes the icon appear.
The most reliable value is the asset ID from the three-dot menu. Anything copied from another part of the page, including the full URL, tends to fail.
Join a guild before Level 20 with an invite
If you are still below Level 20, you do not have to wait to be part of a guild. Ask a guild owner or an existing member to send you an invite. After it arrives, open Join Guild in the Guild menu to view your invites and accept one.
This route is also the simpler choice if you would rather not run your own guild yet. Recruiting players often gather in community spaces such as the Anime Expeditions Discord, which is a practical place to find a group looking for members.
Fix a guild image that will not show
Almost every icon problem traces back to pasting the wrong Roblox value. The game reads a decal’s asset ID, so a mismatched number or the wrong asset type simply shows nothing.
| Problem | Fix |
|---|---|
| Copied the wrong number | Use the decal’s three-dot menu and select Copy Asset ID directly |
| Used a non-image asset | Pick a decal from 2D Assets, not a model, audio, or other type |
| Pasted a full Roblox URL | Paste only the numeric asset ID |
| Asset is private or moderated | Choose a public decal that Roblox allows to display |
| Icon does not appear right away | Wait for Roblox to finish processing the image, then try again |
Once the correct asset ID is in place and the decal is public, the guild icon displays without further steps. If it still stays blank after processing, swap in a different public decal and copy its asset ID the same way.