

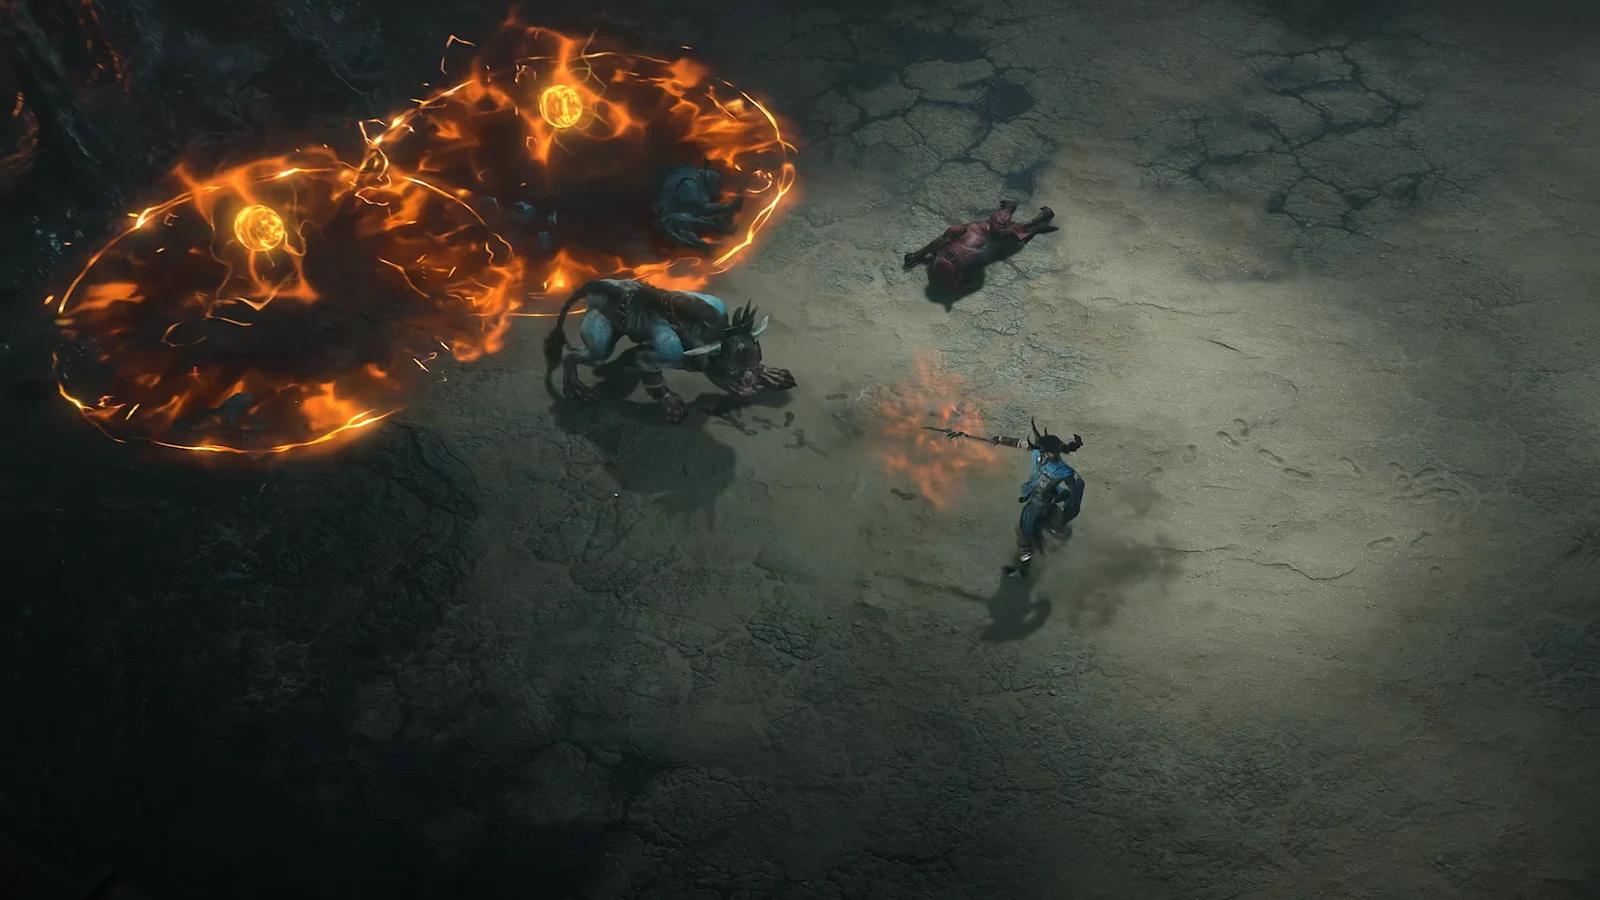
Dance of Knives is the Rogue skill that turns Season 15 into a blur. You hold right-click, knives fly in every direction, and the whole screen dies while you keep moving. The current endgame version leans on Poison Imbuement, the Star Shards upgrade, and the Spellbound Steel charm set, which hands you every imbuement at once instead of forcing you to juggle them.
Quick answer: Run Dance of Knives with Star Shards and Poison Imbuement, equip the five-piece Spellbound Steel charm set, pick Preparation, then hold the channel while keeping Dark Shroud, Concealment, and Shadow Clone active.
How Dance of Knives scales in Season 15
Two mechanics decide how hard this build hits, and both are easy to misread.
The first is Attack Speed. It does not make you throw knives faster. Instead, it raises the base damage of Dance of Knives linearly, which means it behaves as its own separate multiplier. If the skill sits at 100% Weapon Damage, adding 50% Attack Speed pushes it to 150%. If it sits at 200%, the same 50% takes it to 300%. That is why Asheara’s Khanjar is such a strong weapon here.
The second is snapshotting, or rather the lack of it. In Season 15 you can start and stop the channel whenever you want, recast buffs mid-spin, and refresh cooldowns without losing anything. Earlier versions of the build punished you for recasting outside of Inner Sight. That behavior was fixed, so treat the spin as something you can freely interrupt.
One more quirk worth knowing: Dance of Knives combined with Dark Shroud can push you past the 200% Movement Speed cap, which is a big part of why this build feels so fast in open zones and Infernal Hordes.
Combat rotation for Torment XII and Pit runs
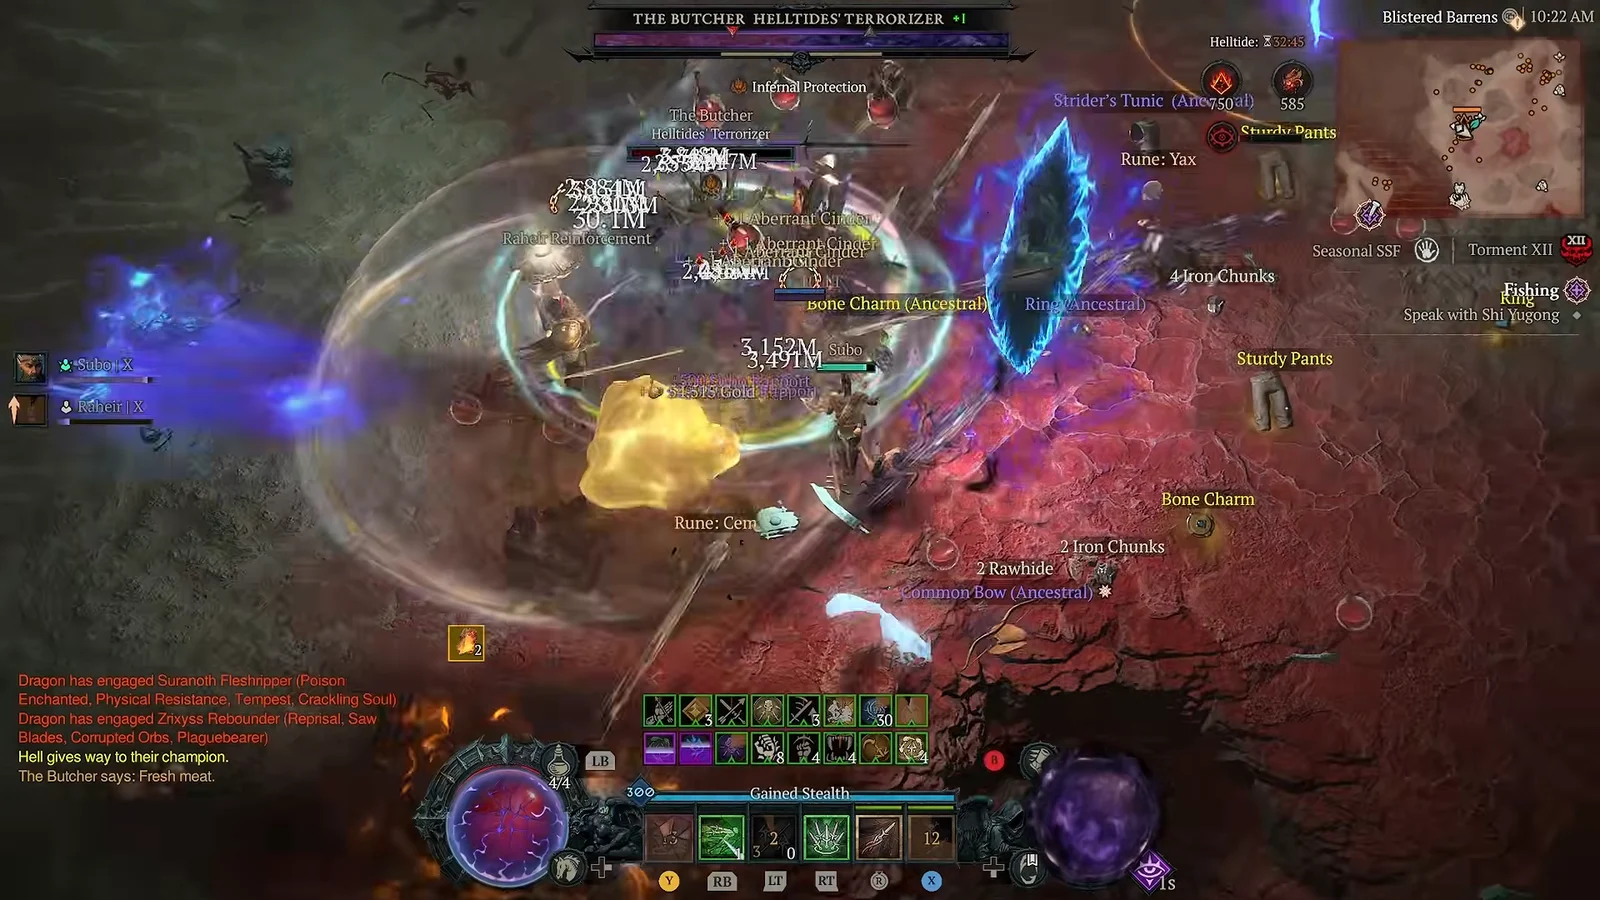
Against bosses, the build is noticeably clunkier than it is in dense packs. Plan for a longer ramp while your damage over time stacks build up.
Skill tree points and specialization
Dance of Knives takes Slow and Movement Speed, Pierce and Size, and Star Shards. Dash runs Weaken, the extra charges node, and Primer. Concealment picks up Resolve, Ferocity, and Recuperate, while Dark Shroud takes Shadow Dancer. Shadow Clone is the ultimate.
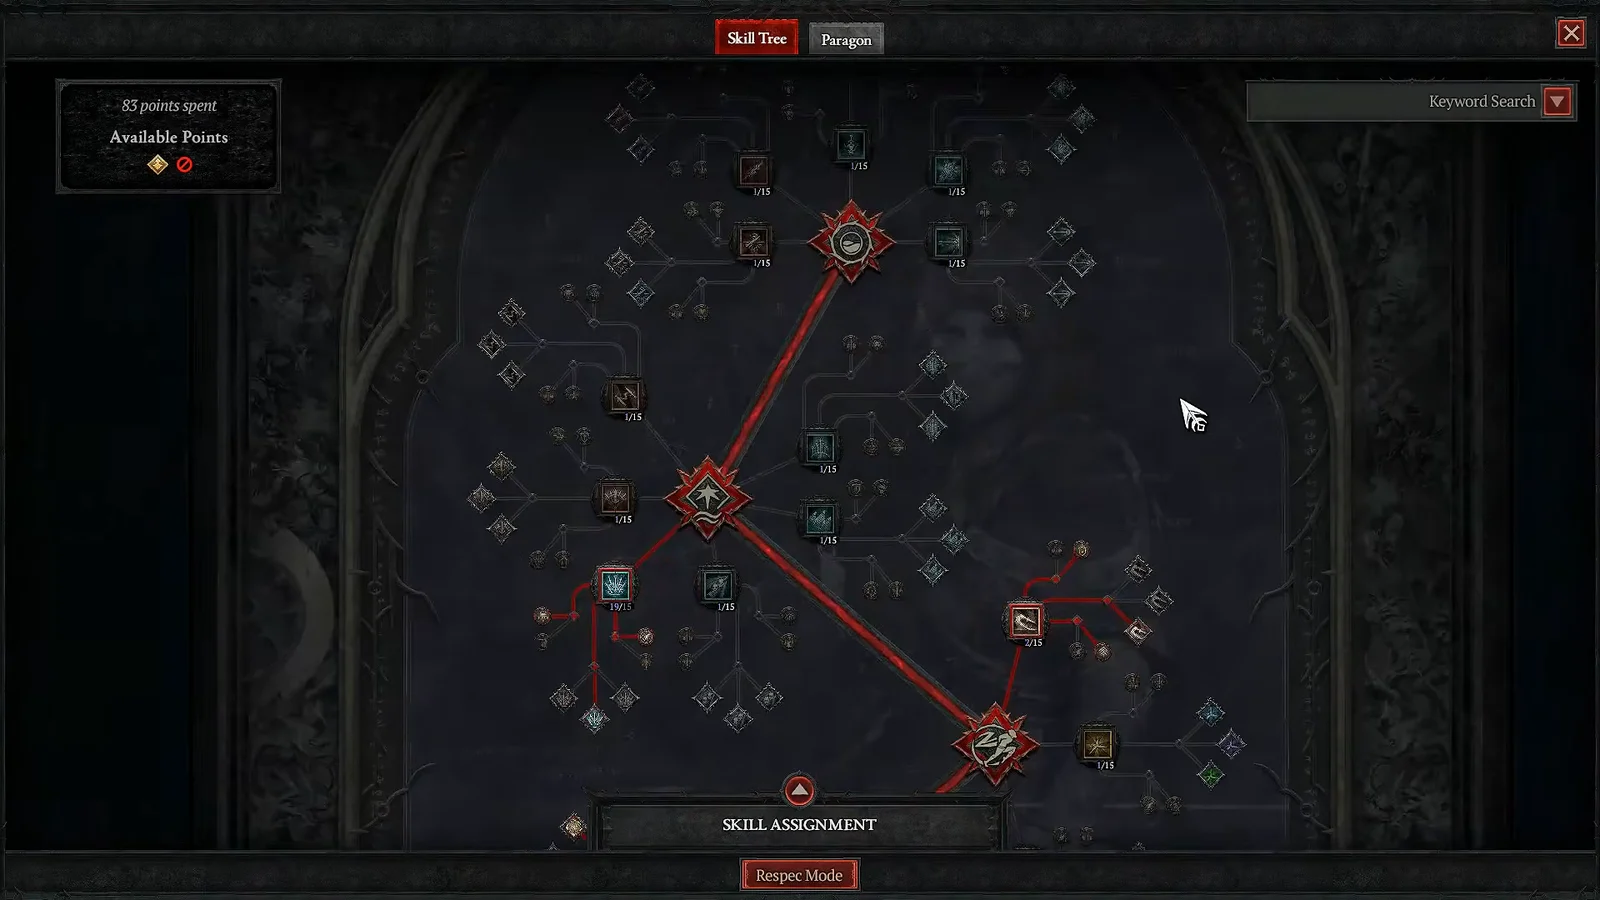
You still spend a point in the Cold, Shadow, and Poison Imbuement trees. Cold and Shadow Imbuement, along with their upgrades, fire off automatically when Inner Sight triggers, so you never cast them manually.
For Specialization, take Preparation. It cuts your Ultimate cooldown and grants 15% Damage Reduction for 10 seconds after you cast one, which keeps Shadow Clone available far more often. The Spellbound Steel set hands you Inner Sight for free, so there is no reason to spend the specialization slot on it.
Until you actually own the set, slot Inner Sight manually instead of Preparation. Without it, the channel drains your Energy within seconds and the build stops functioning.
Talisman and charm setup
The Talisman is the engine. The five-piece Spellbound Steel set unlocks every imbuement at increased potency, which is where your Vulnerable, Weaken, extra Lucky Hit Chance, and the Buffered Battery barrier all come from. Shadow Imbuement supplies Vulnerable through Phoba of Spellbound Steel, while Concealment covers your Fortify.
- Berú, Fer, Linta, Mlor, and Phoba of Spellbound Steel for the full set bonus
- Cowl of the Nameless, which applies Cold and Shadow Imbuement across an area
- Annihilus or Stalwart’s Horadric Seal of Glory in the remaining slots
- Seal of the Diamond Mind, which lets you run Phoba of Spellbound Steel and Phoba of the Sightless together
- Poison Resistance rolls wherever you can get them
Aim for an even split between Dance of Knives: Star Shards and Poison Imbuement while preserving the maximum total ranks. A charm with +3 ranks is always preferable to one with +2, but once that is settled, prioritize balance.
Gear, weapons, and jewelry
| Slot | Item or aspect | Purpose |
|---|---|---|
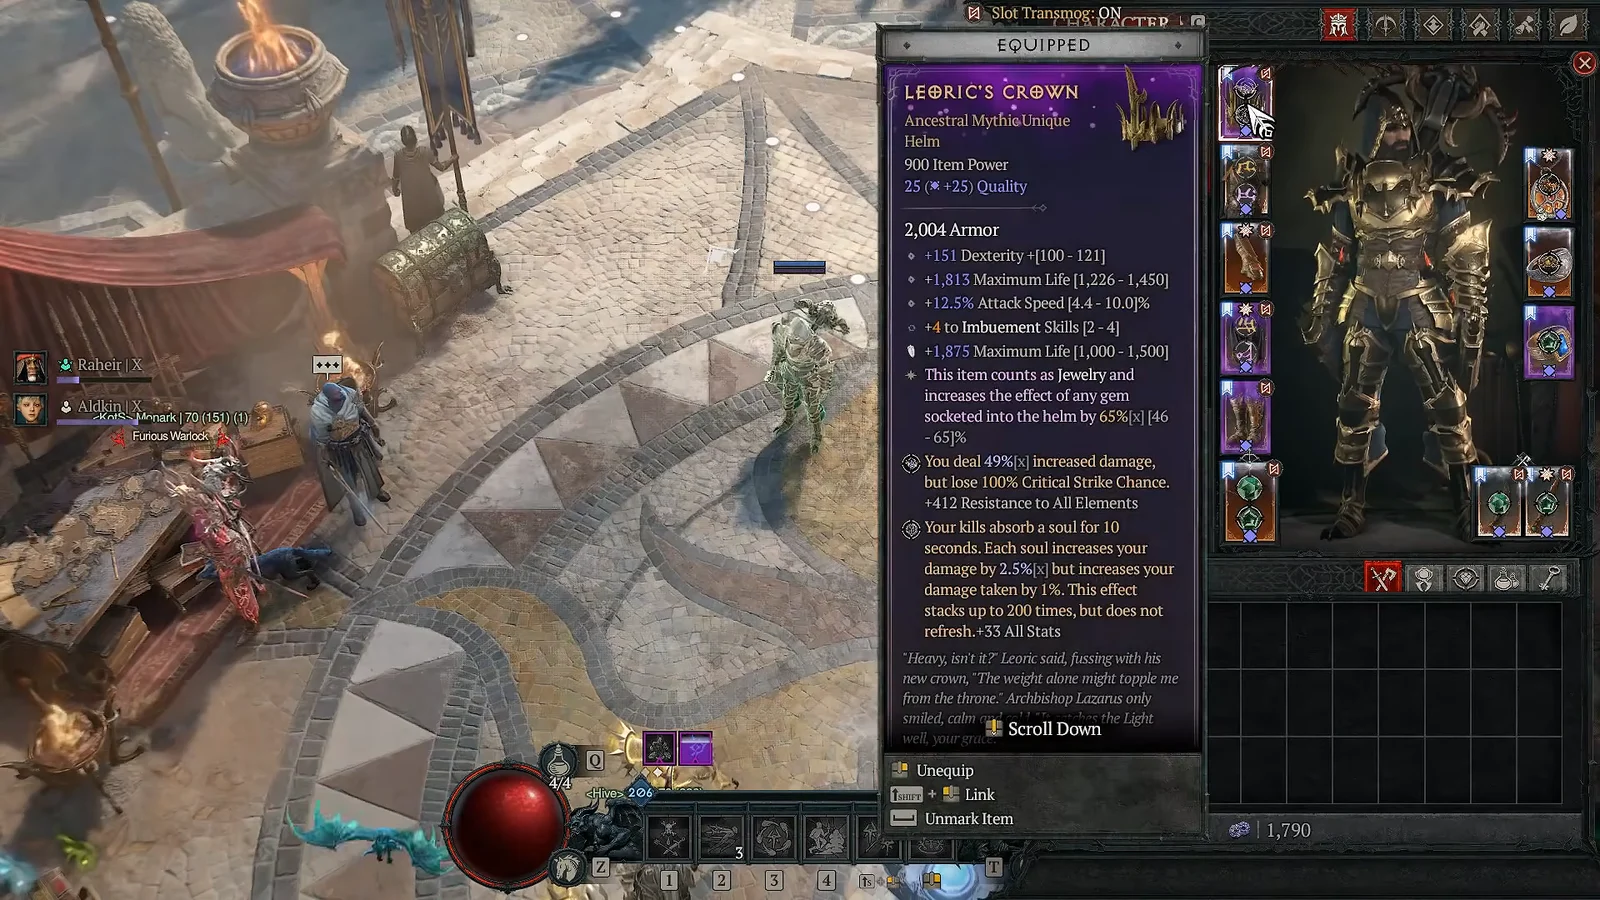
| Helm | Leoric’s Crown | Splinter sockets, crit |
| Chest | Enigma or Stealth runeword | Mobility, defense |
| Gloves | Crushing Aspect or Conceited | Damage |
| Pants | Shrouded Gift | Damage reduction |
| Boots | Penitent Greaves | Movement, chill |
| Amulet | Writhing Hunt Medal | Damage over time |
| Ring 1 | Band of Imitated Imbuement | Imbuement uptime |
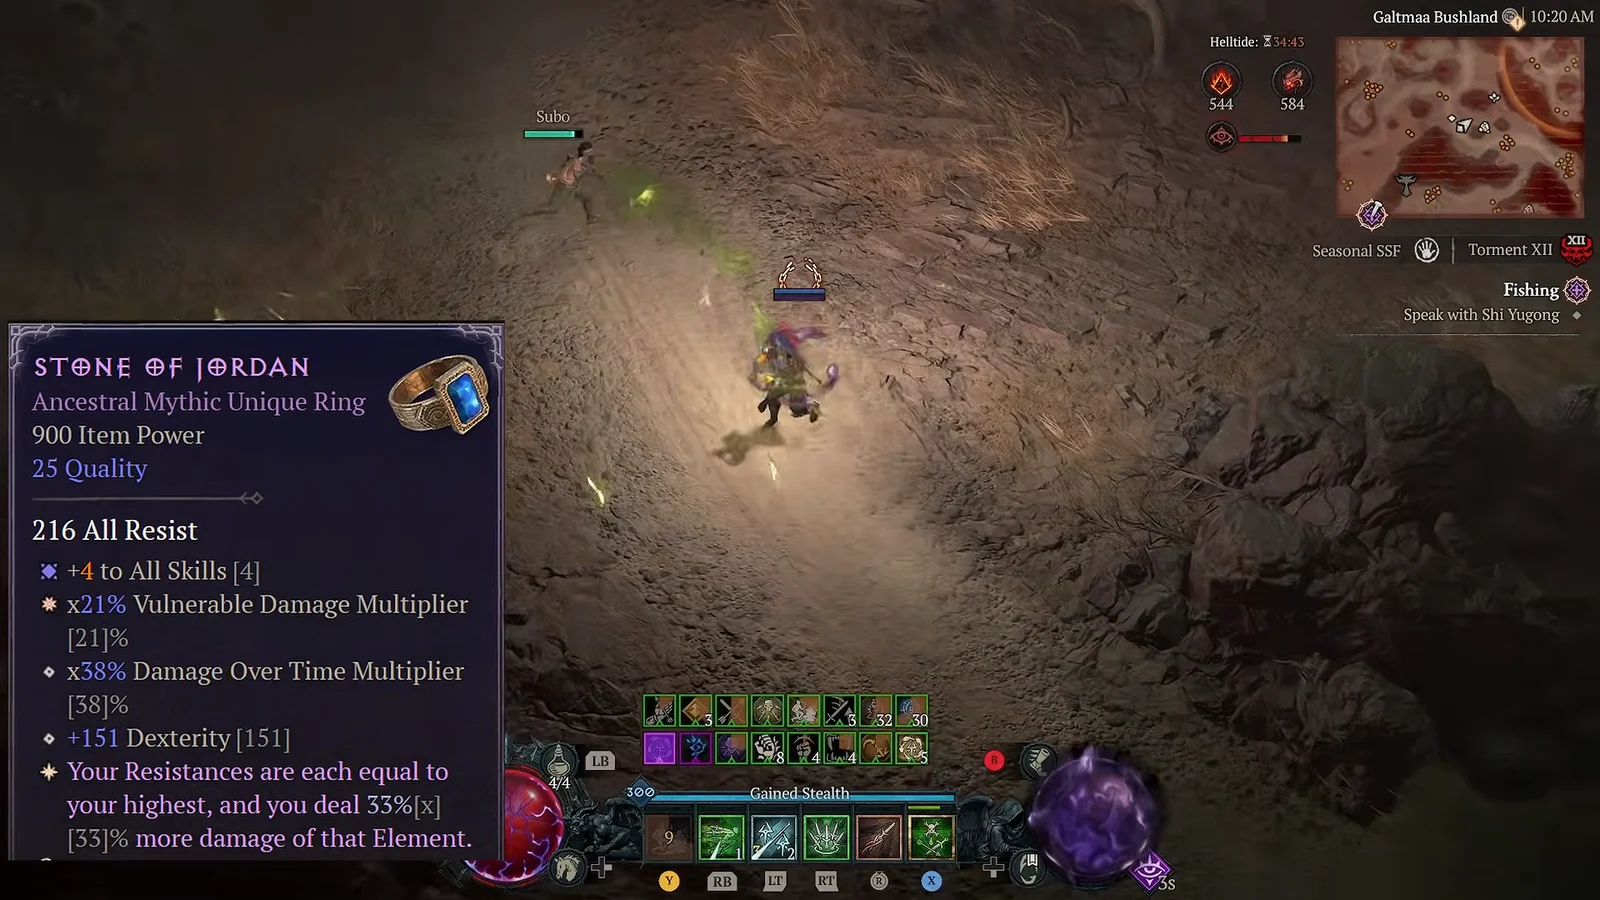
| Ring 2 | Stone of Jordan | All resistances |
| Dagger 1 | Asheara’s Khanjar | Attack Speed |
| Dagger 2 | Etna’s Lost Dagger | Poison scaling |
| Ranged | Piercing Wind crossbow | Channel aspect |
Etna’s Lost Dagger is the highest priority pickup, followed by Leoric’s Crown, Stone of Jordan, Shrouded Gift, and Asheara’s Khanjar. The dagger activates from dealing Poison damage and from the rotating imbuements the set provides, so it stays online constantly once the rest of the setup is in place.
Alternate Smoke Grenade: Silhouette with Concealment to activate Shrouded Gift. If that rotation is inconvenient, replace the pants with a piece that has Snowveiled Aspect or Aspect of Disobedience.
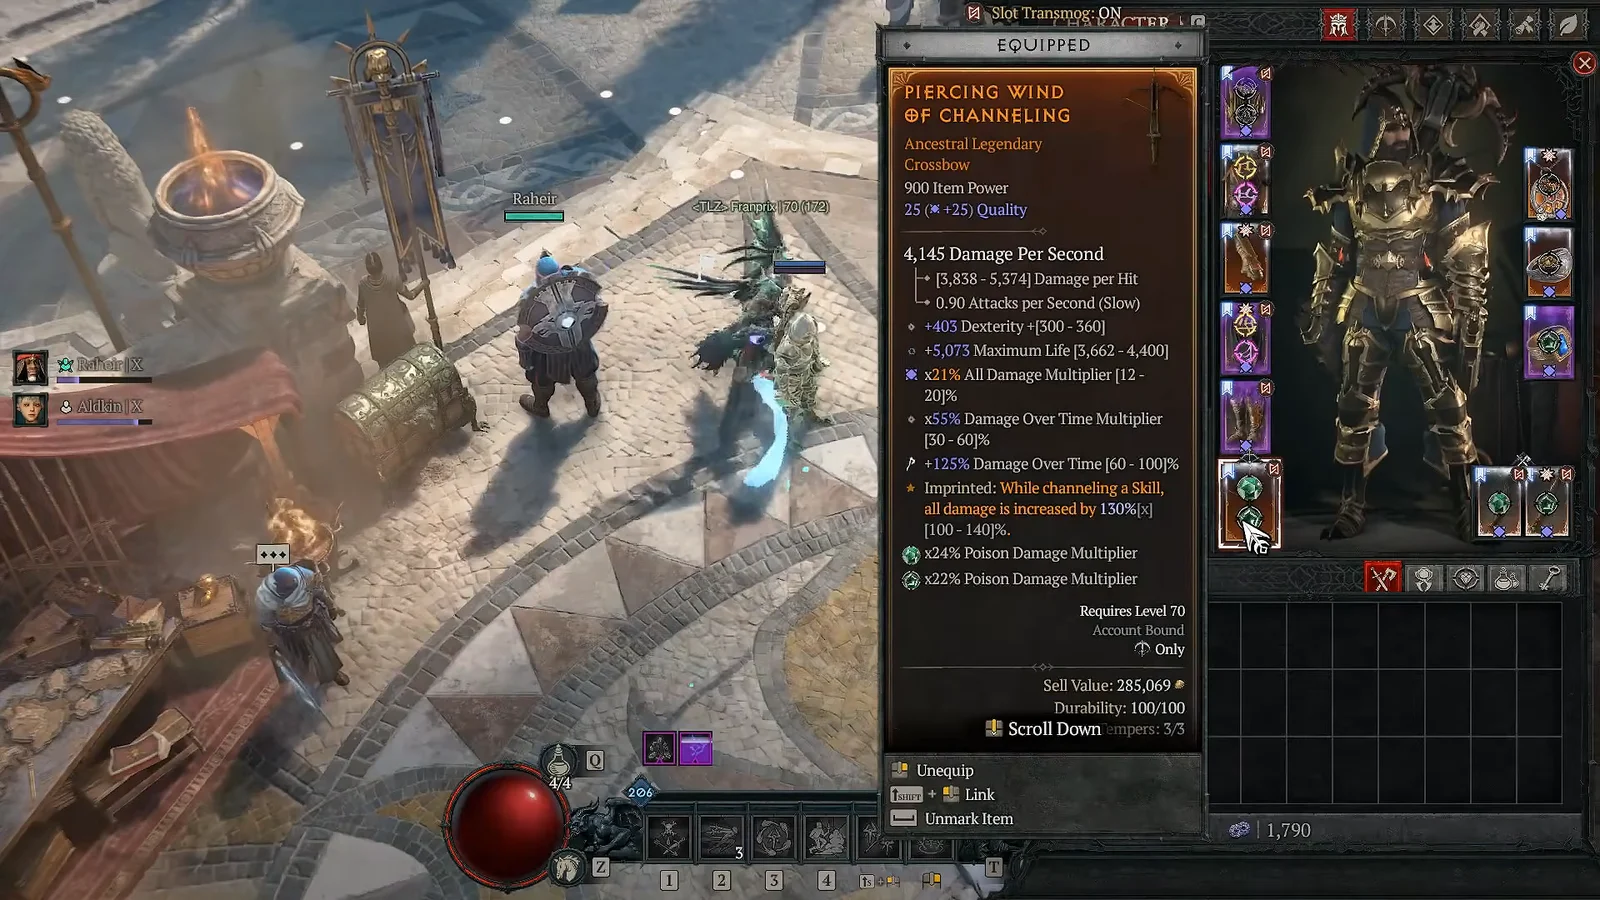
Stone of Jordan raises all of your resistances based on your single highest resistance, which is the reason Poison Resistance shows up as a recurring target on gear and charms. Push Poison as high as it goes and the ring lifts everything else with it.
For bossing, a Rustbitten Dirk in the off-hand is the common swap, and a Grief runeword works as an alternative weapon option.
Runes, gems, and Soul Splinters
For offense, the standard runeword is Yax paired with Vex, which adds skill ranks to Dance of Knives and Poison Imbuement. Bac with Que creates a substantial barrier that benefits further from Barrier Generation affixes, while Xan with Qax is also used in endgame setups. Ner maintains Concealment for greater Unstoppable and Shrouded Gift uptime, whereas Lac provides a flat 20% Damage Reduction.
Gems are straightforward. Emeralds go in armor and weapons, and at least one Emerald belongs in jewelry to keep Poison Resistance as your highest resistance for Stone of Jordan.
Soul Splinters are the Season 15 addition, and the priority order is Splinter of Hellfire first, then Splinter of Pain, then Splinter of the Black Soulstone. Leoric’s Crown is the natural home for a pair of them, and Splinter of Pain is your defensive fallback if you are dying more than you would like.
Tempering, Masterworking, and Transfigurations
Temper for Maximum Life and Damage Over Time. There are no breakpoints to hit, so you simply stack Damage Over Time increases, Poison Damage, and Vulnerable Damage multipliers wherever the slot allows.
Masterworking crits should land on Imbuement skill ranks and Damage Over Time. Everything else is secondary.
- Amulet: Aspect of Mending Obscurity for Resolve generation when you break Stealth
- Boots or a second slot: Exploiter’s Aspect, with Earthstriker’s Aspect as a close alternative
- Jewelry: ranks to all skills and Poison damage percentage
- Everything else: Poison damage percentage
Paragon board and glyphs
| Board | Glyph |
|---|---|
| Starting board | Versatility |
| Exploit Weakness | Tracker |
| Eldritch Bounty | Canny |
| Cheap Shot | Efficacy |
| Danse Macabre | Bane |
Pathing matters as much as the glyph placement here, so run the boards in that order and level the glyphs through the Pit as you go. Tricks of the Trade shows up in dedicated push variants for extra multi-skill stacking.
Mercenaries and Prime Evil Powers
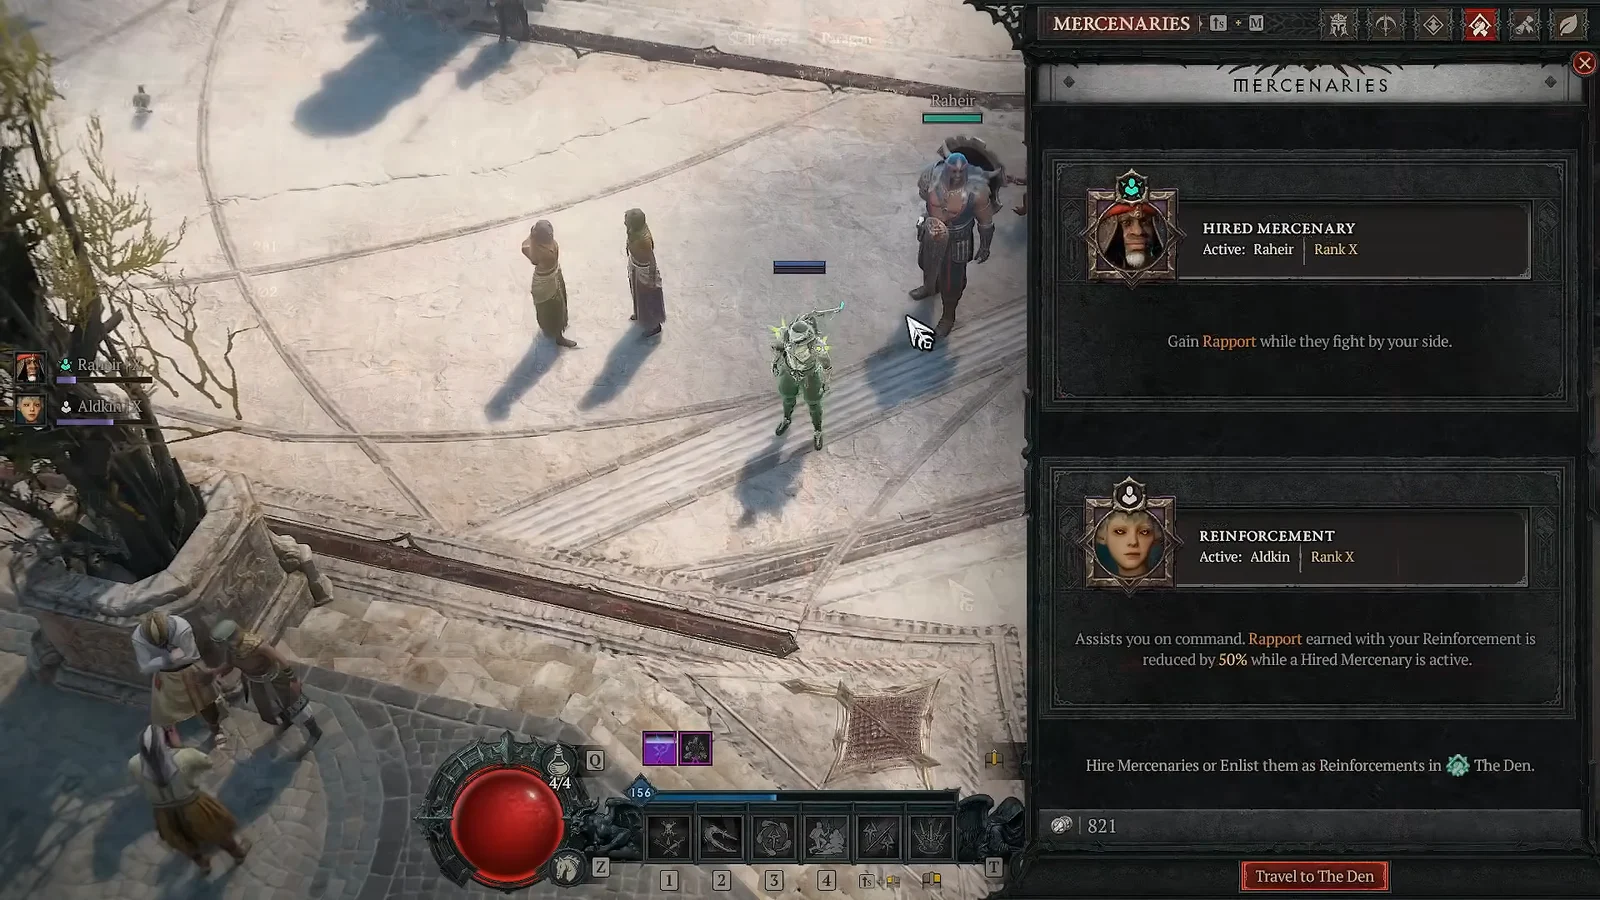
Hire Raheir and run Ground Slam, Bastion, and Inspiration. Higher Torment levels punish squishy characters, and Raheir’s defensive buffs are what keep you standing while you spin in melee range. For the reinforcement slot, Aldkin with Field of Languish adds 20% damage reduction.
On the Prime Evil Powers side, the build sits under Baal with Ice of Excidium as the core power, augmented by Siege Engine, Cold Blood, Seizing Frost, Shattered Flesh, and Thrill of Ruin. Baal’s Splinter of Destruction is the matching splinter choice.
How to check the build is working
Once everything is slotted correctly, a few things should be visible without you doing anything extra. Cold and Shadow Imbuement icons light up on their own as Inner Sight triggers, even though those skills are not on your bar. Enemies across the screen pick up Vulnerable and Weaken as soon as Shadow Clone lands. Your character sheet should show Poison as your highest resistance, with the other four pulled up to match it by Stone of Jordan.
The clearest sign is the movement speed number. With Dark Shroud up and the channel running, it climbs past the usual 200% ceiling. If your Energy bar empties within a few seconds of holding the channel, the set bonus is not delivering Inner Sight yet, and you need Inner Sight in the Specialization slot until it does.
From there it is a farming build first and a pushing build second. Torment XII Infernal Hordes and speed clears are where it feels best, Pit tier 120 is well within reach with a finished setup, and single-target fights are the one place you will notice the damage over time ramp instead of instant deletion.





