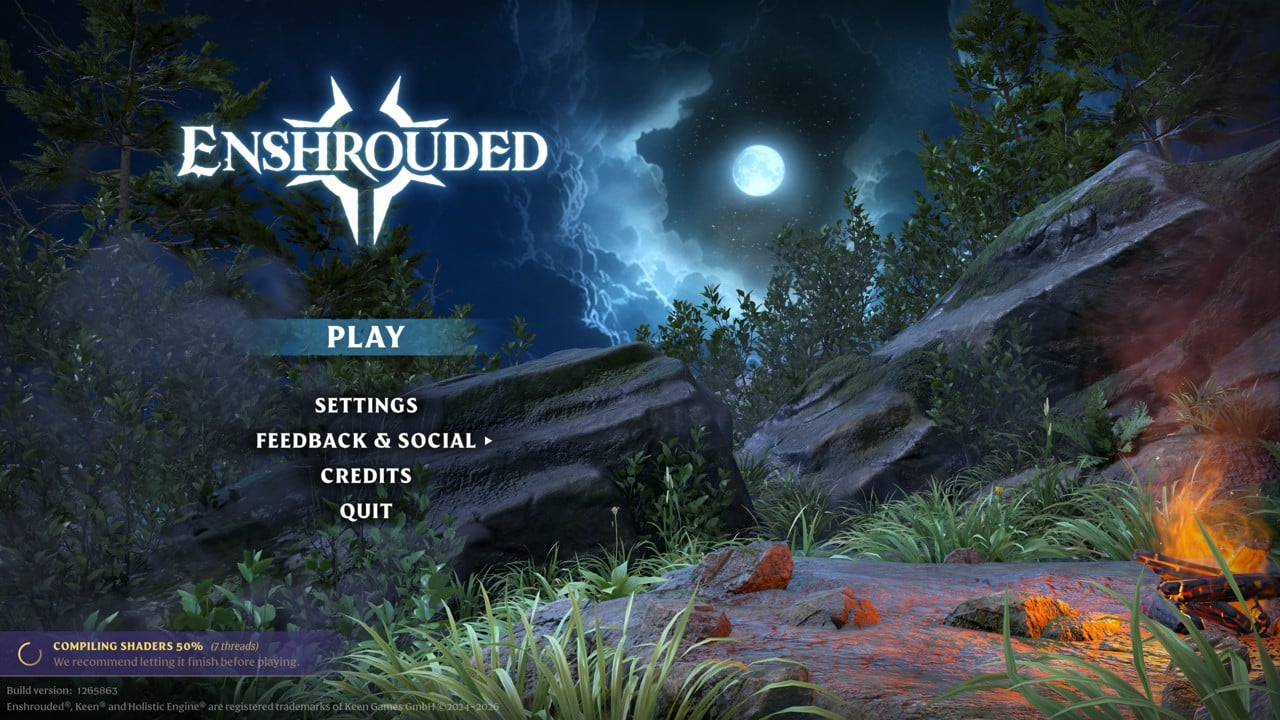
Enshrouded’s Settings menu is split into tabs that each control a different part of how the game looks, sounds, and plays. On PC, the two you will touch most are Display and Game, where the render scale, quality presets, field of view, and HUD toggles live.
Quick answer: Open Settings from the main menu or the in-game pause menu, press Q or E to switch tabs, and start on Display to check 3D Render Scale and Quality Preset, then on Game for Field Of View and HUD Visibility.
Where the settings are and how to move around
The tabs run across the top in this order: DISPLAY, SOUND, GAME, KEYBOARD & MOUSE, CONTROLLER, ACCESSIBILITY, and LEGAL. At the bottom of the screen, “Reset to Default” is bound to F, and Esc closes the menu.
Display tab: Output group
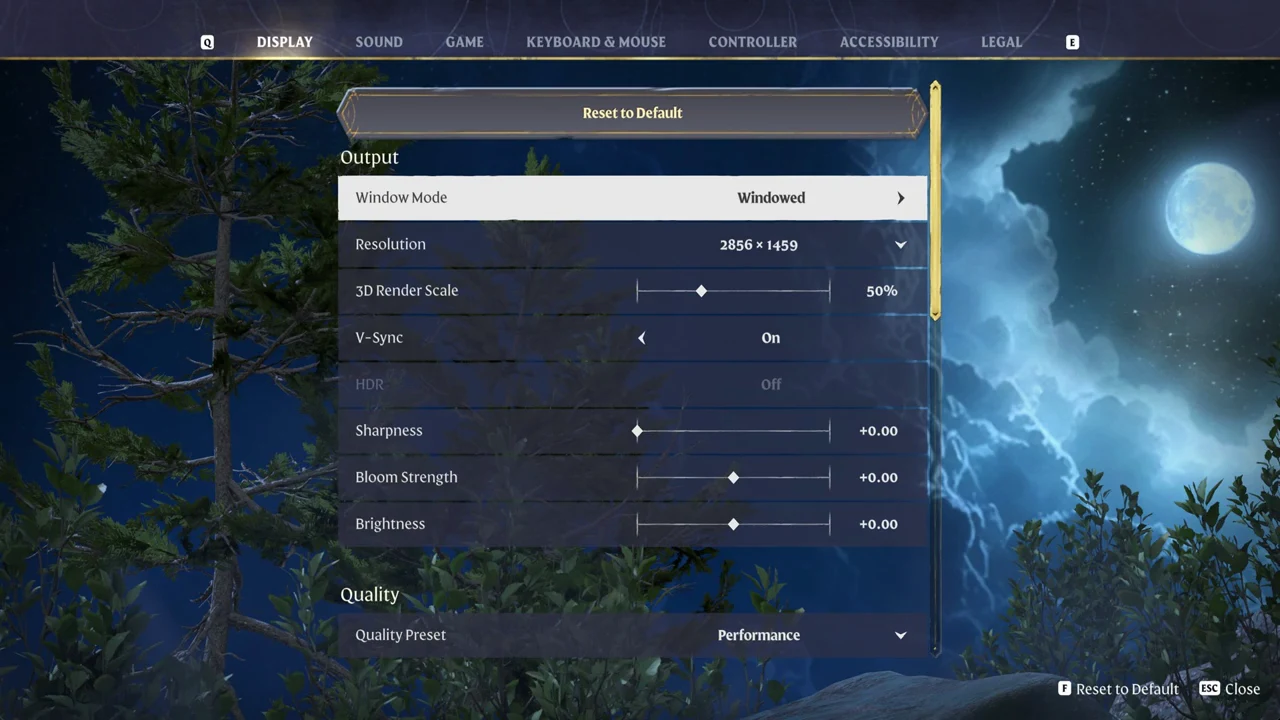
The Output group holds the controls that decide how your screen is filled and how sharp the final picture is.
- Window Mode, which switches between Fullscreen and Windowed.
- Resolution, shown as 3840 x 2160 (Native) in Fullscreen and 2856 x 1459 when Windowed.
- 3D Render Scale, a slider.
- V-Sync, set to On.
- HDR, greyed out and Off.
- Sharpness, Bloom Strength, and Brightness, each at +0.00.
In Windowed mode the Resolution field showed 2856 x 1459, the size of the game window.
What 3D Render Scale does
3D Render Scale controls the internal resolution the game renders at before it shows the image on your monitor. With the slider at 50% on a 3840 x 2160 screen, the game draws the scene below native resolution and then upscales it to fit the display.
It is a slider, so you can change it from the 50% shown.
On a fresh install this slider was sitting at 50%, so it is worth opening Display early and setting it to a level that matches your hardware.
Quality Preset and the per-feature options
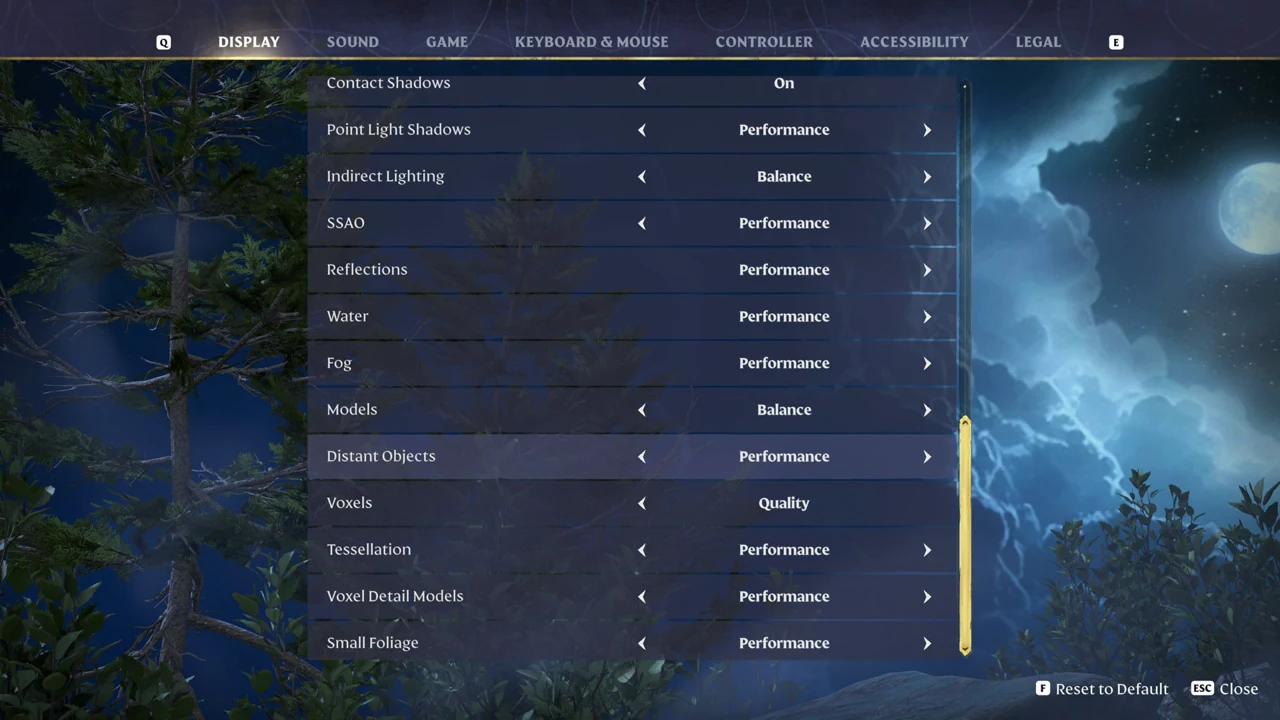
The Quality group starts with a Quality Preset drop-down, seen set to Performance. Below it sits a list of individual graphics features, each with its own arrows so you can step through its levels on top of the preset.
With the Performance preset selected, the per-feature options read as follows.
| Feature | Setting |
|---|---|
| Contact Shadows | On |
| Point Light Shadows | Performance |
| Indirect Lighting | Balance |
| SSAO | Performance |
| Reflections | Performance |
| Water | Performance |
| Fog | Performance |
| Models | Balance |
| Distant Objects | Performance |
| Voxels | Quality |
| Tessellation | Performance |
| Voxel Detail Models | Performance |
| Small Foliage | Performance |
You can leave the preset in charge, or override any single feature with its arrows to trade detail for smoothness in one specific area.
Game tab: language, camera, and loot options
The Game tab controls how the game plays rather than how it looks. At the top are Language and Voiceover Language, both set to System Language, followed by sliders for Camera Distance and Field Of View.
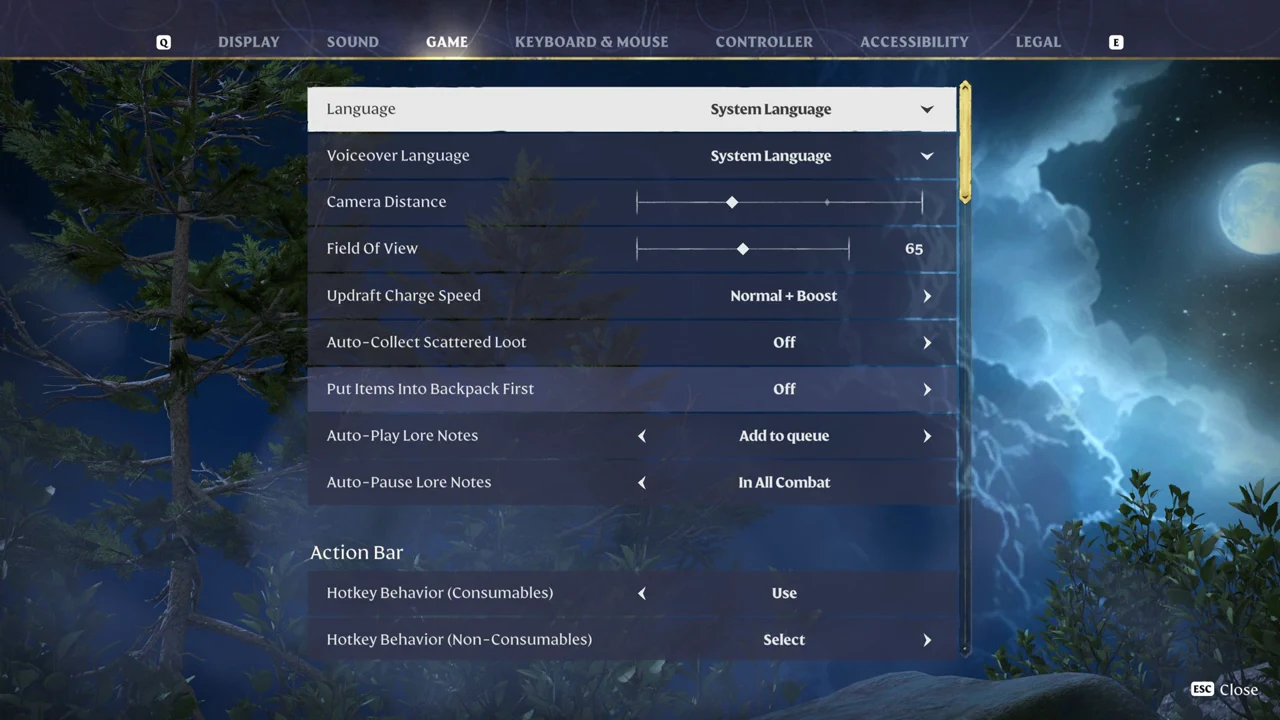
Field Of View is a slider sitting at 65. The rest of this part of the tab covers movement and loot handling.
| Option | Value |
|---|---|
| Updraft Charge Speed | Normal + Boost |
| Auto-Collect Scattered Loot | Off |
| Put Items Into Backpack First | Off |
| Auto-Play Lore Notes | Add to queue |
| Auto-Pause Lore Notes | In All Combat |
| Hotkey Behavior (Consumables) | Use |
| Hotkey Behavior (Non-Consumables) | Select |
Updraft Charge Speed was set to “Normal + Boost”, Auto-Play Lore Notes to “Add to queue”, and Auto-Pause Lore Notes to “In All Combat”. The two Action Bar hotkey options decide what pressing a hotkey does: Consumables are set to Use, while Non-Consumables are set to Select.
HUD Visibility and progression hints
Further down the Game tab, Hints for Neglected Progression Elements is On. Below that is a HUD Visibility group that controls what stays on your screen during play.
Overall is set to Show. Player Vitals, Compass, Quest Tracker, and Action Bar are set to Permanent. Action Hints, Underwater/Shroud Timer, Friendly Health Bars, Hostile Health Bars, and Enemy Awareness Icons are set to Contextual, with more toggles in the list.
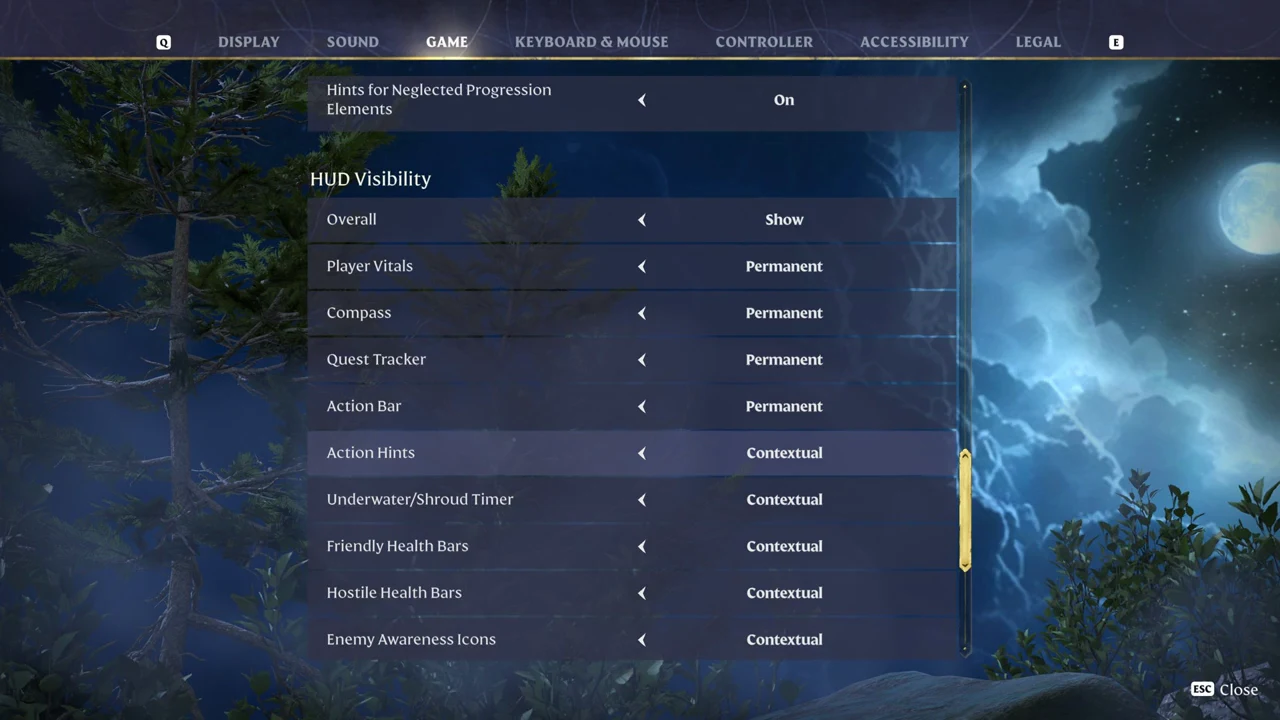
Between the Display and Game tabs you have the controls that shape both performance and comfort. Start with Window Mode and 3D Render Scale to decide how the game is drawn, lean on the Quality Preset and its per-feature arrows to balance detail against smoothness, then tune Field Of View and HUD Visibility to taste.