In Final Fantasy Resonance, each foe has a stagger gauge. Emptying it prevents that enemy from taking its turn and makes it more vulnerable to damage. A successful stagger also grants extra actions when the round ends; stagger all enemies together and the entire party gets one.
Quick answer: Target enemy weaknesses and choose skills marked with the bullet symbol that have strong stagger power to drain the gauge. Whoever causes the stagger earns an action in the bonus phase, while a sweeping stagger rewards the whole party with one.
How stagger works in Final Fantasy Resonance
The game explains stagger in a set of tutorial pages during Chapter 1, “Tailing the Truth”, in the Earth Shrine fight against Belmodar, the Earth Shrine boss. The first page, “Staggering” (1/3), sets the rules: “Each enemy has its own stagger gauge. Reduce it to zero, and the enemy will be staggered.” It adds: “Staggered enemies will be unable to perform actions on their turn and will take more damage than usual.”
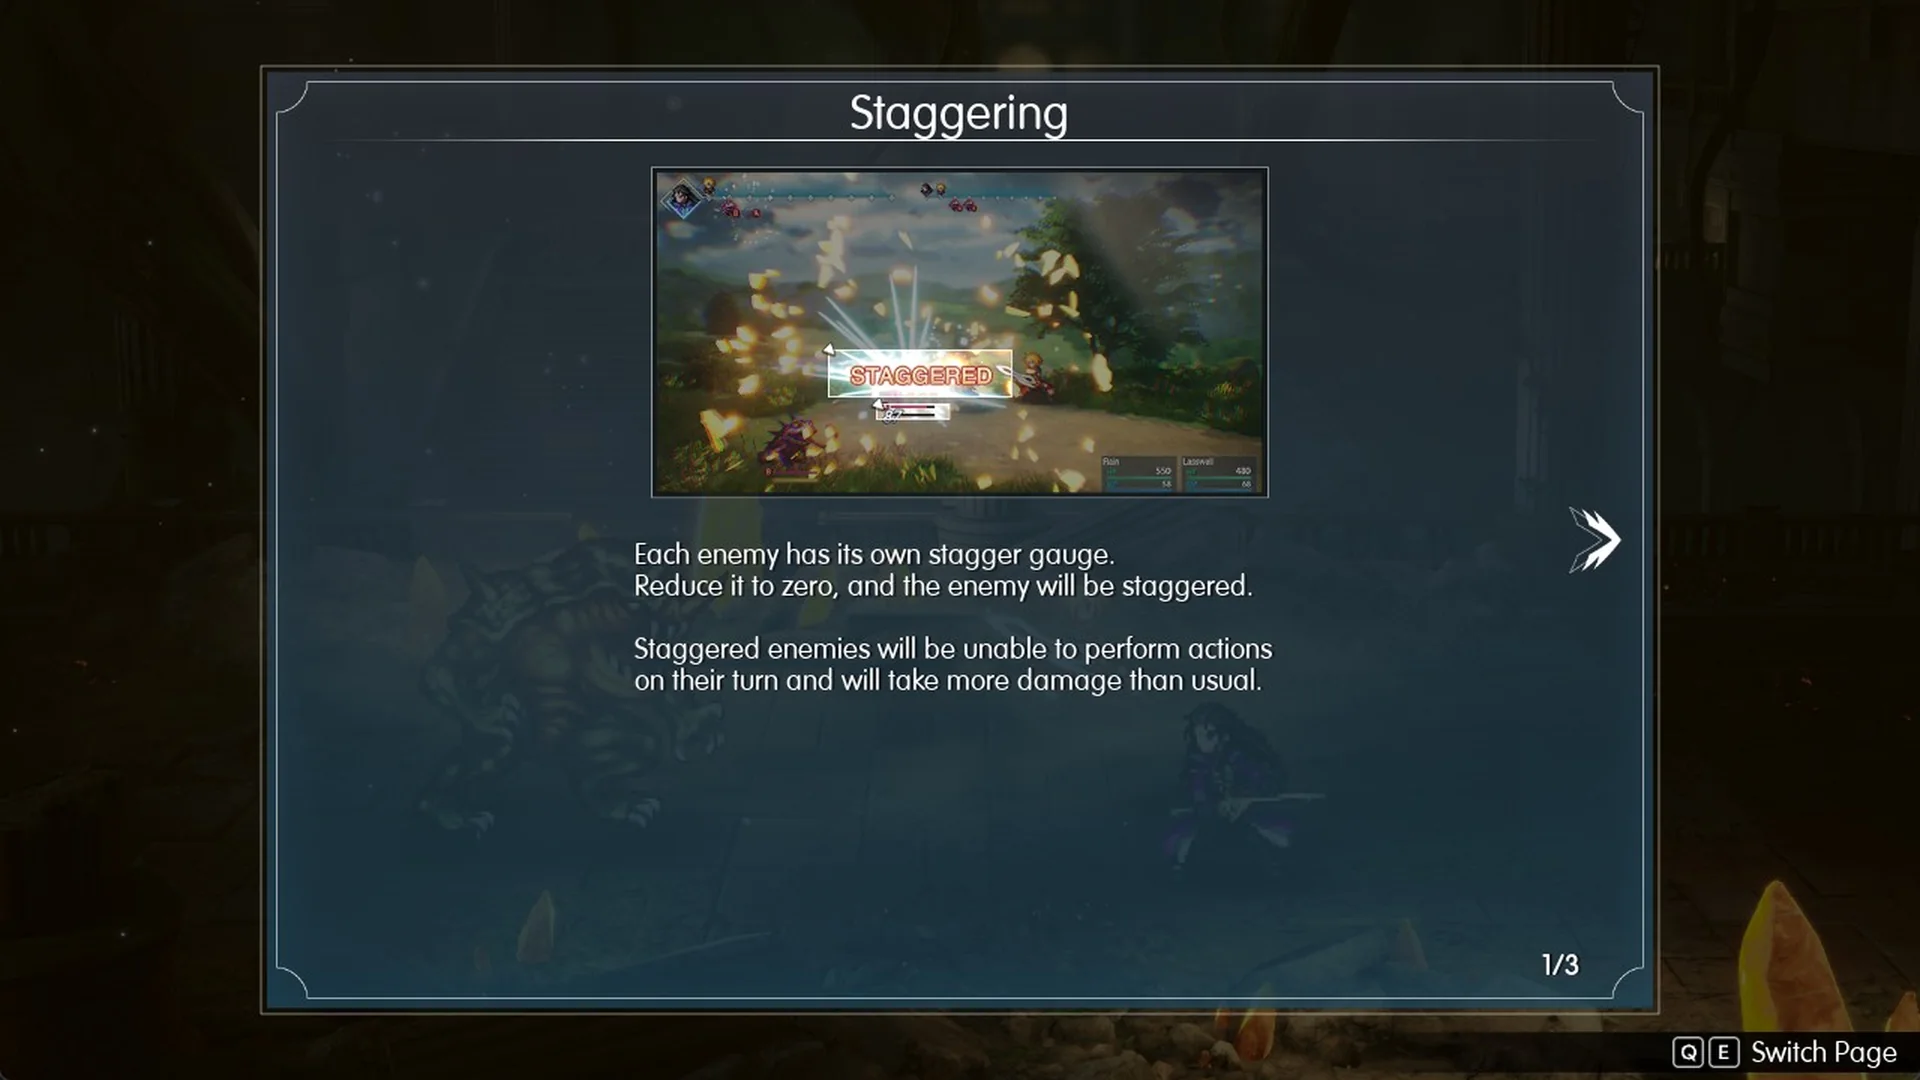
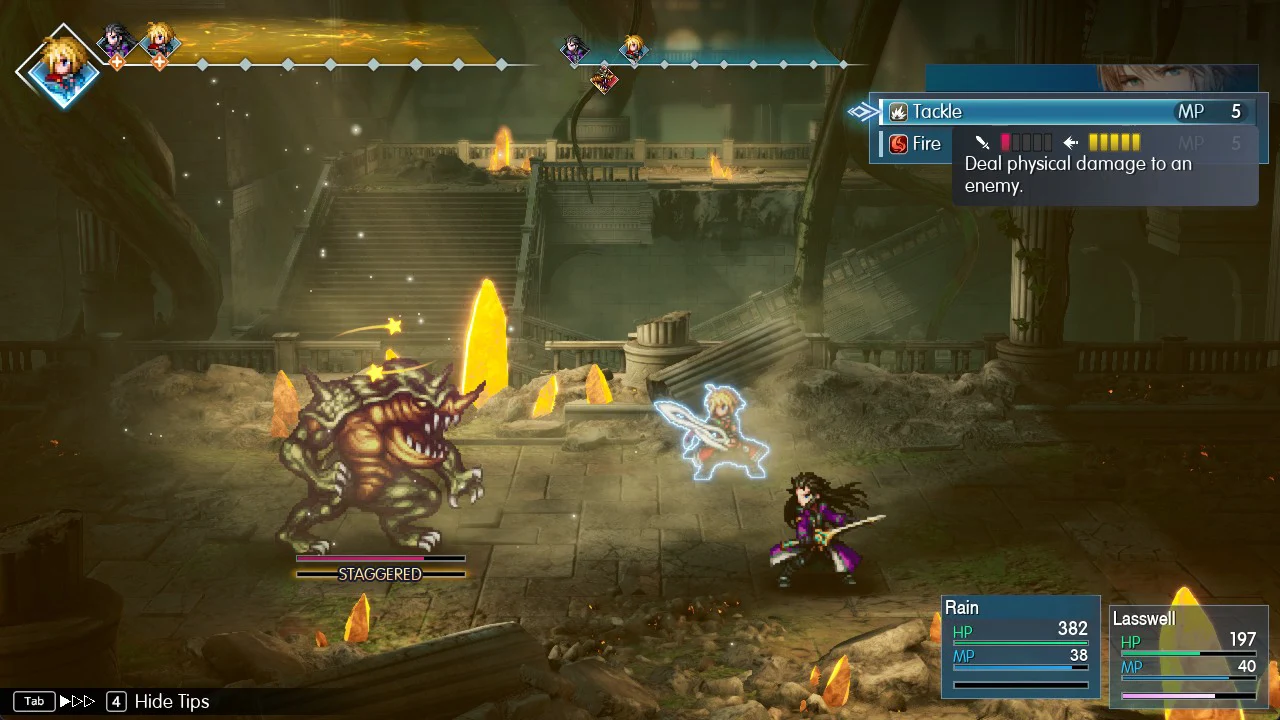
In battle, the stagger gauge is the second bar under the enemy’s HP bar. When it hits empty, the enemy flashes pink and the word STAGGERED takes that bar’s place.
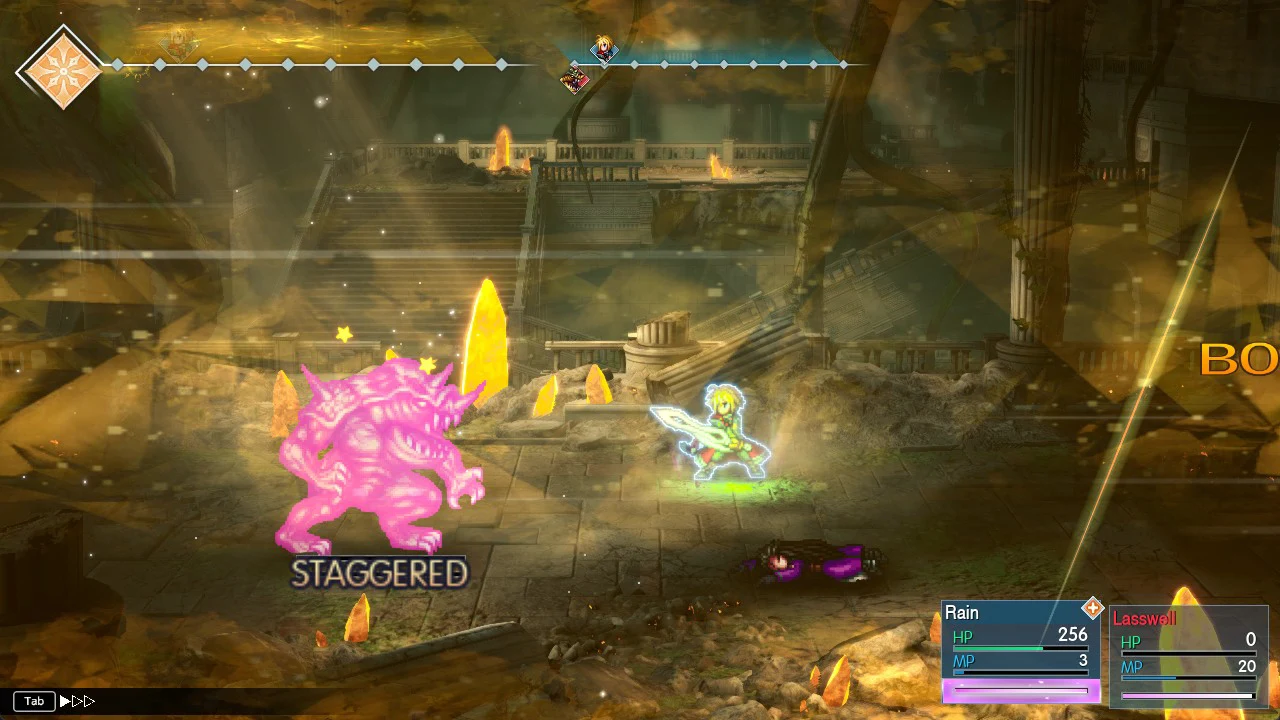
Rain dealt 82 damage to Belmodar with Fire before it was staggered. Afterward, Rain’s basic Attack dealt 175 damage to the same enemy.
How to read stagger power on a skill
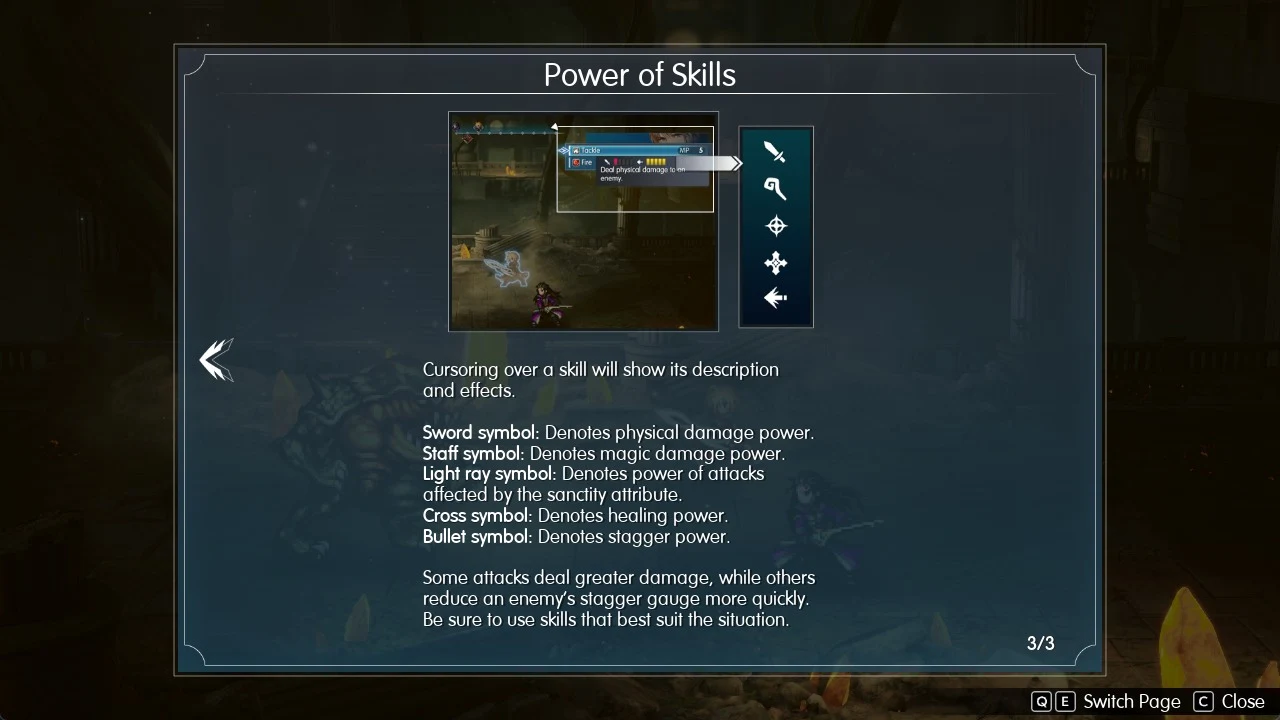
Some skills deal damage. Others mainly drain the stagger gauge. The “Power of Skills” (3/3) tutorial page explains how to tell them apart: “Cursoring over a skill will show its description and effects.” Each tooltip uses these symbols:
| Symbol | Meaning |
|---|---|
| Sword symbol | “Denotes physical damage power.” |
| Staff symbol | “Denotes magic damage power.” |
| Light ray symbol | “Denotes power of attacks affected by the sanctity attribute.” |
| Cross symbol | “Denotes healing power.” |
| Bullet symbol | “Denotes stagger power.” |
The same page sums up the trade-off: “Some attacks deal greater damage, while others reduce an enemy’s stagger gauge more quickly. Be sure to use skills that best suit the situation.” Each rating is shown as pips out of five. Red pips sit next to the damage symbol, and yellow pips sit next to the bullet symbol for stagger.
Stagger ratings for Lasswell and Rain’s skills
| Skill | Character | Damage | Stagger |
|---|---|---|---|
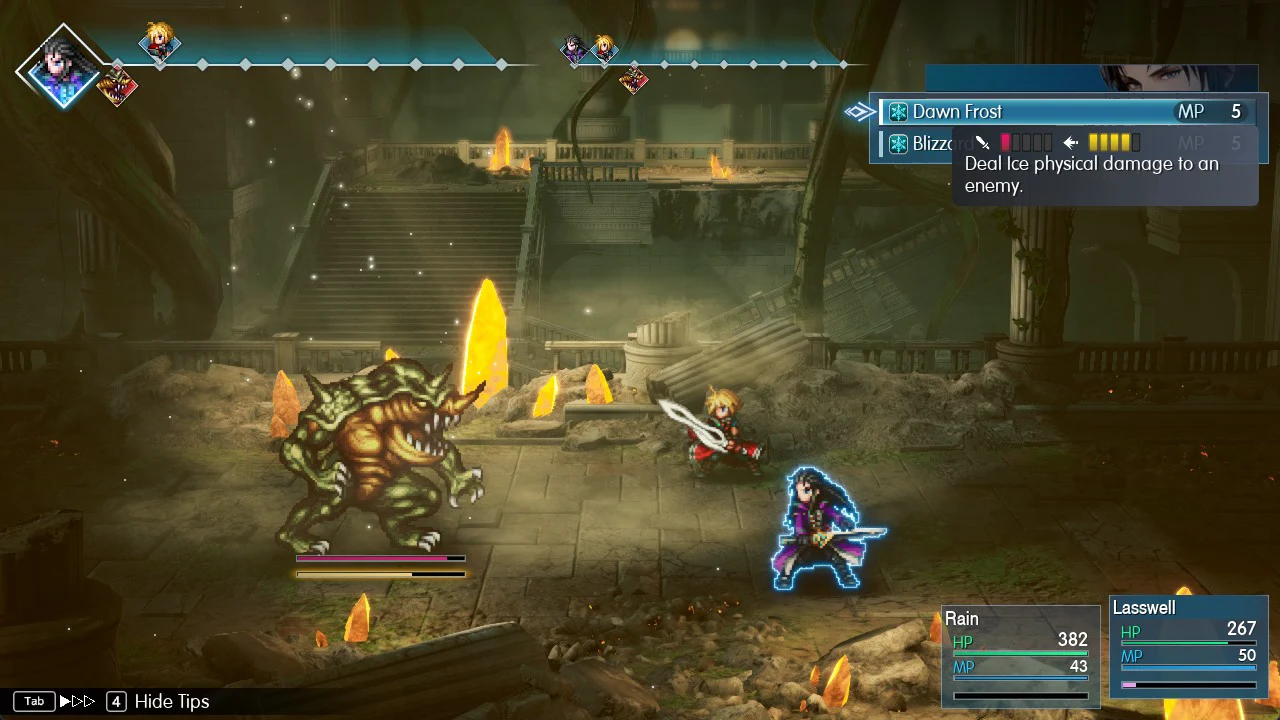
| Dawn Frost | Lasswell | Sword, 1 of 5 | 4 of 5 |
| Tackle | Rain | Sword, 1 of 5 | 5 of 5 |
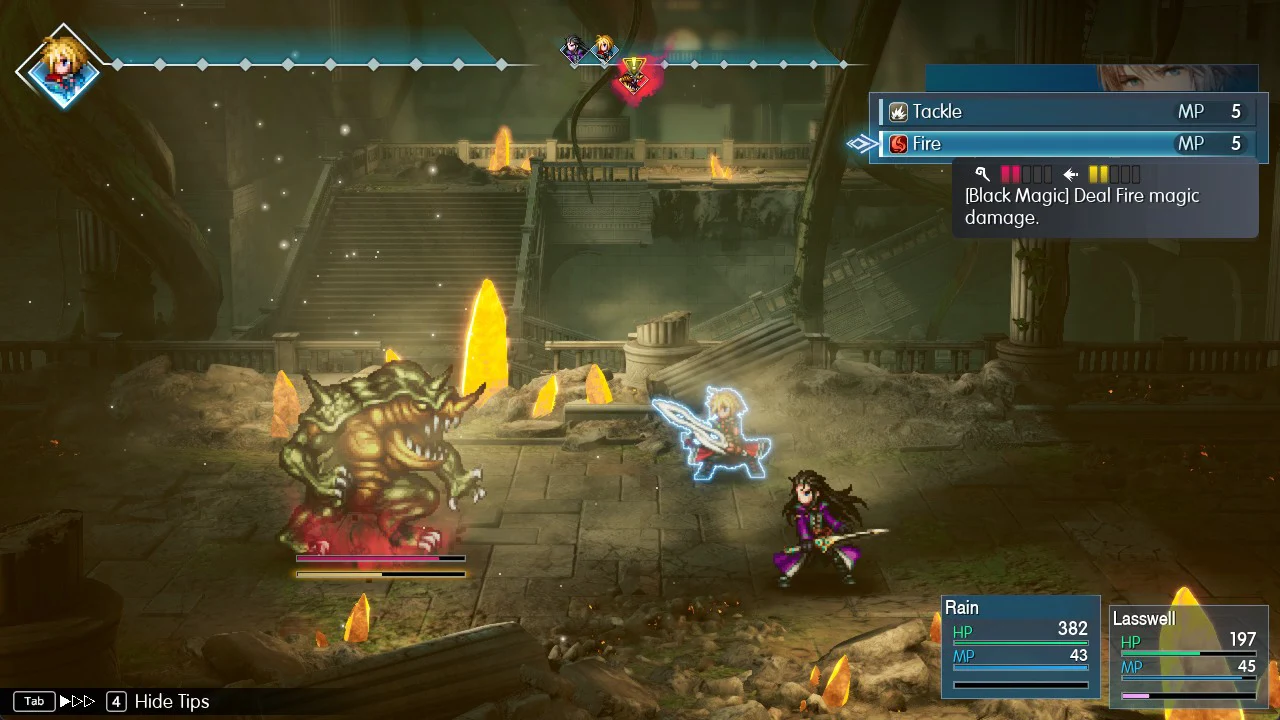
| Fire | Rain | Staff, 2 of 5 | 2 of 5 |
Dawn Frost reads “Deal Ice physical damage to an enemy.” and costs MP 5. It deals little damage but drains a lot of stagger.
Tackle costs MP 5 and is described as “Deal physical damage to an enemy.” Of the three, it carries the strongest stagger rating.
Fire reads “[Black Magic] Deal Fire magic damage.” and costs MP 5. Compared with the other two, it trades stagger for more damage.
Use weaknesses to empty the stagger gauge faster
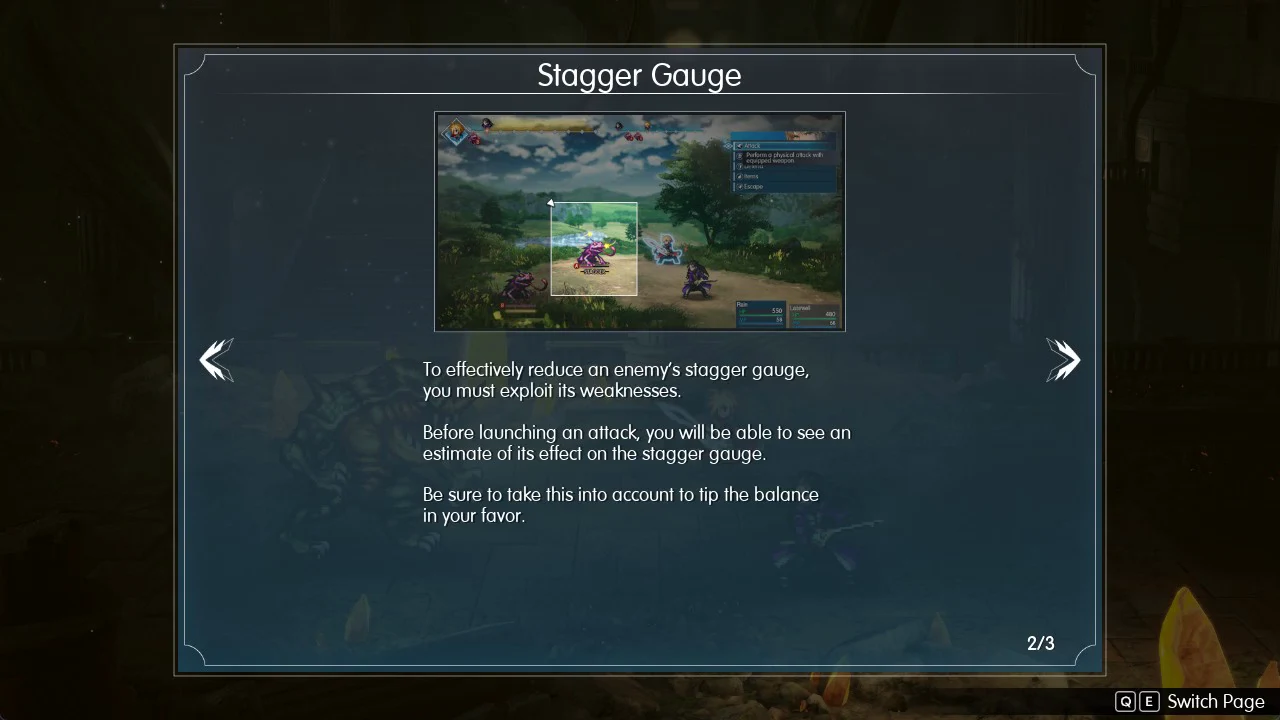
Stagger power is only half of it. The “Stagger Gauge” (2/3) tutorial page says: “To effectively reduce an enemy’s stagger gauge, you must exploit its weaknesses.” It also points out a preview: “Before launching an attack, you will be able to see an estimate of its effect on the stagger gauge.” And it adds: “Be sure to take this into account to tip the balance in your favor.”
An enemy’s weaknesses stay hidden until you hit it with that element. Until then, the Affinities row in its target info shows “?” icons. Belmodar, for example, is weak to Fire, so Rain’s Fire shows “Weak” when aimed at it.
Items can stagger some enemies too. In Grandshelt Castle, a Potion used from Items can target a Skeleton, and it damages the Skeleton and leaves it “STAGGERED”. Where that happens is in the Grandshelt Castle walkthrough.
Enemy levels and stagger
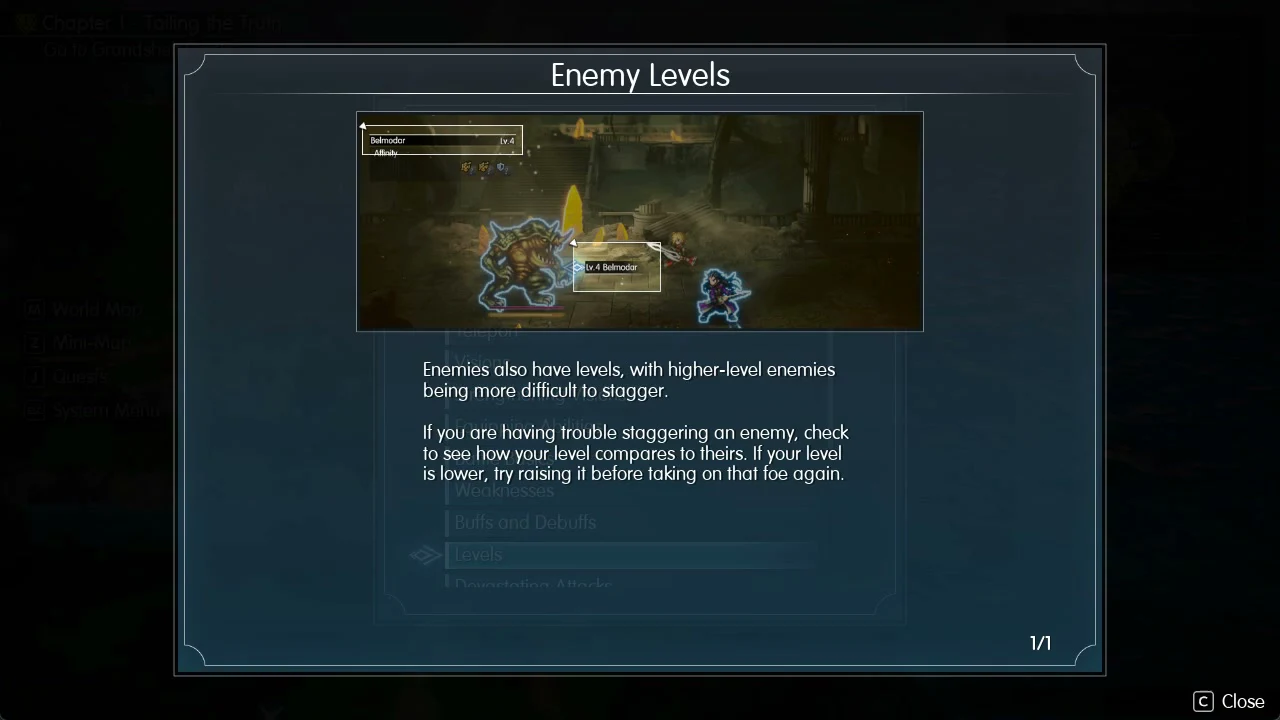
The “Enemy Levels” Help page states that “Enemies also have levels, with higher-level enemies being more difficult to stagger.” You can read an enemy’s level in its target info at the top left, next to its name, and on its target label in the field of battle, where it shows as “Lv.4 Belmodar”. The same page advises, “If you are having trouble staggering an enemy, check to see how your level compares to theirs. If your level is lower, try raising it before taking on that foe again.”
Bonus phase and sweeping stagger
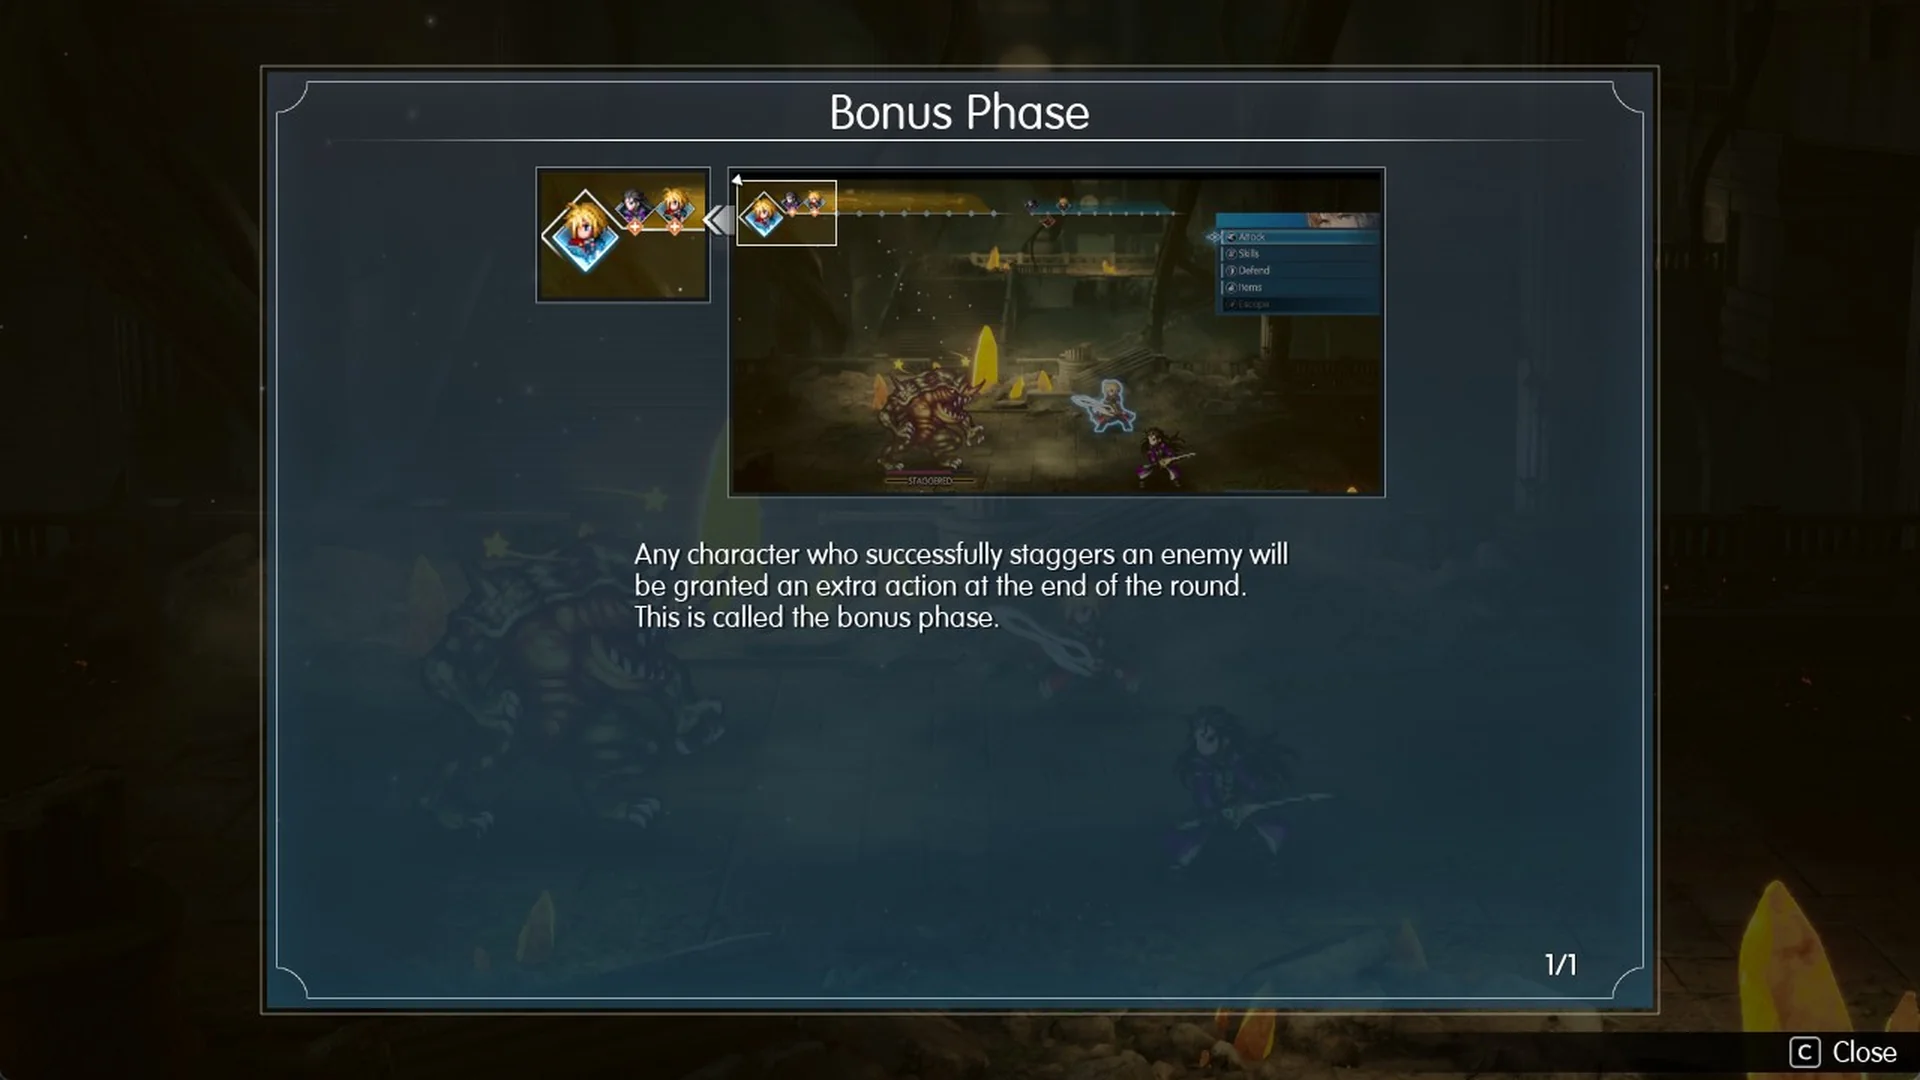
The “Bonus Phase” tutorial page says: “Any character who successfully staggers an enemy will be granted an extra action at the end of the round. This is called the bonus phase.” When it starts, a BONUS banner appears on screen. The “Sweeping Stagger” tutorial page says: “If you stagger all enemies in a single turn, you will trigger what is called a sweeping stagger. This will grant all party members an extra action during the bonus phase.”
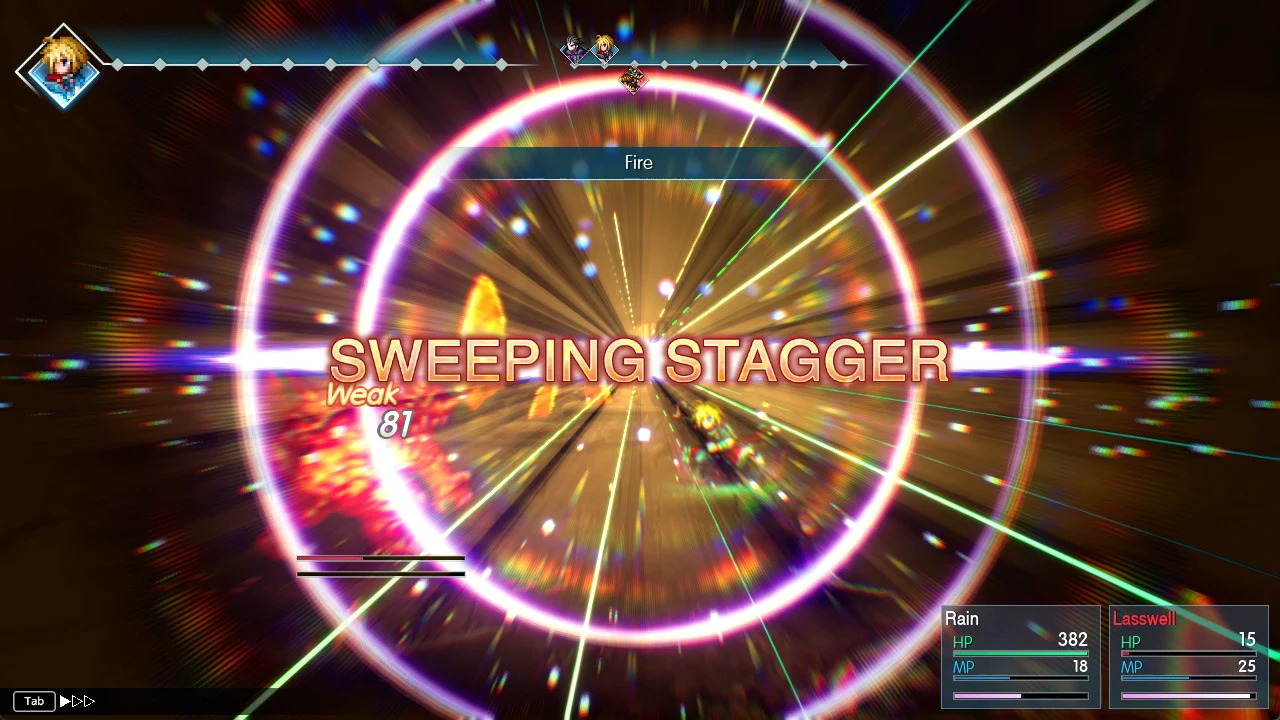
Belmodar is the only enemy in its fight, so any stagger on it counts as a sweeping stagger. You’ll know it worked when the words SWEEPING STAGGER fill the screen. This happens whether the finishing hit is Lasswell’s Dawn Frost or Rain’s Fire. Belmodar then shows STAGGERED, and the bonus phase begins.
Select Resonance after a stagger
With the Visions Tronn and Leah equipped, staggering enemies gives the party a round of queued commands, after which a “SELECT RESONANCE” screen opens with “C Cancel” available. The screen offers one Resonance per equipped Vision, with W for Tronn’s Hibernal Fury and A for Leah’s Healing Wind. Highlighting either one shows its tooltip.
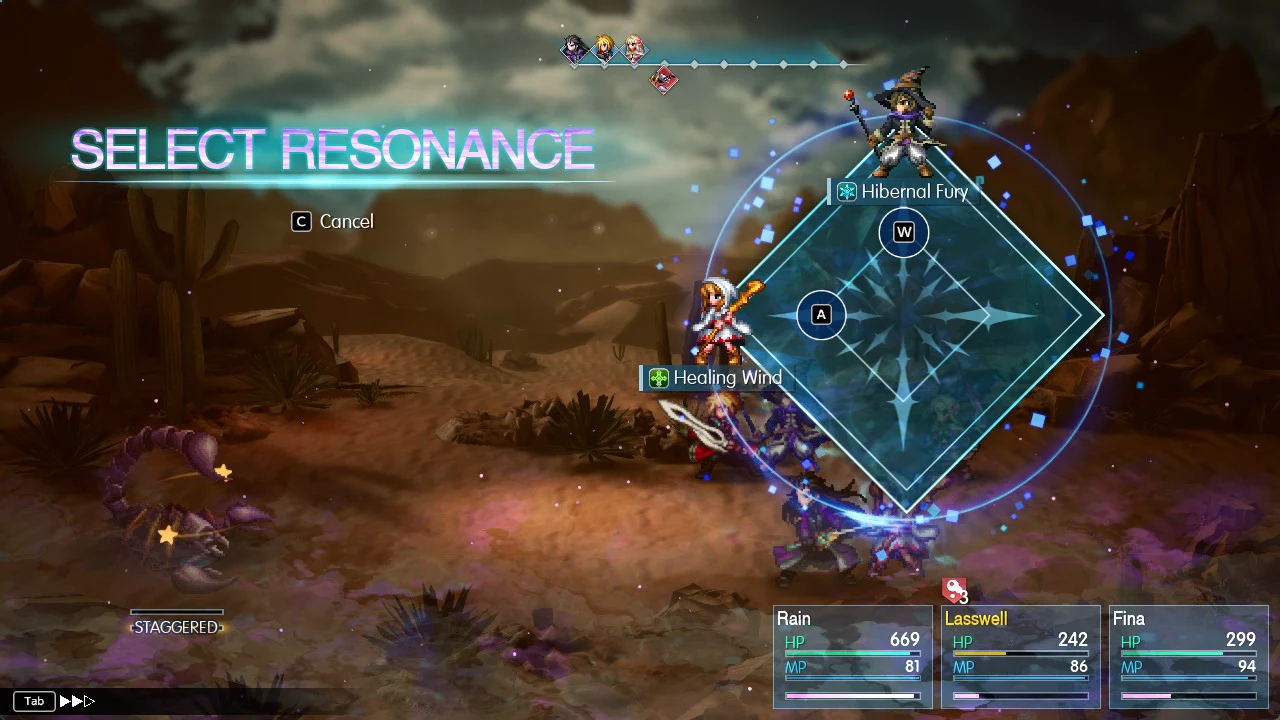
Hibernal Fury’s tooltip reads “Deal Ice magic damage to random enemies 5 times.” and it plays as a short cinematic of ice hitting the enemies.

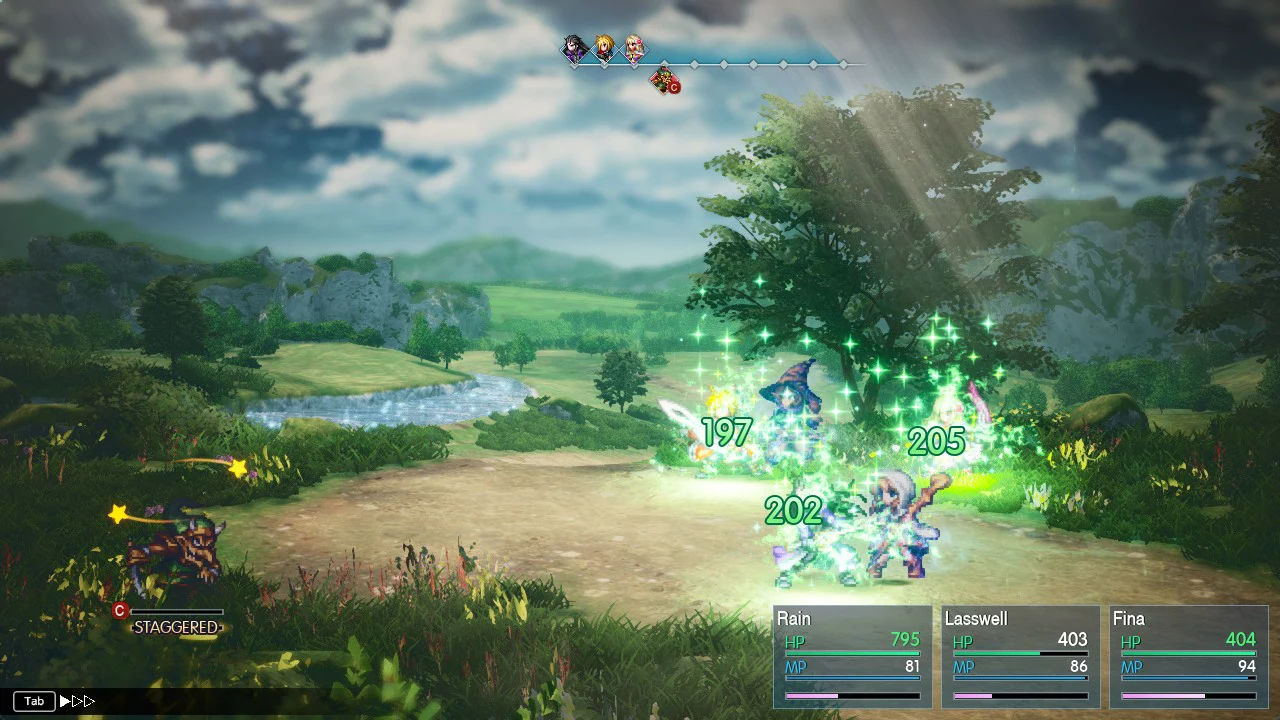
Healing Wind’s tooltip reads “Heal all allies and cast Regen on them. Heal effect can exceed max HP.” In one fight it took Rain from 598 to 795, Lasswell from 201 to 403 and Fina from 199 to 404, and since Rain’s maximum HP at Lv.9 is 718, his 795 sits above that maximum, with the over-the-maximum numbers shown in green. Pick Healing Wind when the party is hurt, and Hibernal Fury when you want extra Ice damage on a group, especially enemies weak to Ice.
Stop devastating attacks with a stagger
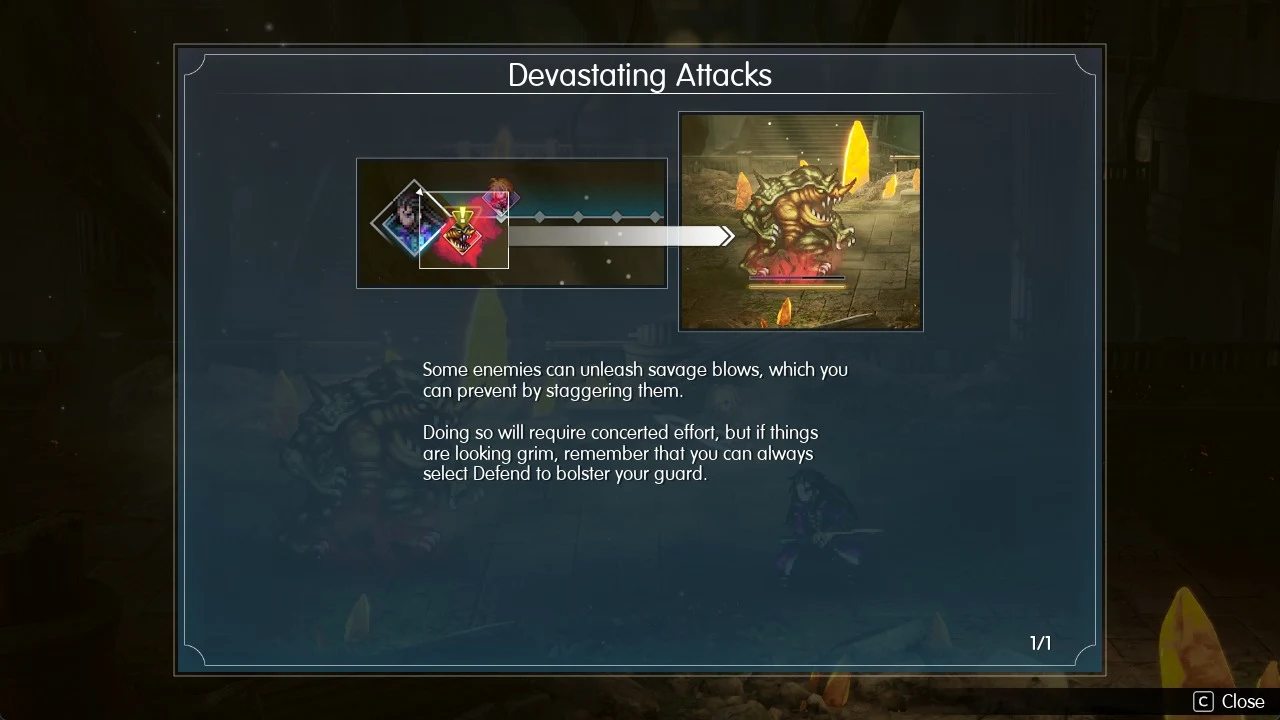
Stagger is also your main defense. The “Devastating Attacks” tutorial page warns: “Some enemies can unleash savage blows, which you can prevent by staggering them.” It goes on: “Doing so will require concerted effort, but if things are looking grim, remember that you can always select Defend to bolster your guard.”
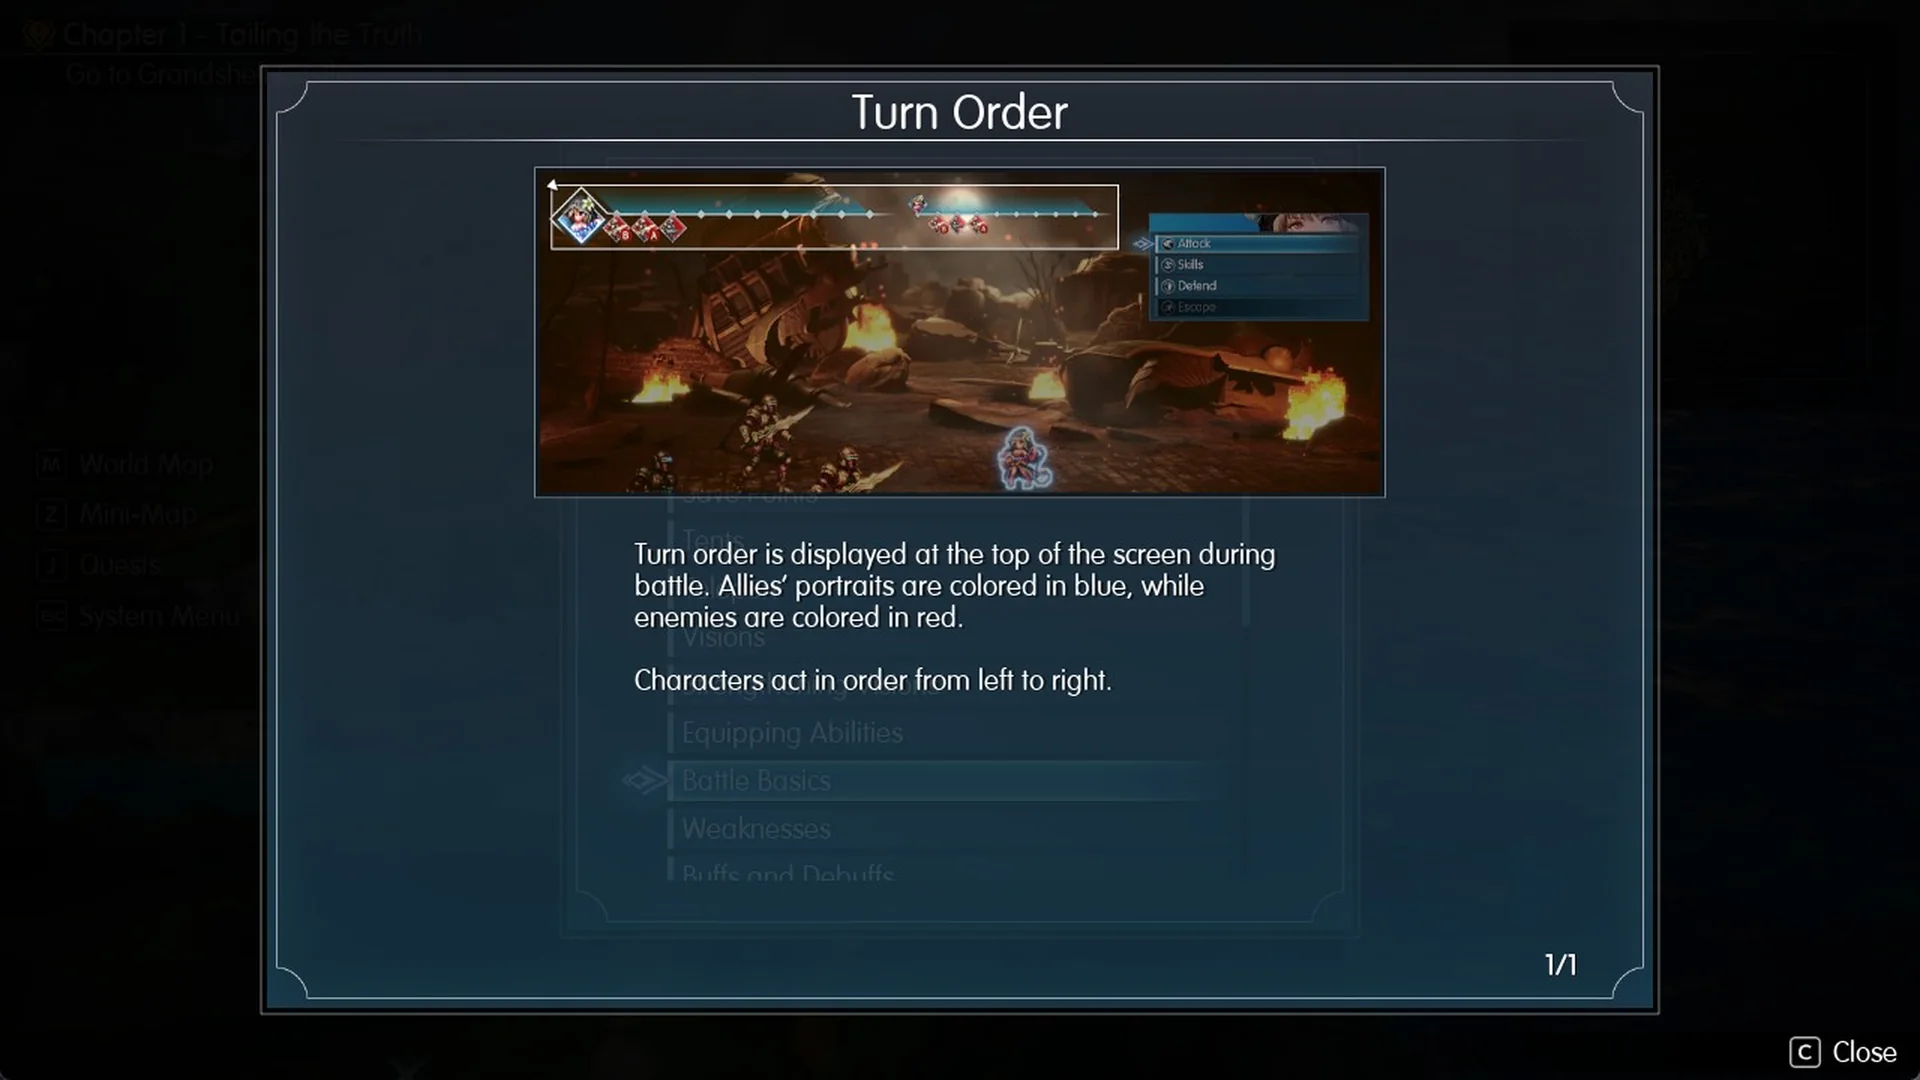
The “Turn Order” Help page under Battle Basics explains that “Turn order is displayed at the top of the screen during battle. Allies’ portraits are colored in blue, while enemies are colored in red.” and that “Characters act in order from left to right.” That bar tells you how many turns you have before an enemy acts, so it is what you watch when you are racing to stagger it.
Watch for the warning signs. The enemy glows red, and its icon on the turn order bar gets a red flare with a yellow “!”. To stop the attack, stagger the enemy before its turn comes up. Against Belmodar, the red attack never lands as long as it is staggered first each time.
Limit Bursts and stagger
The “Limit Bursts” Help page explains, “Fill up a character’s limit gauge to unleash a powerful attack called a Limit Burst.” and adds, “This takes time, but with enough sheer force to turn the tide of a battle, these attacks are worth the wait.”
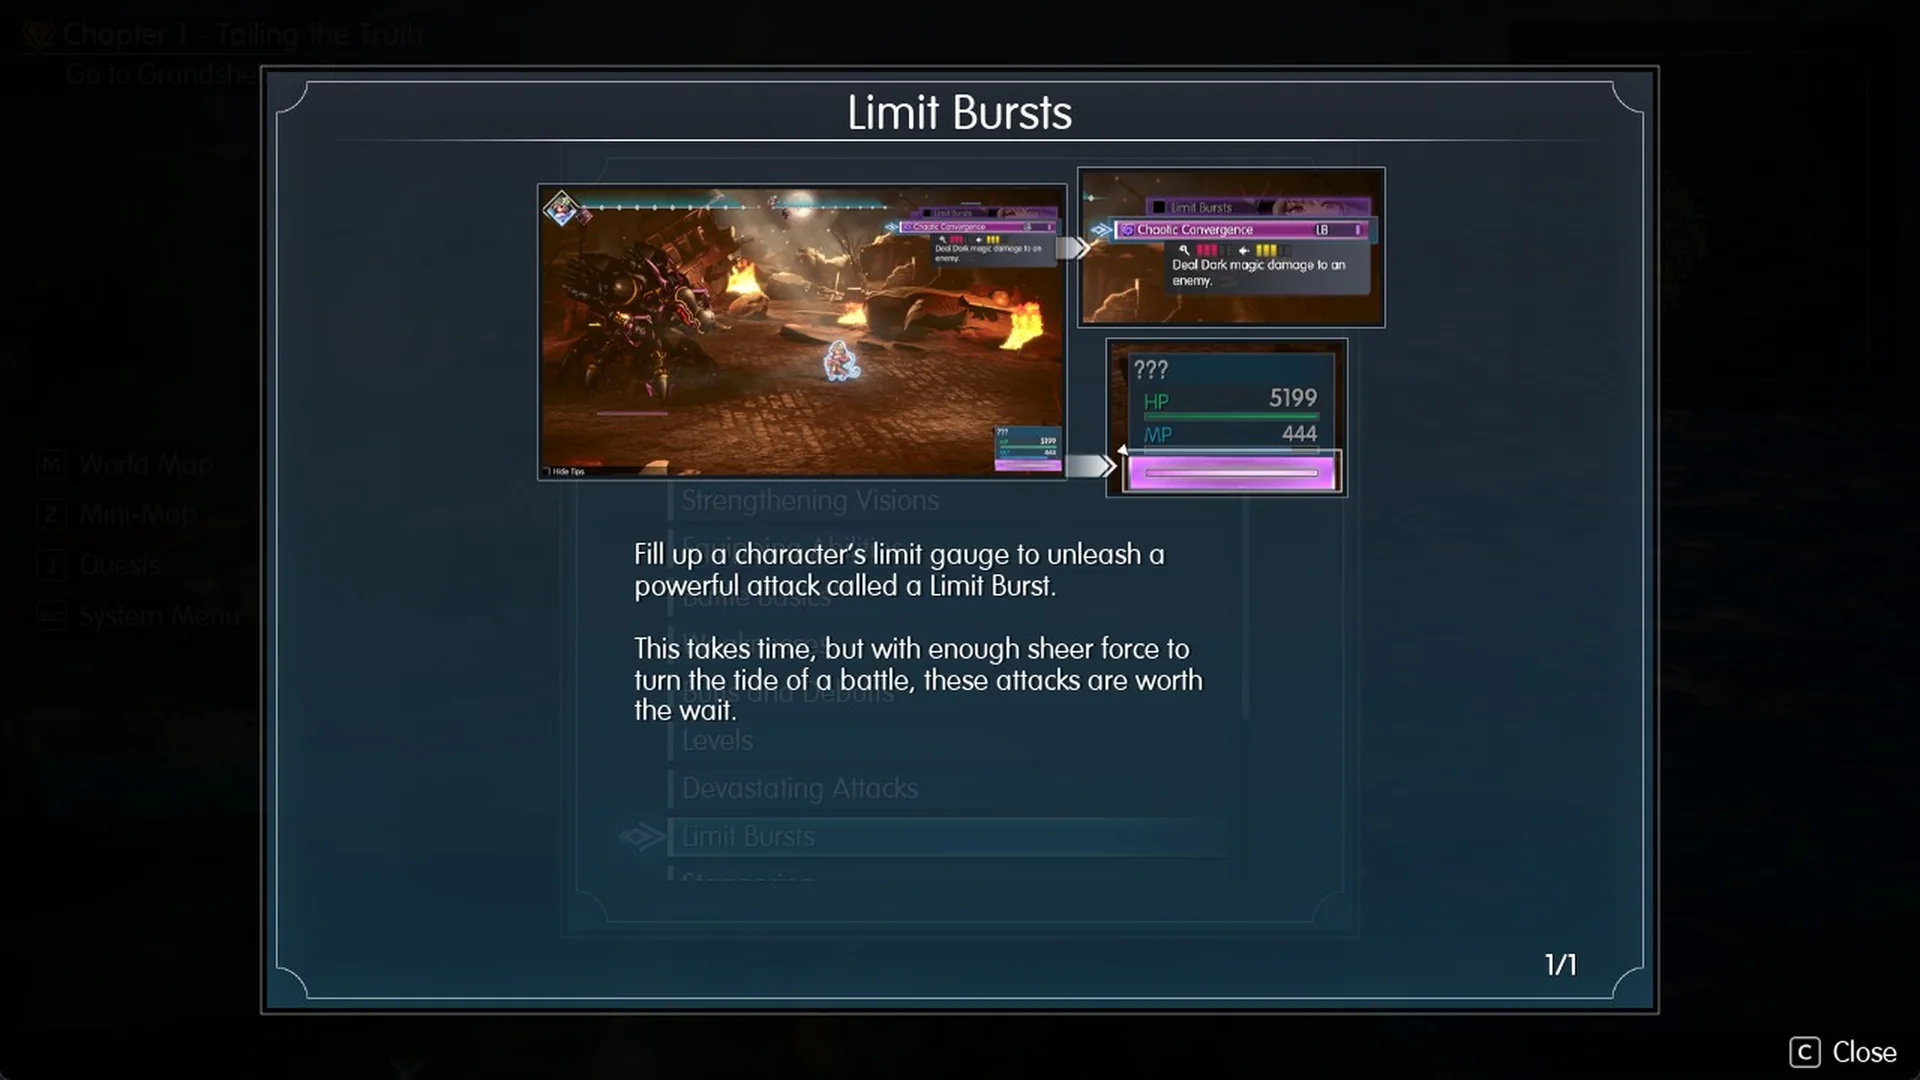
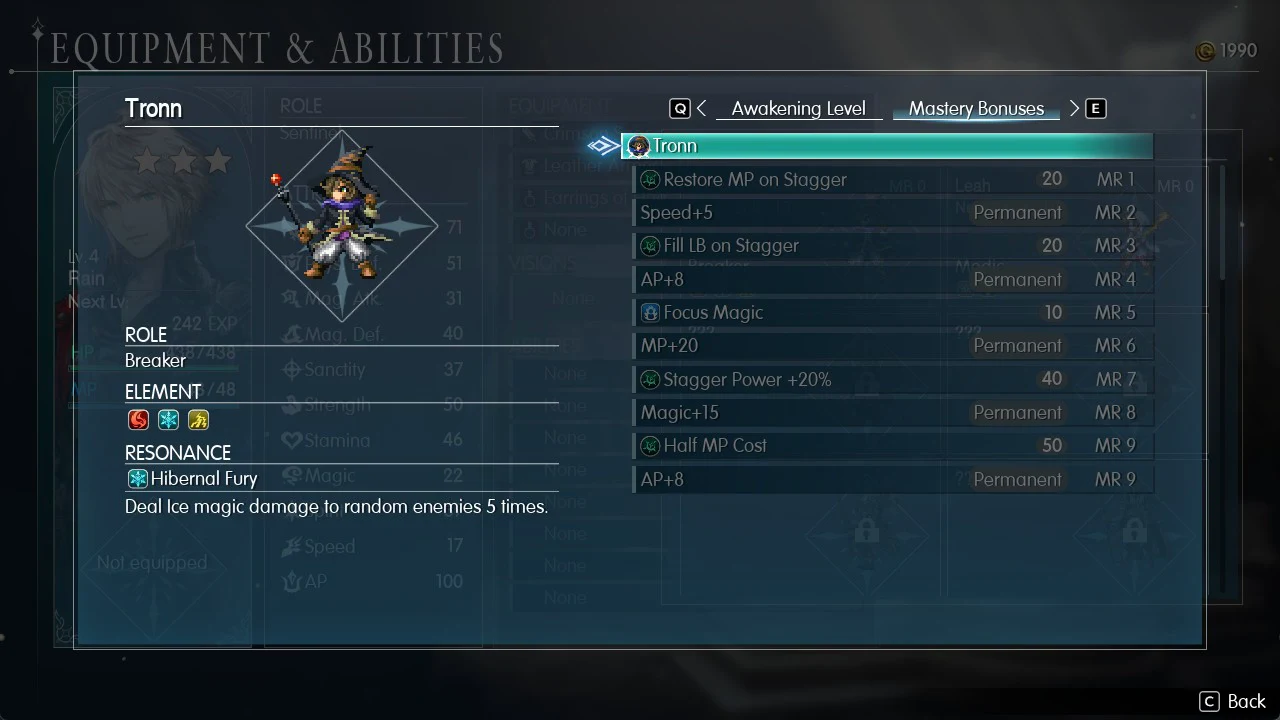
In battle menus, a Limit Burst carries the “LB” tag. Stagger and the limit gauge connect through a Vision ability, as Tronn’s Mastery Bonuses list “Fill LB on Stagger” at MR 3 for an AP cost of 20.
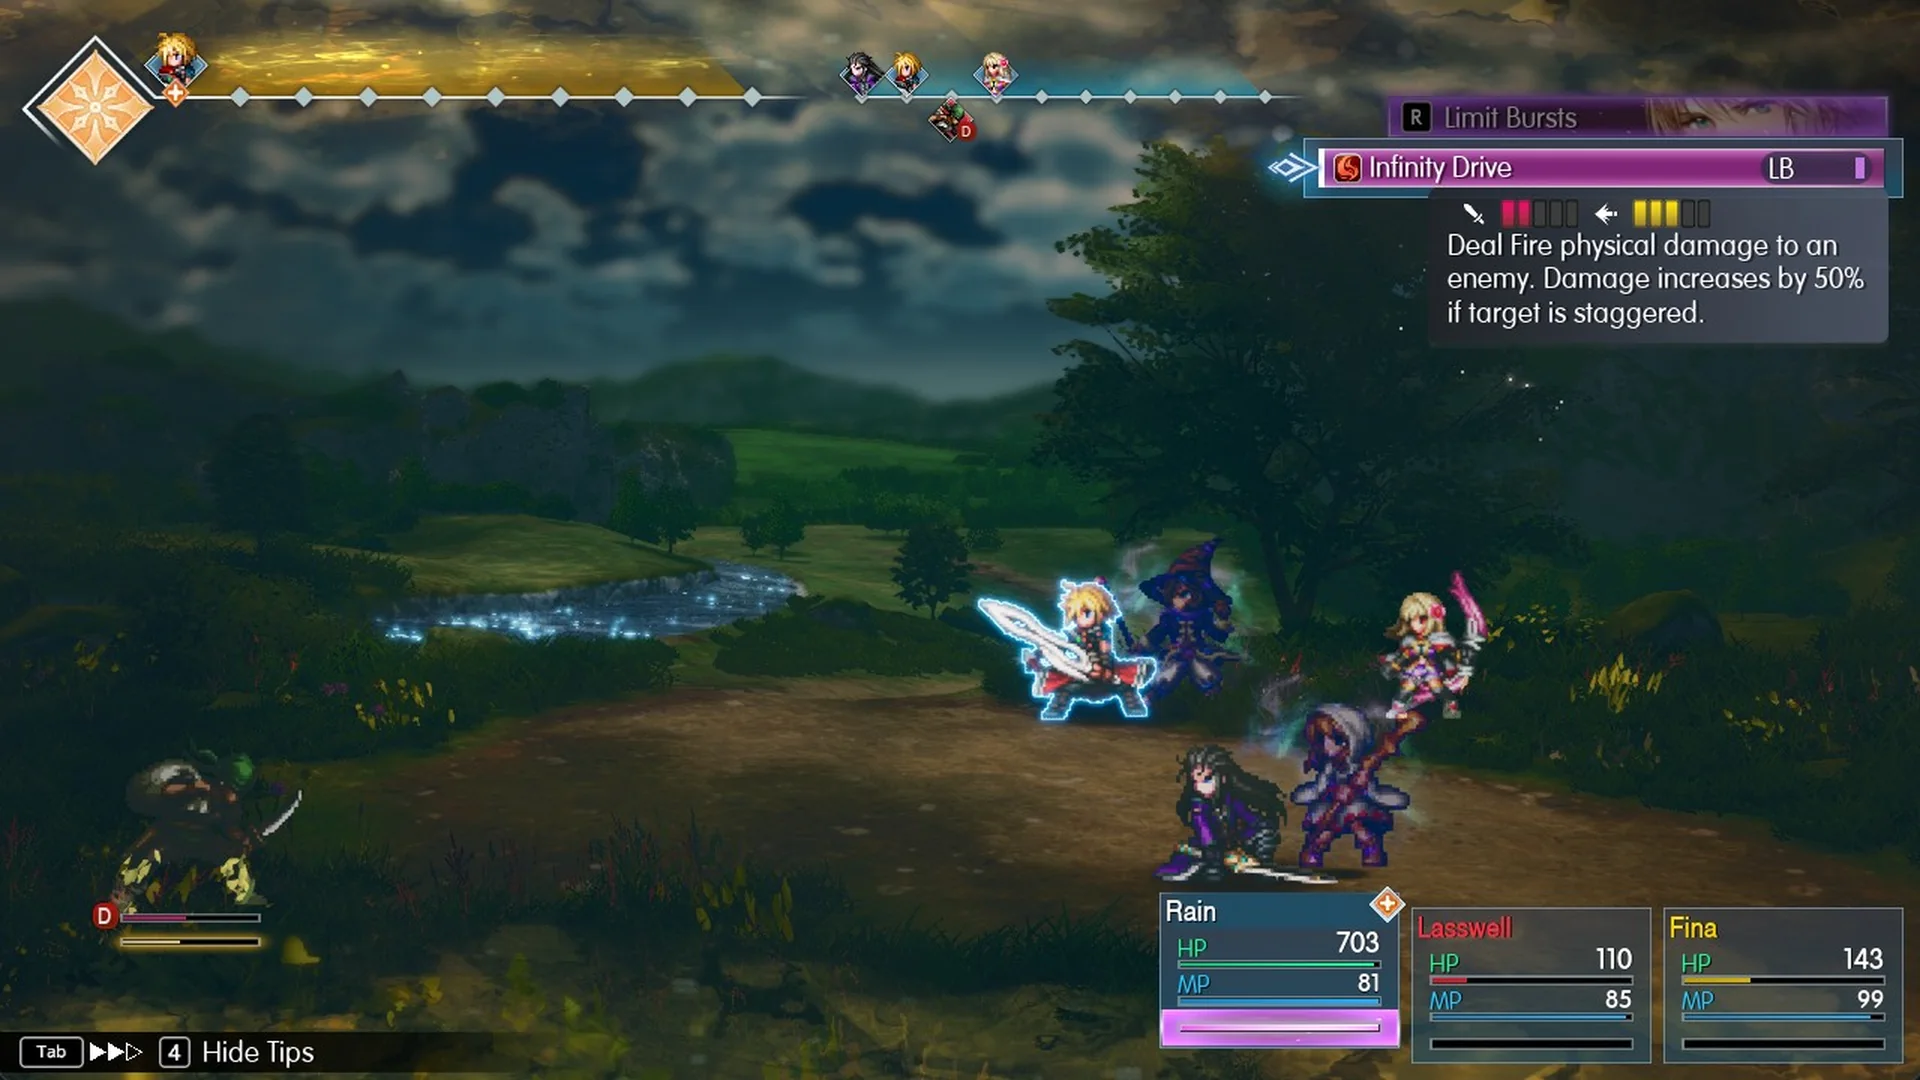
Once Rain’s limit gauge, the pink bar under his HP and MP on the party panel, is full, a “Limit Bursts” bar with the R key appears above the command menu. Press R to bring up his Limit Burst, Infinity Drive, marked with the “LB” tag, and its tooltip reads “Deal Fire physical damage to an enemy. Damage increases by 50% if target is staggered.” That makes it hit hardest when you hold it for a staggered enemy, and its Fire element suits Fire-weak enemies such as Alraune.
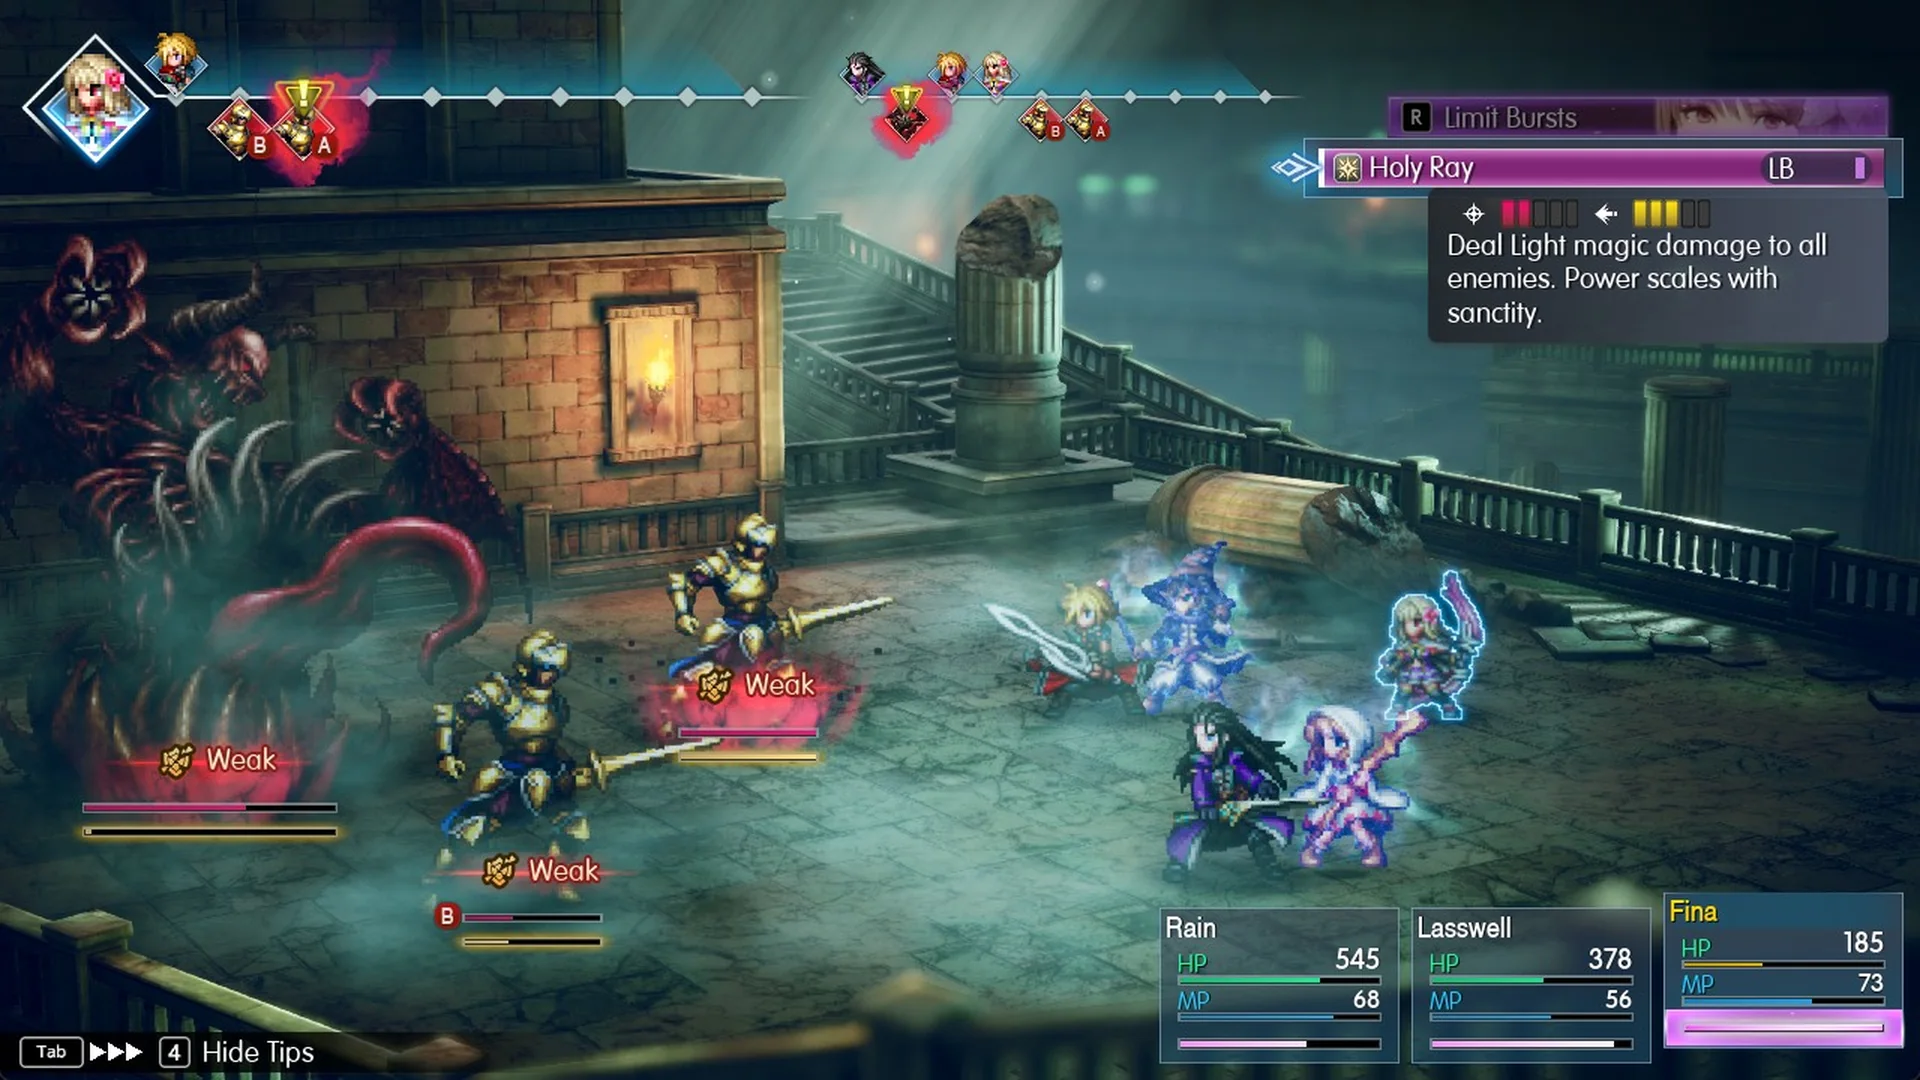
Fina’s Limit Burst is Holy Ray, and its tooltip reads “Deal Light magic damage to all enemies. Power scales with sanctity.” Once Fina’s limit gauge is full, it shows up with the “LB” tag in the same “Limit Bursts” row (R) as Rain’s Infinity Drive. In the Kolobos Ruins boss fight, a single Holy Ray defeats both Enhanced Wraith Soldiers (Lv.9, 650 HP each, weak to Light) and staggers The Hunger v2, which is also weak to Light.
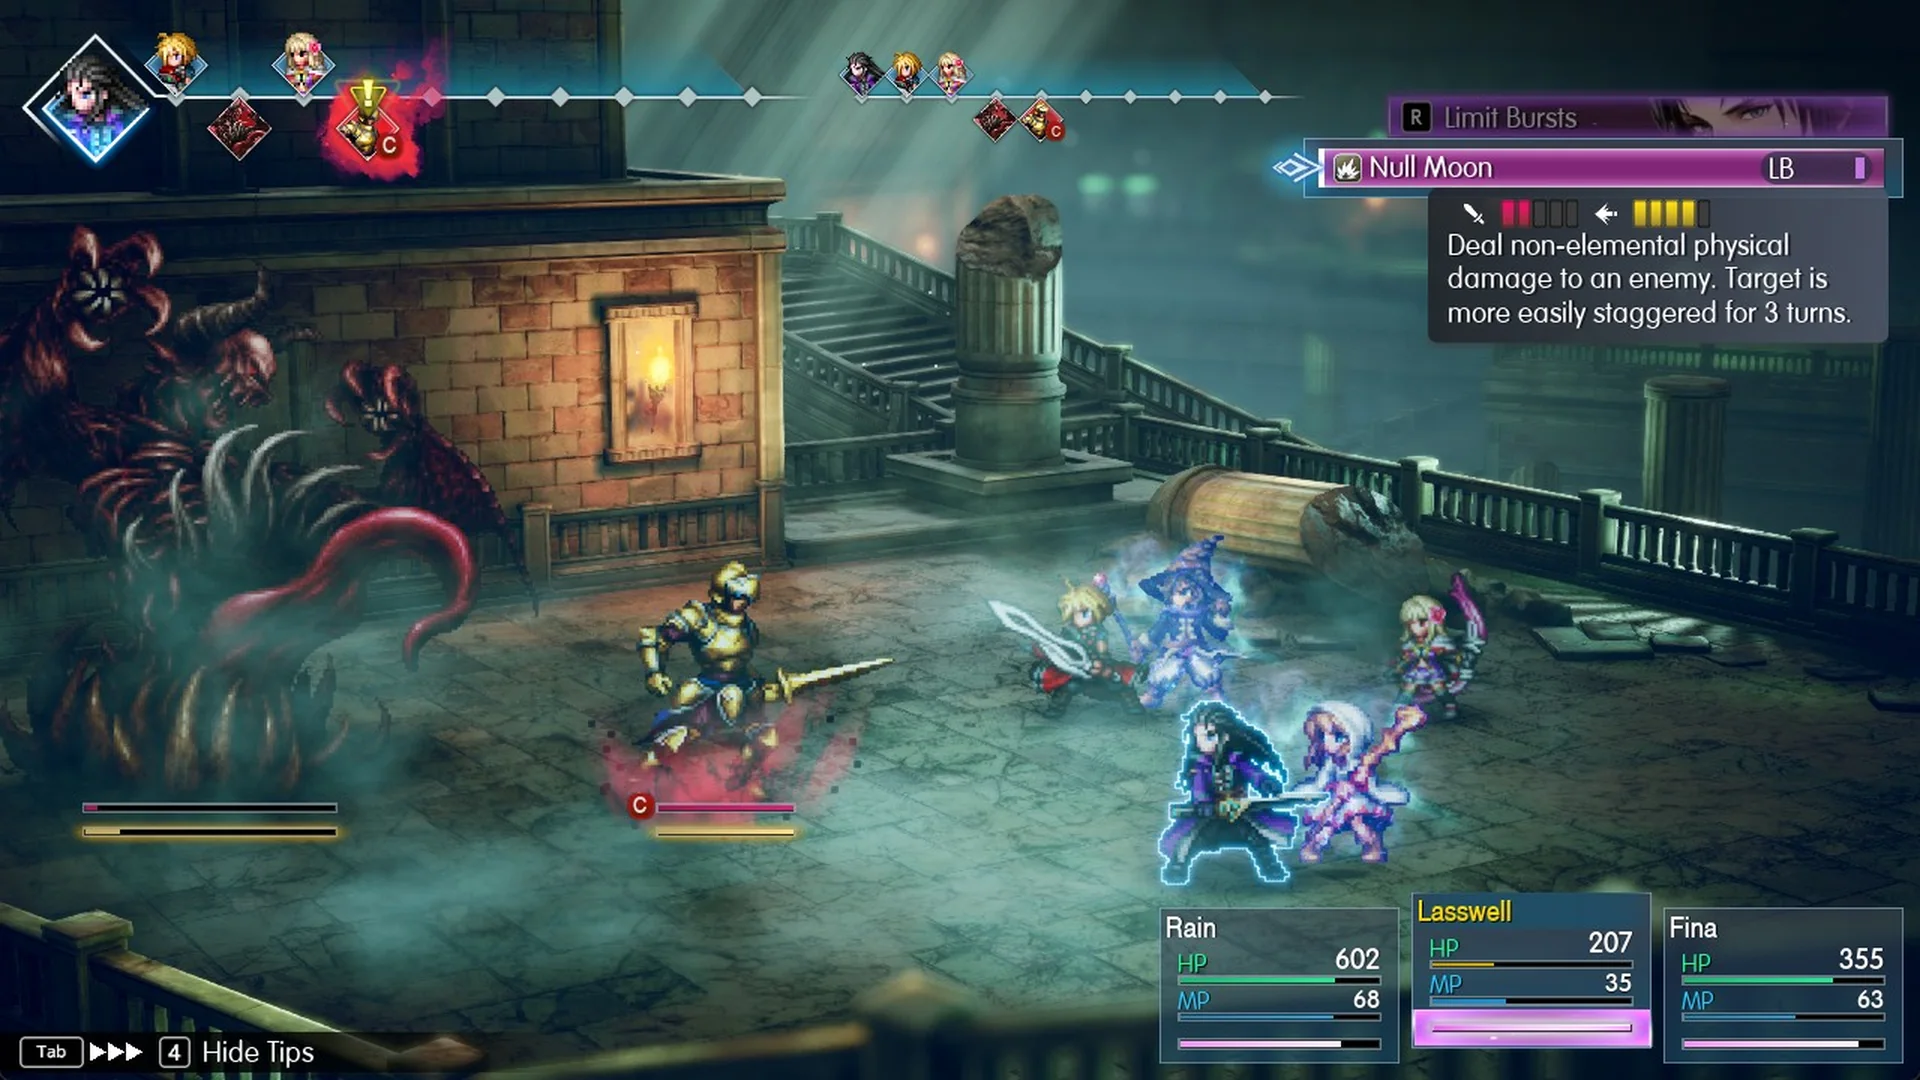
Lasswell’s Limit Burst is Null Moon, and its tooltip reads “Deal non-elemental physical damage to an enemy. Target is more easily staggered for 3 turns.” That 3-turn window means you either open with it on a boss you want to stagger or save it to finish the fight. In the Kolobos Ruins boss fight, Null Moon is the hit that finishes off The Hunger v2.
The Limit Bursts list gives each character’s Limit Burst, its unlock level and the game’s description. Lid uses March of the Machines, while Nichol’s Formation: Steeled Advance replenishes allies’ limit gauges.
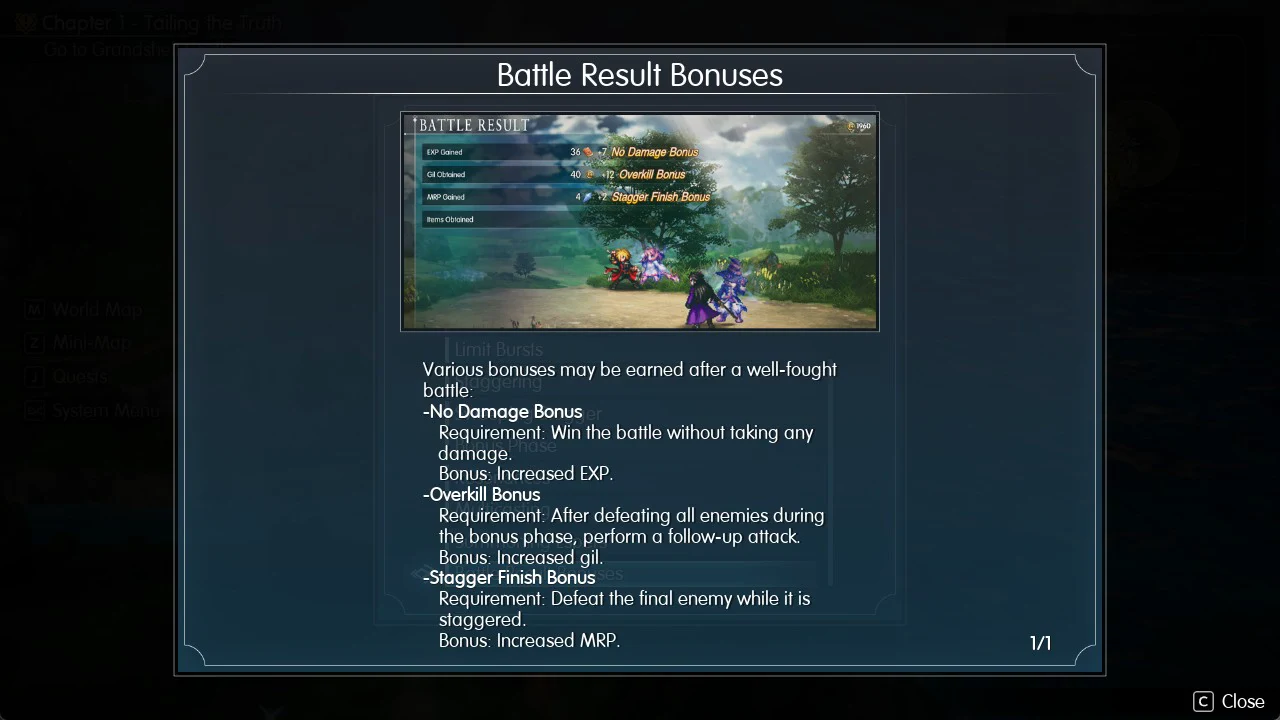
Battle Result bonuses: No Damage, Overkill and Stagger Finish
The “Battle Result Bonuses” Help page opens with “Various bonuses may be earned after a well-fought battle:” and lists three of them. They are the No Damage Bonus, the Overkill Bonus and the Stagger Finish Bonus, and two of the three come straight from stagger.
| Bonus | Requirement | Bonus |
|---|---|---|
| No Damage Bonus | “Win the battle without taking any damage.” | “Increased EXP.” |
| Overkill Bonus | “After defeating all enemies during the bonus phase, perform a follow-up attack.” | “Increased gil.” |
| Stagger Finish Bonus | “Defeat the final enemy while it is staggered.” | “Increased MRP.” |
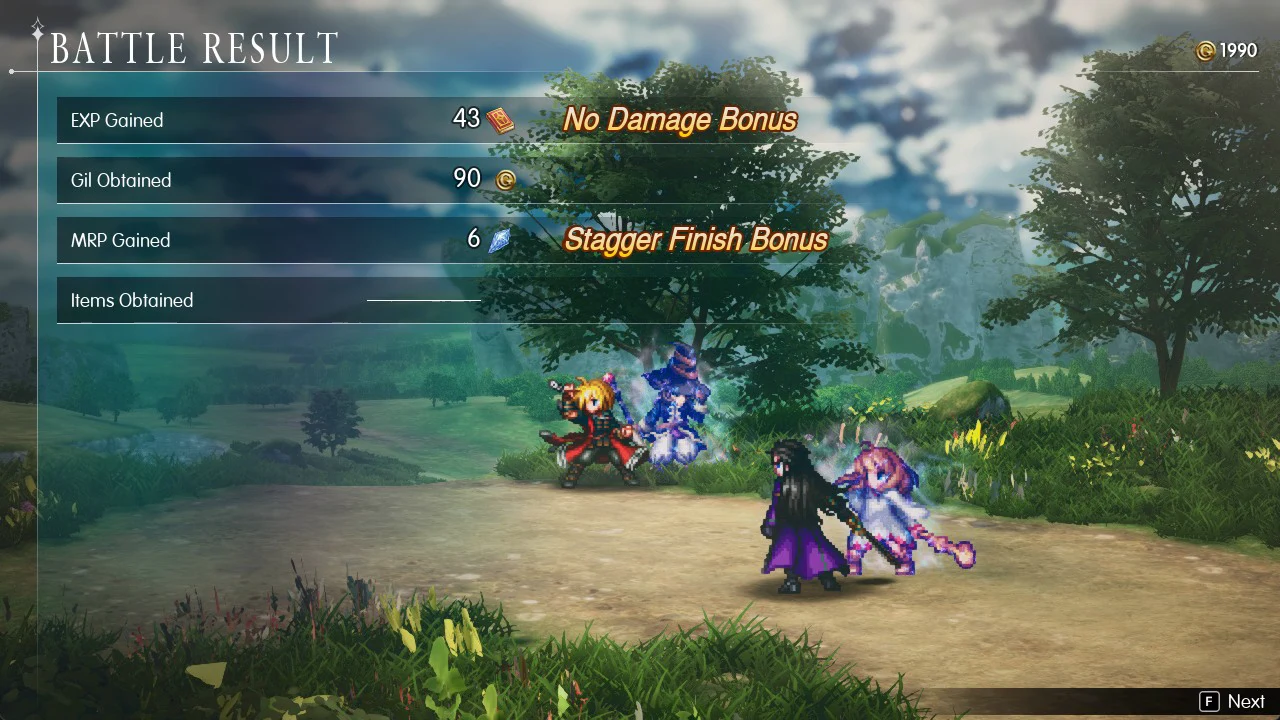
After a Chapter 1 battle on the road by the river, the BATTLE RESULT screen shows each earned bonus as an orange label beside the row it increases: “No Damage Bonus” appears by EXP Gained, and “Stagger Finish Bonus” by MRP Gained. For a Stagger Finish Bonus, have the final enemy still standing be staggered when it is defeated; for an Overkill Bonus, continue attacking during the bonus phase once all enemies are down. MRP increases a Vision’s Mastery Rank.
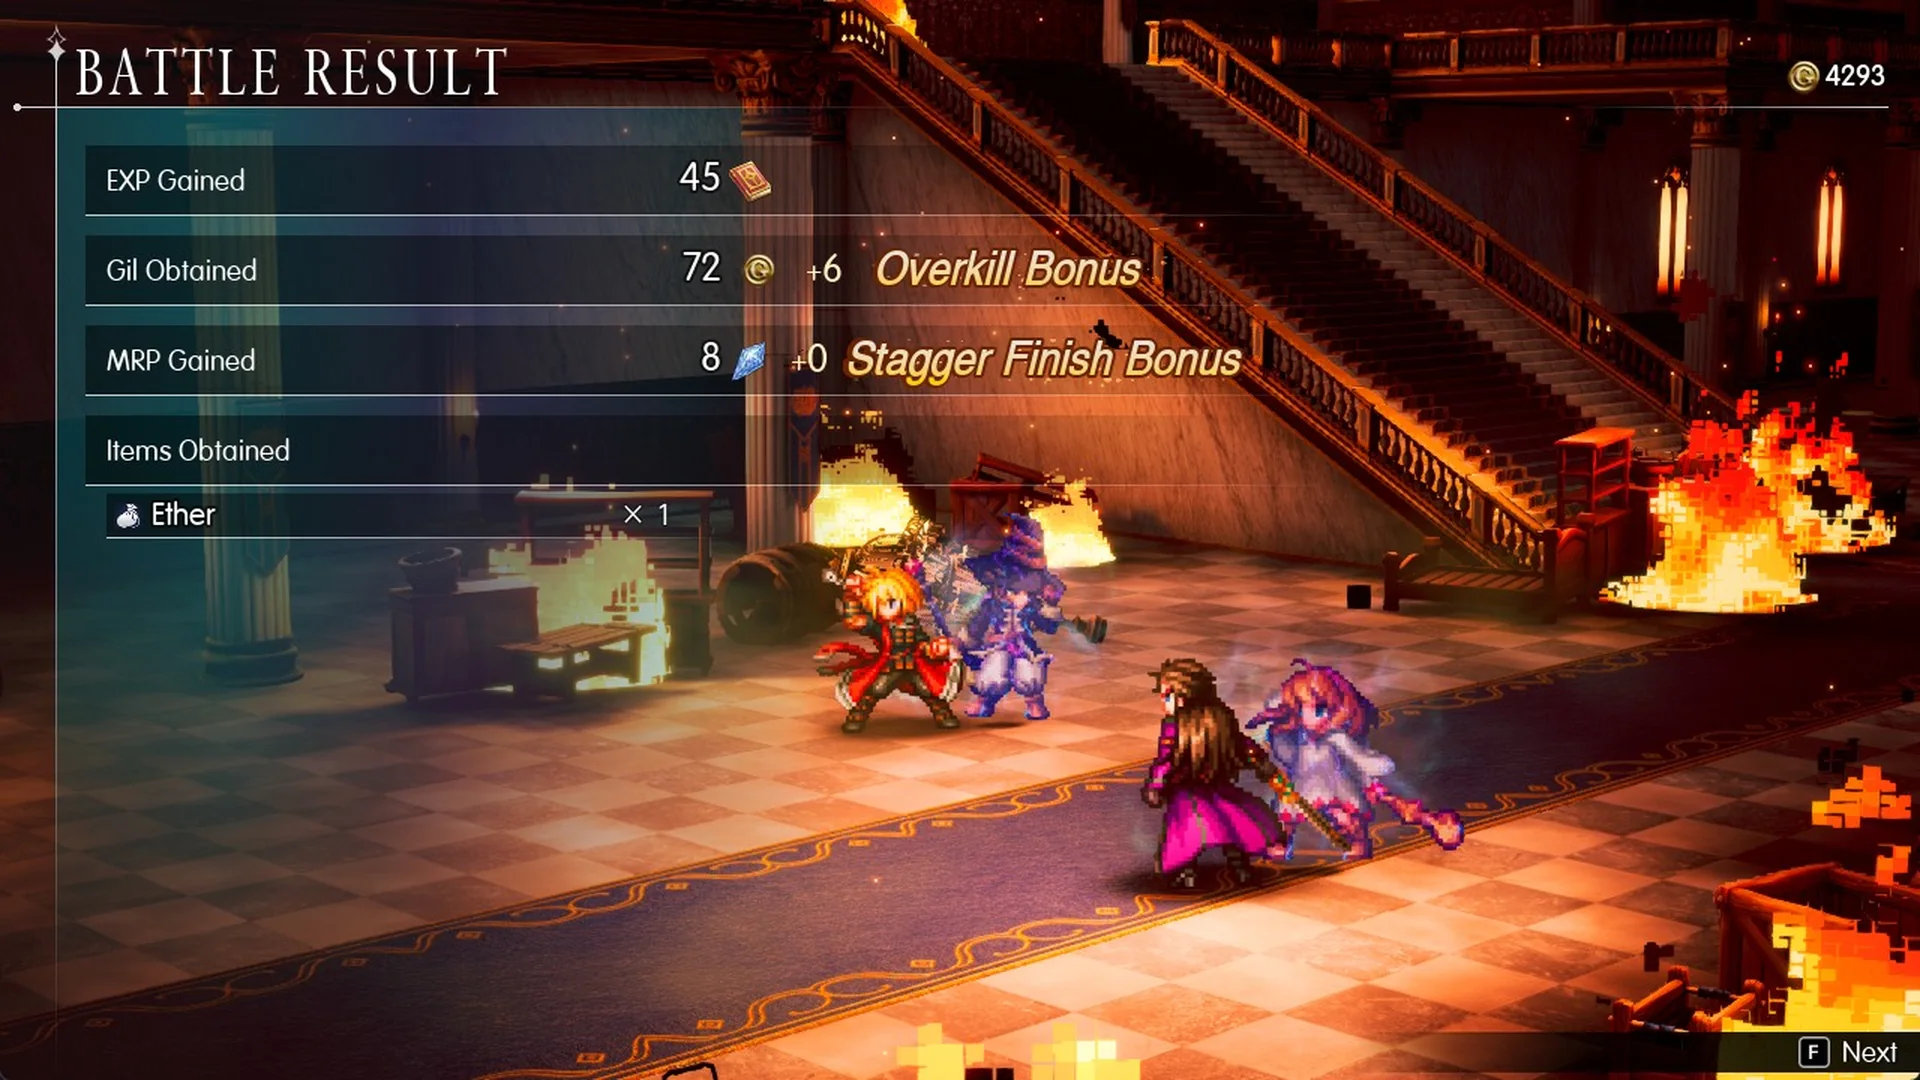
When you win a battle with both bonuses, the BATTLE RESULT screen puts the Overkill Bonus label next to Gil Obtained and the Stagger Finish Bonus label next to MRP Gained. Each bonus first appears as its own “+” number beside its row before it is added in. After a random battle in Grandshelt Castle, for example, Gil Obtained reads 72 with “+6” from the Overkill Bonus, and MRP Gained reads 8 with “+0” from the Stagger Finish Bonus, so the Overkill Bonus is a small extra amount of gil on top of the battle’s normal gil.