Life isn’t always a smooth ride, and the same goes for your Windows experience. Imagine working on an important project when your system suddenly crashes. Even the remote possibility of losing your work can be anxiety-inducing. One such error that Windows users encounter is the ‘Bad System Config Info’ Blue Screen of Death (BSOD) error. This guide will help you understand the underlying causes and provide step-by-step solutions to resolve this issue.
What is the ‘Bad System Config Info’ Error?
The ‘Bad System Config Info’ error typically occurs due to problems with both hardware and software, with software issues being more common. This error often stems from:
- Malfunctioning Boot Configuration Data (BCD) or registry files
- Faulty hardware
- Corrupt or unstable drivers
- Damaged hard drive or RAM
Once you identify the problem, fixing it becomes much simpler and quicker. Let’s explore various solutions to resolve this error.
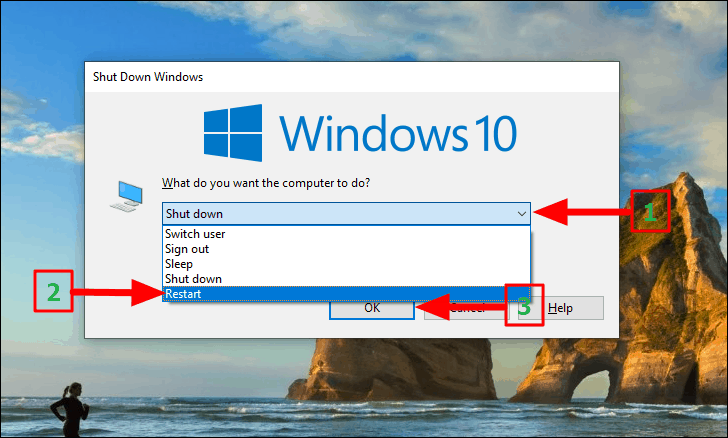
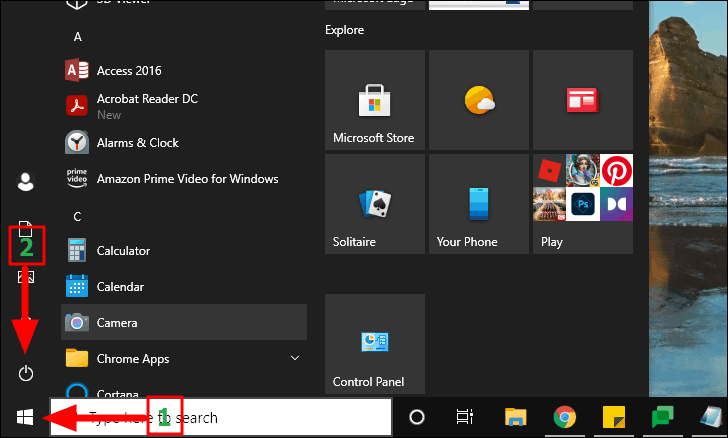
1. Restart Your Computer
This should be your first approach as it’s the simplest and often quite effective in fixing the error. Restarting your computer can resolve many issues.
To restart:
- Open the Start Menu
- Click on the ‘Power’ icon
- Select ‘Restart’
Alternatively, use the ALT+F4 keyboard shortcut and select ‘Restart’ from the drop-down menu.
2. Check for Hardware Issues
If restarting doesn’t solve the problem, check your system for RAM and Hard Drive issues. Over time, these components might get damaged or their connections might come loose.
If you’re comfortable with computer hardware:
- Unscrew your computer case
- Check for loose connections, particularly with RAM and Hard Drive
- Reseat components if necessary
However, if you’re not confident in handling hardware, it’s best to consult a technician to avoid causing further damage.
3. Run Windows Troubleshooter
Windows has built-in troubleshooters that can identify and fix various issues. Here’s how to use them:
- Press
WINDOWS + Ito open ‘Settings’ - Click on ‘Update & Security’
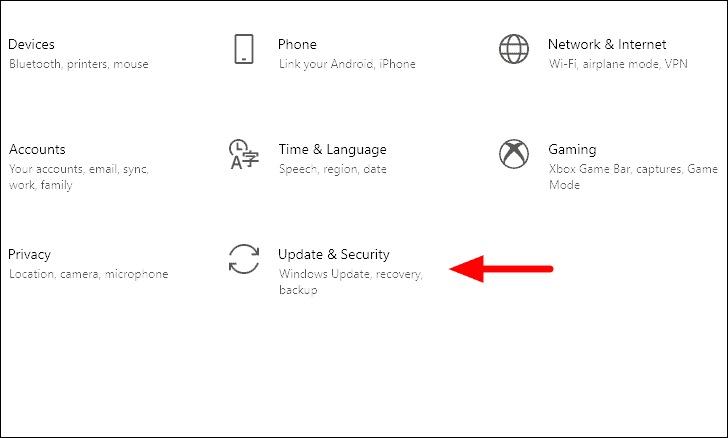
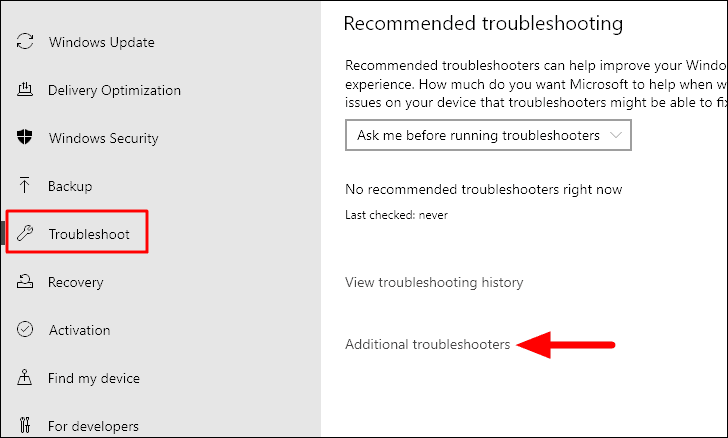
- Select ‘Troubleshoot’ from the left menu
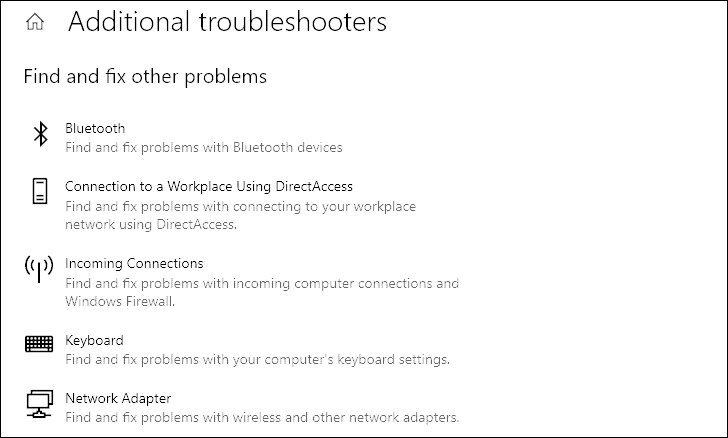
- Click on ‘Additional troubleshooters’
- Run the relevant troubleshooters from the list
4. Update Windows
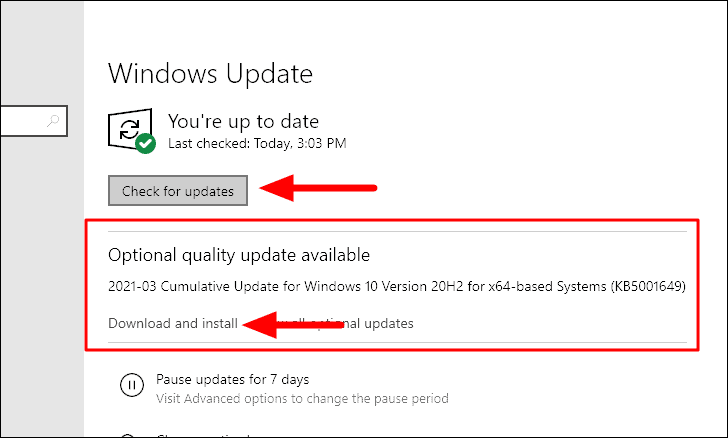
Running an outdated version of Windows can sometimes lead to the ‘Bad System Config Info’ error. Here’s how to check for and install updates:
- Press
WINDOWS + Ito open ‘Settings’ - Click on ‘Update & Security’

- Click ‘Check for updates’
- If updates are available, click ‘Download and install’
Updating Windows also updates all drivers to the best available option, potentially resolving driver-related issues.
5. Run SFC (System File Check) Scan
The System File Check (SFC) scan can repair corrupted Windows system files. Here’s how to run it:
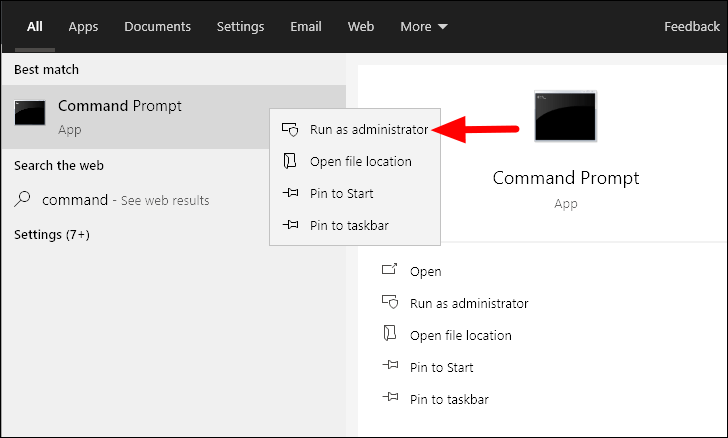
- Search for ‘Command Prompt’ in the Start Menu
- Right-click on it and select ‘Run as Administrator’
- First, run the DISM tool by entering:
DISM /online /cleanup-image /restorehealth
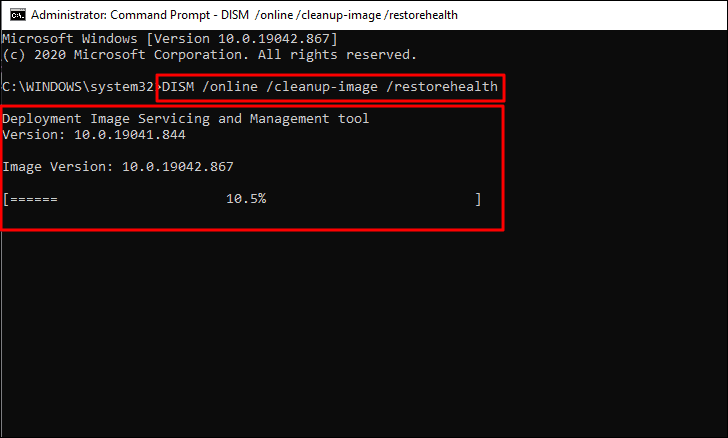
- After DISM completes, run the SFC scan by entering:
sfc /scannow

The scan will take some time to complete and will fix any issues it finds.
6. Run Check Disk Utility
The Check Disk utility scans the entire hard drive for errors and fixes them. To run it:
- Open Command Prompt as Administrator
- Type the following command and press Enter:
chkdsk /r
When asked to schedule the check for the next restart, type ‘Y’ and press Enter.
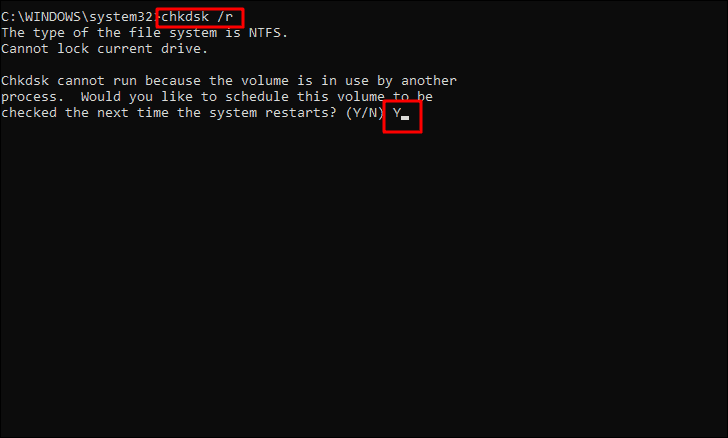
- Restart your system to run the Check Disk utility
If the utility can’t fix the issues, there might be a hardware problem with your hard disk. In this case, consider getting it repaired or replaced.
7. Use BCDEDIT Command
Incorrect system configuration can lead to the ‘Bad System Config Info’ error. The ‘bcdedit’ command can help fix this:
- Open the Start Menu and click on the ‘Power’ icon
- Hold the SHIFT key and click ‘Restart’
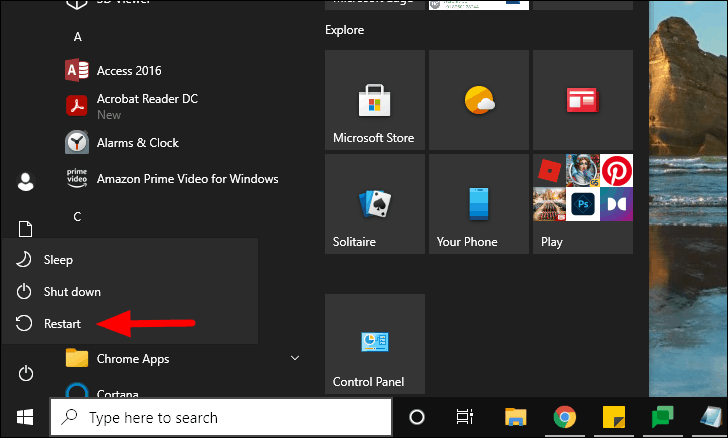
- In the ‘Choose an option’ screen, select ‘Troubleshoot’
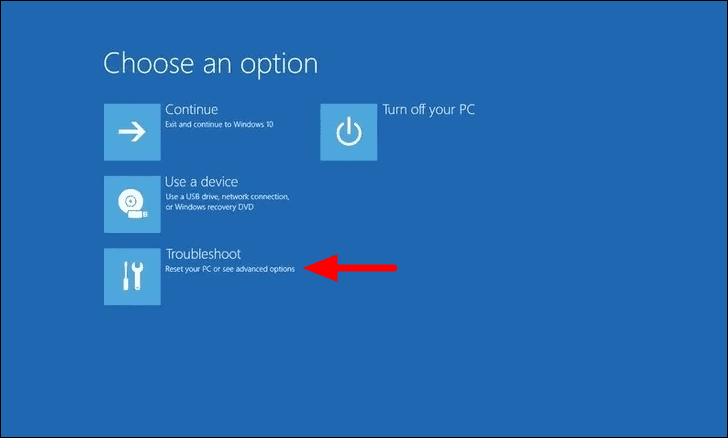
- Select ‘Advanced options’
- Select ‘Command Prompt’

- In the Command Prompt, enter these commands:
bcdedit /deletevalue {default} numproc
bcdedit /deletevalue {default} truncatememory
- Close Command Prompt and restart your computer.
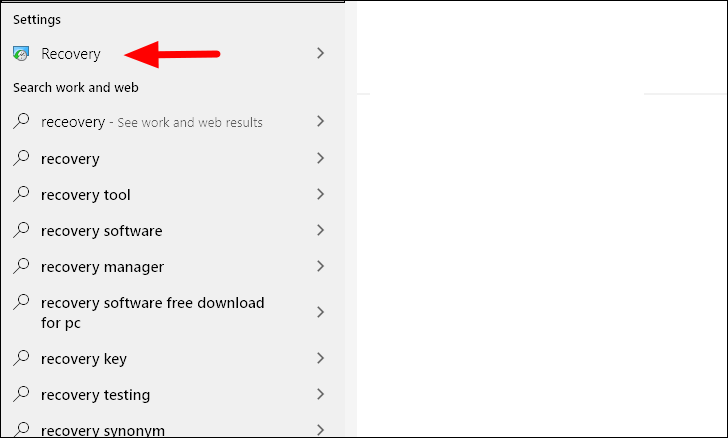
8. Restore System Files and Settings
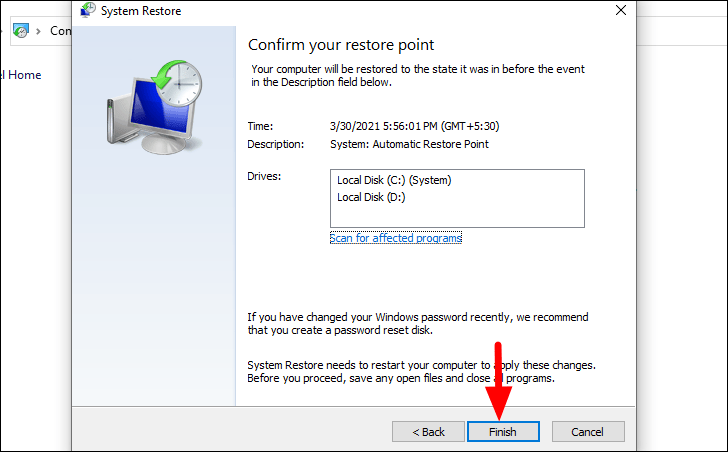
If you have a restore point on your system created before the error occurred, restoring your PC might help:
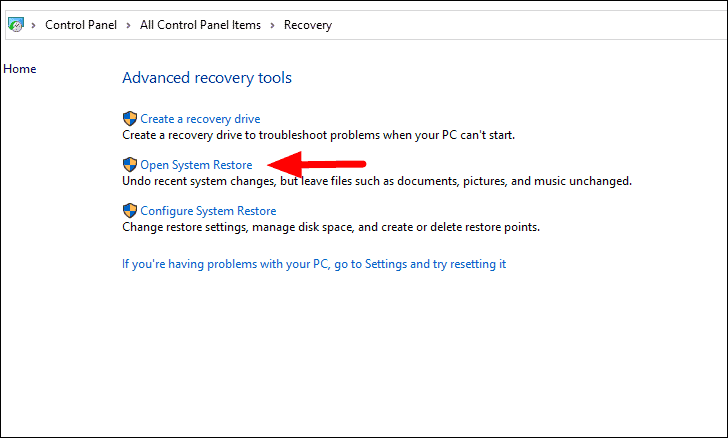
- Search for ‘Recovery’ in the Start Menu and open it
- Select ‘Open System Restore’
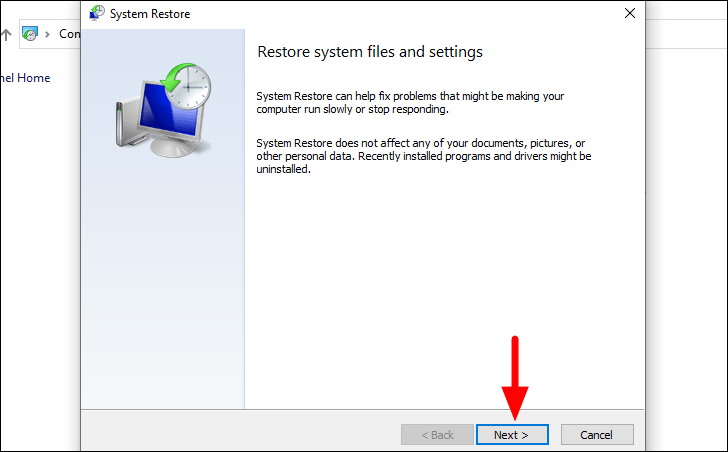
- Click ‘Next’ in the System Restore window
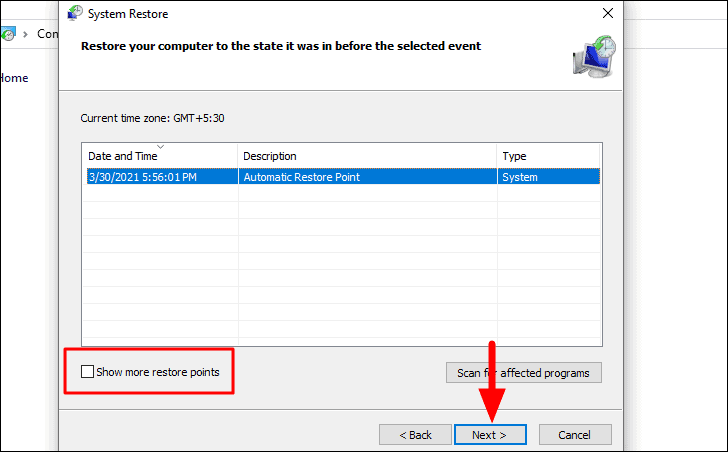
- Select a restore point from the list and click ‘Next’. To view more restore points, check the box next to ‘Show more restore points’.
- Review the restore point details and click ‘Finish’. Save any open work before proceeding, as your system will restart during the restore process.
9. Reset Your PC
If all other methods fail, resetting your PC should be your last resort. Be aware that this process will result in data loss on the drive where Windows is installed. It’s crucial to back up your important data before proceeding.
To reset your PC:
- Open the Start Menu and click on the ‘Power’ icon
- Hold the SHIFT key and click ‘Restart’
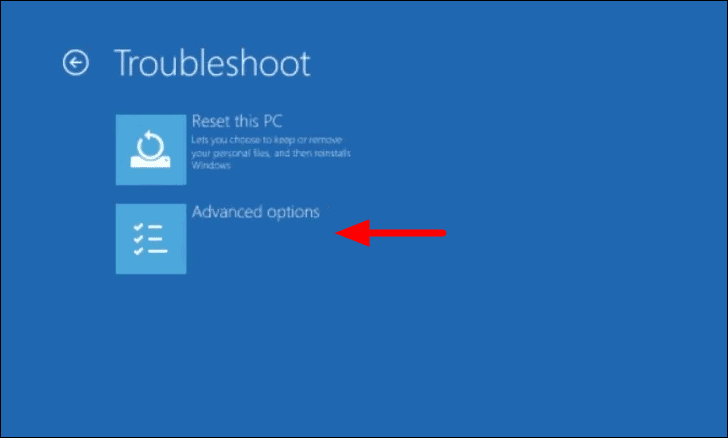
- In the ‘Choose an option’ screen, select ‘Troubleshoot’
- Select ‘Reset this PC’
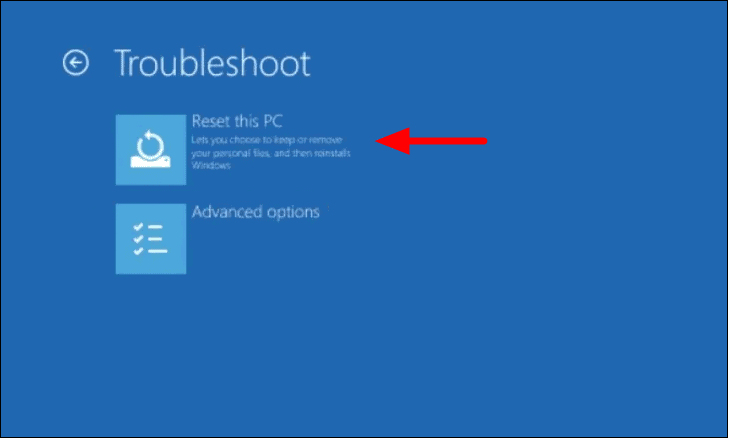
- Choose your options:
- Select ‘Remove everything’
- Choose ‘Only the drive where Windows is installed’
- Select ‘Just remove my files’
- Click ‘Reset’ to begin the process
Important: Ensure you have a Windows installation media available, as you might need to reinstall Windows after resetting your system.
Conclusion
The ‘Bad System Config Info’ error can be frustrating, but with these methods, you should be able to resolve it in most cases. Start with the simpler solutions like restarting your computer or running Windows troubleshooters, and gradually move to more complex fixes if needed. Remember to back up your important data regularly to minimize potential losses in case of system errors.
If you’ve tried all these methods and still encounter the error, it might be time to consult with a professional technician. They can perform a more in-depth diagnosis and potentially identify hardware issues that may be causing the problem.
By following this guide, you should be well-equipped to tackle the ‘Bad System Config Info’ BSOD error and get your Windows 10 system back up and running smoothly.


