Taskbar, placed at the bottom of the screen, is one of the most important parts of Windows 10. Many users started encountering errors with the ‘Taskbar’ after updating the Windows. This error renders the taskbar unusable. Either you won’t be able to click on anything in the taskbar, the tiles on the taskbar will disappear or you wouldn’t be able to move the cursor over the taskbar.
The issue has been encountered by a lot of users and could be due to a number of reasons. There are various methods to fix the ‘Taskbar’ issue so that you can access it effectively without encountering any error. The taskbar also contains the ‘Search Menu’ which becomes unusable, thus proving to be a major hurdle when it comes to progress.
We will walk you through the various fixes to resolve the taskbar error. Follow the fixes in the sequence that they are mentioned for a quick resolution.
1. Update Windows
Since the error is generally encountered after updating the Windows, it’s highly likely that the same is fixed in the subsequent updates. Therefore, you must check for any available Windows 10 updates and install them, if available.
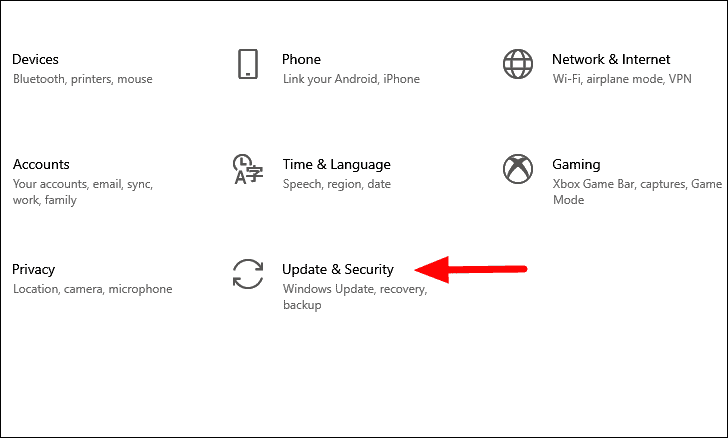
To update Windows, press WINDOWS + I to launch the system ‘Settings’ and then click on ‘Update & Security’ from the list of options.
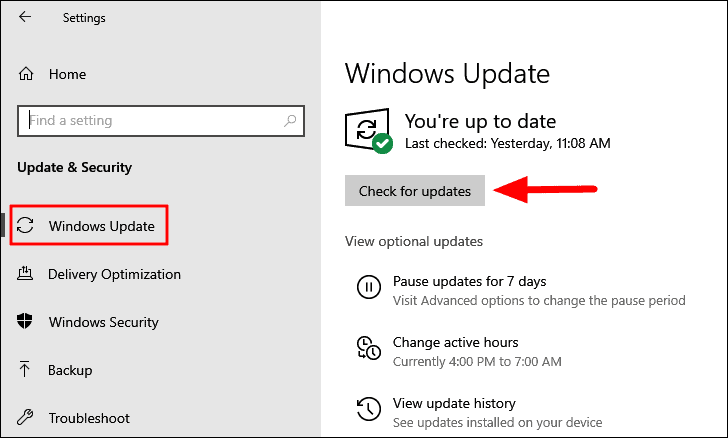
In the ‘Update & Security’ settings, the ‘Windows Update’ tab will open by default. You will find the ‘Check for updates’ option on the right, click on it to let Windows search for updates. In case there are any updates available, Windows will download and install them to your system.
After the Windows has been updated, check if you are now able to access the ‘Taskbar’. If not, move to the next fix.
2. Restart File Explorer
File Explorer is a file management system on Windows that helps you access the various files and folders and several other functions. The ‘Taskbar’ is a part of the ‘File Explorer’. If you are encountering errors with the taskbar, restarting the file explorer might help fix the issue since it will start the taskbar afresh as well.
There are three ways to restart the ‘File Explorer, with Task Manager, Command Prompt, and using a BAT file. We will discuss the all in the following section and you can choose the one you deem appropriate and are more comfortable with.
Restart File Explorer with Task Manager
Task manager is an application on Windows 10 that allows you to monitor the various apps, processes, and services running on the system and make changes to them.
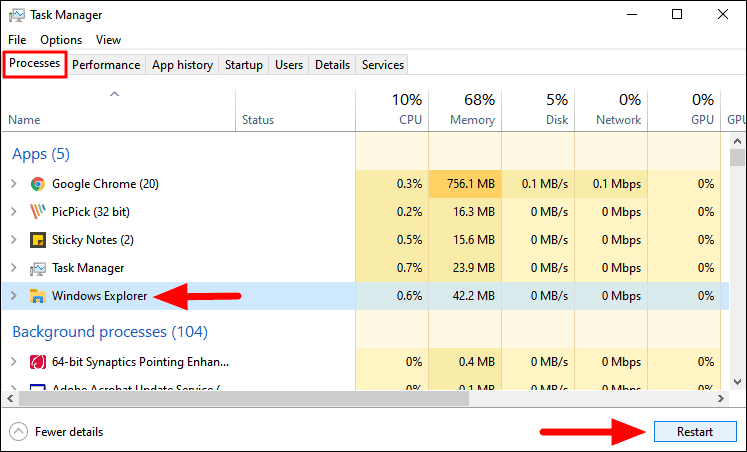
To restart ‘File Explorer’ with ‘Task Manager’, first press CTRL + ALT + DEL and select ‘Task Manager’ from the list of options displayed on the screen. In the ‘Processes’ tab of the task manager, locate the ‘Windows Explorer’ option, select it, and then click on ‘Restart’ at the bottom-right corner.
Restart File Explorer with Command Prompt
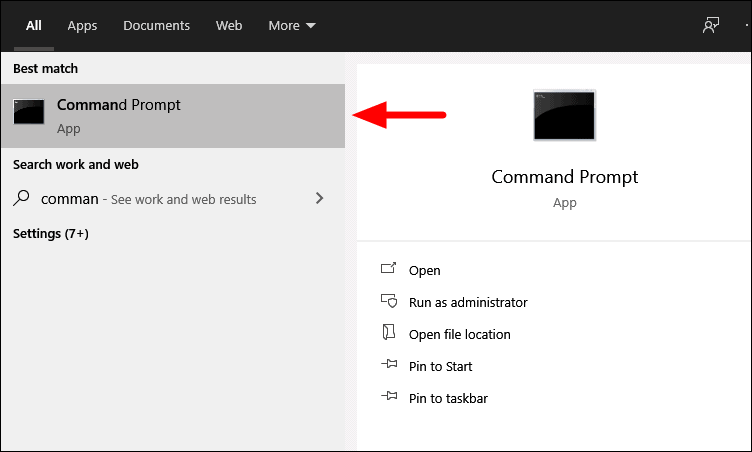
To restart ‘File Explorer’ with ‘Command Prompt’, search for it in the ‘Start Menu’ and then click on the search result to launch the app. Click ‘Yes’ on the confirmation box that pops up.
In the ‘Command Prompt’ window, types or paste the following command, and then press ENTER to execute it.
taskkill /f /im explorer.exeThis command will end the ‘File Explorer’ task.

When you end the ‘File Explorer’ task, there would be flickering on the screen and the ‘Taskbar’ might disappear for a second or two, which is an indication that the process has been ended.
After the task has been ended, it’s time to restart it using another command. Type or paste the following command in ‘Command Prompt’ and then press ENTER to restart ‘File Explorer’.
start explorer.exe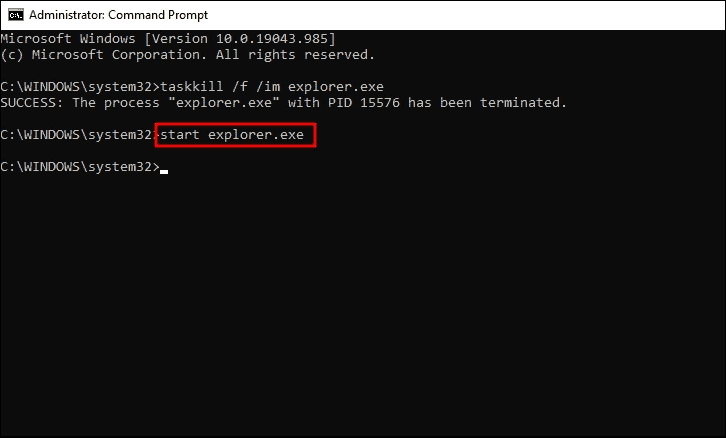
The ‘File Explorer’ will restart instantly after you execute the command.
Restart File Explorer with BAT File
If you often encounter the issue with ‘Taskbar’ and restarting the ‘File Explorer’ has worked as a fix, it’s time you opt for a simpler process, i.e. BAT files, to do so. BAT files are used to automate tasks, thus saving a lot of time.
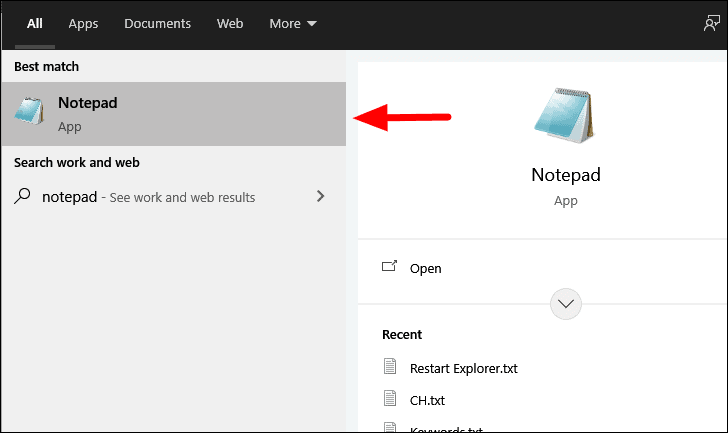
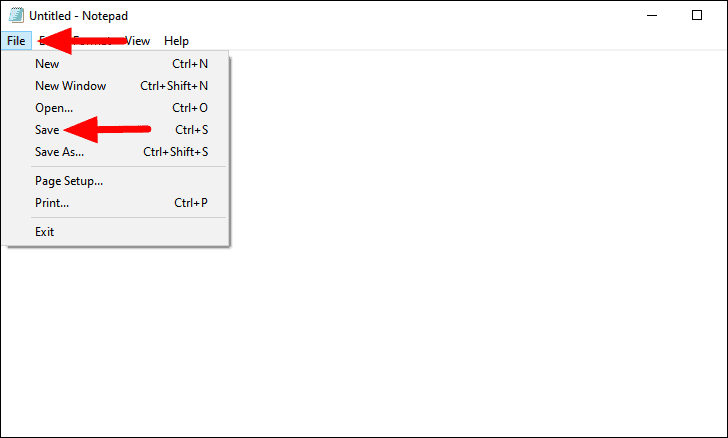
To restart the ‘File Explorer’ with a ‘BAT’ file, search for ‘Notepad’ in the ‘Start Menu’ and then click on the search result to launch the app.
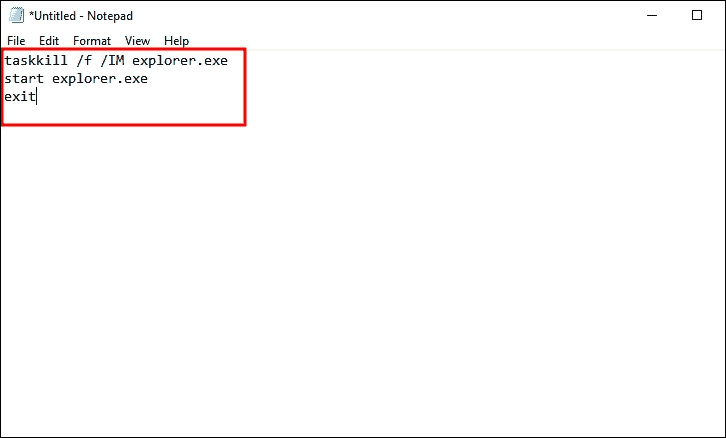
Next, enter the following command in the notepad.
taskkill /f /IM explorer.exe
start explorer.exe
exit
These commands are the same as the ones used earlier since they will be run through ‘Command Prompt’ only. However, you wouldn’t have to enter the commands to end and restart separately, rather, it would now be done with just three clicks.
Next, click on the ‘File’ menu at the top-left corner and select ‘Save’ from the drop-down menu.
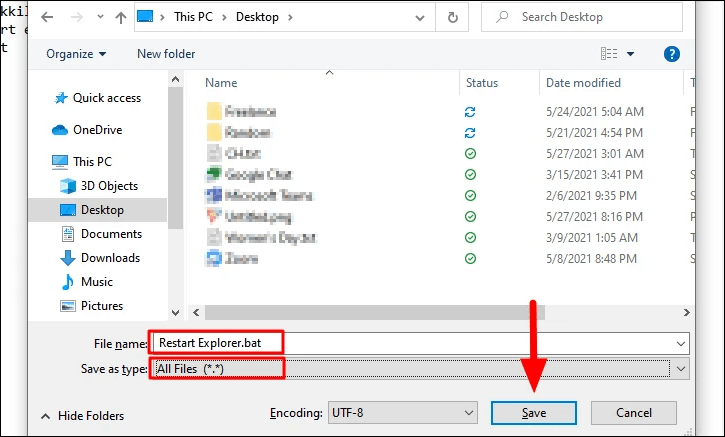
Enter ‘Restart Explorer.bat’ as the ‘File Name’ and ensure that you have select ‘All Files’ as the ‘Save as type’. The name that we suggested is to help you easily identify the bat file, although, you can enter any other file name. However, ensure that you enter the ‘.bat’ file extension at the end. Finally, click on ‘Save’ at the bottom to save the file.
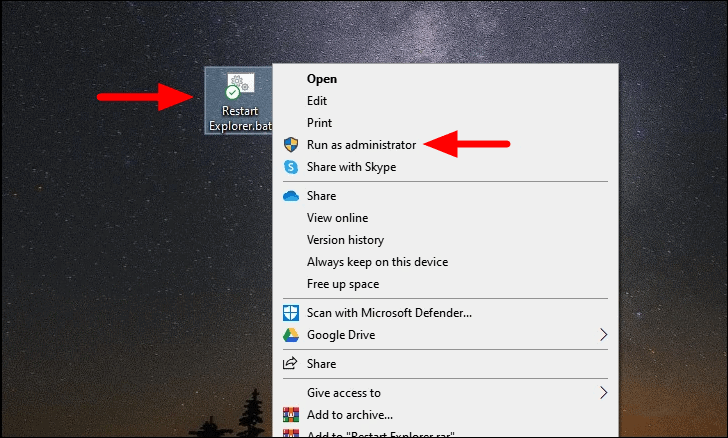
Now, locate the ‘BAT’ file, right-click on it, and then select ‘Run as administrator’ from the context menu to restart ‘File Explorer’
When restarting the ‘File Explorer’, you might notice certain momentary changes in the display which is a part of the process and you need not worry about it.
3. Re-register the Taskbar
Many a time, the ‘Taskbar’ may get deregistered from the system which might lead to errors in accessing it. If that’s what leads to the error, it’s time you re-register it with ‘Windows PowerShell’.
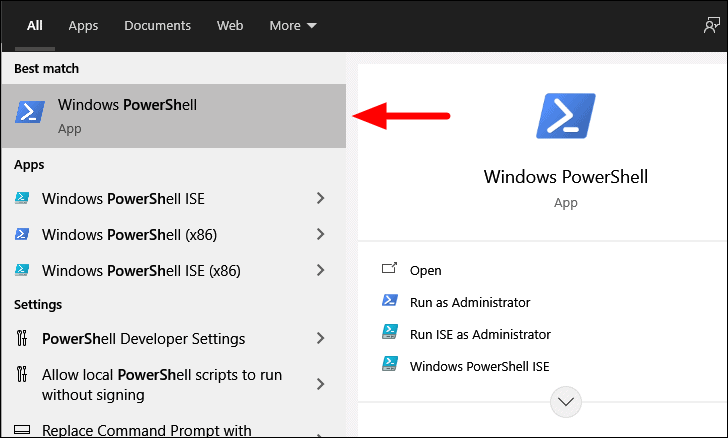
To re-register the ‘Taskbar’, search for ‘PowerShell’ in the ‘Start Menu’ and then launch the app from the search result.
In the ‘Windows PowerShell’ window, type or paste the following command, and then press ENTER.
Get-AppXPackage -AllUsers | Foreach {Add-AppxPackage -DisableDevelopmentMode -Register "$($_.InstallLocation)AppXManifest.xml"}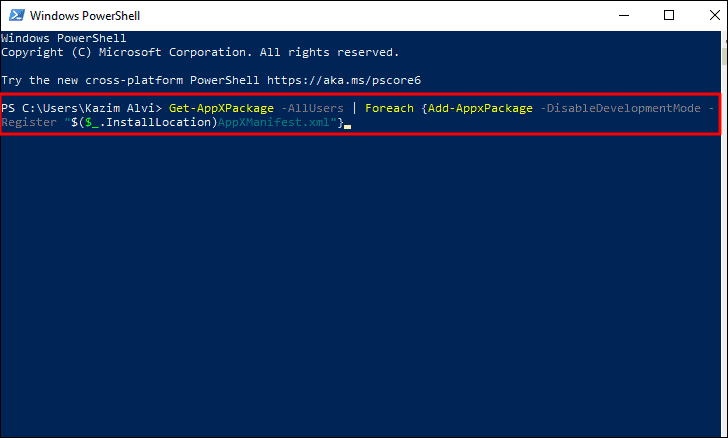
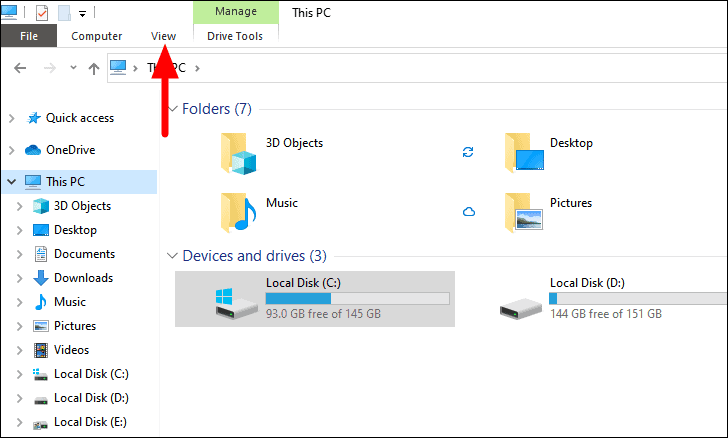
After you have executed the above command, launch the ‘File Explorer’ and verify if the ‘Hidden Files’ are being displayed. If not, click on the ‘View’ menu at the top in the file explorer window.
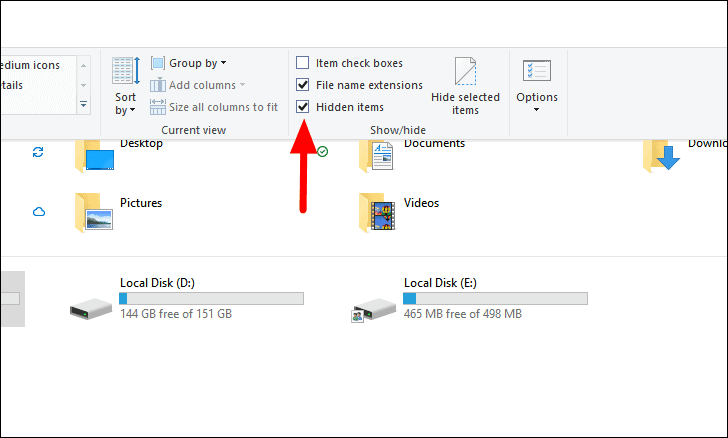
Next, tick the checkbox for ‘Hidden items’ in the list of options that appear.
After you have enabled the ‘Hidden Files’ setting, navigate to the following path. The ‘Username’ in the following address is the name for your account that you have logged in with on Windows 10.
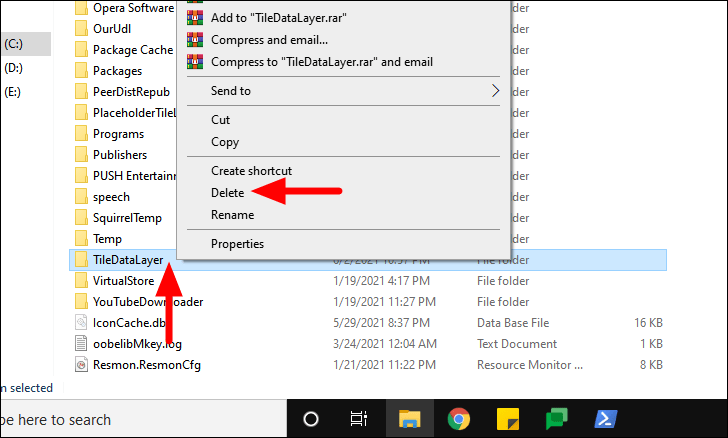
C:\Users\<Username>\AppData\Local\Next, scroll down and locate the ‘TileDataLayer’ folder.
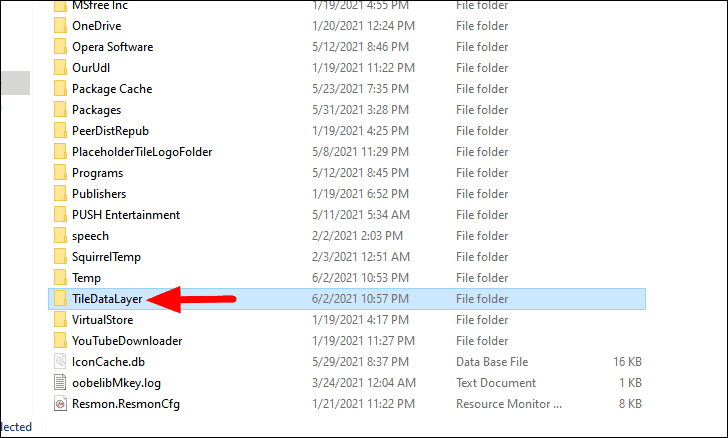
Now, right-click on the folder and select ‘Delete’ from the context menu.
After you have deleted the folder, restart the computer and check whether you are able to access the ‘Taskbar’ and are not encountering any error. If not, move to the next fix.
4. Disable Conflicting Apps from Launching at Startup
Some apps might be conflicting with the functioning of Windows, thereby, leading to errors in accessing the ‘Taskbar’. A simple solution to this would be to disable the apps from launching at startup. This might require a little research on your end in identifying the apps that might cause the error. When you have shortlisted a few, disable them.
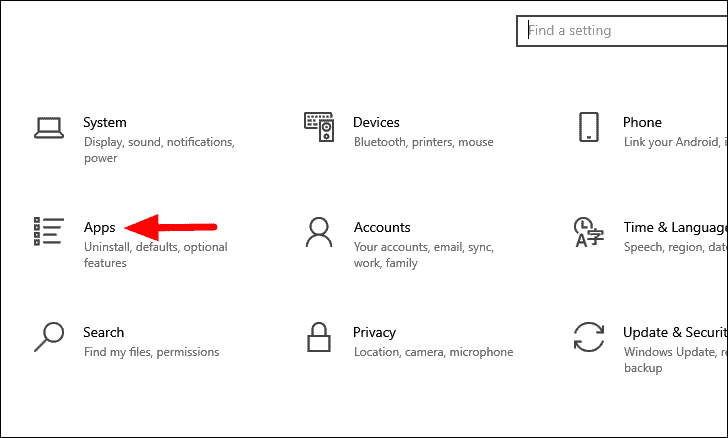
To disable apps from launching at startup, press WINDOWS + I to launch system ‘Settings’, and then click on ‘Apps’.
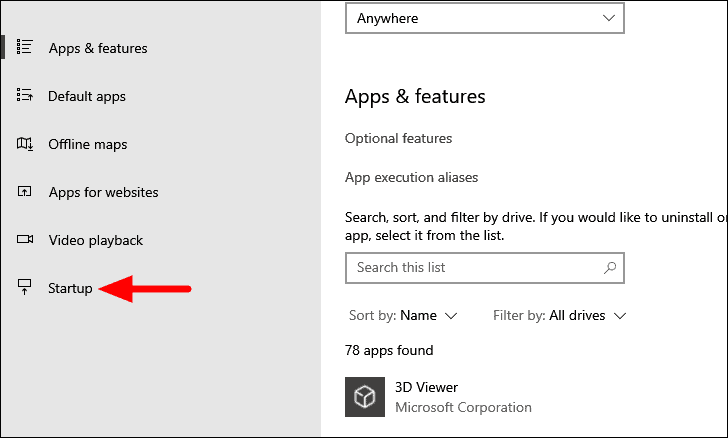
In the ‘Apps’ settings, the ‘Apps & features’ tab will launch by default. You will find multiple tabs listed on the left, select the ‘Startup’ option.
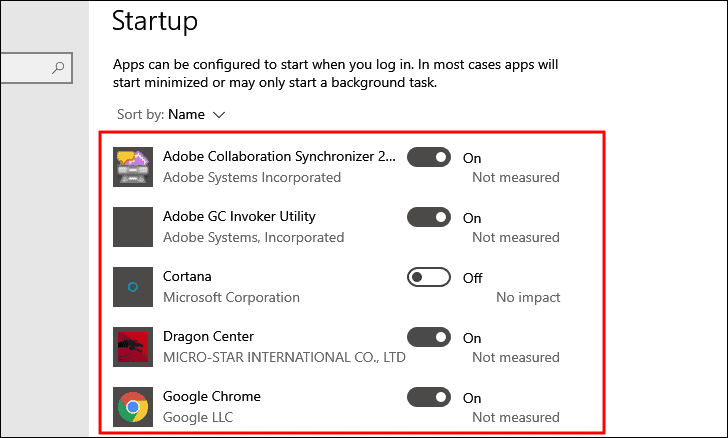
In the ‘Startup’ tab, several apps will be listed on the right. The ones that are enabled to launch at startup have the toggle next to them in the ‘On’ state. To disable any app from launching at startup, click on the toggle next to it.
Now, restart your computer and check if the error with the ‘Taskbar’ is fixed. If not, move to the next fix.
5. Start Application Identity Service
Many users have reported that starting the ‘Application Identity’ service has fixed the ‘Taskbar’ issues for them, hence, you must give it a try, in case none of the above fixed have worked. This service verifies the identity of an app.
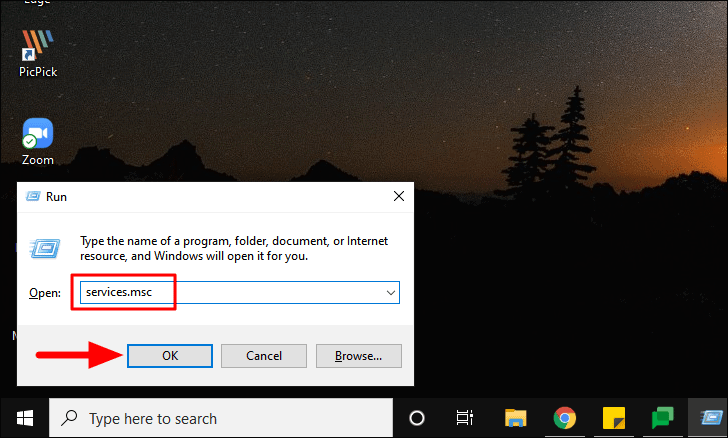
To start ‘Application Identity’ service, press WINDOWS + R to launch the ‘Run’ command, enter ‘services.msc’ in the search box, and then either click on ‘OK’ or press ENTER to open the ‘Services’ app.
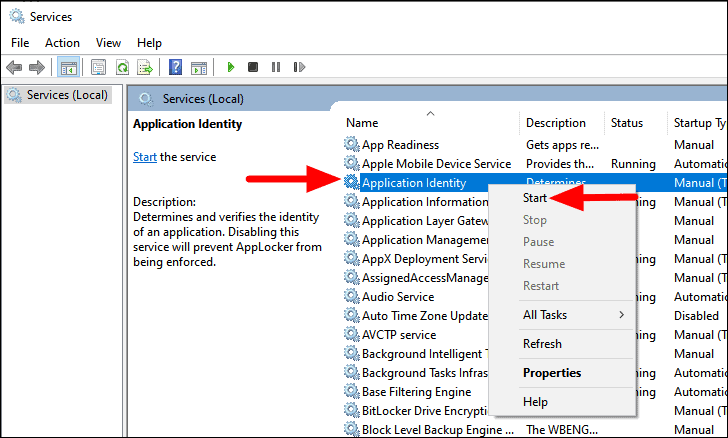
In the ‘Services’ app, locate the ‘Application Identity’ service, right-click on it and then select ‘Start’ from the context menu. The services here are by default listed in alphabetical order, thus, find a particular service won’t be difficult.
After enabling the service, wait for a few minutes and then restart your computer. Now, check if the taskbar issue is fixed or you are still encountering errors while trying to access it.
6. Run SFC Scan
If the error in accessing the ‘Taskbar’ is encountered due to corrupt system files, it’s time you run an SFC scan. This scan looks for corrupt system files and replaces them with a cached copy.
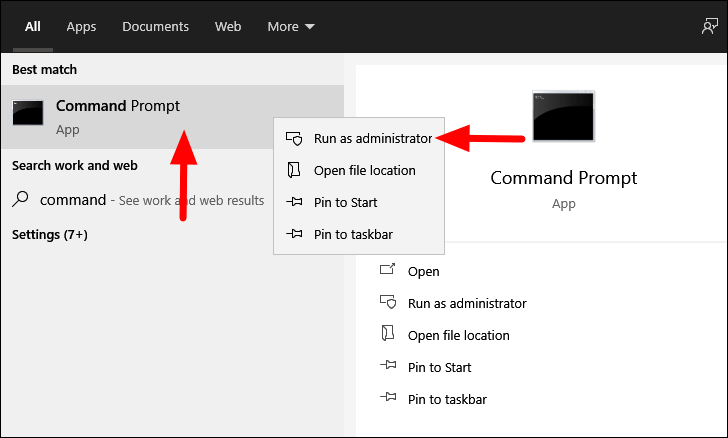
To run an SFC scan, search for ‘Command Prompt’ in the ‘Start Menu’, right-click on the search result, and then select ‘Run as administrator’ from the context menu. Click ‘Yes’ on the confirmation box that pops up.
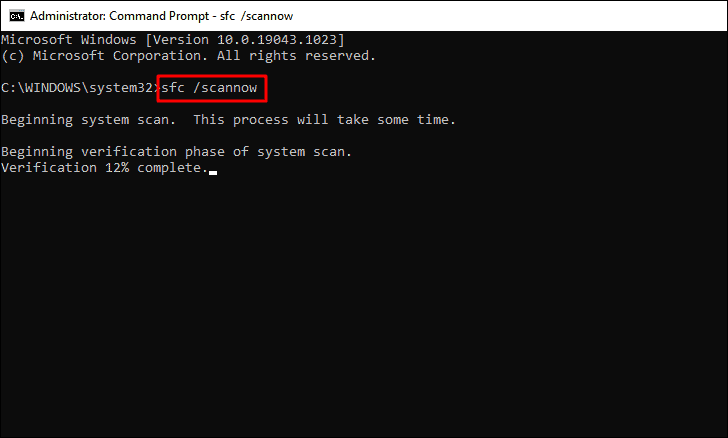
In the ‘Command Prompt’, enter the following command and then press ENTER to run the SFC scan.
sfc /scannowThe scan will start within a few moments and you will be notified of the same.
After the scan is complete, you will be informed if any corrupt files were found and repaired. Now, restart the system and check if the issue with the taskbar is fixed.
7. Login with Another User Account
If certain data on your system is corrupted, there is a high chance that’s it’s conflicting with the other elements, including the ‘Taskbar’. This is when the ‘Taskbar’ throws up an error and is not accessible. To fix this, a simple solution would be to sign in with another user account, in case you have one. Otherwise, you can create one right away and it will most likely fix the error.
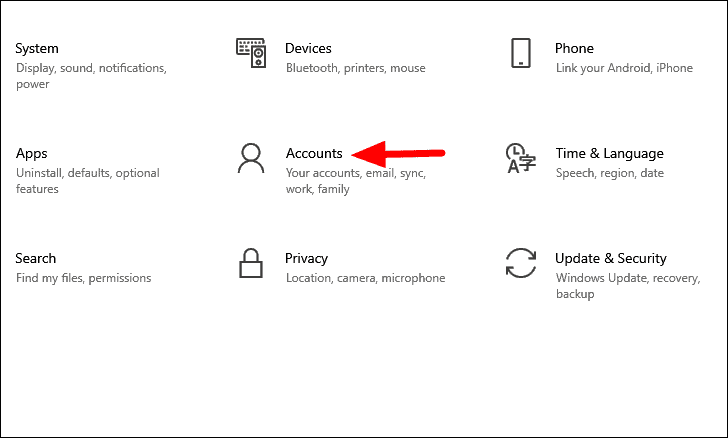
To create a new user account, press WINDOWS + I to launch system ‘Settings’ and then select ‘Accounts’ from the list of options.
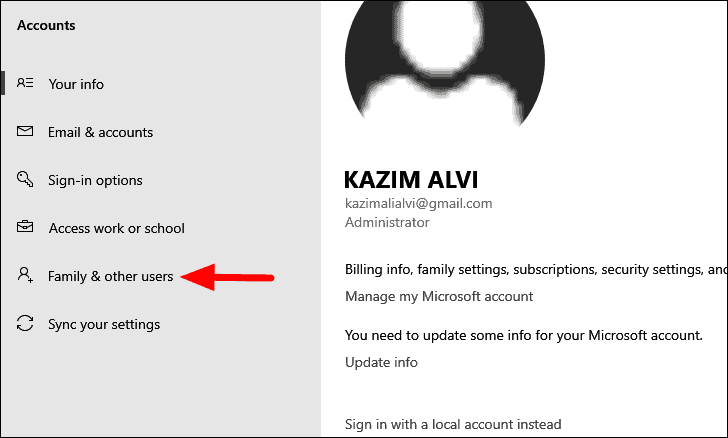
In the ‘Accounts’ setting, you will find multiple tabs on the left, select ‘Family & other users’ from the list.
Next, click on the ‘Add someone else to this PC’ option under ‘Other users’.

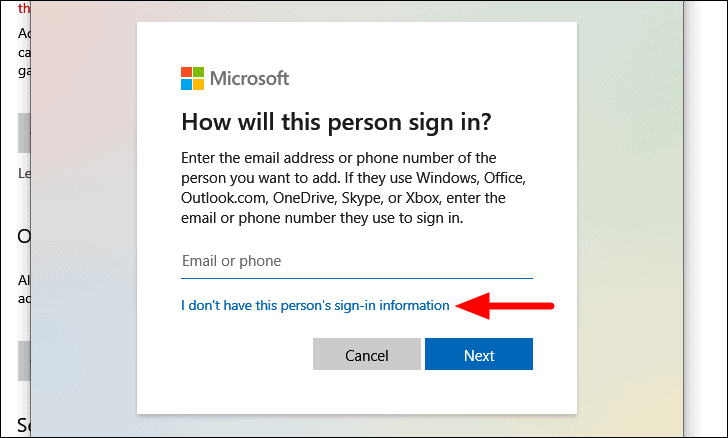
The ‘Microsoft Account’ window will launch, click on the ‘I don’t have this person’s sign-in information’.
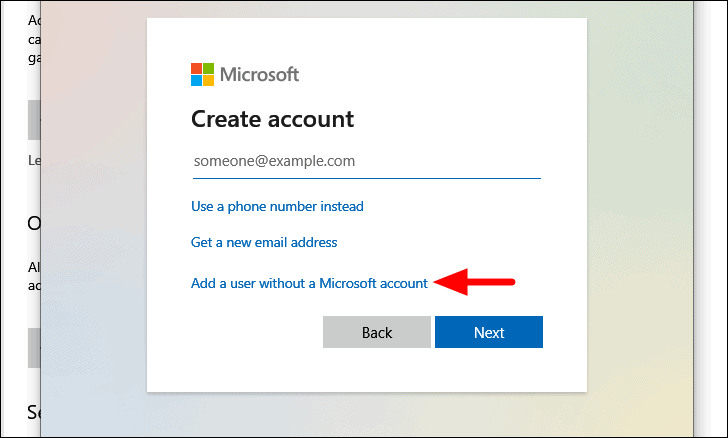
On the next screen where you are asked to create a user account, click on ‘Add a user without a Microsoft account’.
You will now be asked to enter the username and password for the new account. Once you are done entering that, you will be asked to choose and answer three security questions. Finally, click on ‘Next’ at the bottom to complete the process of account creation.

After the new user account is created, click on it and then select the ‘Change account type’ option that appears.

In the ‘Change account type’ window, click on the box under ‘Account type’ to view the options.
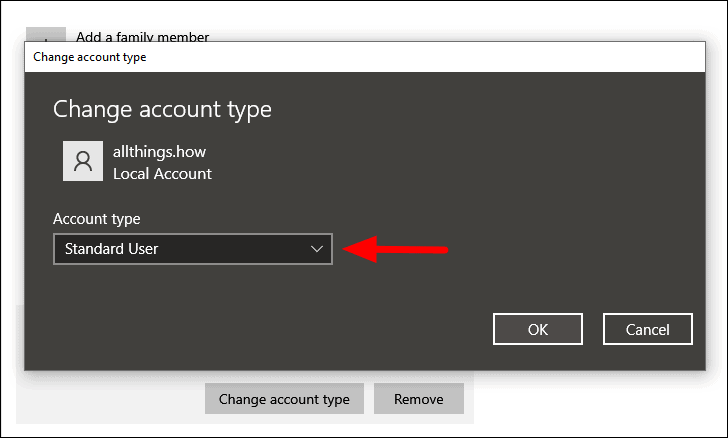
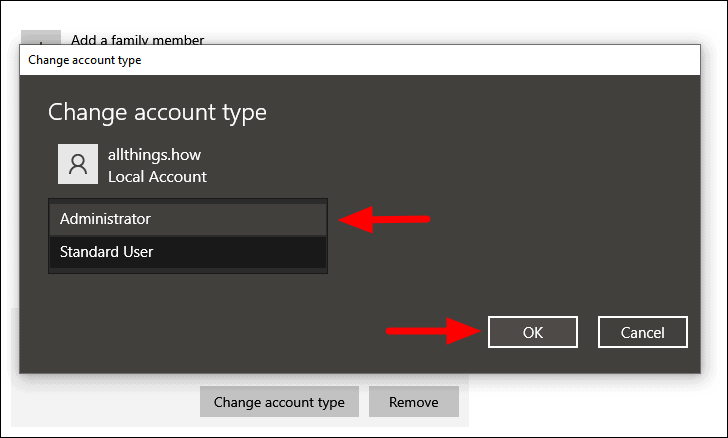
Next, select ‘Administrator’ from the menu and then click on ‘OK’ at apply the changes.
After you have created a new user account and changed its type to administrator, it’s time you log in with that account.
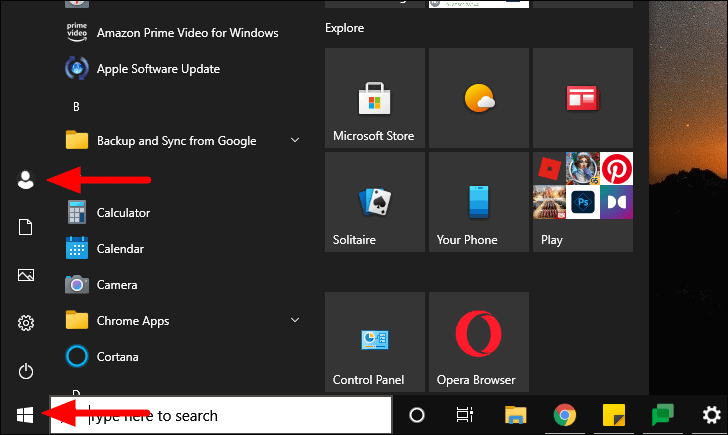
To log in with the new user account, launch the ‘Start Menu’ either by pressing the WINDOWS key or by clicking on the ‘Windows’ icon on the bottom-left corner of the desktop. In the ‘Start Menu’, click on the ‘Account’ option at the left.
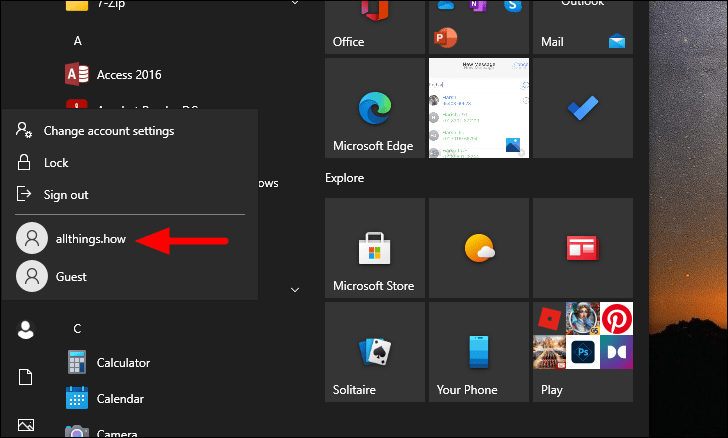
The newly created account will now appear along with a few other settings, click on the account name to sign out of this account and log in to that one.
Once you are in the other user account, check if the ‘Taskbar’ works fine and that you are not encountering any errors while trying to access it.
8. Run System Restore
If you have started encountering the error lately after making some changes in the settings or installing a program or app that you can’t recall, ‘System Restore’ comes to your aid. It allows you to take back your system in time to a point when you weren’t encountering the issue.
System Restore does not delete the files stored on the system but it might affect the programs and the various settings. After you have run ‘System Restore’, the issues with the ‘Taskbar’ will be fixed, thereby allowing you to access it effectively.
With the ‘Taskbar’ running perfectly, you can now access the ‘System Tray’, ‘Search Bar’, the various ‘Shortcuts’ pinned to the taskbar amongst other options. This enhances your productivity and ensures that your Windows 10 experience remains the way it’s supposed to.


