
Windows search is one of the best tools on Windows 10. It is a complex search tool that can find files, applications, documents, etc. on your PC and also search the web using Bing, or even Google.
Its complex nature can make it buggy sometimes. It can stop working or the search results won’t show or some other issue may crop up. Whatever may be the reason, the problem can be fixed with any of the following methods.
Check for updates
Windows updates can fix a lot of issues that occured due to any previous incompatible update. If Windows search stopped working after an update, a new update might fix it.
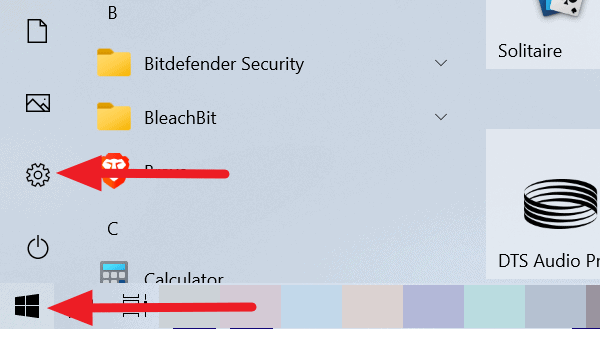
To update Windows 10, click on the ‘Start’ button on the taskbar and then click on the gear icon to open ‘Settings’.
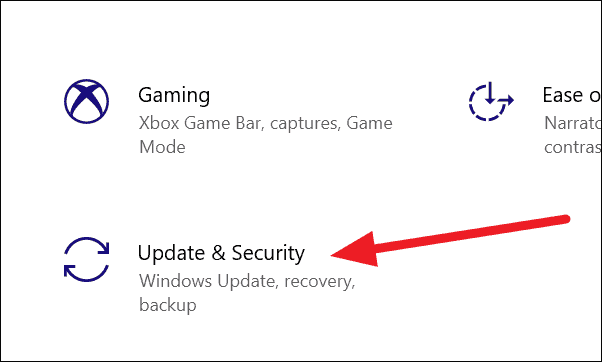
In the Windows Settings page, click on ‘Update & Security’, to access the updates page.
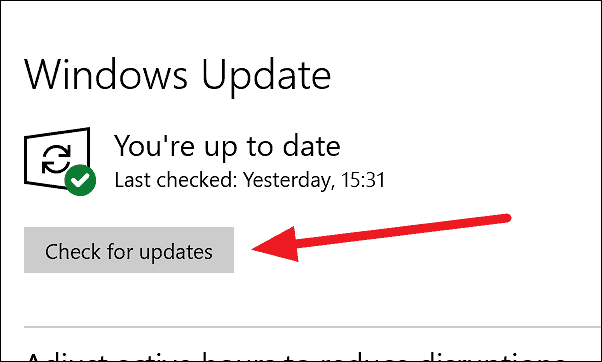
On the ‘Windows Update’ page, click on the ‘Check for updates’ button.
Install any available updates and check if the problem has resolved.
Rebuild Windows Search Index
Occasionally, broken indexes or older indexes might cause Windows search not to work. In that case, rebuilding the index might fix the problem.
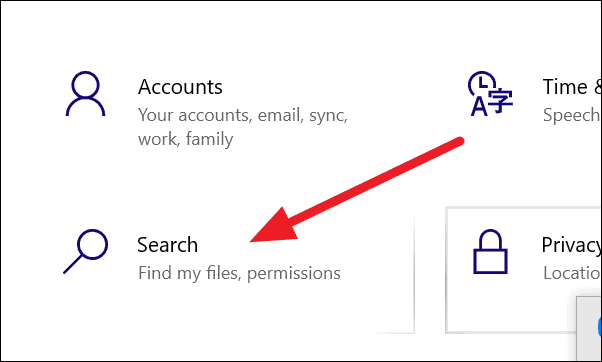
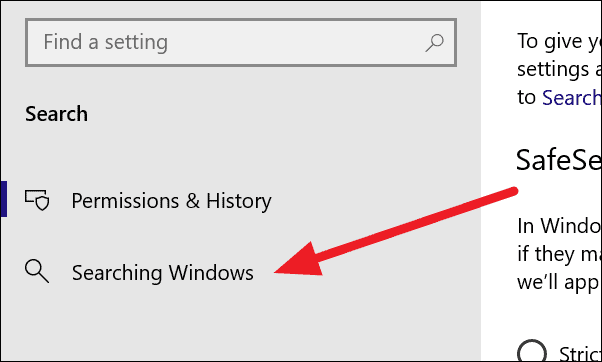
To rebuild the Windows search index, open ‘Settings’ like in the previous method. Then click on ‘Search’ on the settings page.
From the Search settings screen, click on ‘Searching Windows’ option from the left panel.
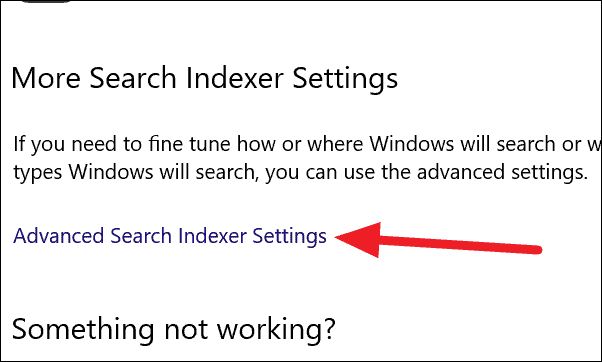
Scroll down to find the ‘Advanced Search Indexer Settings’ link on the Searching Windows page and click on it.
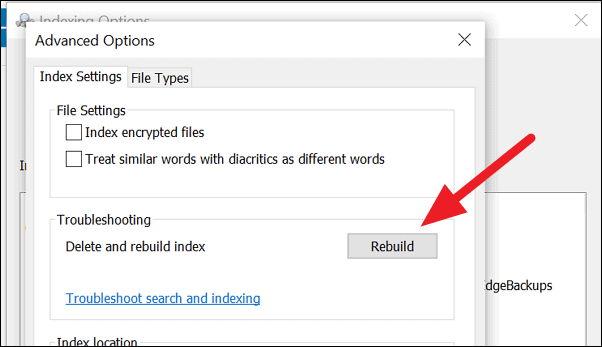
It will open a window of ‘Indexing Options’. Click on the ‘Advanced’.

From the ‘Advanced Options’ window, click on the ‘Rebuild’ button.
Wait for the index to rebuild and then restart your computer after it is completed and see if Search is working in Windows 10 now.
Troubleshoot Windows Search
The troubleshooter on Windows 10 is so powerful that it can fix many of the issues with the least hassle. It can also fix any Windows Search related issues as well.
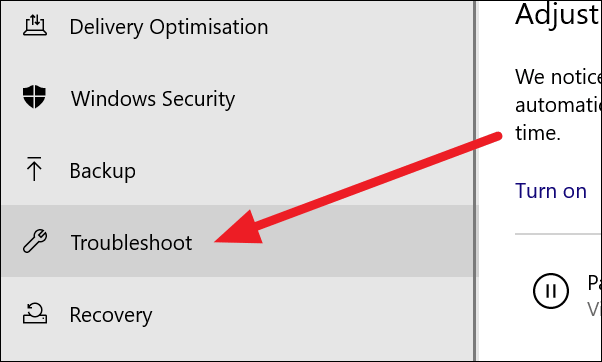
Open ‘Settings’ from the start menu and click on ‘Update and Security’. Then, click on ‘Troubleshoot’ from the left side panel.
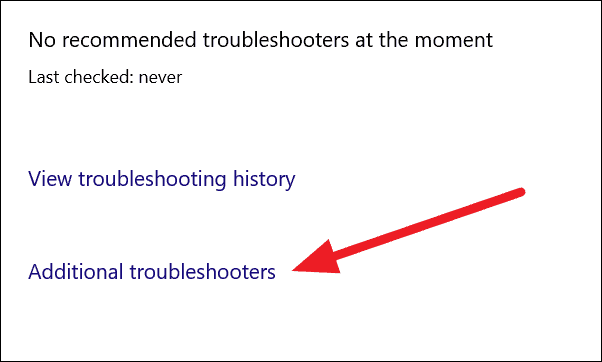
On the ‘Troubleshoot’ page, click on ‘Additional troubleshooters’ link.
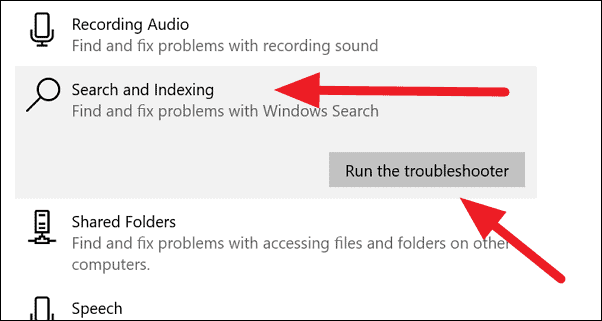
Scroll down on the ‘Additional troubleshooters’ page to find ‘Search and Indexing’. Click on it to see the ‘Run the troubleshooter’ button. Click on the button to run it.
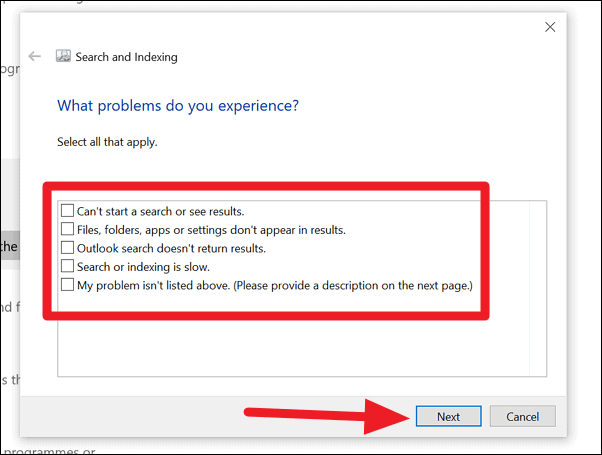
It will run for a very few seconds and show you a list of possible problems with the Search. Select the problems you are facing by checking the button beside them and click on the ‘Next’ button to run the troubleshooter.
Your issue with the Windows Search should end with the troubleshooting.
Restart Windows Search Process
Like all things that fix with an off/on cycle, restarting the Windows Search process could also fix the issue you’re facing with Windows 10 Search.
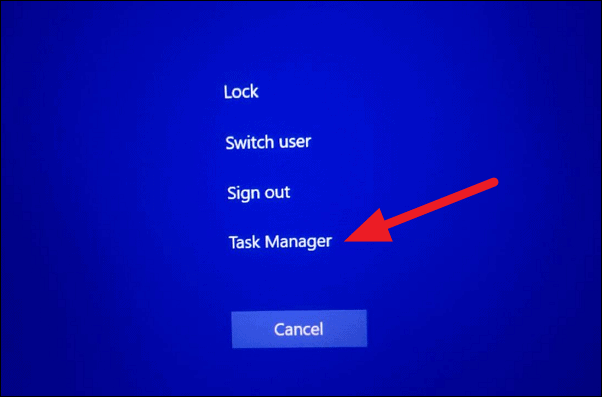
Press the Ctrl+Shift+Del buttons on your keyboard and select ‘Task Manager’ from the available options.
It will open the ‘Task Manager’ which shows the list of programs and processes that are running on your PC. Scroll down to find the ‘Search’ process. Right-click on it and click on ‘End task’ from the options.
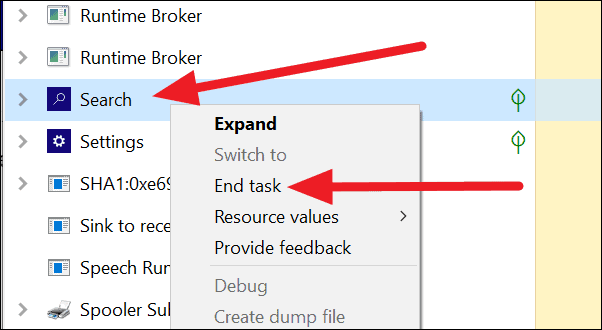
The ‘Search’ program will disappear from the list when you click on ‘End task’. It will stop running and automatically restart when you use the ‘Search’ feature next time.
Reset Windows Search
If none of the above methods worked in fixing the ‘Search’ issue, resetting it might fix it. The process of resetting ‘Windows Search’ differs with different versions of Windows 10.
For Windows 10, version 1809 and earlier
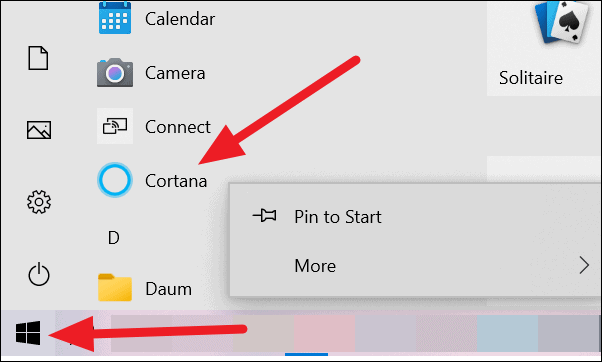
If you’re using Windows 10 version 1809 and earlier, the process to reset ‘Search’ is simple. Click on the ‘Start’ button, then right-click on the ‘Cortana’ app in the Start menu. It will show options of ‘Cortana’.
Select ‘More’ and click on ‘App Settings’ from the options.
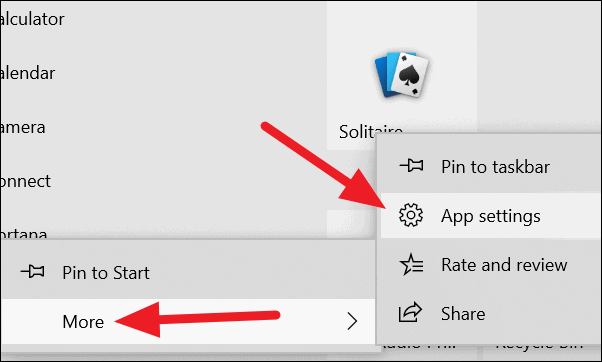
It will open a new window of ‘Cortana’ settings. Scroll down the window to find the ‘Reset’ section. Click on the ‘Reset’ button to reset Windows Search.

For Windows 10, version 1903 or newer
If you’re using Windows 10 version 1903 or newer, you have to reset Windows Search using PowerShell. You also must have administrator permissions to do so.
To reset ‘Search’ using PowerShell, you need to download ResetWindowsSearchBox.ps1 script from Microsoft (Download link).
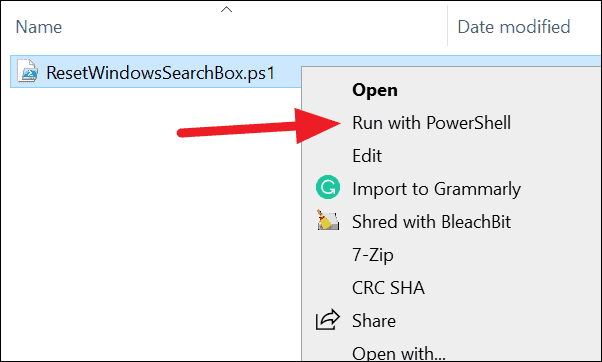
After you have downloaded the script on to your PC, go to the folder in which it is saved and right-click on it. Select ‘Run with PowerShell’ from the options.
It will open a warning dialog box regarding the opening of file. Click on the ‘Open’ button.

The Powershell script will now run. When finished, you’ll see a ‘Done’ message in the script output. This confirms that Windows Search has been reset successfully.
If the script fails to run and shows “Cannot be loaded because running scripts is disabled on this system” error, then type/paste the following command in PowerShell and press enter.
Get-ExecutionPolicy
If you see ‘restricted’ after running the above command, type/paste the following command in the PowerShell and press enter to change the execution policy.
Set-ExecutionPolicy -Scope CurrentUser -ExecutionPolicy Unrestricted
You will see a warning message regarding the execution policy.
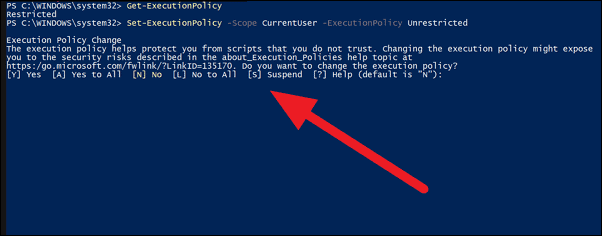
Type ‘Y’ and press enter.
Now, go to the folder where you have downloaded the script to reset Windows Search and run it with PowerShell as explained in the previous steps. This time it will run successfully and reset Windows Search.
When done resetting Windows Search, set the ExecutionPolicy back to Restricted by running the following command.
Set-ExecutionPolicy -Scope CurrentUser -ExecutionPolicy Restricted
It will show the warning regarding the change of execution policy. Type ‘Y’ to change it back to ‘restricted’.


