Act 1 in Gears of War: E-Day has 13 collectibles spread over four chapters. Most sit just off the path. The levels follow a linear route through doors, drops, and cutscenes, so grab each item when you come across it; there is no on-screen notification to signal a nearby collectible.
Quick answer: Act 1 holds 13 collectibles — 3 in Emergence, 4 in Survival of the Fittest, 2 in A Gear in Need, and 4 in Back in the Fold. Hold the X button on each one to collect it.
How to pick up and confirm each collectible
Every collectible works the same way. Walk up to it and a “PICK UP” prompt with the X button appears over the item. Hold X and the ring around it fills, then a toast reading “<item name> Found!” drops into the bottom right of the screen.
Under that toast you will see “View Collectibles” beside the controller’s three-line Menu button glyph inside a ring. Hold the Menu button to open the item straight away. The same list lives on the pause menu under GAME PAUSED > COLLECTIBLES, and the pause screen shows your current act, chapter, and a “Collectibles x/y” count for that chapter in the top right.
Your finds appear in the War Journal’s “ACT 1” tab, arranged in a separate row of tiles for each chapter. A collected item has its name and picture displayed; a missed one remains a black tile bearing a padlock. Select a found tile to see the item’s 3D model and a brief squad-written note. Collecting it grants no other reward.
Nothing in Act 1 highlights collectibles on screen before the pickup prompt appears, so you cannot rely on a scan to spot them. Check rooms as you pass through them.
Emergence: 3 collectibles
Monster Jaw
The first collectible in the chapter is a piece of a creature’s jaw, available as soon as you gain control on the opening street. A red fissure glowing across the road is your landmark: on the right sidewalk, a red kiosk bears a yellow “NEWSSTAND” sign. Look among the scattered papers on the pavement, directly before the kiosk’s bottom newspaper racks. Pick up the jaw before continuing down toward the tunnels.
Bloody Transit Worker’s Helmet
Once the road tunnel has been blocked, enter the maintenance tunnels through the side service door. Continue along the caged passage, go by the red-glowing breach in the left wall, and proceed into a brick passage where a body lies on the floor. A small storage recess branches off nearby. Inside, metal shelving stands to the left and a pale double locker is at the rear. The blood-covered yellow hard hat is on the floor before the locker; a body wearing a yellow jacket is immediately to its left.
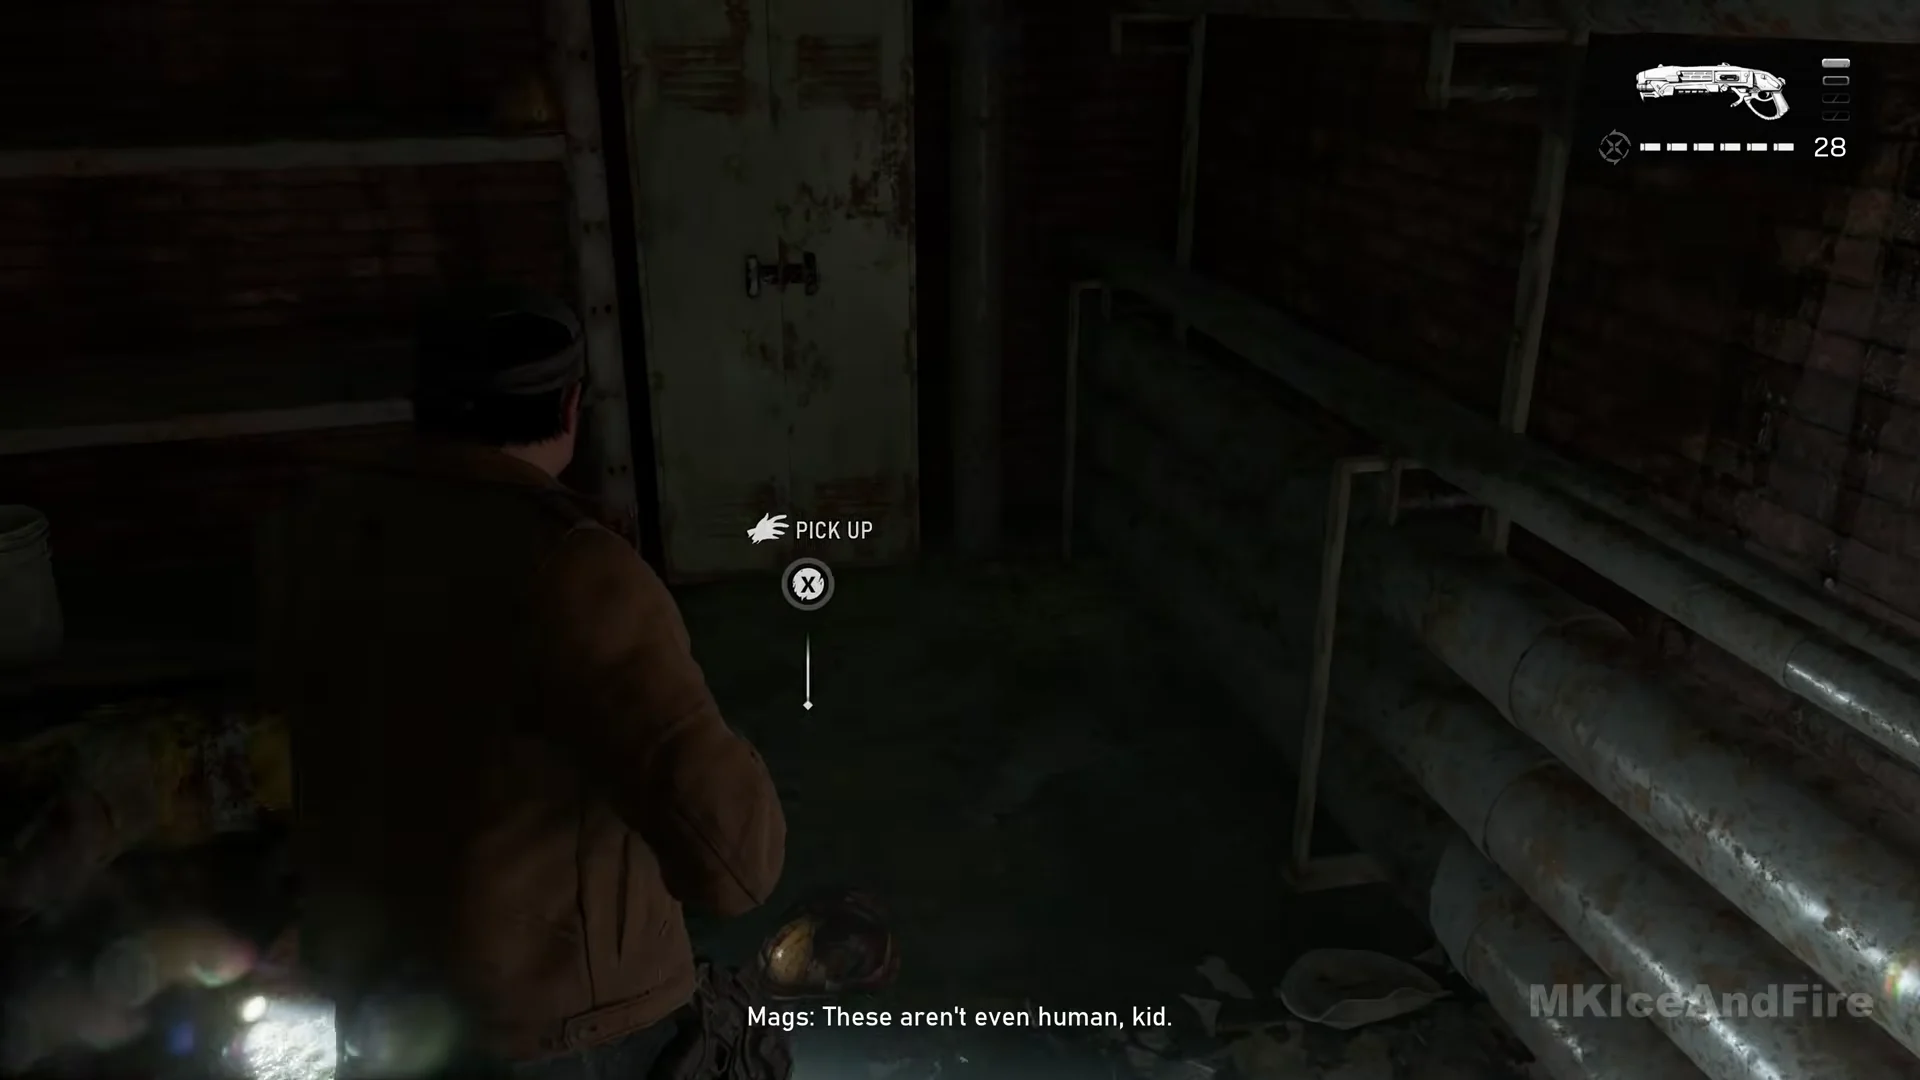
Leave the clean yellow hard hat on the shelf unit alone. Pick up the bloodied collectible from the floor instead.
Front Page of the Kalona Times
Back on the surface, the street is split by another glowing red fissure. Take the side alley with the dumpsters where civilians are sheltering, and enter the building through the tiled back doorway into a dark restaurant kitchen. The folded newspaper lies flat on the steel worktop against the white-tiled wall, between a tall pale fridge on the left and the stove with a large pot on the right, next to a mug.
Survival of the Fittest: 4 collectibles
KPD Police Bulletin
At the beginning of the chapter, you cross the police station’s large, desk-filled open office. Dead creatures are scattered across the floor, and cork bulletin boards line the wall. In front of the boards, find a desk with an old green-screen computer on its left half and a green-shaded lamp and telephone on the right; a wooden swivel chair sits behind it. The police paperwork is on the desktop before the computer. You can collect it on your first visit, before this office takes you to the chief’s doors later.
Bloodied Police Chief’s Badge
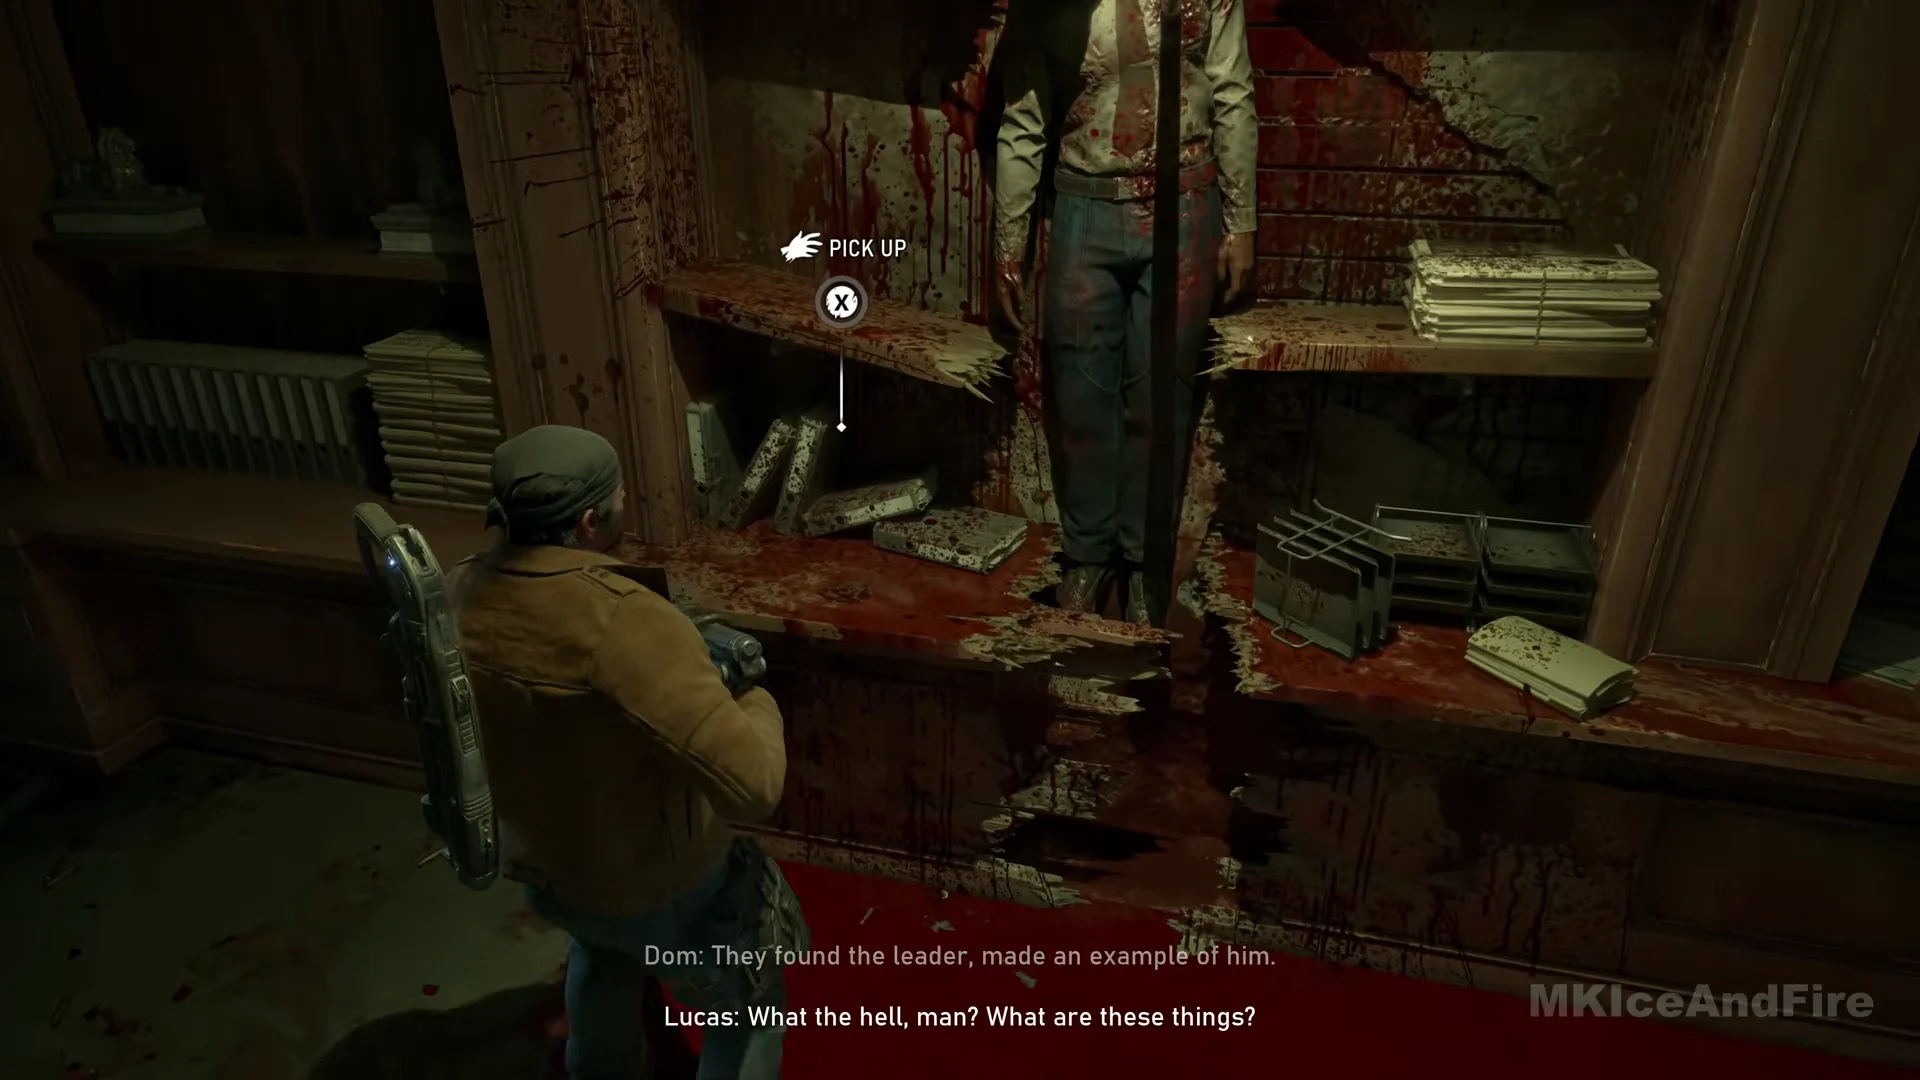
Cross the open office to the double wooden doors carrying the “POLICE DEPARTMENT / CITY OF KALONA” crest on the glass and open them. Inside the chief’s office, a body in uniform hangs against the wooden bookcase behind the desk. The blood-covered badge sits on the bookcase’s waist-high ledge directly under the body, just left of its feet, next to some toppled books.
Army Recruitment Pamphlet
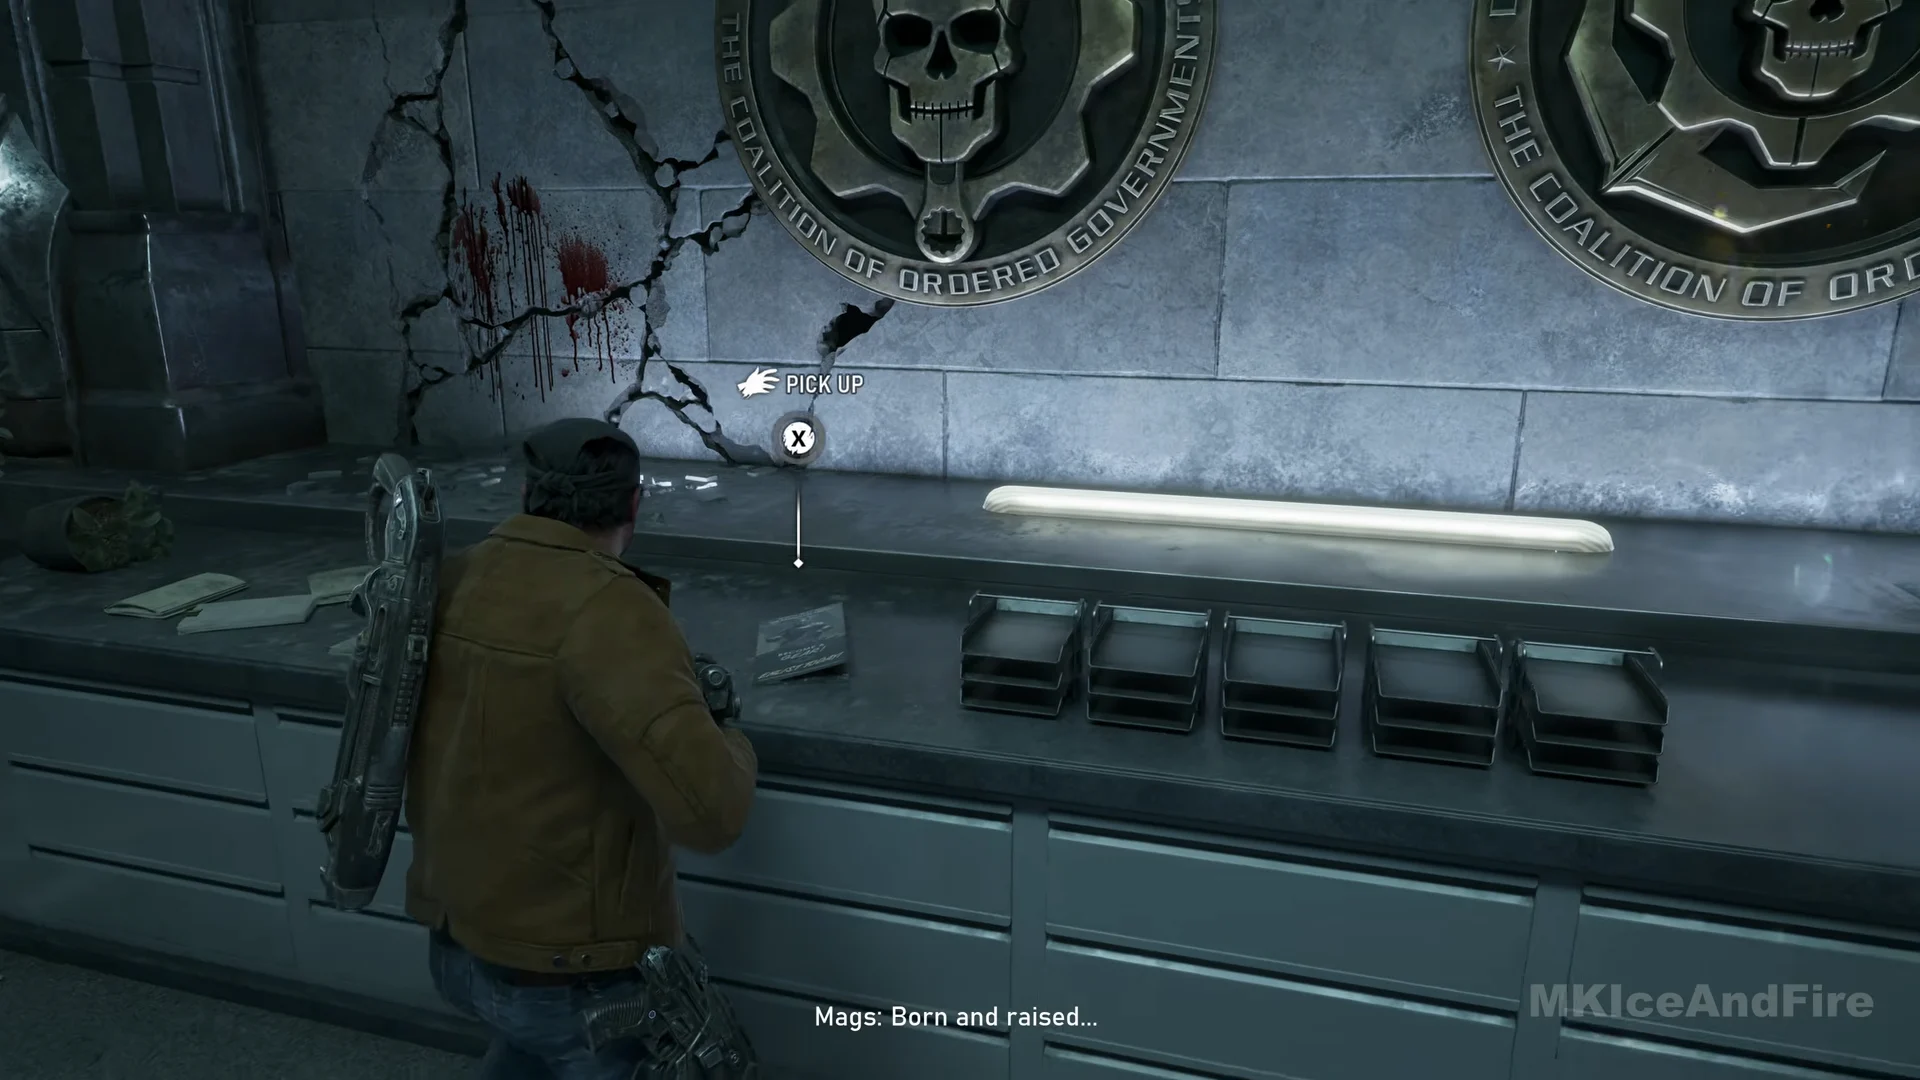
In the recruitment center lobby, circle around the large curved desk marked “RECRUITING STATION”. The COG enlistment leaflet is elsewhere: it’s flat on the long counter along the back wall, beneath the large round COG emblems and strip light, directly to the left of five black paper trays.
Try On Pilot Helmet
Still in the lobby, look at the equipment display counter along the wall beside the steps that lead up to the EXIT doors. A row of helmets stands on small stands under a “COALITION OF ORDERED GOVERNMENTS” board, with a “JOIN” poster at the left end and a chest armor piece on a stand at the right. The Try On Pilot Helmet is the pale helmet near the left end of the row. Take both lobby items before you leave through the EXIT doors with the civilians.
A Gear in Need: 2 collectibles
In the Pay-N-Save stockroom, look for Tomatoes, Canned. After the fight in the street by the store trailers, enter at the loading entrance and find the aisle that ends at a stepladder, between tall steel shelves stacked with cartons. Follow the blood trail into it. Among scattered tins and shell casings, the tin rests in a shallow cardboard tray on the floor near the shelving on the right. Collect it before proceeding through the stockroom’s far doors.
Broken Lancer Bayonet appears only after the Pay-N-Save has been defended. A cutscene plays in which a large Locust grabs Marcus on the shop floor and the bayonet snaps off inside it. When control returns, you are in the produce section with red fruit-and-vegetable bins knocked over and apples and tins rolling across the checkered tiles. The Locust lies dead on its back in a pool of blood a few steps away, with the broken blade in its chest and the prompt over the body. Take it before following the squad out of the store.
Back in the Fold: 4 collectibles
Frontpage of The Tyran Chronicle
Early in the chapter, on the night street walked with the squad before the clinic, you pass a bar with a tall vertical neon sign reading “LOUNGE” beside a 30 speed-limit sign. A little further along on the same side, a stone building has a short flight of steps up to dark carved wooden double doors, with a square concrete planter on each side and a wall lamp to the left. On the doormat at the top lie a loose newspaper and a tied bundle of the same paper. The collectible is the loose copy on the left of the mat, not the bundle.
Anti-UIR Propaganda Poster
On arriving at the clinic’s emergency yard, the chain-link gate has been opened and the “LANDA MEDICAL” sign and parked ambulances sit ahead. Rather than crossing to the ambulances, go through the gate onto the concrete terrace, then down the short concrete steps on the right-hand side to the lower pavement, and turn right along the wall. That wall is covered in graffiti, with wooden benches against it and a phone booth beyond. The poster is stuck on the graffiti wall just above the back of a bench, left of a large pale graffiti tag.
Landa Memorial Medical Supplies Memo
Inside the clinic, the medic Shin stops in a corridor to treat a wounded Gear. Carry on through the double doors under the green EXIT sign into the reception area. The clinic memo lies on top of a low wooden cabinet against the wall behind the reception desk with the glowing monitors, to the right of the old computer screens and under a wall chart titled “HUMAN SKELETAL SYSTEM”, next to a closed door. Take it before leaving through the reception’s street doors.
COG Tags of Private Brick Rosso
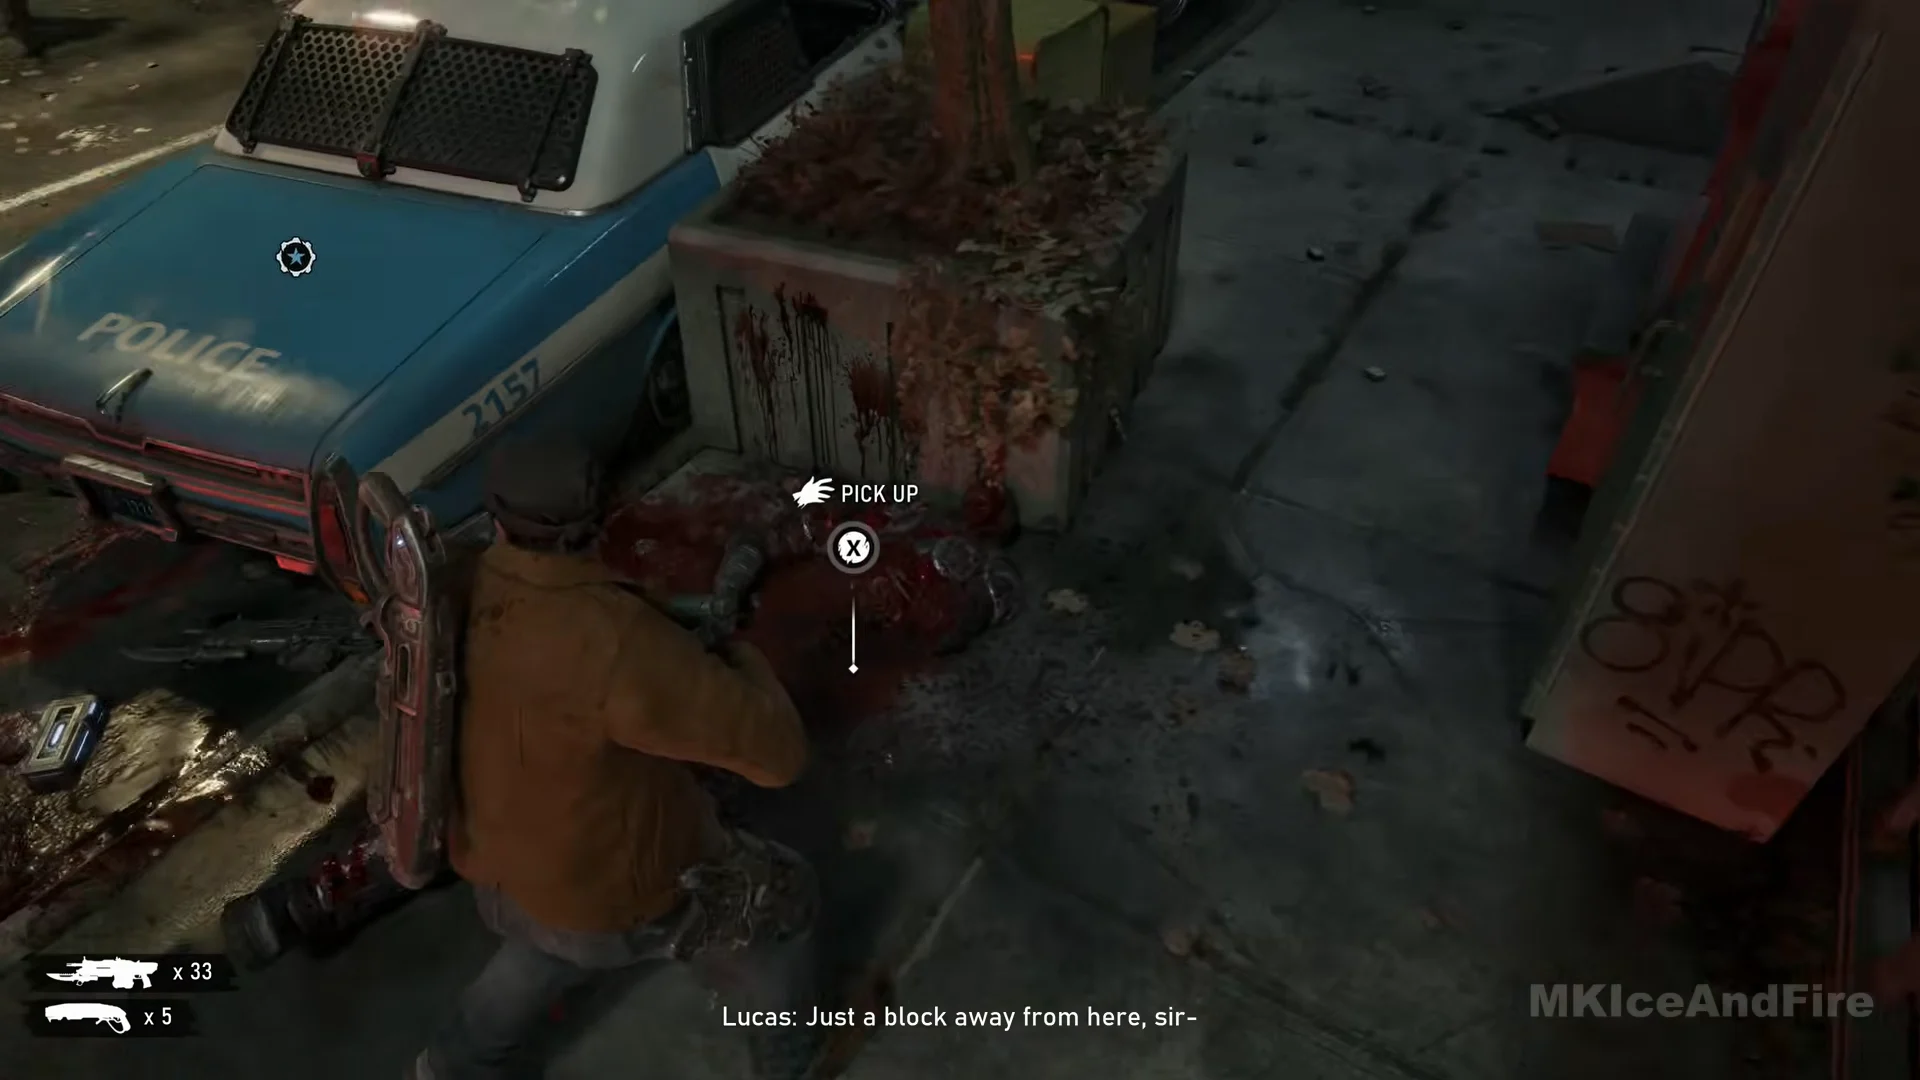
Once you’ve fought through the street outside the clinic and reached the checkpoint, head for the stone gateway marked “ECHO PARK”. Before the gate, find blue-and-white police car 2157 at the curb. A dead Gear is on the sidewalk between the car’s rear and a concrete tree planter; cog-shaped tags are on the body, with an ammo box beside it.
Collectibles easiest to miss in Act 1
Five of the 13 sit off the direct route and are the ones most players walk past:
- Monster Jaw, which is there within seconds of gaining control.
- KPD Police Bulletin, on a desk in a room most people cross quickly.
- Broken Lancer Bayonet, which only appears right after a cutscene.
- Frontpage of The Tyran Chronicle, on a doorstep off the street before the clinic.
- Anti-UIR Propaganda Poster, on a side wall you have to deliberately turn toward.
Once all four chapters show full counts in the War Journal, you have every Act 1 collectible, and each tile will open its model and squad note for a closer look.