The Luna VIII rotation of Stygian Onslaught in Genshin Impact 6.7 puts three heavily armored bosses in your path, and each one gates its own health behind a mechanic that only certain elements or reactions can break. The featured lineup is the newly added Shadow of the Precursor’s Secret Source Matrix of Overseer Network, followed by the returning Lord of the Hidden Depths: Whisperer of Nightmares, and the Secret Source Automaton: Configuration Device. You need three separate teams, and characters cannot be shared across the three arenas.
Quick answer: Bring a Superconduct or Stellar-Conduct Cryo/Electro team for the first boss, a Lunar reaction team (Lunar-Charged, Lunar-Bloom, or Lunar-Crystallize) for the second, and a Nightsoul team led by Natlan units for the third.
Luna VIII schedule and difficulty tiers
The 6.7 rotation runs from July 8, 2026 to August 11, 2026. The Disturbance Outbreak window, where spending Original Resin can pull artifacts from Domains, is open from July 8, 2026 to July 18, 2026. Clearing every arena at the highest tier awards roughly 450 Primogems along with Mora, EXP books, Dust of Enlightenment for artifact substat redistribution, and a weapon skin at Dire.
There are six difficulty tiers. Only the first three allow co-op play, and the top three are solo only. Match your team plan to the tier you are aiming for, because the time limit tightens sharply from Menacing onward.
| Tier | Level | Time limit | Co-op |
|---|---|---|---|
| Normal | Lv.40 | 10 min/boss | Yes |
| Advancing | Lv.70 | 10 min/boss | Yes |
| Hard | Lv.90 | 10 min/boss | Yes |
| Menacing | Lv.100 | 2 min/boss | No |
| Fearless | Lv.105 | 2 min/boss | No |
| Dire | Lv.110 | 2 min/boss | No |
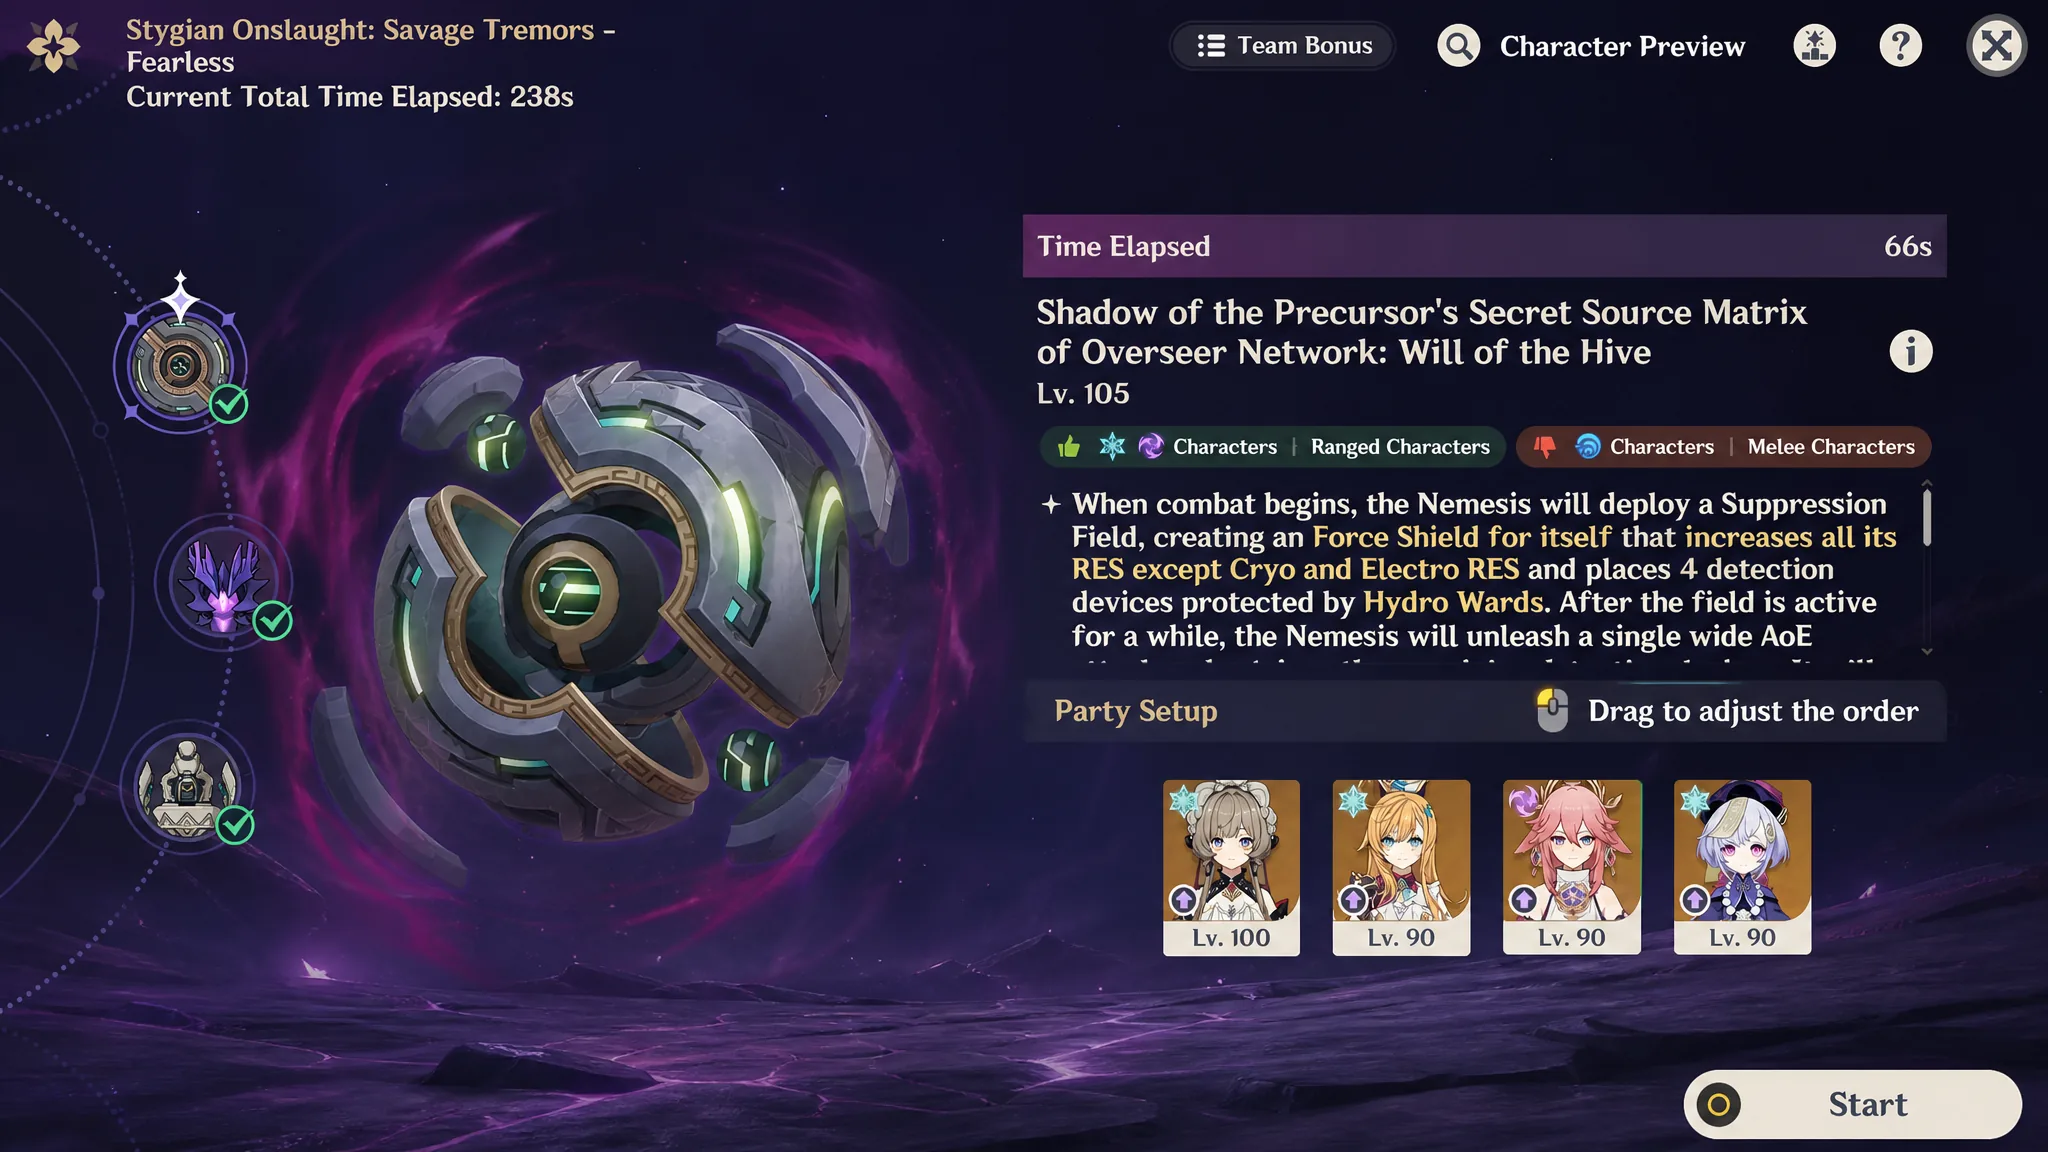
Battlefield 1: Shadow of the Precursor’s Secret Source Matrix of Overseer Network
This is the same enemy you may have met as the Mushteshir Local Legend, now scaled up. At the start of combat it deploys a Suppression Field that creates a Force Shield and raises all of its resistances except Cryo and Electro. Four detection devices, each protected by a Hydro Ward, float at a high angle around the boss. At Dire the boss carries 14,480,438 HP.

How to break the shield and drones
Triggering Superconduct and Stellar-Conduct reactions chips away the Force Shield far faster than raw damage, and breaking that shield deals heavy backlash damage that paralyzes the boss. You can also clear the detection devices by breaking their Hydro Wards, or by Freezing them and then applying Shatter, Melt, or another reaction. Destroying every device damages the shield and opens your main damage window. Because of the drones’ placement, favor characters whose skills track or cover a wide area, such as Sandrone’s Charged Attack, Escoffier, Fischl, Ineffa, or Clorinde. Hydro is the weakest option here, so avoid leaning on it.
| Team | Members | Focus |
|---|---|---|
| Sandrone Stellar-Conduct | Sandrone, Yae Miko, Escoffier, Qiqi | Stellar-Conduct |
| Wriothesley Superconduct | Wriothesley, Yae Miko, Furina, Escoffier | Superconduct |
| Flins Superconduct | Flins, Columbina, Escoffier, Ineffa | Superconduct |
| Skirk Superconduct | Skirk, Escoffier, Furina, Fischl | Superconduct |
| Varesa Electro | Varesa, Yae Miko, Escoffier, Citlali | Superconduct |
If you lack Yae Miko or Qiqi in the Sandrone lineup, Beidou and Diona fill the same roles, though your total damage drops. Escoffier is valuable across every option because she shreds resistance and reaches the aerial detection devices.
Battlefield 2: Lord of the Hidden Depths: Whisperer of Nightmares
This boss gathers Abyssal energy to form a Deepdark Shield worth about 45 percent of its HP. The shield takes 300 percent of incoming damage from Lunar Reaction DMG but is immune to Physical. Once it breaks, the boss loses 20 percent HP, becomes Weakened, and drops all resistances to minus 60 percent. At Dire the boss has 13,614,572 HP.
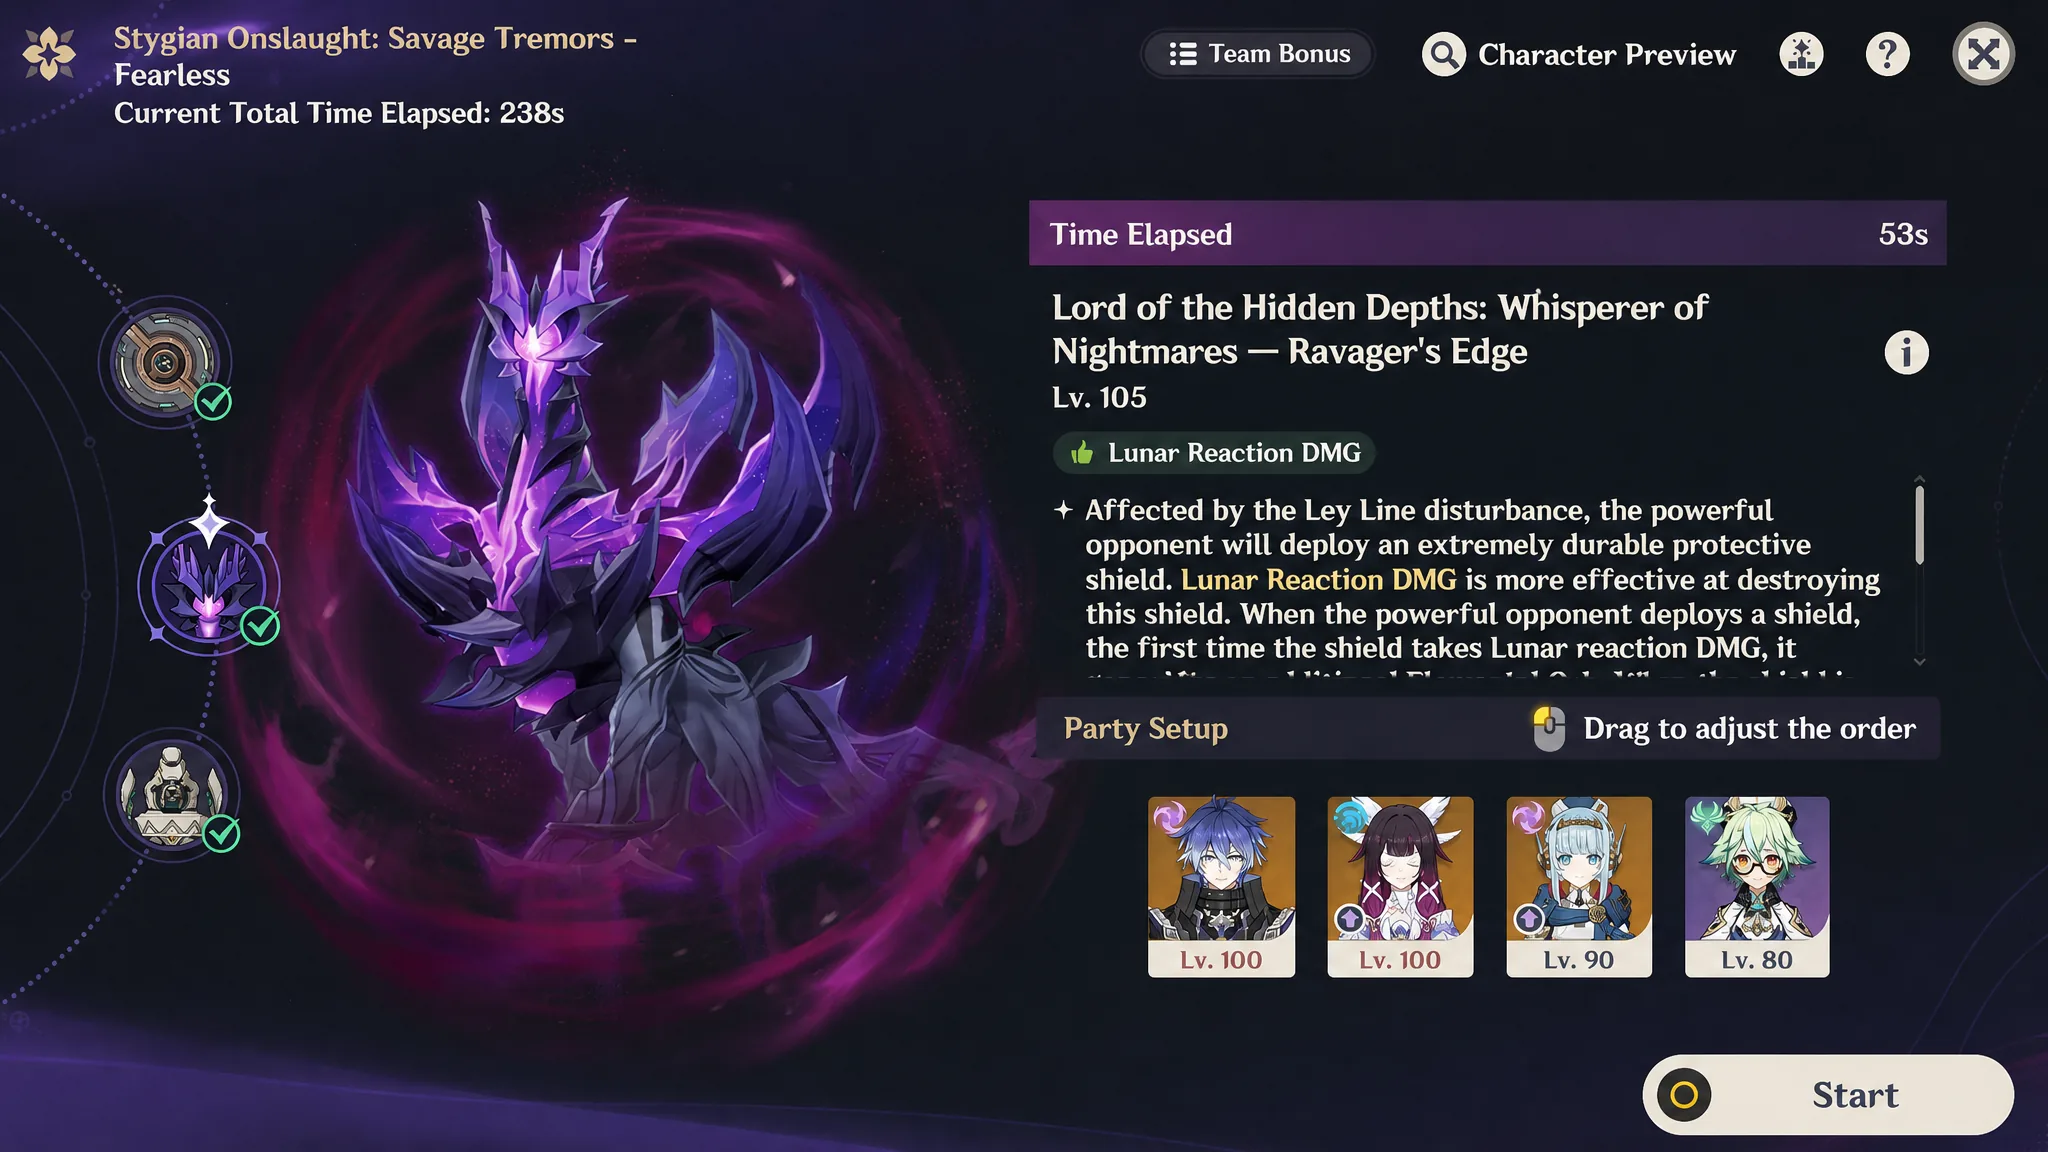
Break the Deepdark Shield fast
Lunar Reaction DMG is by far the quickest way through the shield, so a Lunar-focused core is the intended answer. During its Rift Assault charge the boss summons Fishers of Hidden Depths, and each one you defeat removes about 25 percent of the shield while cutting the charge short. If you do not own Lunar units, you need very high single-target damage plus strong grouping. Kazuha or Sucrose can gather the summons so a carry like Melt Arlecchino, Mavuika, or Skirk can wipe them together, but the skill check climbs steeply at higher tiers.
| Team | Members | Reaction |
|---|---|---|
| Flins Lunar-Charged | Flins, Ineffa, Columbina, Sucrose | Lunar-Charged |
| Zibai Lunar-Crystallize | Zibai, Columbina, Linnea, Illuga | Lunar-Crystallize |
| Navia Lunar-Crystallize | Navia, Columbina, Linnea, Furina | Lunar-Crystallize |
| Nefer Lunar-Bloom | Nefer, Columbina, Lauma, Nilou | Lunar-Bloom |
Columbina anchors nearly every viable comp here, so build the rest of your roster around her. Aino can stand in for Columbina in some setups, and Nahida can replace Nilou when you want stronger Dendro output in the Lunar-Bloom line.
Battlefield 3: Secret Source Automaton: Configuration Device
The Automaton opens with a Void Carapace that grants massive resistance to every element and Physical. The only way to strip it is to keep a character in Nightsoul’s Blessing, which fills the Adaptive Countermeasures gauge. Once that meter completes for the first time, the boss loses its starting resistance buff entirely. This is the tankiest arena at Dire, with 25,547,953 HP.
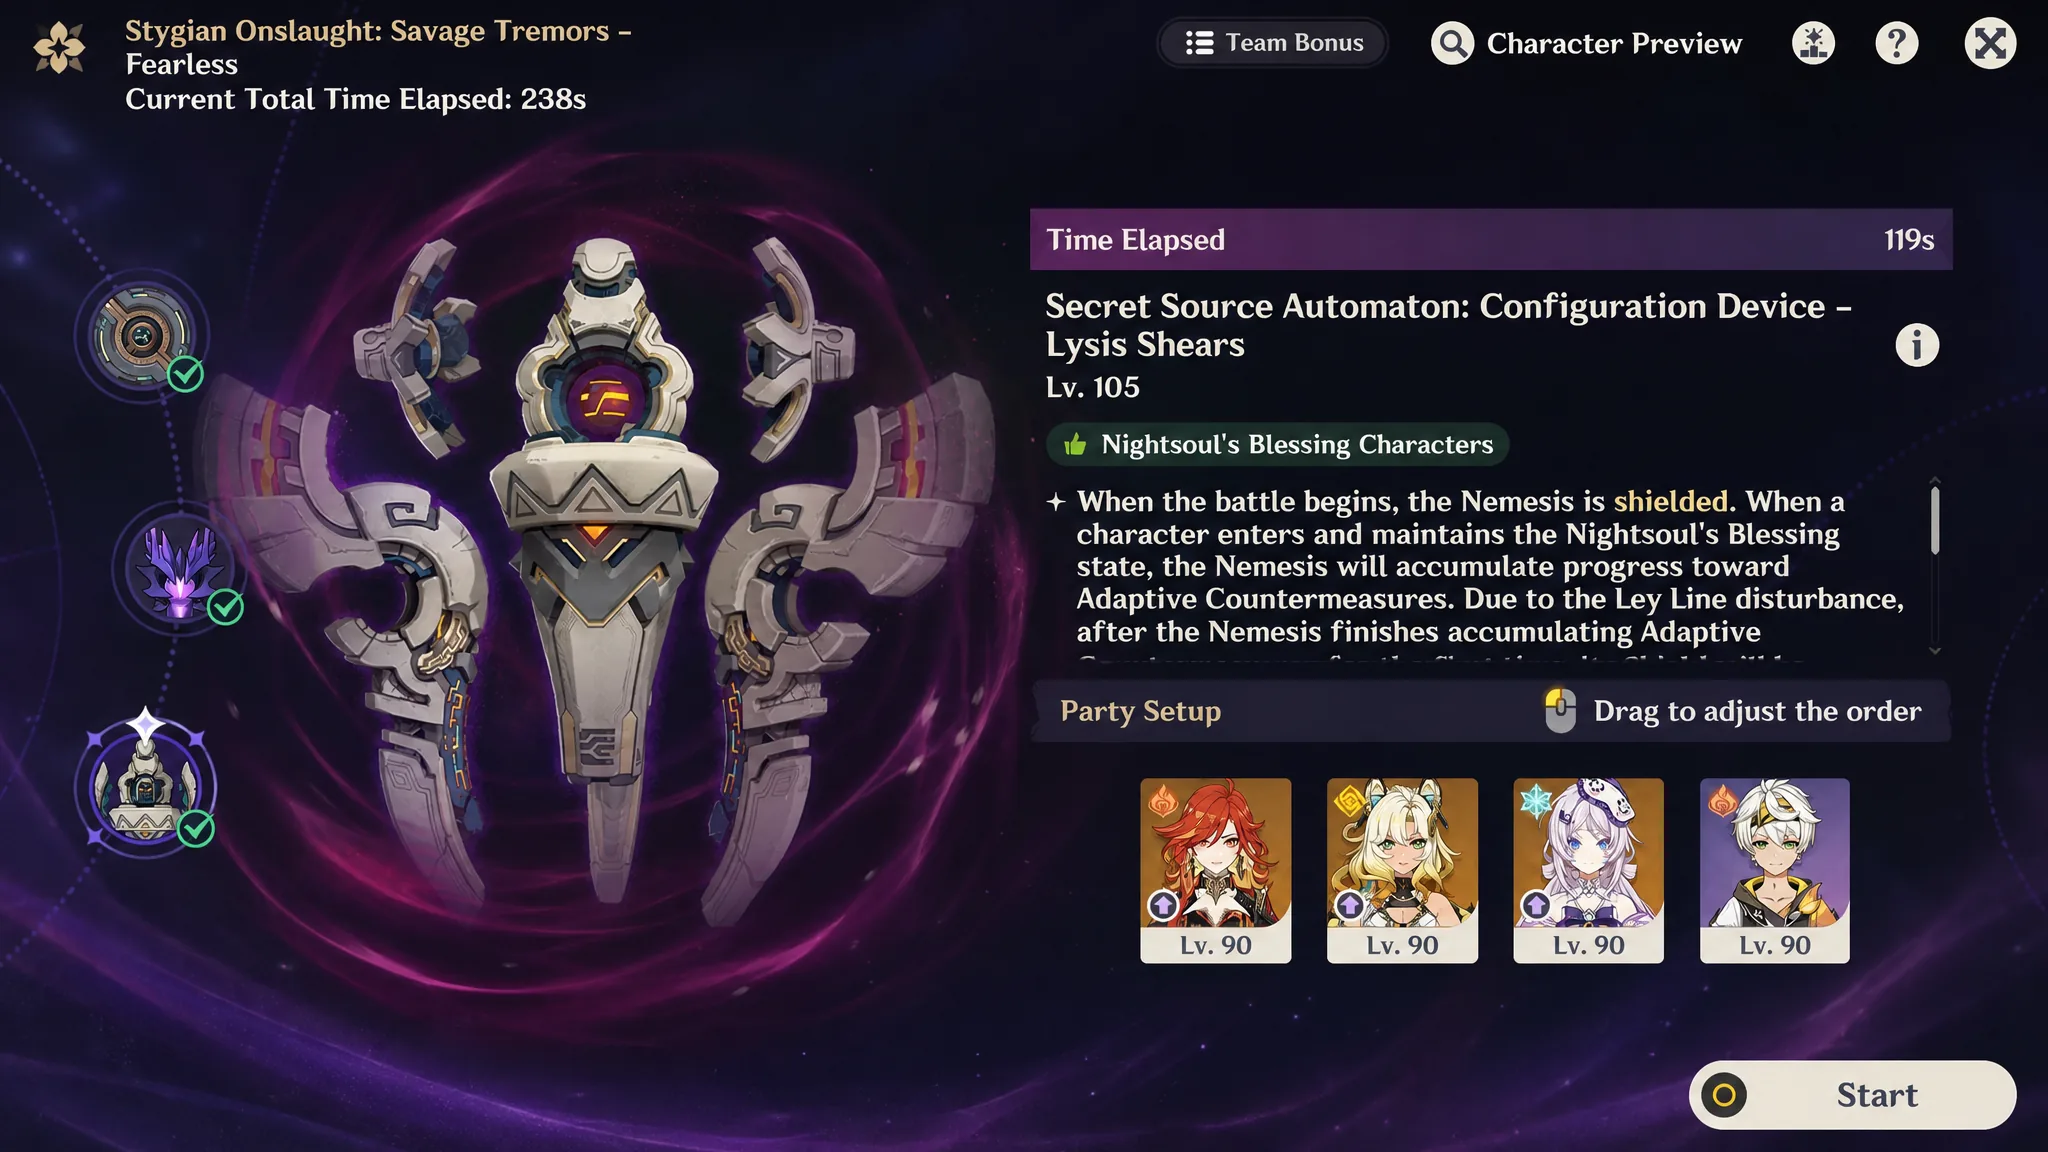
Climb the pillars and cancel the cannon
When the Countermeasures gauge fills, the boss starts charging its Boltsphere Cannon, summons Accretion Mechanisms, and raises two blocks of solid Phlogiston. Climb those pillars, reach the protected force fields, and destroy the mechanisms. Clearing all of them interrupts the cannon, deals massive rebound damage, and paralyzes the boss for a safe damage window. Natlan units like Mavuika and Xilonen climb naturally, but shorter character models can also latch onto the bulges on the pillars, and skills from Zhongli, Xianyun, Kazuha, or Keqing help lift you up.

| Team | Members | Notes |
|---|---|---|
| Mavuika premium | Mavuika, Xilonen, Citlali, Bennett | Highest overall damage |
| Mavuika Overload | Mavuika, Ororon, Iansan, Chevreuse | Off-field Nightsoul application |
| Kinich Dendro/Pyro | Kinich, Emilie, Mavuika, Bennett | Sustained Nightsoul uptime |
| Chasca aerial | Chasca, Citlali, Iansan, Nicole | Dodges hard-hitting attacks |
| Varesa Nightsoul | Varesa, Iansan, Chevreuse, Mavuika | Strong Electro pressure |
If you run Xilonen for climbing on a non-Natlan carry, avoid hitting more than once during her Nightsoul’s Blessing state. Extra hits cancel the state and stall the gauge, so tap once and keep moving until it depletes.
How to confirm each arena is done right
Each boss gives a clear on-screen signal that its gate is down. The first boss enters paralysis with heavy backlash damage once the Force Shield shatters. The second boss loses 20 percent HP, becomes Weakened, and drops to minus 60 percent resistance the moment the Deepdark Shield breaks. The third boss takes massive rebound damage and freezes in place once every Accretion Mechanism is destroyed and the cannon is interrupted. If you cannot open those windows, the usual cause is an element mismatch, so check that your team is triggering the reaction each fight demands before you blame damage numbers.

Since gear and characters can’t be reused between the three battlefields, plan the whole run at once. Lock your Cryo/Electro reaction unit and Escoffier into the first fight, reserve Columbina and your Lunar carry for the second, and save your best Natlan climber for the third. Sort the three teams before you start and each stage becomes a matter of breaking the shield, then dropping your rotation inside the paralysis window.